Jobs
The Jobs page in Backup Administration for Microsoft 365 allows you to set up jobs customized to manage specific data management processes. You can create new jobs from a range of options to keep your data operations running smoothly. Each job has its own settings, such as scheduling, filtering, and objects to process. These configurations assign specific data processing tasks to the job. It is possible to create countless jobs of the same type, providing you the flexibility to manage your data just the way you want.
In Backup Administration, two types of jobs can be created:
- Backup job – allows you to copy any physical or virtual files from the selected source (mailbox, SharePoint site, MS Teams) to a secondary location. It offers secured data storage and protection against data lost due equipment failures, malicious actions, disasters, etc. You can back up all selected files, versions, and data, or only the changes made since the last backup. This includes updating items and creating versions.
- Restore job – the restore jobs in the Backup Administration is used to regenerate a mailbox, a SharePoint site, a OneDrive, or a team from the backup. This type of job is useful if an entire mailbox/site/OneDrive/team was deleted; or if one or more folders/items were deleted from the entity(ies) and the user wants to restore these items from the backup storage.
- Indexing job – automatically assigns default index zones to files, emails, Teams messages, and Teams chat messages from the selected items. This makes it easier to search and find specific content in the contentACCESS Portal.
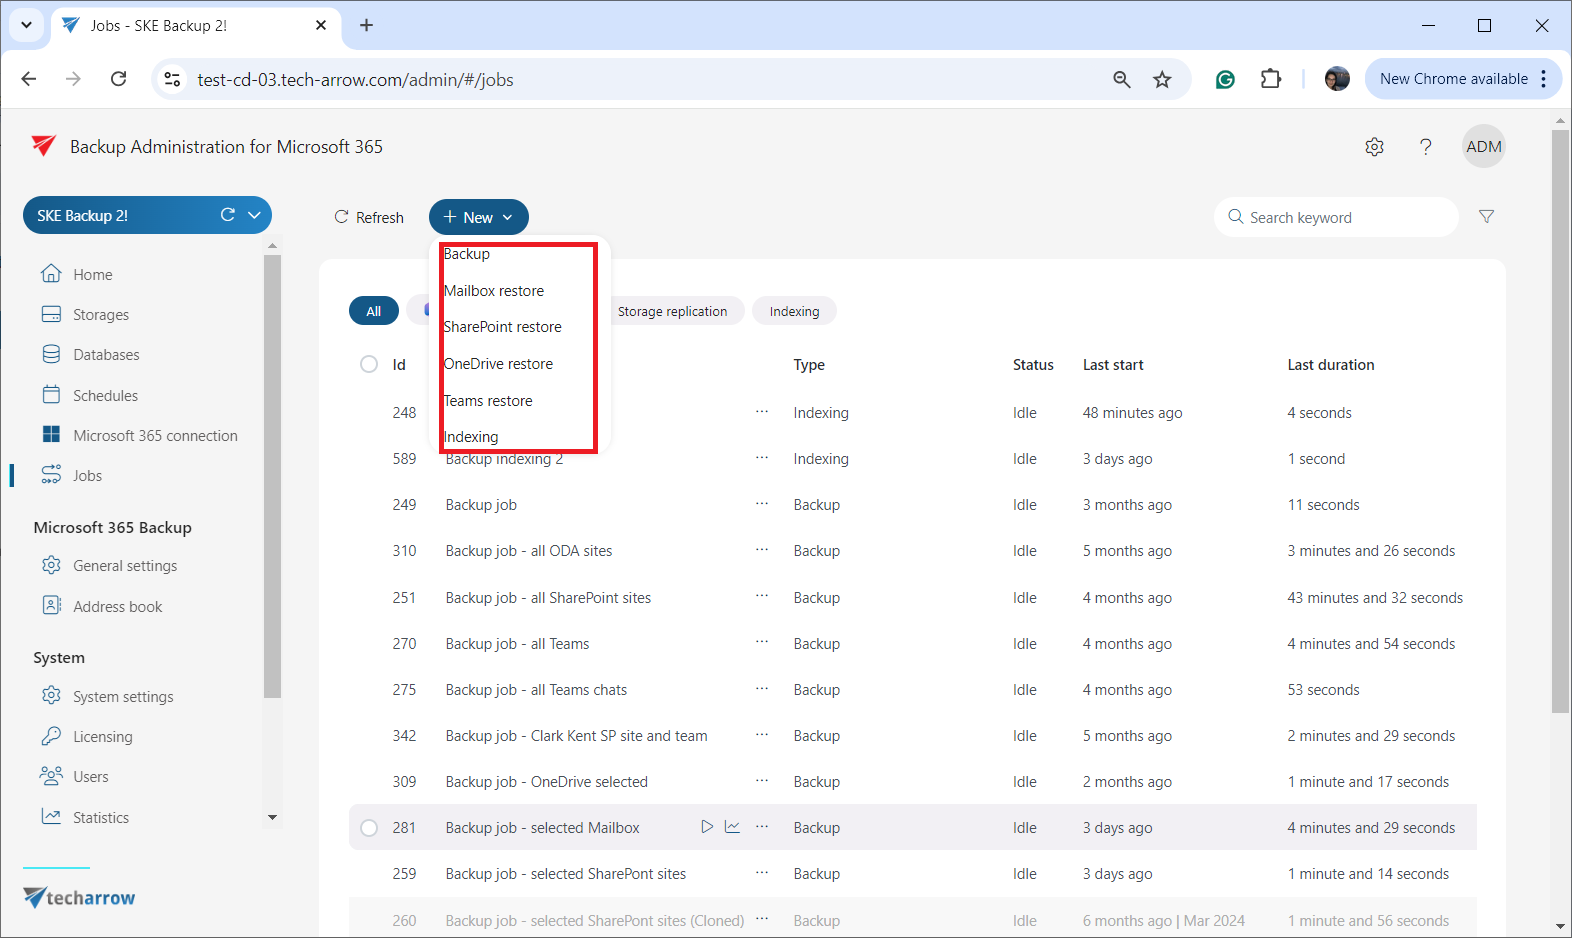
To create a new job from any of these options, you need to navigate to the Jobs page and click on + New. A dropdown menu will be open where you can select the desired job type (Backup, Mailbox restore, SharePoint restore, OneDrive restore, Teams restore). The job configuration window will appear, allowing you to set the selected job based on your preferences. Further information about configuring jobs can be found in the respective subsection.
On the same page, you can refresh the list of available jobs by pressing the Refresh button.
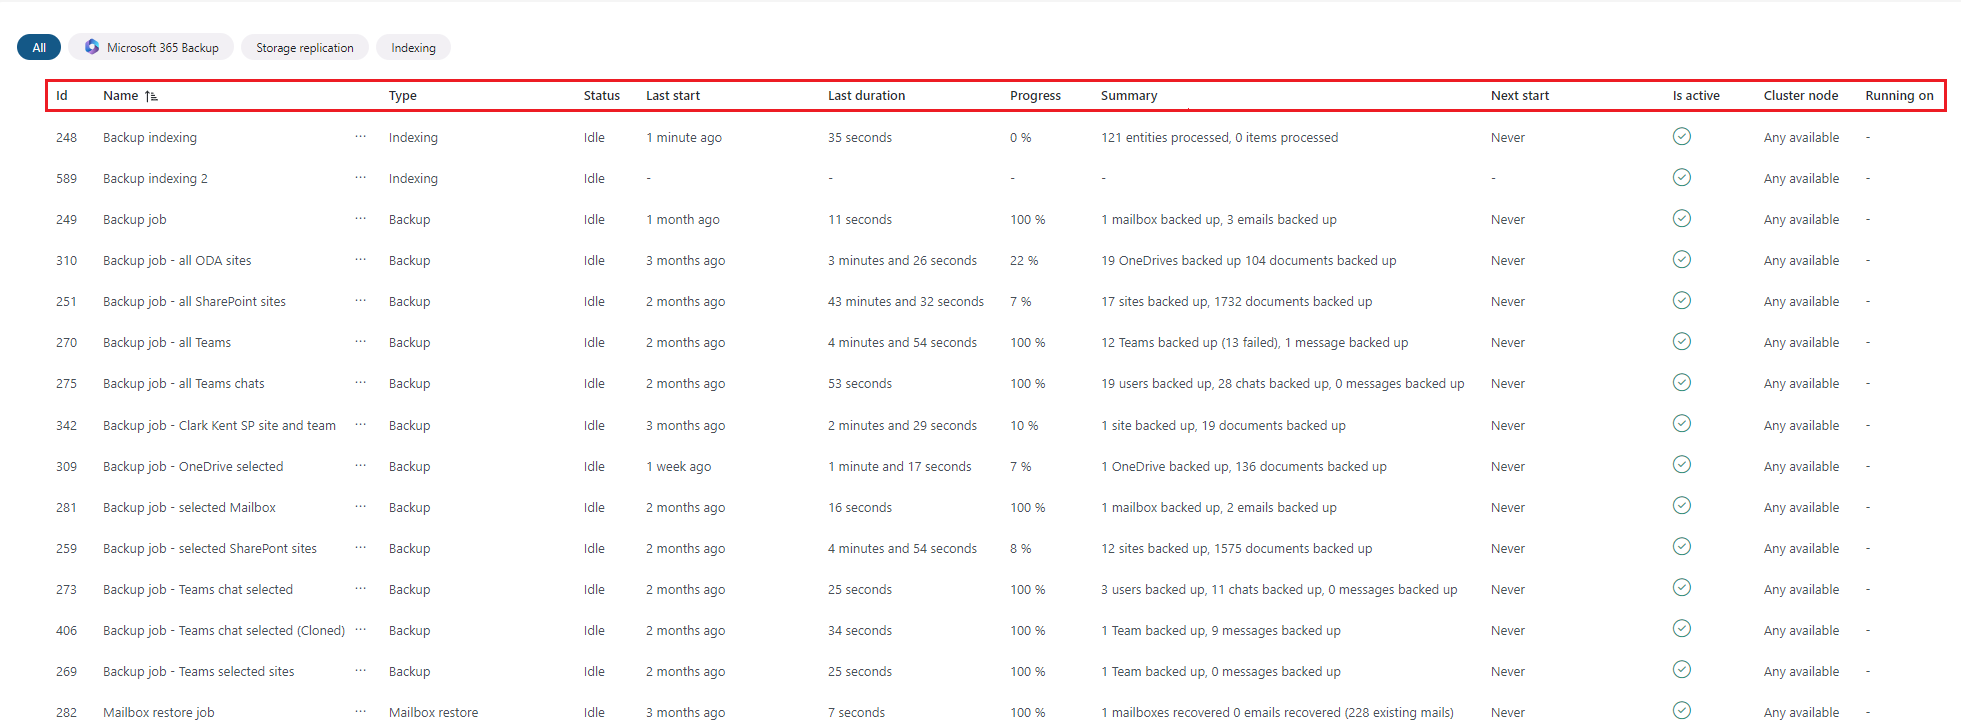
The grid contains the following columns: ID number, Name, Type, and Status. If the job is in Idle status, it means that the job has completed the task and is not running.
The next columns provide information about the Last start, Last duration and Progress. The Progress column shows the volume of the items already processed, while the Summary column gives an overview of the processed, skipped, and failed items.
The Next start column indicates when the job will restart the processing (if the schedule is set to Periodical or Week schedule with repeat).
The Is active column whether the job is active or deactivated. Active jobs will run based on the schedule; deactivated jobs are not running and cannot be manually started.
In the Cluster node column, you can see the node where the selected job can run.
The Running on column informs the user about the node where the job is currently running.

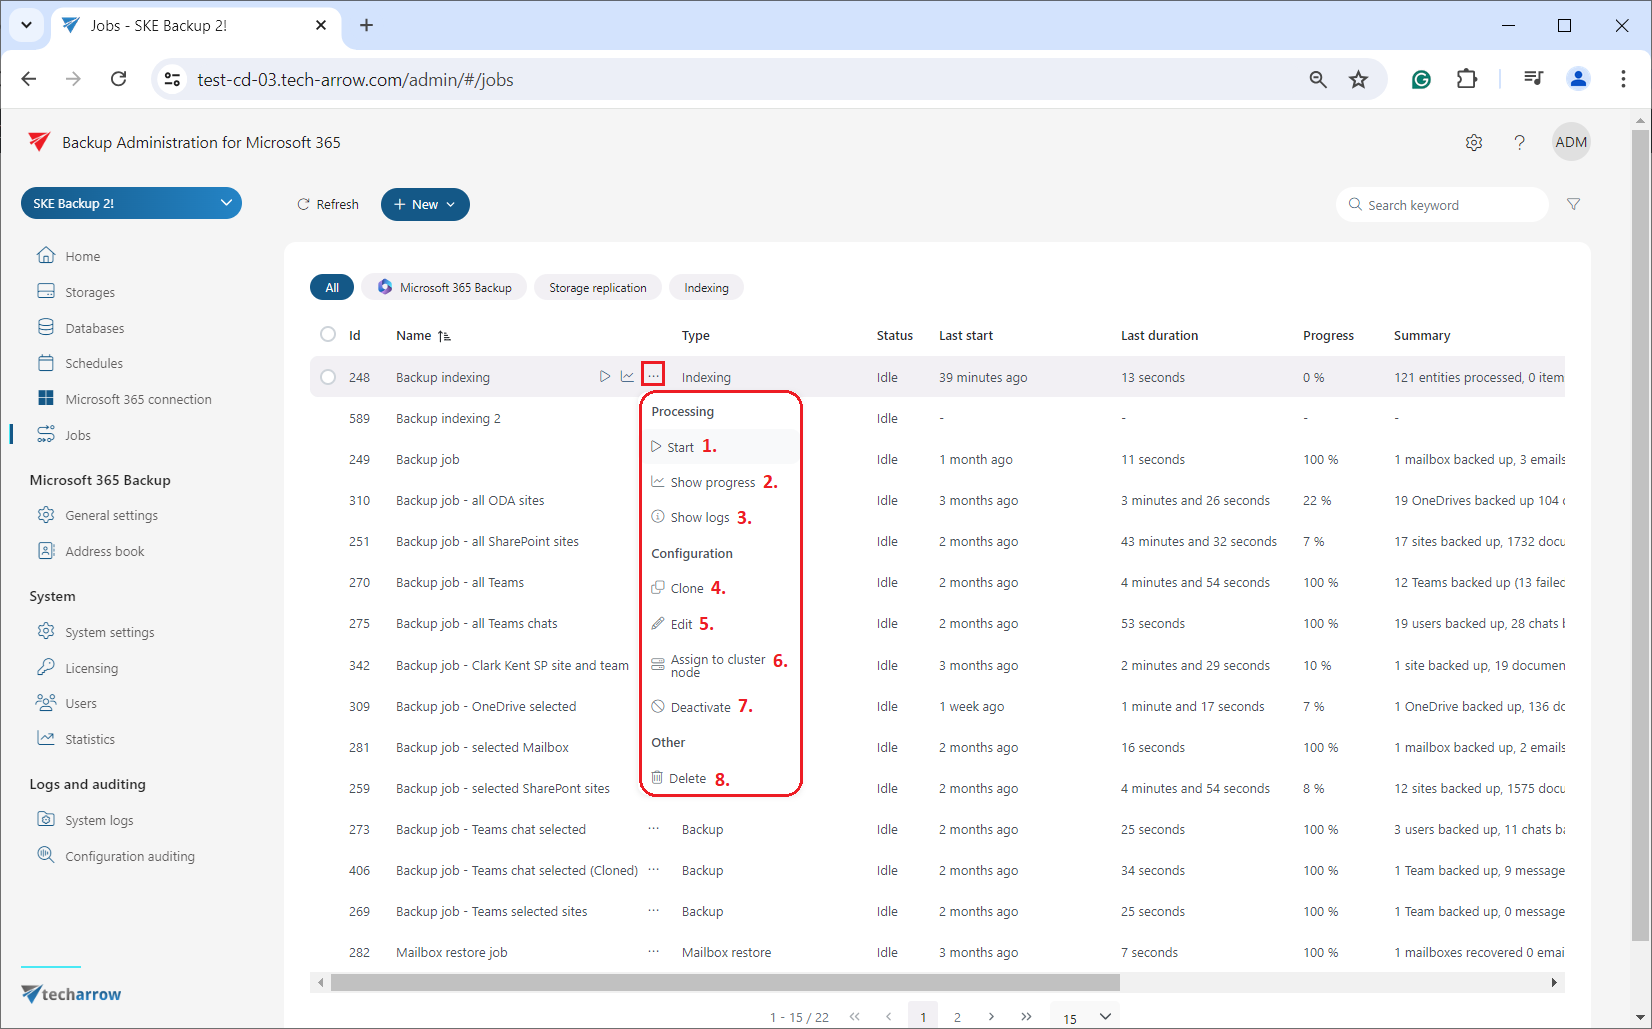
Any changes to a job can be made from the job context menu. To access this menu, select the corresponding job from the list and left click on the ellipses (…). The context menu of a job contains the following options:
- Start/Stop – by default, only the Start button is displayed in the context menu, allowing you to start the job manually. Once the job is started, the Stop button will appear in the menu, enabling you to stop the selected job
- Show progress – this option relocates you to the Job progress page, where you can monitor the job’s progress, and check the session logs
- Show last logs – selecting this option redirects you to the System logs page. Here, the last run of the selected job will be preselected, and the corresponding events will be displayed in the table of events
- Clone – use this option to create a clone of an already configured job. The clone will have the same configuration as the original job. Upon clicking the Clone option, the Clone job window appears, with the display name automatically filled out. You can change or edit the name as desired, then press the Clone button
- Edit – opens the Job configuration window, where you can modify an already configured job
- Assign to cluster node – the Assign job to cluster node pop-up window appears, allowing you to assign a cluster node to the selected job
- Deactivate – this option lets you deactivate jobs that are not in use for a long time but may be used in the future. Deactivating a job does not delete it permanently; it will only be marked as inactive and will not run according to the schedule, nor can it be manually started. Running and waiting jobs cannot be deactivated
- Delete – you can permanently delete selected jobs from the list with this option. Running and waiting jobs cannot be deleted.
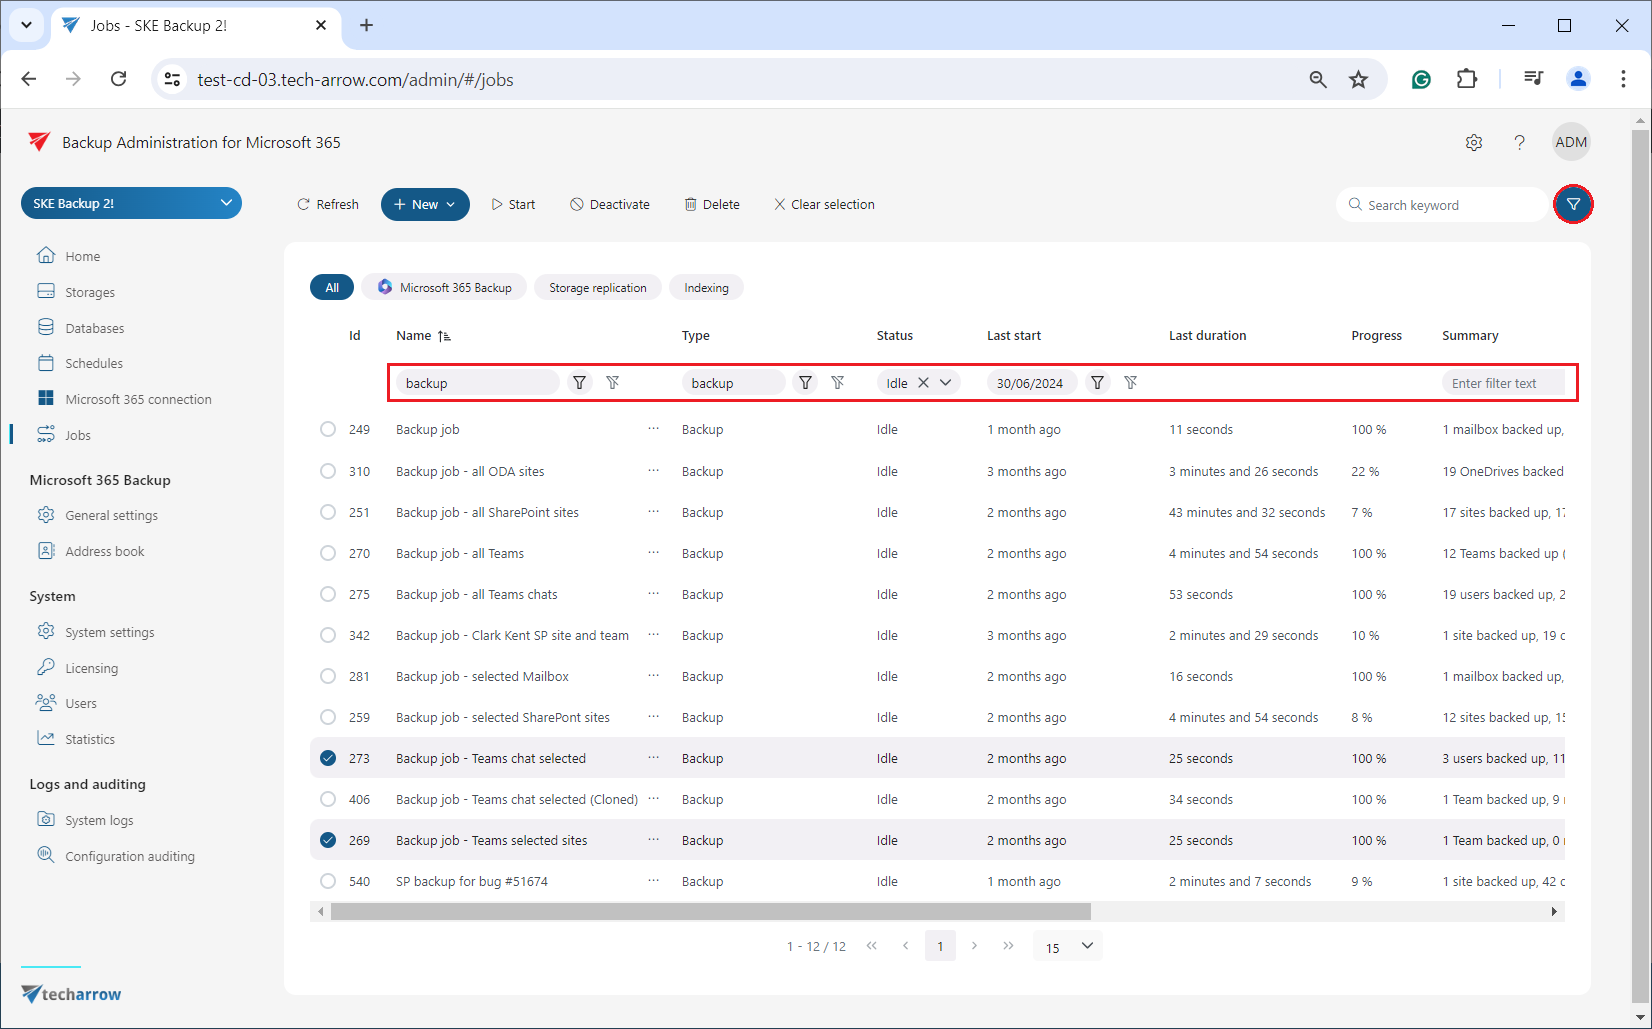
It is also possible to search through the jobs using the search textbox in the top right corner of the page or to filter out specific types of jobs from the list. Filtering can be done by clicking on the available options (All, Microsoft 365 Backup, Indexing, etc.) or by clicking on the funnel icon.
If you press the funnel icon, an extra row will appear under the column titles, allowing you to filter different values with using various methods.


