contentACCESS documentation version 3.1 with service pack2

  1. Introduction to contentACCESS
    1. Services provided by contentACCESS
    2. Software requirements
  2. contentACCESS setup package
    1. Installation of contentACCESS
      1. EULA
      2. Installation type
      3. Components
      4. Prerequisites
      5. Base folder
      6. Service settings
      7. Database connection
      8. contentACCESS Central Administration
      9. contentACCESS Web Services (Proxy)
      10. contentWEB
      11. Central login
      12. Virtual drive
      13. Overview
      14. Installation
      15. Summary
  3. contentACCESS components
    1. contentACCESS Central Administration
      1. Central administration login
      2. contentACCESS Automated single sign on
      3. Central Administration logout
      4. contentACCESS Central Administration user interface
    2. contentWEB
      1. Logging in to contentWEB
      2. contentWEB Automated single sign on
    3. Virtual drive
    4. contentACCESS Web Services (Proxy)
    5. Central login page
  4. contentACCESS Tools
    1. Installing Outlook forms
    2. Legacy email archive connectors
    3. Legacy archive connector for Metalogix Archive Manager Exchange Edition (MAM EE)
    4. Legacy archive connector for Email Lifecycle Manager (ELM)
    5. Installing TECH-ARROW’s WinShortcutter
    6. contentACCESS Outlook add-in
      1. Installation of contentACCESS Outlook add-in
      2. How to use contentACCESS Outlook add-in
  5. Tenants in contentACCESS
    1. How to create a new tenant
    2. Tenant limitations
    3. How to provide access to a tenant (adding new tenant administrators)
    4. Tenant administrator invitation types
  6. General system configurations
    1. Connection
    2. User interface
    3. Users in contentACCESS
    4. Invitations
    5. Roles
      1. Creating roles
      2. Role details
      3. Role assignment
      4. Defining specific permissions of a role assignment
      5. Editing roles, editing role assignments
      6. General use cases of how to create/assign roles
      7. Managing access to contentACCESS objects
    6. Login providers
      1. Login providers’ context menu options
      2. External login provider configuration
      3. Exchange login provider
      4. Associating an enabled provider with a user login
      5. contentACCESS users in third party systems
    7. System
    8. Licensing
      1. How to activate your license key
    9. Notifications
    10. Monitoring — how to find out possible misconfigurations / reasons of potential system/job failures
    11. Distributed environment in contentACCESS — Clusters
    12. Statistics
    13. How to create/configure databases — All databases
  7. Common features
    1. Databases
    2. Schedules
    3. Retentions
    4. Storages
      1. Google drive storage
    5. Exchange connections
      1. Exchange performance settings – turning off the Exchange throttling policies
      2. Hybrid Exchange environments in the Email Archive system
    6. Importing contentACCESS configurations from files
      1. Manual import of Exchange servers/groups/mailboxes to the contentACCESS Address book
      2. Importing File Archive root folders to be archived
  8. Creating new jobs in contentACCESS
  9. Jobs’ page, jobs’ context menu
  10. File Archive
    1. Introduction to File system archive
    2. File archive settings
    3. File archive Databases
    4. File archive System settings
    5. File archive Retentions
    6. File archive Storages
    7. Root folders
    8. Aliases
    9. File archive Schedules
    10. Provisioning settings and managing access to contentWEB
    11. Configuring aliases
    12. Configuration of jobs available in contentACCESS File Archive
    13. Configuration of File system archive job
    14. Configuration of a File system restore job
    15. Configuration of File system recovery job
    16. Configuration of Remote shortcutting job
    17. Active/inactive documents in File system archive
  11. Email Archive
    1. Important settings before creating an Email Archive job
    2. Database settings
    3. Email archive System settings
    4. Email archive Provisioning settings
    5. Retention settings
    6. Shortcuts in email archiving
    7. Storing of archived emails
    8. Creating email archive schedulers
    9. User experience
    10. Exchange 2013+: Mail app in OWA 2013+ or on MS Outlook 2013+ desktop version
    11. Exchange 2010: OWA 2010 integration
    12. Address book objects
    13. Granting access rights for mailbox users and explicit users to view the mailbox archive
    14. Creating contentWEB users (option 1)
    15. Manage access to a mailbox archive (option 2)
    16. Database and store assignment in email archiving
    17. How to assign database and storage to an Exchange group?
    18. How to assign database and storage to a mailbox?
    19. How to move data from source database/storage into a second (target) database/storage?
    20. Creating Email archive jobs: archive, restore, recovery, mailbox move, shortcut synchronizaion, shortcut repair
    21. Email archive job
      1. Email archive job configuration
    22. Email restore job
      1. Email restore job configuration
    23. Email recovery job
      1. Email recovery job configuration
    24. Mailbox move job
      1. Mailbox move job configration
    25. Shortcut synchronization job
      1. Shortcut synchronization job configuration
    26. Shortcut repair job
      1. Shortcut repair job configuration
    27. Public folder archiving
      1. How to configure a job to archive public folders
      2. Public folders in the contentWEB archive
      3. User permissions to public folders
      4. Public Folder archiving in hybrid Exchange environments
  12. SharePoint archive plugin
    1. SharePoint Archive settings
    2. SharePoint Archive job configuration
    3. SharePoint recovery job configuration
    4. SharePoint archive Provisioning settings
    5. SharePoint Publishing job
    6. SharePoint in the contentWEB archive
  13. Custom plugins
    1. Email management job configuration
    2. Storage replication plugin
    3. Sharing plugin
    4. Datengut plugin
    5. Email synchronizer plugin
  14. officeGATE
  15. accessGATE Mobile
  16. Virtual drive configurations
  17. Application settings
  18. Terms of use
  19. FAQ
    1. Download sample for the file to be imported does not work
    2. Archiving is not working, if MAPI is set to communicate with the Exchange server
    3. Virtual drive is still appearing after the uninstall
    4. Outlook forms problem
    5. Unable to open shortcuts of archived file on the server side
    6. Samples are not shown using 'Show sample" option in the Import dialog
    7. Do I need to create separate tenants for file archiving and email archiving
    8. What is the recommended database size for email, file and Sharepoint archiving
    9. The TEMP folder is running out of space when archiving big files
    10. The attachment could not be opened
    11. After updating Exchange 2013, the EWS connection might not work in contentACCESS
    12. If Windows authentication is not working in contentACCESS and an alias was created for contentACCESS
    13. contentACCESS Outlook add-in certificate issue

6.9.Notifications

To increase efficiency of the troubleshooting process, contentACCESS uses notification plugins. These plugins are used to send notification emails to the user about the errors/warnings/misconfigurations or possible system or job failures in contentACCESS. Based on the settings in the Central Administration, the transport server of these notifications can be either an Exchange server, or an SMTP server. If the organization doesn’t have Exchange Server, SMTP server can be used instead.
For Notification settings open the Notifications page (System tab => Services group => Notifications button) on the Central Administration ribbon.

notifications-pic1-3-1

In the status bar of notifications there are 6 control buttons:

  • With the “start immediately/stop” button it is possible to manually start/stop sending of notification emails;
  • “refresh” control button serves to reload (manually refresh) the current state of notification plugin;
  • “enable auto refresh”/“disable auto refresh”: serves for activating/deactivating the auto refresh of notification plugin status information; if enabled, then the current state will be refreshed in every 5 seconds;
  • “deactivate job/activate job” button is used to deactivate/activate the job if it should not run; a deactivated job will not be started automatically, nor can be started m
  • “logs”: in case that you want to check the notifications plugin events, or if any problem occurred during the sending of notifications emails, click on this control button and you will be redirected on the correspondent monitoring page, where the last run of the plugin will be pre-selected, and the corresponding run events will be displayed.
  • “edit” control button is used to change the name of the notification job and to specify the node where the job should run;
  • With the arrows mark (Documentation118.1) at the right side of the status bar the user may collapse or expand the progress information about the job’s running. The status bar’s last state is always stored, and the last state will be opened by navigating to the page again.

Under the status bar the following sections are configured:

  • Scheduling settings: This configuration option is common both for SMTP and Exchange server transport types. The administrator can choose here an already existing notification scheduler from the list, or to create a new one. Notification emails will be sent at time, which is set here. New notification schedulers can be also created (or edited) by selecting the “system” tenant in the right upper menu of the Central Administration user interface, and configuring the schedulers on the Schedules page (System tab => Tenants group => option Schedules on the ribbon, refer to screenshot below).

    notifications-pic2-3-1
  • Notification settings: The administrator can choose right here, if the SMTP server or Exchange provider will be used to transfer notification emails.

    notifications-pic3-3-1

    In both cases, the

    From address – the email address of the real sender
    Administrator addresses – the recipient addresses

    text boxes must be filled. It is also a possible to send notification emails on behalf of somebody else. The condition for that is to have on behalf permissions on the mailbox of this second user. It is recommended to send a test email via the “Send test email” button to check, if everything works correctly.
    The page displays different configuration sections based on which transport type is selected in the Notification settings section. If “Use Exchange Server” is selected, then the EWS settings must be configured; if “Use SMTP server” is set, then the SMTP server settings must be configured. SMTP server is used if the organization doesn’t have Exchange Server.

    notifications-pic4-3-1
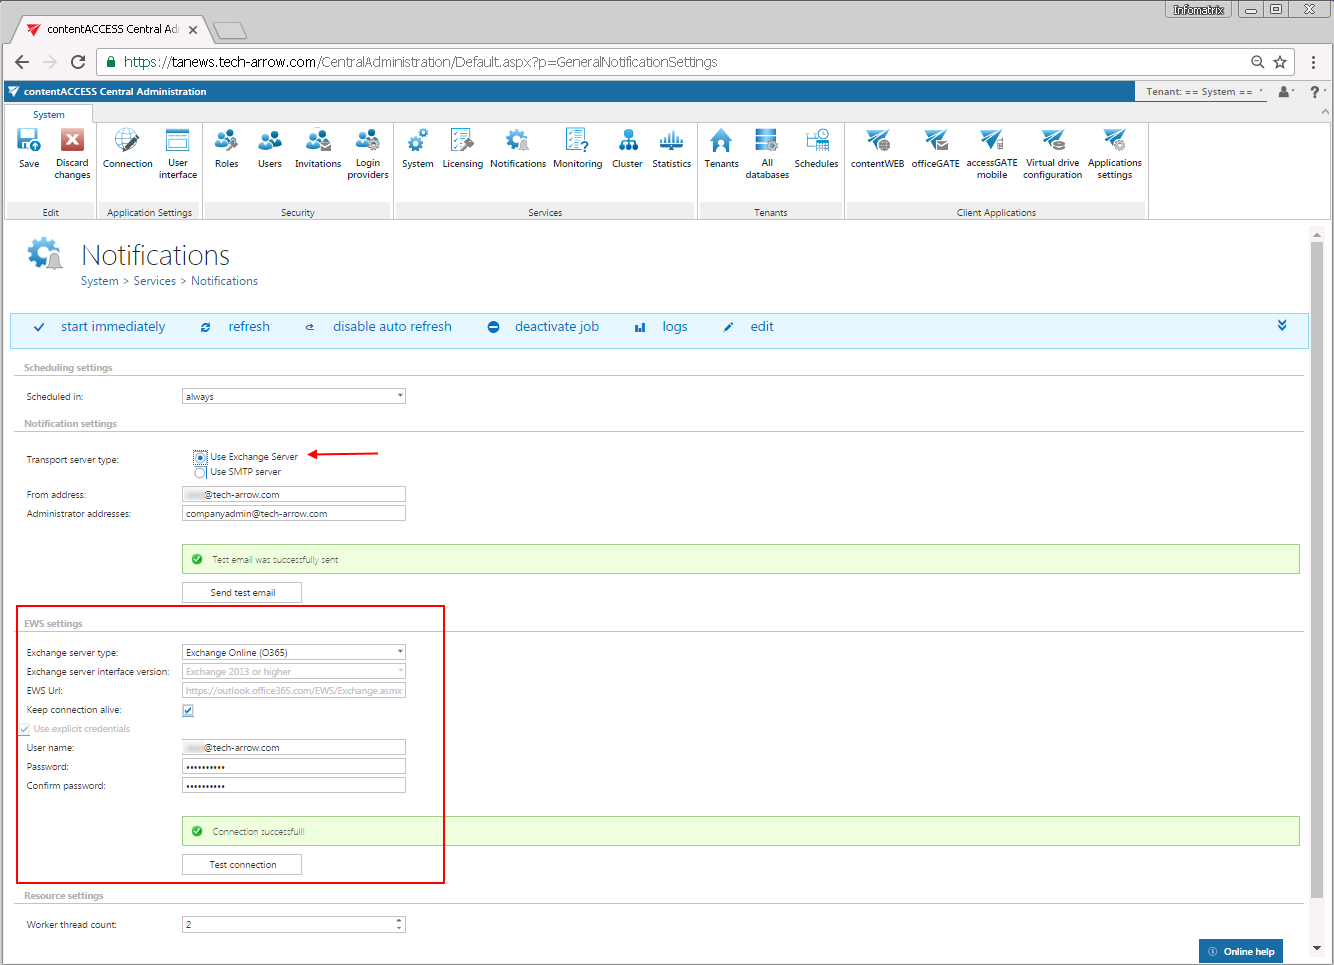
    Screenshot A: Exchange Server used
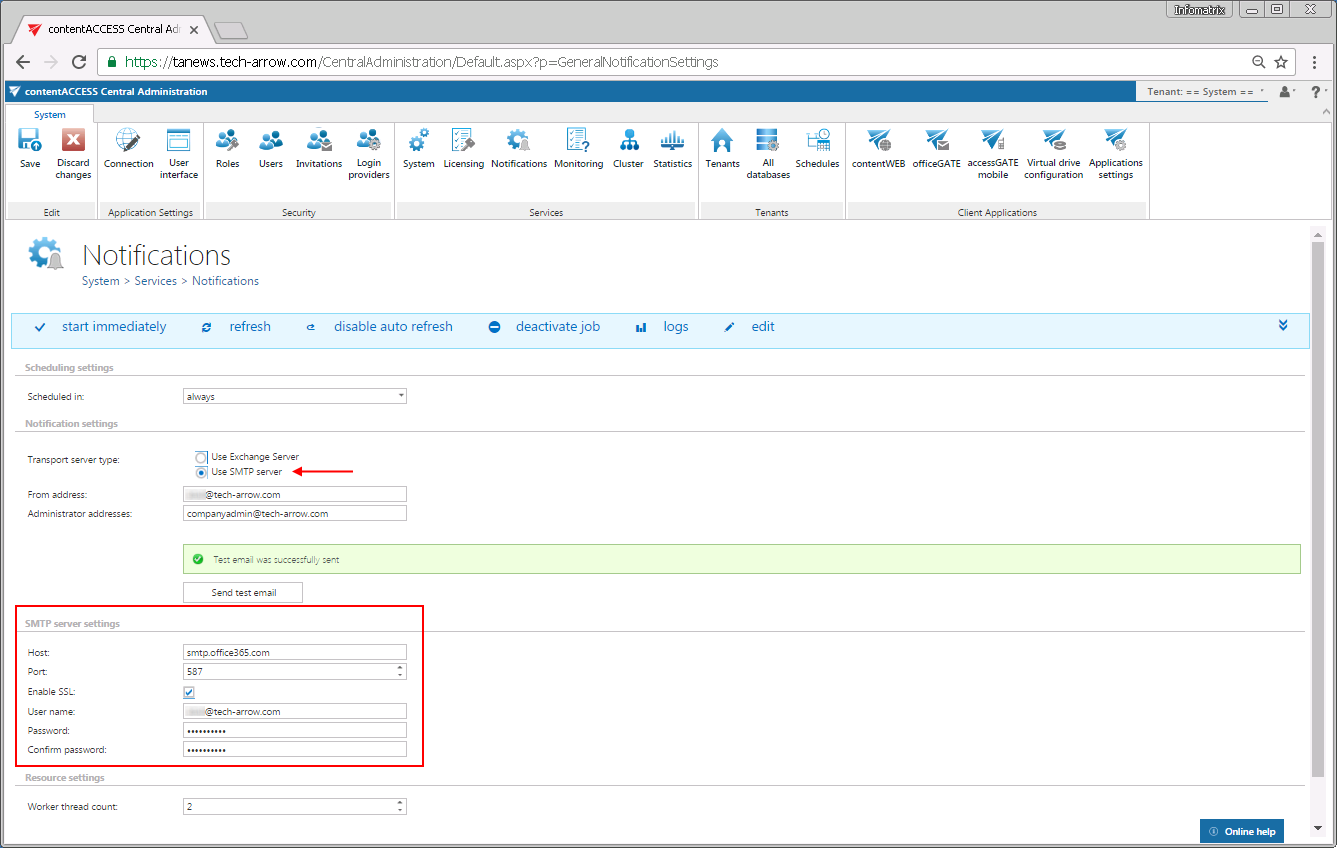
    notifications-pic5-3-1
    Screenshot B: SMTP server used
  • EWS settings: The following parameters are needed for EWS connection:

    Exchange server type, Exchange server interface version: the type and version of the Exchange provider which will send the notification emails.
    EWS URL (received from the Exchange provider)
    Keep connection alive: If it is turned on, then the connection between contentACCESS and the Exchange server is cached, which increases the performance. If the Exchange is load balanced, some requests can land on another Exchange which causes errors in contentACCESS. In these cases unchecking the keep alive option will destroy the connection after each request and will rebuild it on the next request.

    • If you are communicating with one Exchange server: turn it on to increase the performance
    • If you have a load balanced Exchange environment and there are communication problems with the Exchange: it is recommended to turn it off

    User name, Password: Finally enter the User name (email address) and password of the EWS user that can be applied to connect to the Exchange server.

  • SMPT server settings: the following parameters are needed for the STMP connection:

    Host – name of the SMTP server (like: smtp.gmail.com, smtp.office365.com, …)
    Port – the SMTP port of the SMTP server. There are some recommendations and standards. Usually the port 25 is used for SMTP (or 2525). But because this protocol is vulnerable, the port is usually blocked by firewall. The secure SMTP port is either 465 or 587. The port 587 is usually using TLS (Transport layer security).
    Enable SSL – based on the SMTP server it is possible to enable SSL (recommended)
    User name, password: authenticated user on the SMTP server (required)

    Use the Send test email button to verify if the notification emails are working properly.

  • Resource settings: under worker thread count, at the bottom of the page you can set the count of simultaneously sent notifications.
Yes No Suggest edit
Help Guide Powered by Documentor
Suggest Edit