6.4.Invitations
Invitation is another way of how to invite
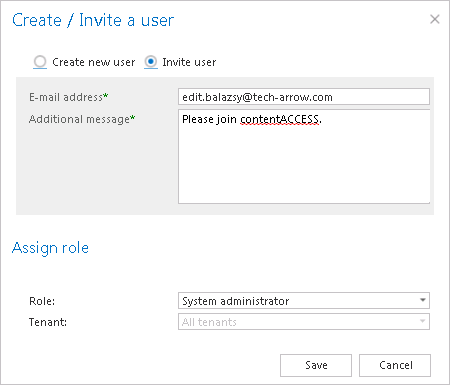
To send an invitation for an already existing or potential contentACCESS user, click the “Invite user” option in the Create/Invite user dialog.
The pop up dialog requires to fill the email address, where the invitation will be sent and the role that should be assigned to this user. If you are ready with the necessary configurations, click “Save”. In case that you have assigned a role having at least one “Specific” permission, you will be automatically redirected to the Assign specific permissions page, where you can further specify these specific permissions of the role assignment. This will be described later in section “Roles”.

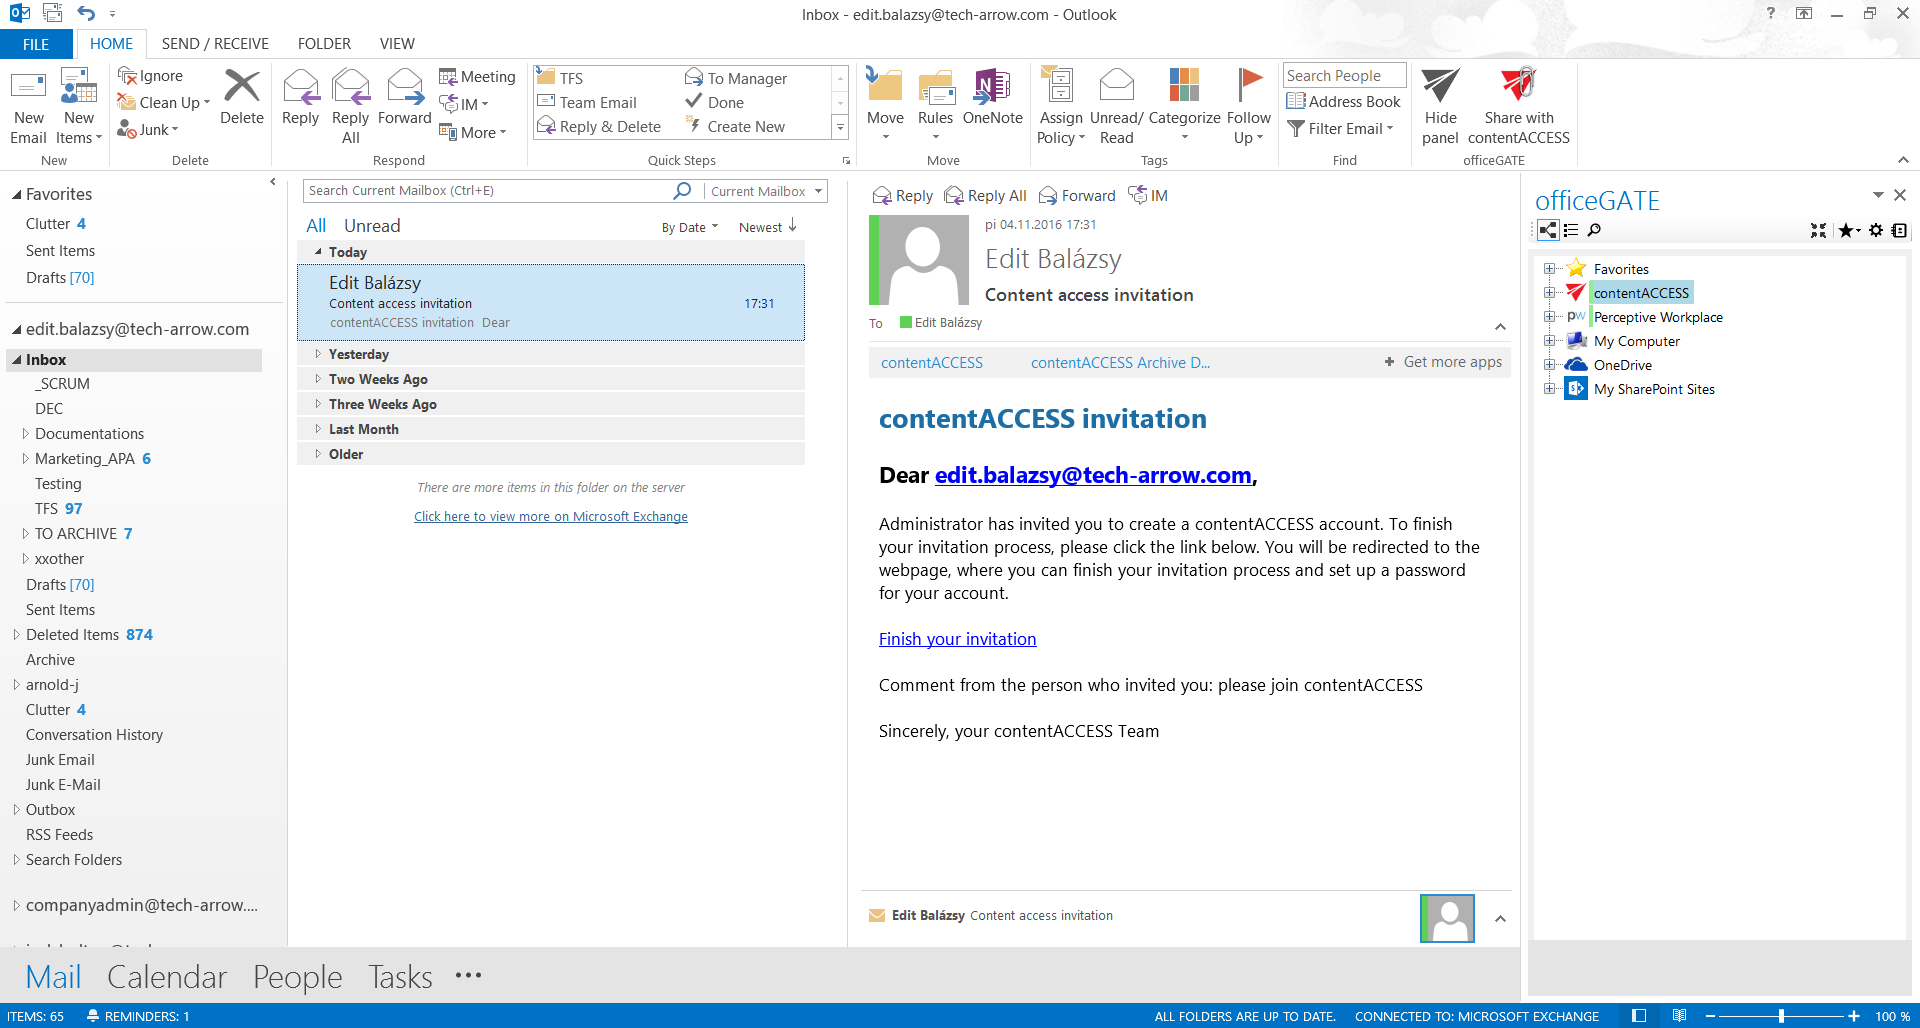
After the notification job has run, the invited user gets an invitation message, that he was invited to contentACCESS. To accept this invitation, he clicks “Finish invitation”.

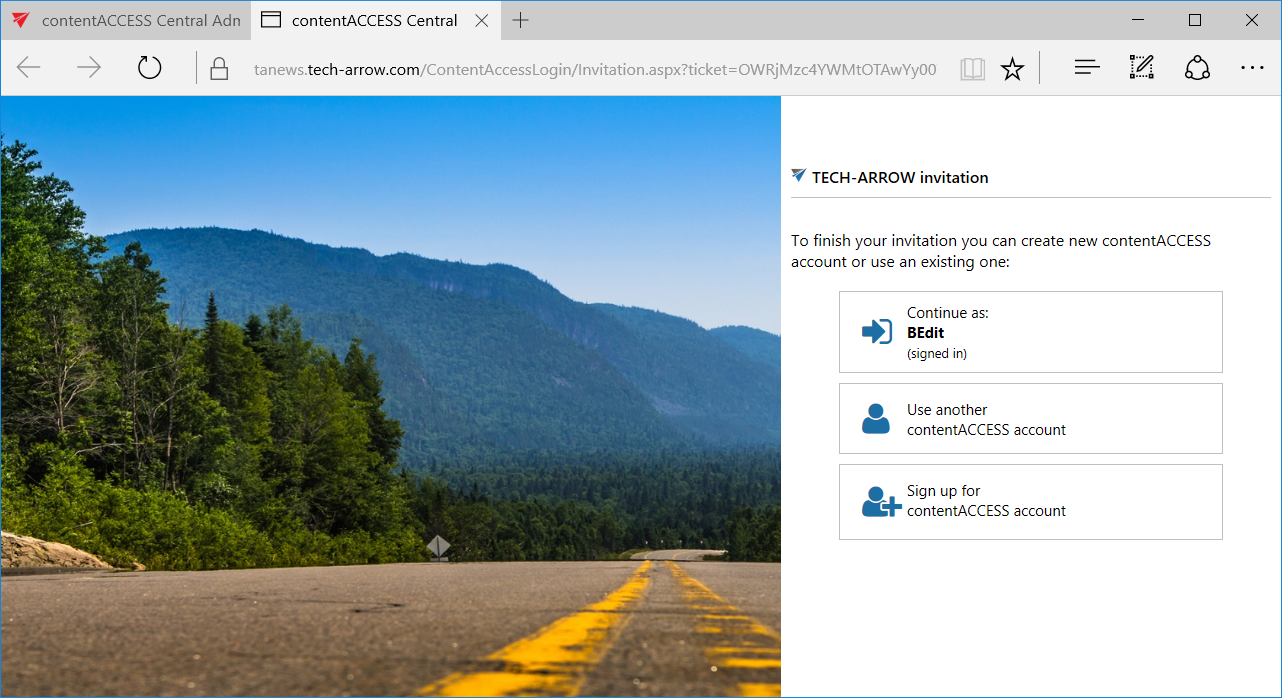
He is now redirected to the webpage where he can finish the invitation process. Depending on if the invited user already exists/doesn’t exist in contentACCESS, or if the user is already signed in to contentACCESS, he has multiple options how to finish the invitation process. He can
After successful login, the new user is created / the respective role defined in the invitation will be automatically assigned for the new/existing user.

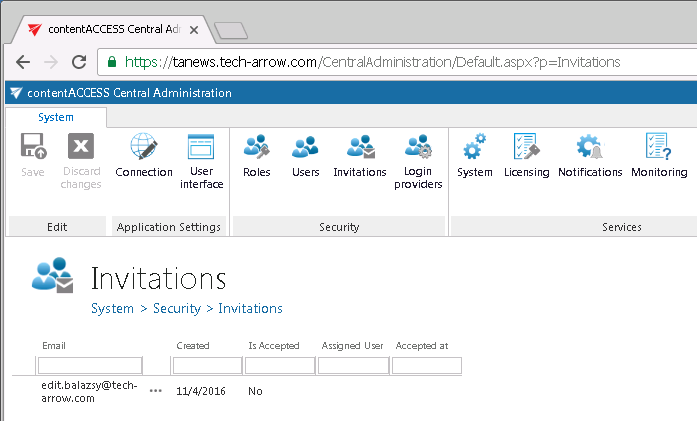
The list of invitations, so the list of already invited users can be viewed on the Invitations page accessible at: System => Security => Invitations. The following columns are displayed in the grid:
- Email: the email address where the invitation was sent
- Created: the date when the invitation was sent to the user
- Is accepted: here can be viewed if the invited user has accepted the invitation, or it is still a pending invitation
- Assigned user: the user with the assigned role(s)
- Accepted at: the date when the invitation was accepted by the user
The context menu option of the respective invitation allows to delete it from the list.

