6.6.2.2.Configuring Azure login provider
The Azure login provider supports both API versions (v1.0 and v2.0). German cloud (dedicated and isolated Microsoft Azure version for Germany) unfortunately does not support v2.0, only v1.0. Here are the differences between versions:
- The login application for API version 1.0 is registered through the Azure management portal (requires Microsoft Azure subscription) and does not support logins through Microsoft personal accounts, only Work and School accounts.
- The login application for API version 2.0 is registered through apps.dev.microsoft.com and supports all Microsoft logins (Personal, Work and School).
API version 1.0 registration
When configuring Azure login provider, if Germany is selected in the Region dropdown list, version 1 is automatically preselected in the API version dropdown list. Do not change it, as the German cloud does not support API v2.0.
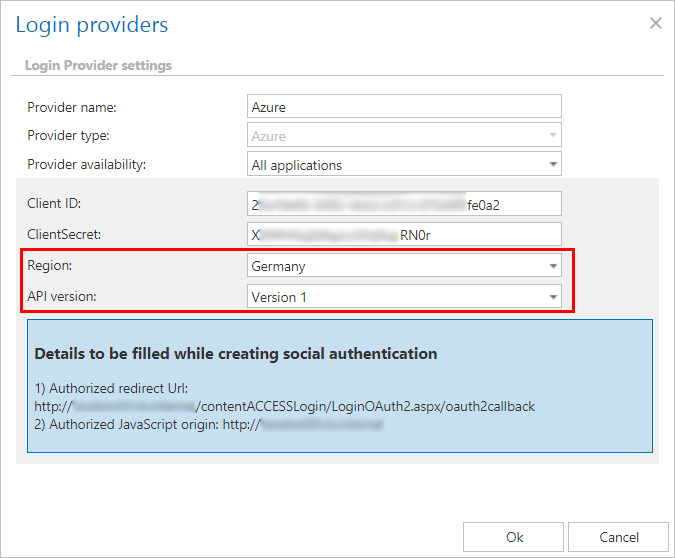
Here is how to register the API version 1.0:
- On the Microsoft Azure portal, click on Azure Active Directory -> App registrations -> New application registration.

- Enter the name, application type (API) and sign-on URL (https://SERVER_NAME/contentACCESSLogin).

- Select the created app.

- Copy the necessary IDs and enter them to the respective fields in Settings -> Properties. Set the app as multi-tenanted.

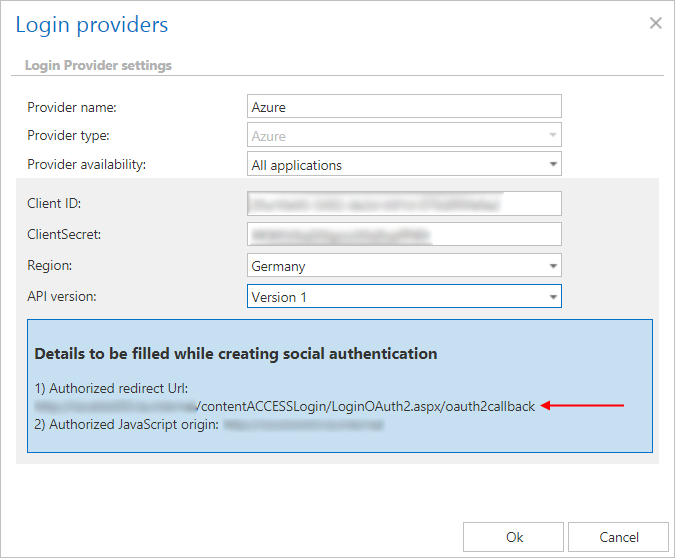
- In Settings -> Reply URLs, enter the reply URL (https://SERVER_NAME/contentACCESSLogin/LoginOAuth2.aspx/oauth2callback). This URL can also be found in contentACCESS Central administration -> System -> Login providers -> Azure -> Authorized redirect URL.

- In Required permissions, click on +Add -> Select an API -> Microsoft Graph.

- Click on Select permissions and check the options Sign in and read user profile and Read all users’ basic profiles.

- In Settings -> Keys, add the key name/description and select the option Never expires. Click Save.

- Copy the key value and save it somewhere, because you won’t be able to retrieve it afterwards. This value must be entered in the Azure login provider as the ClientSecret.

API version 2.0 registration
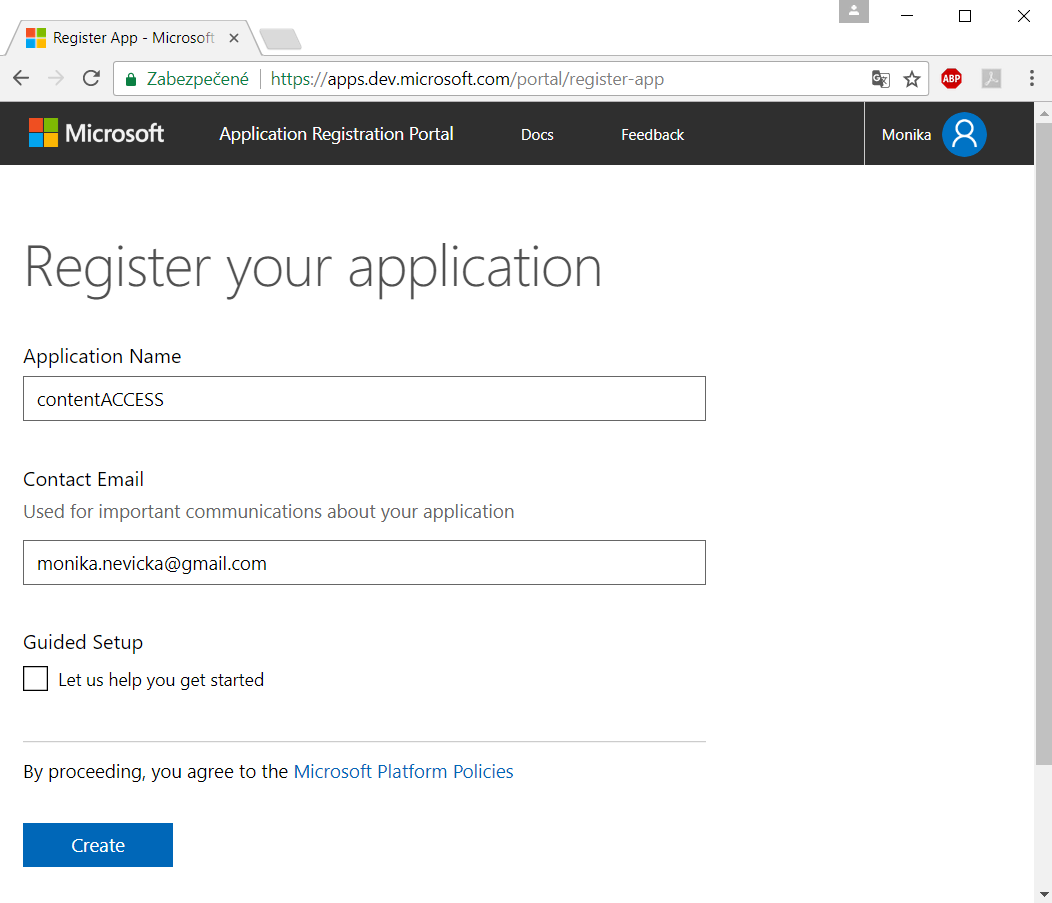
contentACCESS supports log in using your Microsoft account. The first thing you need to do is to register an application (contentACCESS) under your Microsoft account. We used monika.nevicka@gmail.com personal account for the registration in our use case below.
- Go to the Windows Live application management site and sign in.
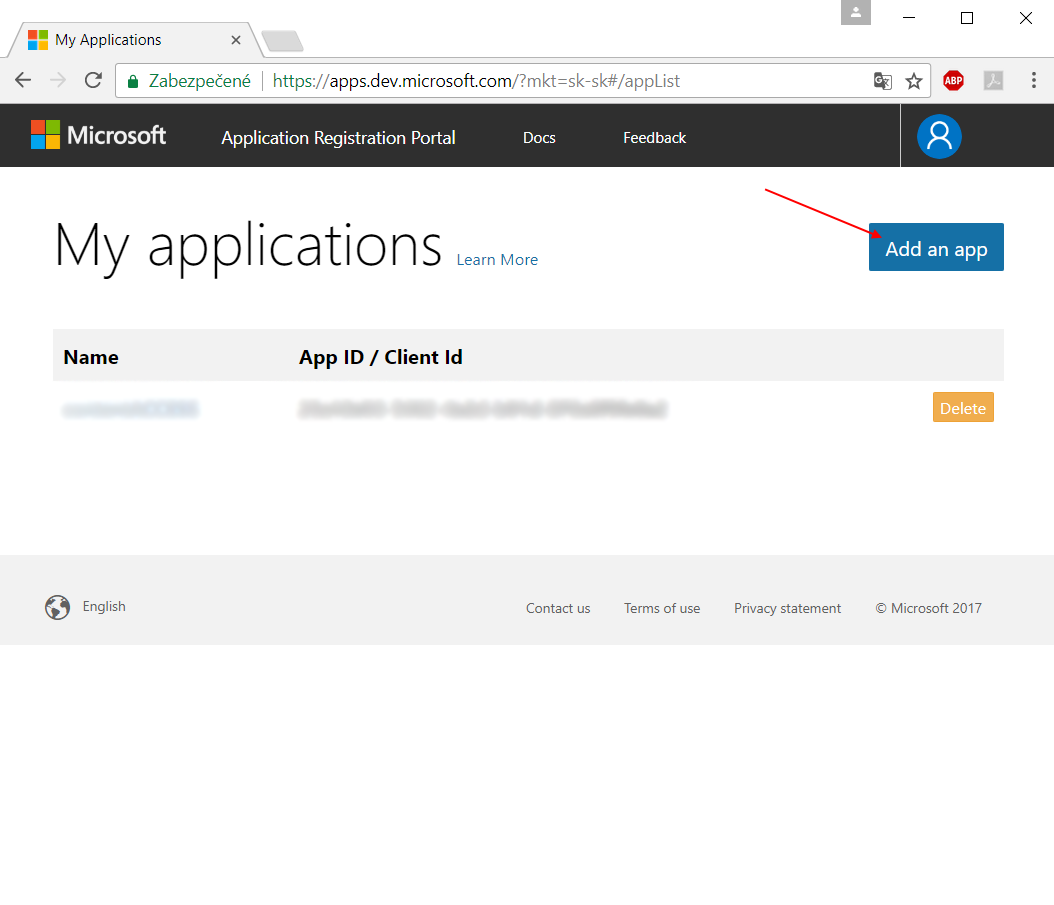
- Click “Add an app“ and name your application. The name that you specify should contain only alphanumeric characters and cannot be changed after registration is complete.
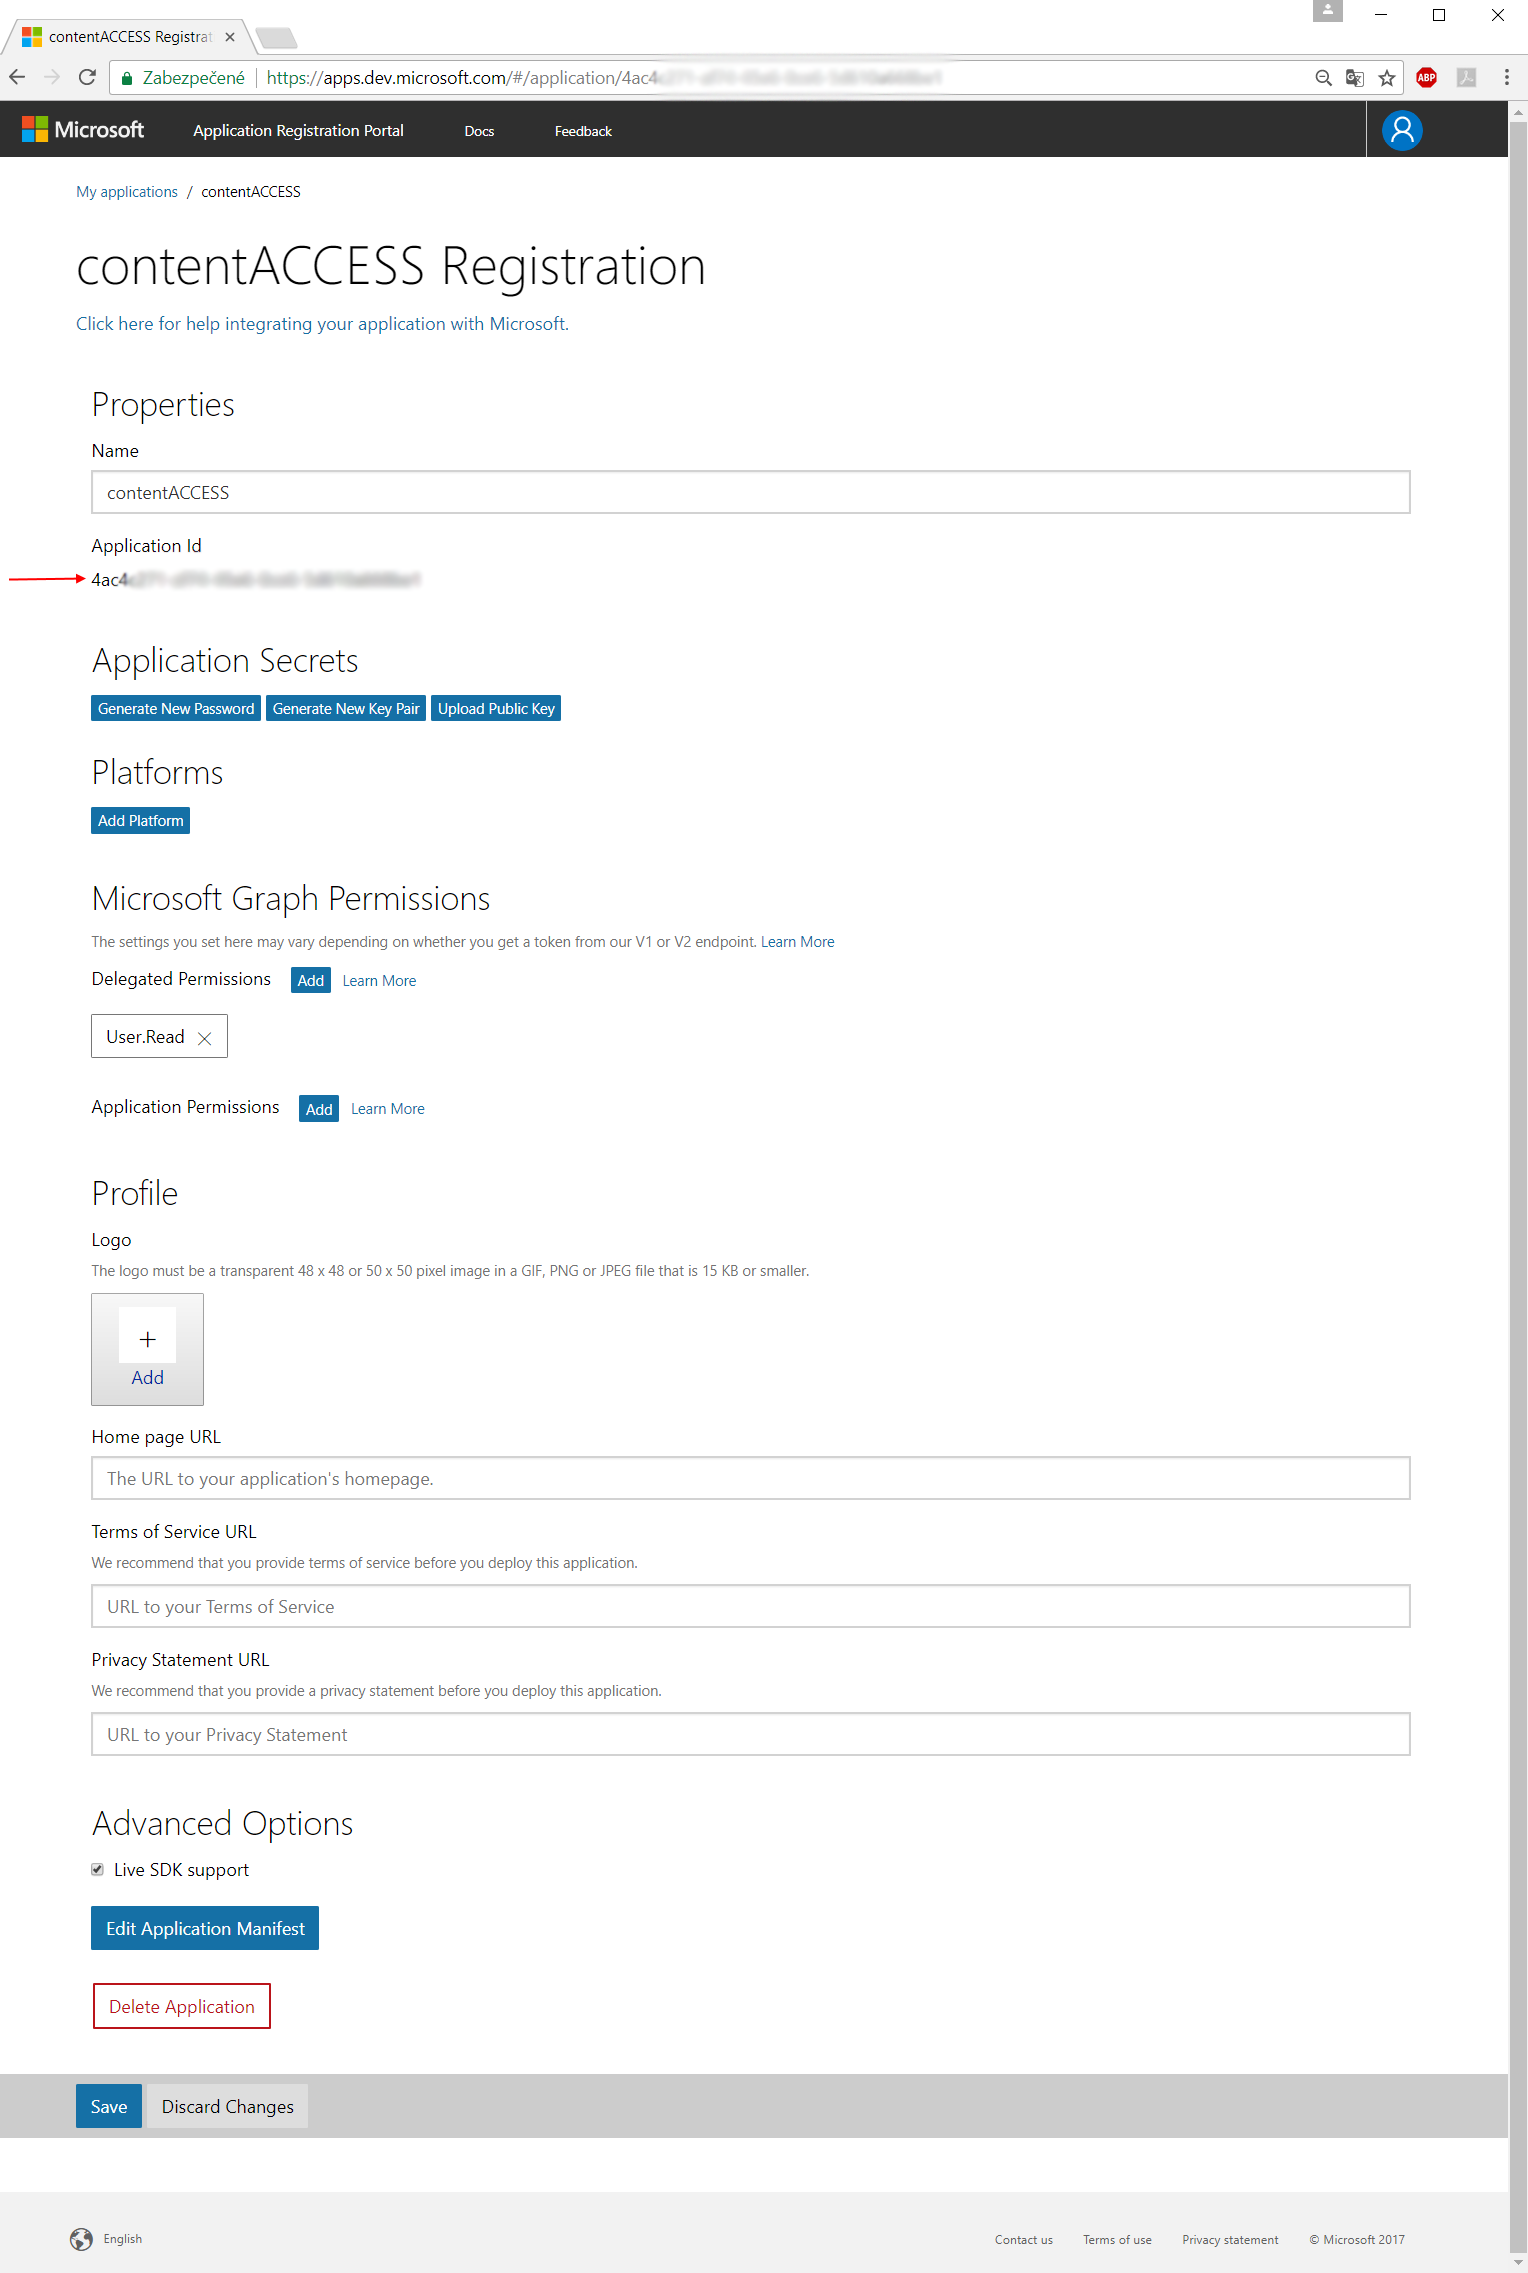
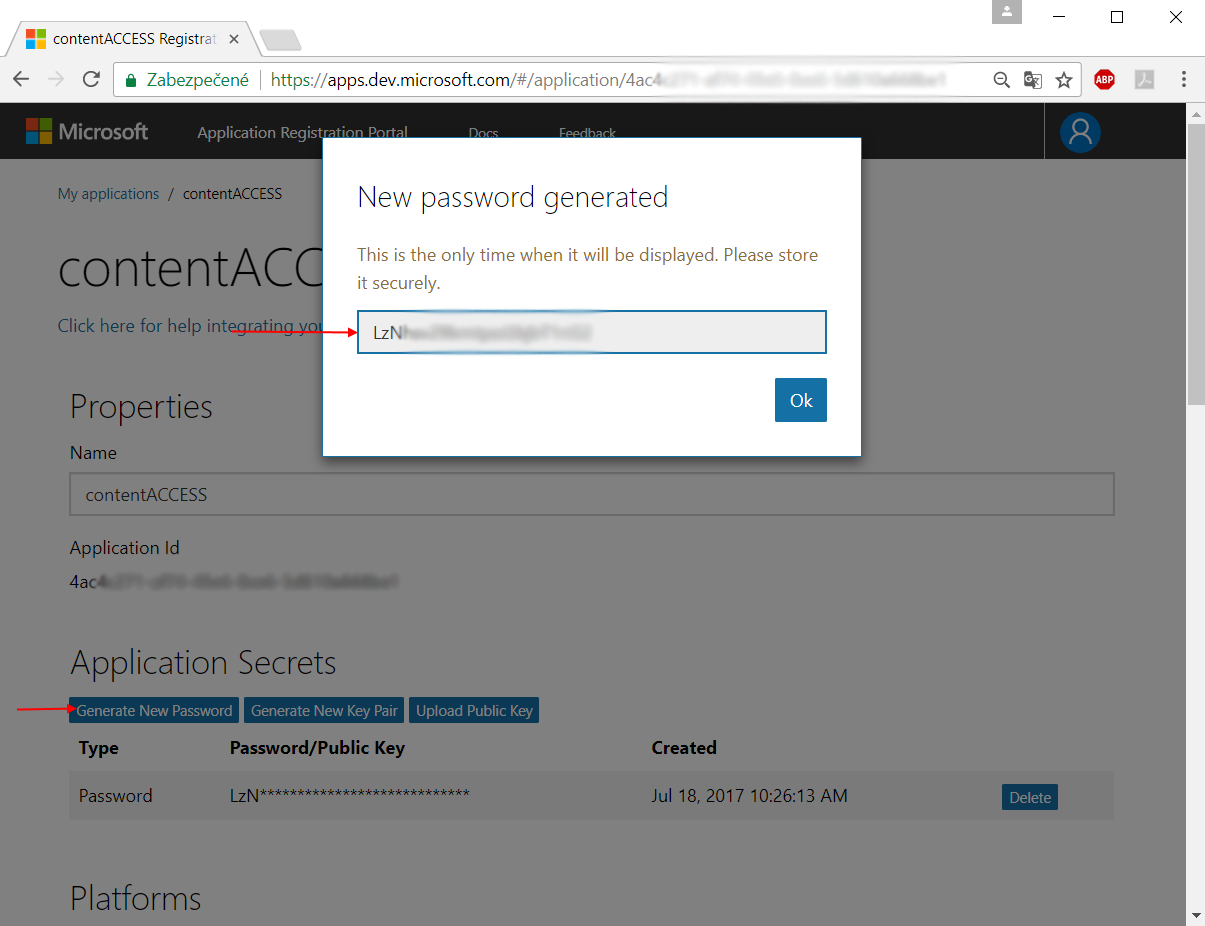
- The Application ID will be later used as the Client ID in your application (in the Login provider’s window of contentACCESS Central Administration).
- Click option Generate New Password. This will be the ClientSecret in your application. You should record this key, but we recommend that you do not store it in the same location as its corresponding client ID:
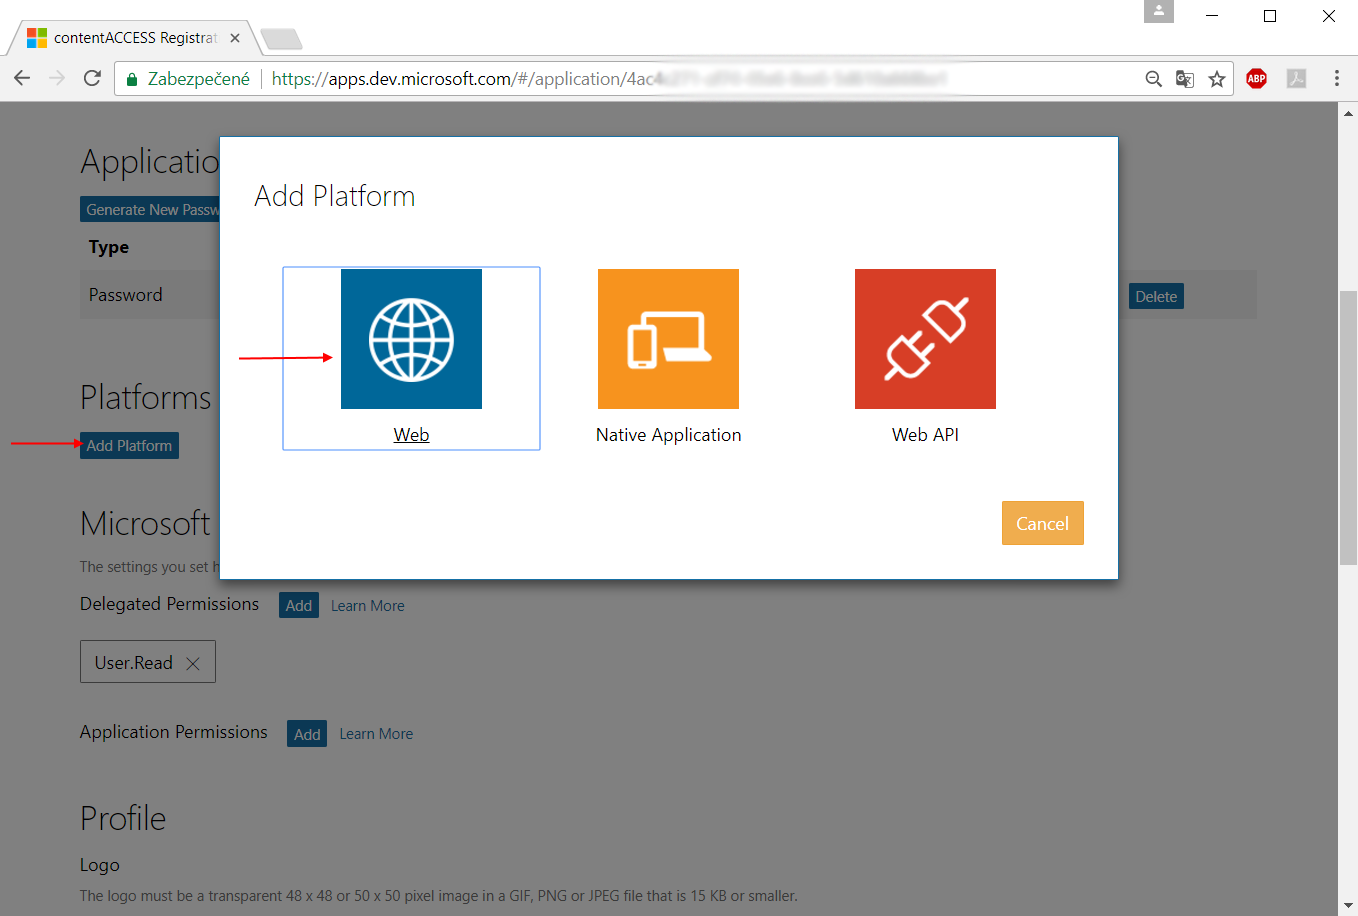
- Choose your application platform: Click “Add platform” and choose “Web“.
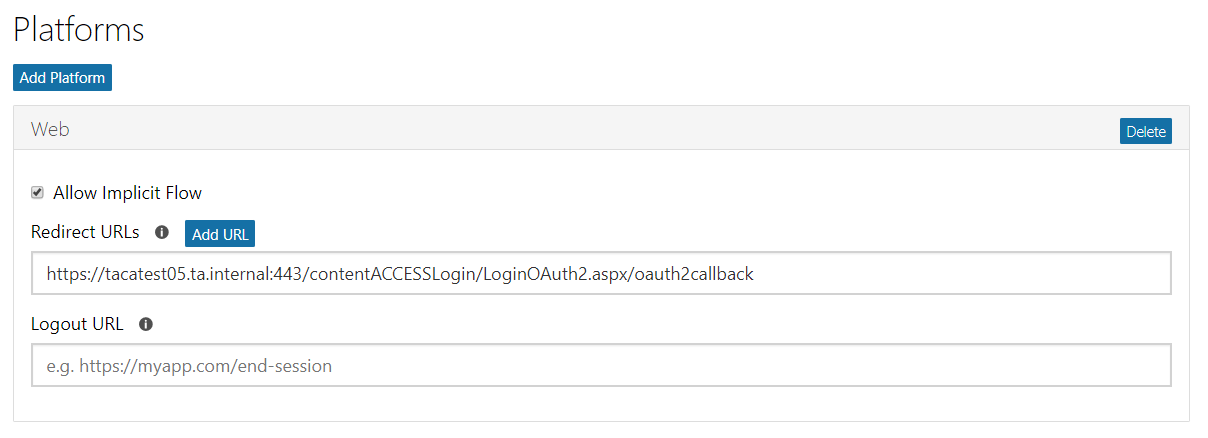
- Now you can specify the redirect URIs (– more with clicking on the Add Url button). Use the URL displayed in the Login provider’s window of the contentCCESS Central Administration.
Sample: https://[contentACCESS_Server:Port_Number]/contentACCESSLogin/LoginOAuth2.aspx/oauth2callback
- Upload your application logo, add terms of services and Privacy Statement. If you want to use the personal accounts too, you need to check the Live SDK support. Save your changes.
- Open the Login providers page (System => Security => Login providers) and click +new. Name your provider, select the “Azure” provider type and specify the applications that will use the Azure login (All applications/contentACCESS only/contentWEB only/Client applications only). Enter the Client ID and ClientSecret from steps 3) and 4) above and click “OK”.
Now configure the Azure login provider in the contentACCESS Central Administration.
With this step, this new login provider configuration has been enabled in contentACCESS. A user can use the configured login provider if this login type is associated with him. In the following subchapter we will learn how to associate a login type with a user.

