11.23.1.Email recovery job configuration
On the job’s configuration page the user is required to configure the following settings:
✓ Processing settings.
The administrator may select here, if he would like to use MAPI protocol to communicate with the Exchange server. EWS (Exchange Web Services) connection is selected by default, if MAPI is not selected here. It is important to know, that O365 Exchange server does not support MAPI connection. Another requirement to use MAPI is to have Exchange server 2013 or earlier version. Since some other functions might still use EWS, the EWS connection must be configured in any cases.
There are multiple options what to recover with a recovery job; the user may recover the original item, or he can get back the shortcut only. The user has the chance to select one of these 2 radio buttons:

If the administrator would need to recover items as shortcuts, then the already configured shortcut selected right here will be used to recover them. If the administrator selected above to recover the original item, this configuration option will be then hidden.

Specify a scheduler to determine, when the recovery job will run. It is possible either to select a scheduler from the list or to create a new scheduler via Create new option. (For more information about how to set schedulers refer to the section Schedules above.) It is recommended to set here a One time scheduler, or to start the job manually.

Select here, when you will need to get notifications from the job regarding the successfulness of the recovery process. It is possible to set here, if you will get a notification email always/never, or you get it only in case when an error/warning occurred during the archiving − for example, if the recovery of one or more items failed, then you may get a notification email about this error. Into the Recipient list textbox insert the email address(es) of the person(s), to whom these emails should be sent.

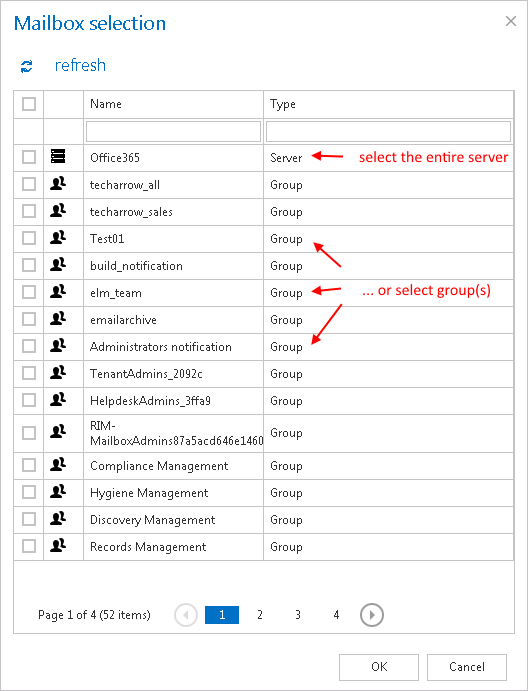
Here you can select the mailboxes, groups or the entire Exchange server, which will be processed by the recovery job. Click on the
 select option and check the groups or servers in the Mailbox selection window, then click on OK:
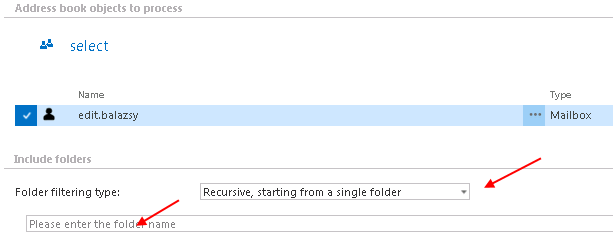
Recovery job is able to recover any folders of the mailbox; the entire mailbox, one single folder, multiple folders, recursive folder structures etc. Before you enter the folder name(s) to be crawled, it is necessary to select the folder filtering type.

The same rule applies to the Multiple folders and to the Multiple recursive, starting from a single folder too, but in this case we can work with more folders simultaneously (e.g.: INBOX, OUTBOX\Folder name 5…or…TASKS, CALENDARS\Folder name 6).
How to recover whole mailbox? It is important to bear in mind that by selecting “Recursive, starting from a single folder” filtering type under “Include folders” section and leaving the folder path textbox empty, the whole selected mailbox will be recovered:
✓ Exclude folders
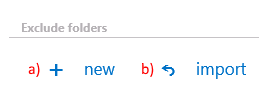
With this function you may set, which folders/subfolders should not be recovered. The folders that should not be recovered may be
- Added via the “+ new” button – The settings are the same as for the Email archive job with ONE EXCEPTION: for the Email recovery job you can’t use %INBOX% to use the language independent default folders.
- Imported from a file via the import button – For more information refer chapter Importing contentACCESS configurations from files of this guide.
✓ Item filtering
This configuration enables you to filter among your items to be recovered by 2 types of criteria: by age and message class. Only emails with the predefined filtering criteria will be processed. It is also possible to use more filters simultaneously. To activate any of these filters, check the corresponding checkbox first, then click on the button to open the filter dialog:

- Age filter: To filter out recoverable items with specific send dates, choose an option from the Select filtration type list and check the Use Dates checkbox. Now specify a date/date interval to filter out items, which have the sent date matching with the search criteria entered here. The items falling under this sent date interval will be selected to be recovered. Examples of using dates:
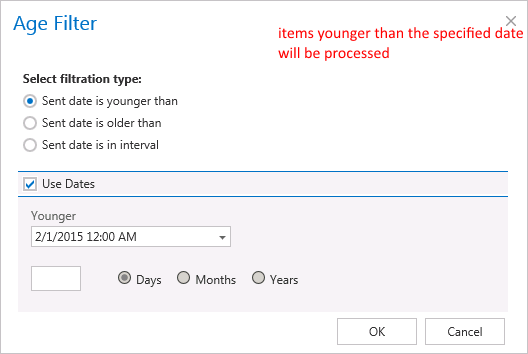
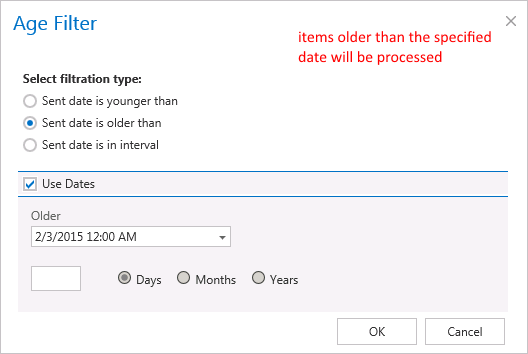
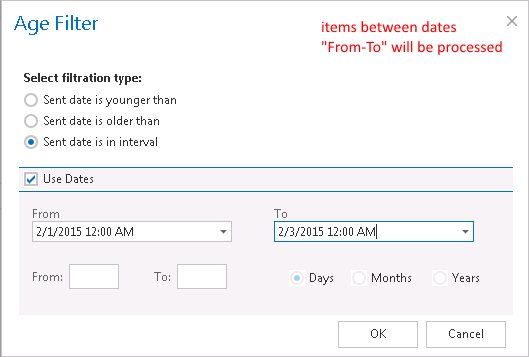
If the Use dates checkbox is not selected, then the date selection option becomes inactive. In this case it is allowed to filter between items older than/younger than a certain number of days/month/years. This age filtering type should be used if you would like to recover those items, which are older/younger than a certain number of days/months/years (i.e. items younger than 1 year). Enter the desired value into the From, To checkboxes. Then click OK.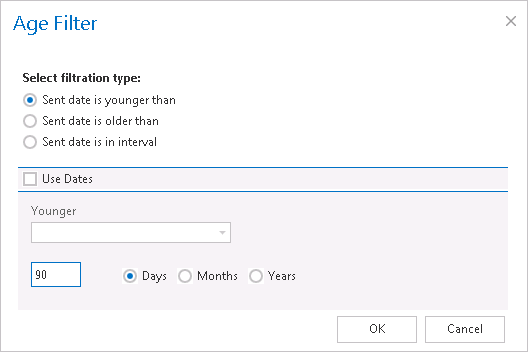
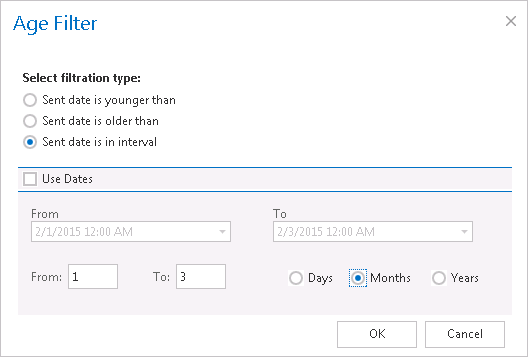
Screenshot A: Filtering items younger than 90 days. Screenshot B: Filtering out up to 3 months old items. - Message class filter:
By using this filter, the user will be allowed to filter out different message types, such as mails, documents, contacts etc. that he would like to recover. For filtering emails according to this criteria activate Message class filter button by checking the checkbox next to it, then click on the active button.
In the Message class filter dialog select all (choose radio button Apply for all message classes) or specify certain message classes (Apply for selected message classes). It is also allowed to add Custom message classes to the already existing ones. After all necessary custom classes have been checked, click on OK.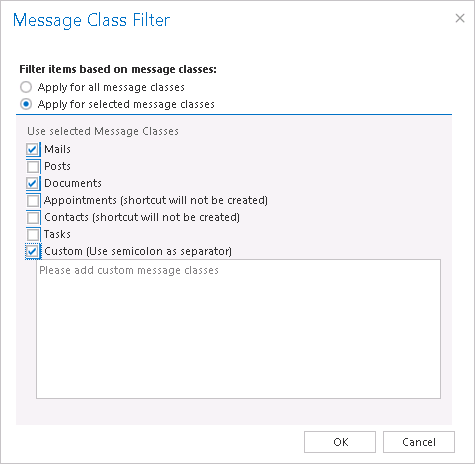
✓ Exclude addresses
With the “Exclude addresses” feature you may exclude the desired
✓ domain(s) (e.g. @microsoft.com) or
✓ email address(es) (e.g. john.arrow@tech-arrow.com) from the list of messages to be recovered.
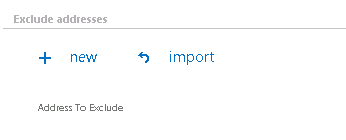
You may filter between recipients, senders or both, and the objects to be excluded from the recovery process may be imported from a file (using option import) or added manually (using option + new). The settings are the same as we described in the email archive and email restore jobs above.
Set the value, which will determine how many items will be processed simultaneously by the recovery job. The recommended value is “2”.
✓ Save your changes!
✓ Wait until the scheduler starts the job.
