10.7.Root folders
The root folder paths to be applied in a file archive job are specified in this section. The root folder defines the start point (start point = e.g. “c:”) of the archive process. A root folder set here is selected for an archive job on the given job’s configuration page. The relative path (e.g. folder “Test files” if directory “C:\Test files” will be archived) can be set in the given job’s configuration section further on.
The root folders and their settings are written to the file system database defined in section File archive System settings above (File Archive ⇒ Settings ⇒ System settings). A connection, that already exists in the system database, cannot be specified twice. E.g. if \\tanews\TECH-ARROW files to archive is already set, then \\tanews\TECH-ARROW files to archive\contracts cannot be added to the root folder’s list. This feature prevents the users from archiving the same folder into two different databases/storages. If the user wants to add a root which already exists in the system database, he will be prompted about this.
Example: “D:\Share” which is shared as “\\server\Share” can be added to the list of root folder twice, like this:
or as a shared path:
These paths are pointing to the same physical directory. contentACCESS can’t detect such collision.
This configuration might result in an unpredictable behavior: if both root folders are assigned to a different database or they are processed by different jobs, it is not possible to predict in which archive the files will be stored.
A root folder must always have a database and a storage assigned. The job, which archives (restores/recovers) this root, will use this database and storage.
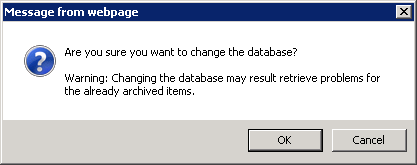
Hint: It is not recommended to change the database and storage connections already associated with a root folder. Changing the database will lead to problems when trying to retrieve the already archived items, because some of your data will be saved in the originally set database, and another part of data in the newly set database. The same retrieve problem might occur when changing the storage, too. The application warns the user about it:
The root folders may be either
- imported using the “import” button (refer to chapter Importing File Archive root folders to be archived) or
- added to the list using the “new” button.
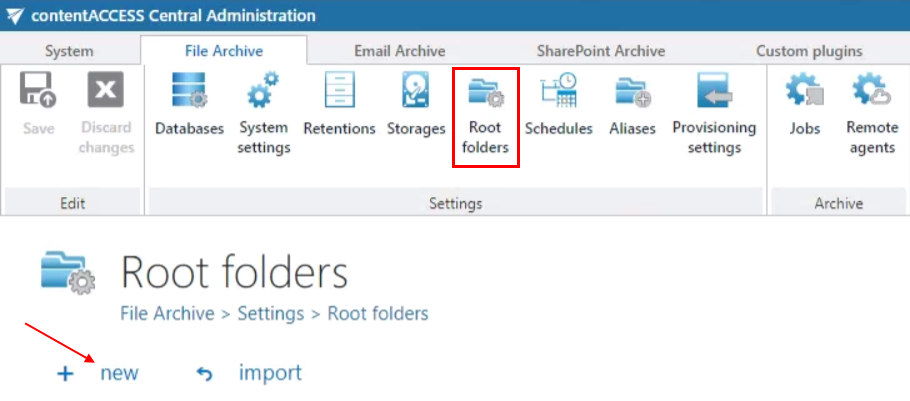
Click on “+ new” to manually add a root folder that should be processed by a job.
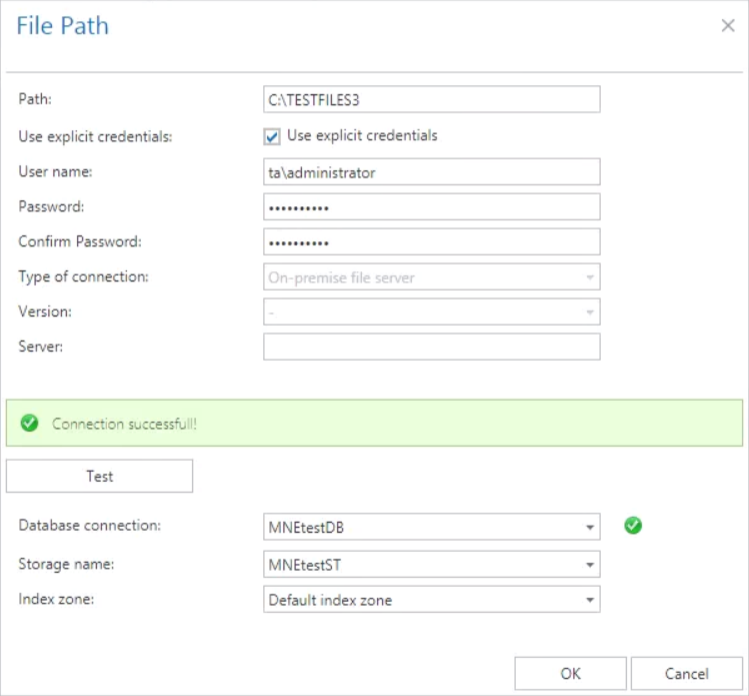
 The File Path dialog opens. Enter the file path that should be applied and the applicable user credentials. The Type of connection shows if the files to be archived are located on the server (on-premise) or on network shares (remote). Version can be either way Business or Private. The File Archive database, storage and index zone must be associated with this specific root folder directly in this dialog. It is NOT recommended to change the database and storage that is already used, because it will lead to file retrieve problems (as mentioned in the hint above). Use the “Change” option only in case if such change is really necessary (e.g. if you haven’t archived the root yet).
Root folder details
Details and archive statistics of the already configured root folders can be viewed by clicking on Details in the root’s context menu.
Details:
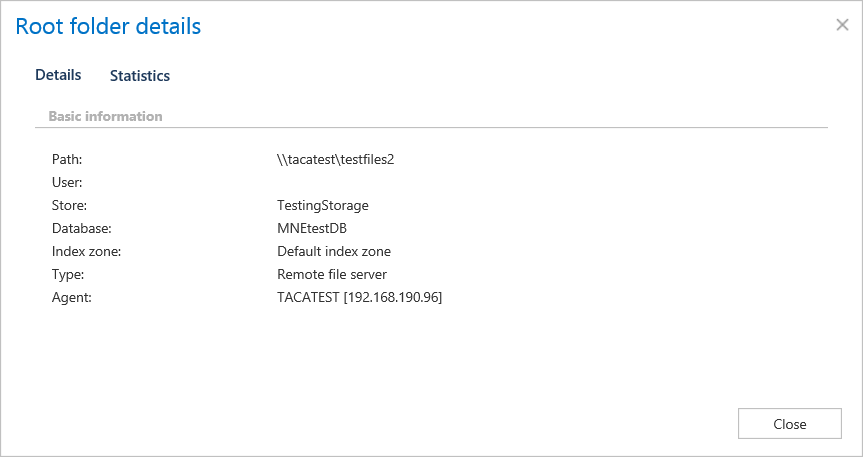
Path – where the folder is located
User – if the username was specified, it will appear here
Store – storage assigned to the folder
Database – database assigned to the folder
Index zone – index zone assigned to the folder
Type – type of the server the folder was archived by
- on-premise
- remote (as on screenshot above)
Agent – if the folder was remotely archived, it will display the agent who archived it
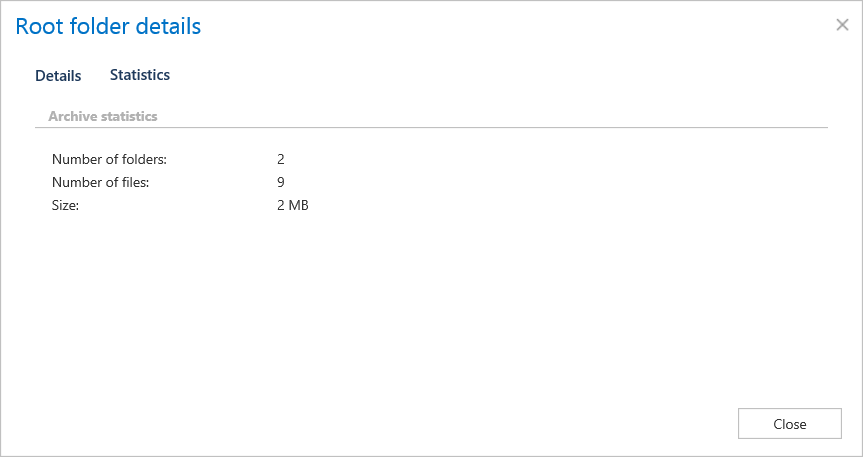
Statistics:
Statistics show archived folders count, document count and total size of the files that were archived.
Deleting a root:
Already configured root folders can be deleted from the list using the root’s context menu. A deleted root is only hidden, but it still exists in the database. If the user wants to add an already deleted root again, he will be prompted that it already exists in the database, and he will be able to restore it, but only with the old settings (with the originally assigned database and storage).
