11.20.PST configuration
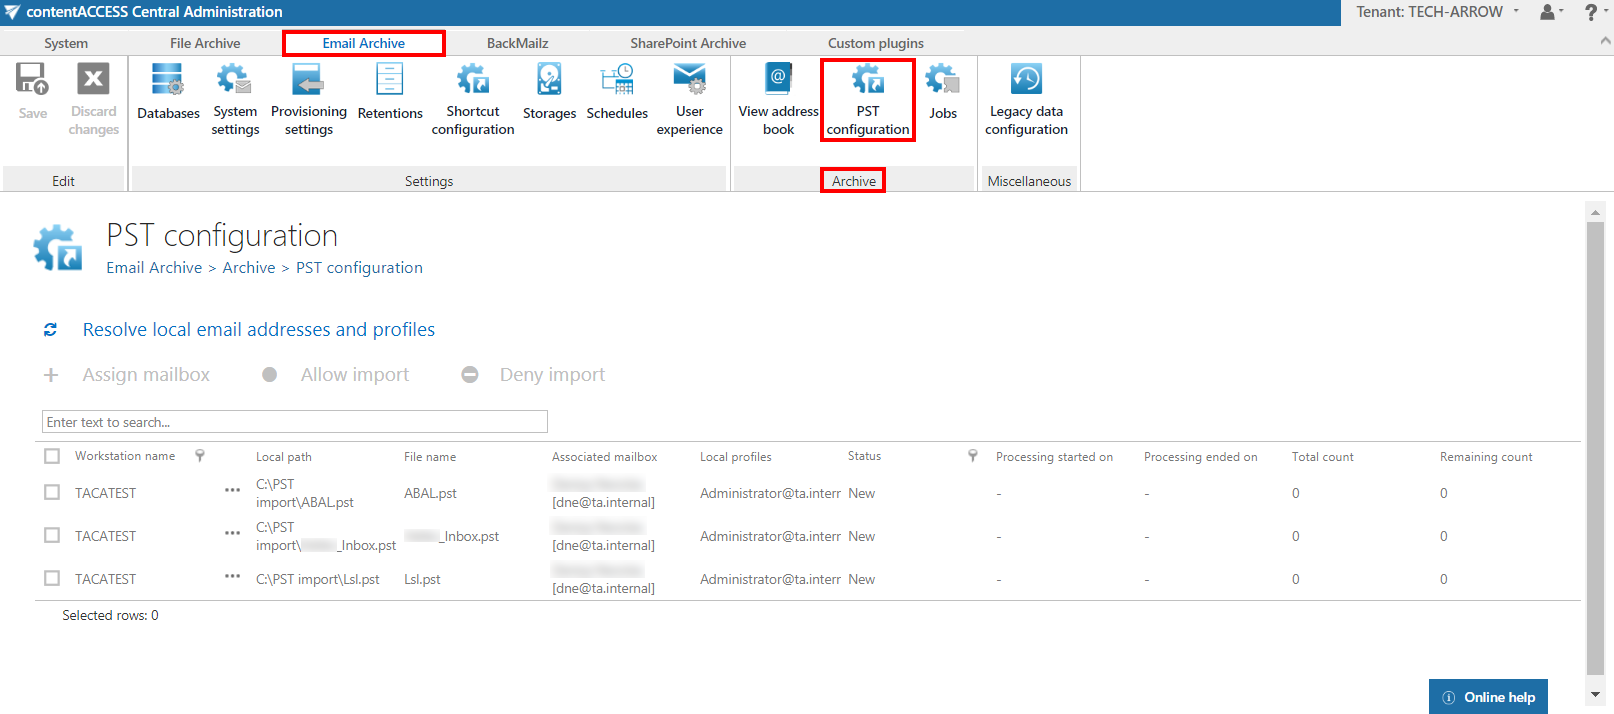
Go to Email archive -> Archive -> PST configuration.
On this page it is possible to manage the PST files that were uploaded by Remote File archiving agent (read more here). The PST files are stored in the resource storage. At first all PSTs are grey, because the import is not allowed yet.
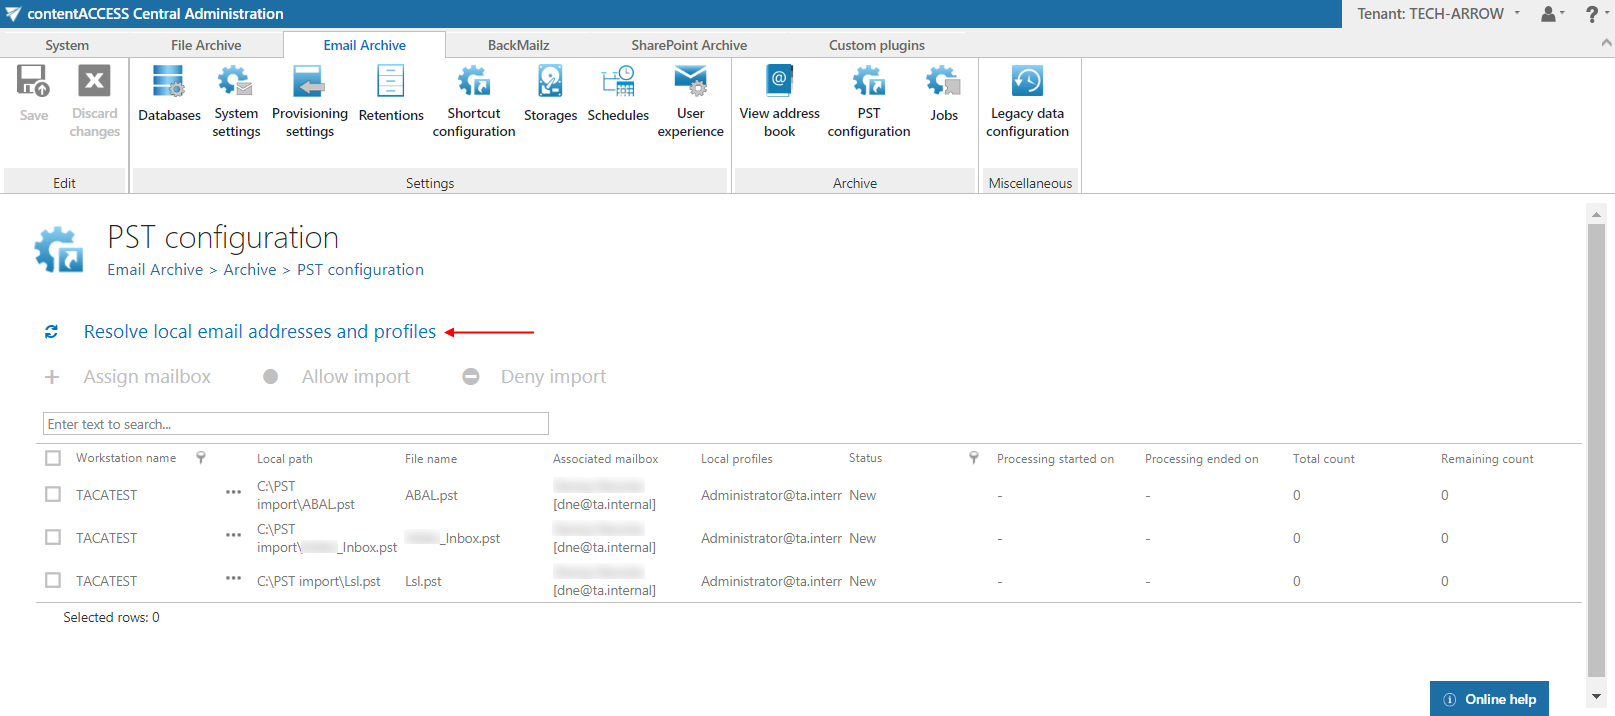
For the import to be allowed, mailboxes must be assigned to the PST files. It is possible to resolve local email addresses and profiles to automatically assign mailboxes. Click on Resolve local email addresses and profiles.
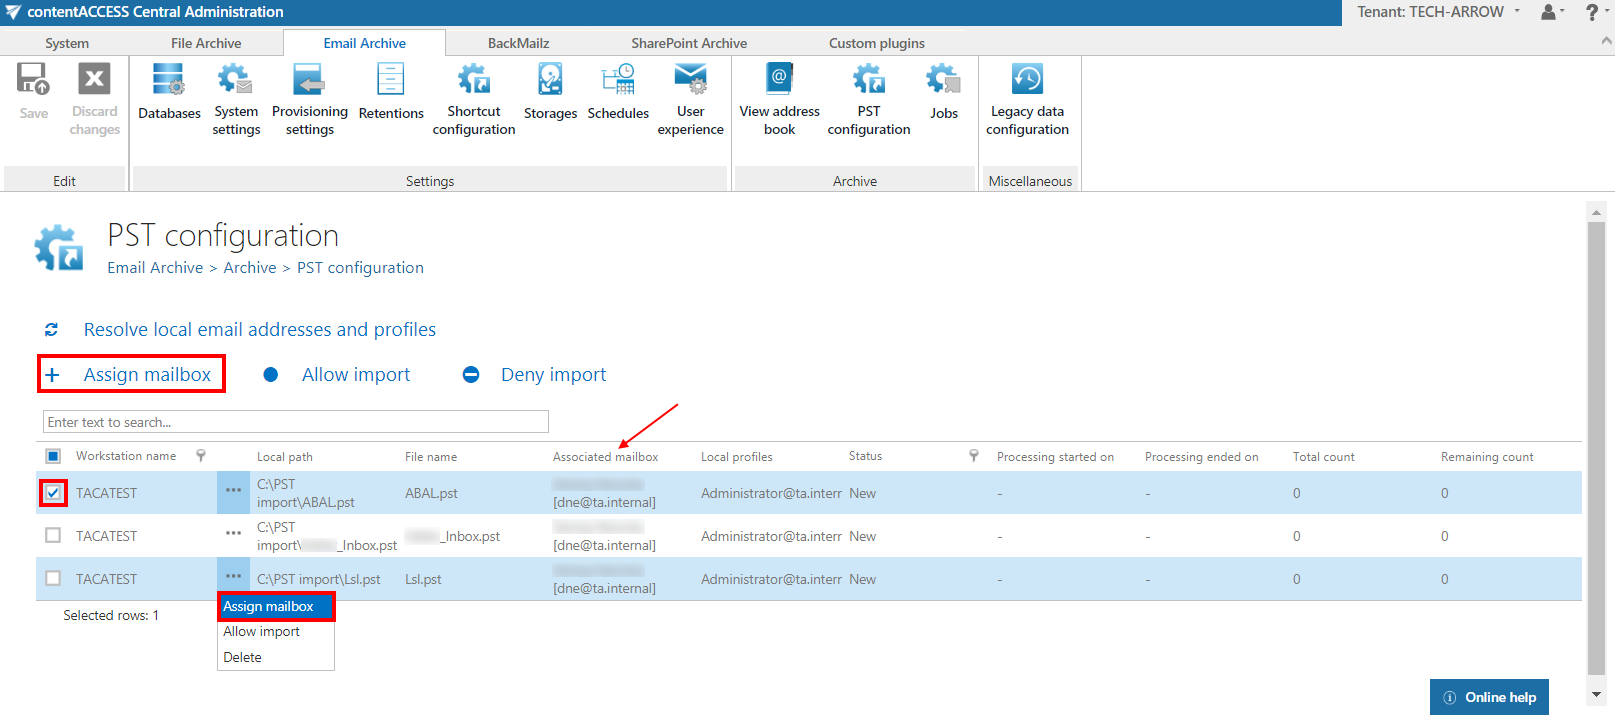
Mailboxes can be assigned also manually. Check the checkbox of the desired PST file and click on Assign mailbox. By clicking on the checkbox next to Workstation name, all PST files will be selected. It is also possible to assign mailbox from the context menu of the PST file. The mailboxes assigned here will be the target mailboxes of the PST import.
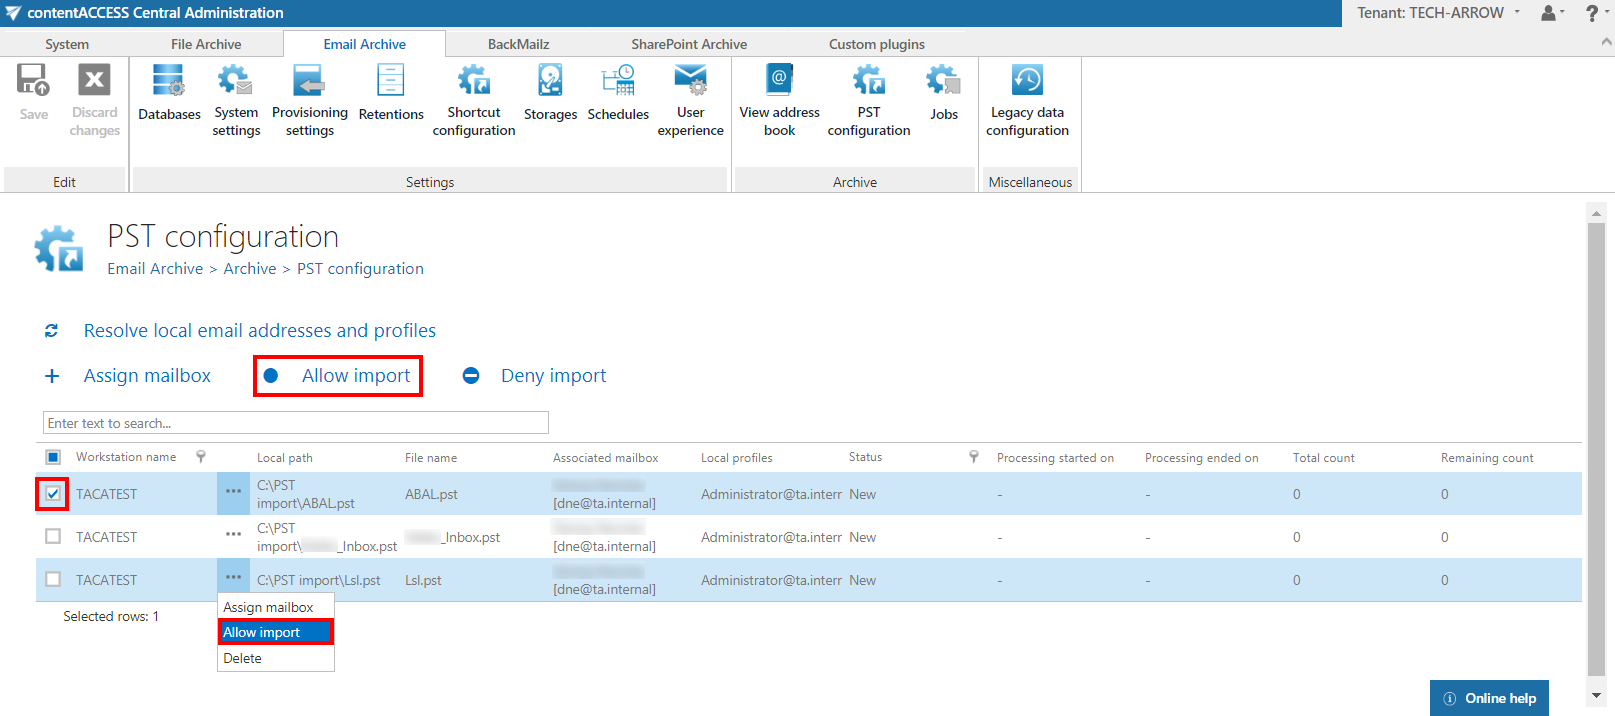
Next, select the desired PSTs by checking their checkbox and clicking on Allow import, or by clicking on Allow import in the context menu.
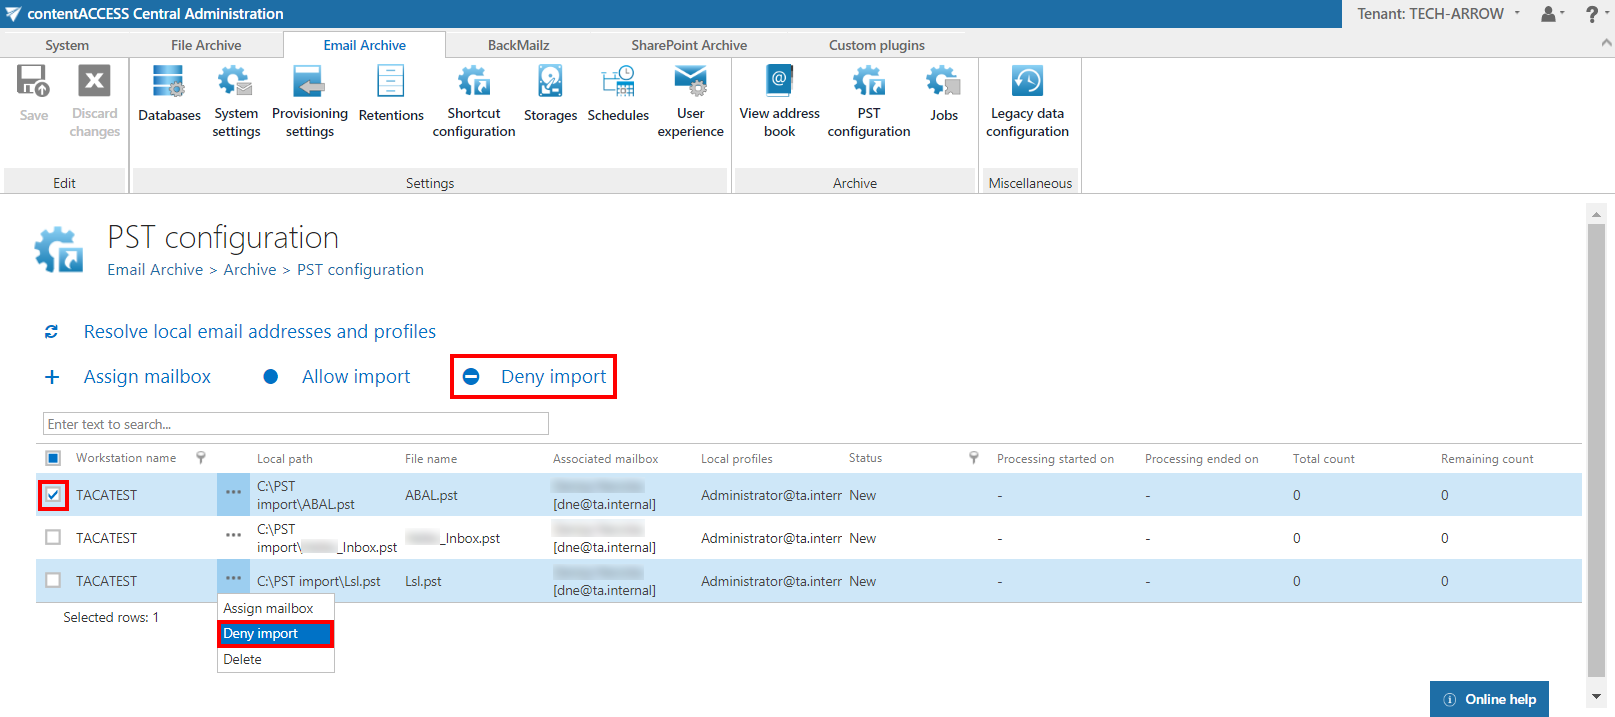
To deny the import of a PST file, select the desired one, check its checkbox and click on Deny import or select Deny import from its context menu.
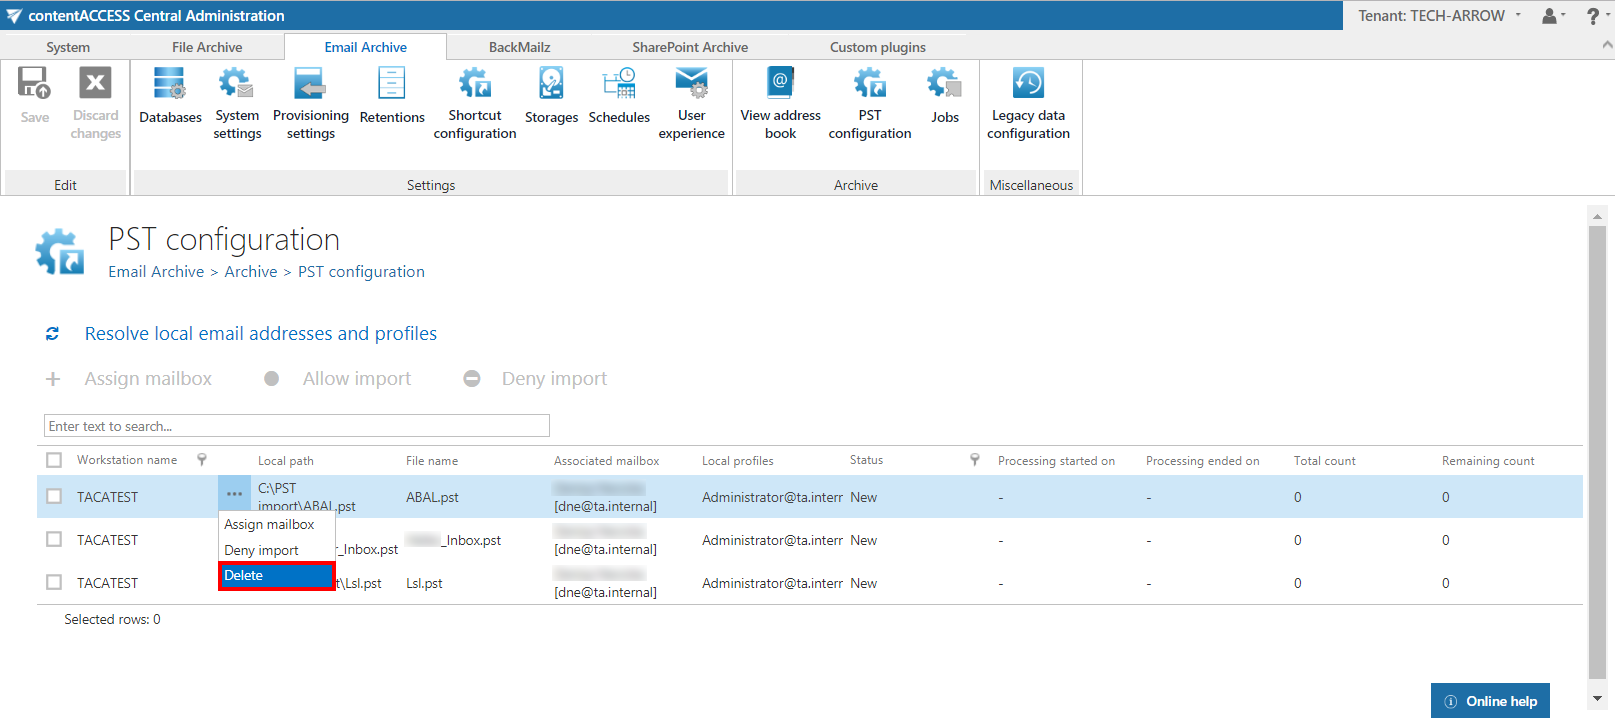
If you do not need the PST file anymore, you can delete it by selecting Delete from its context menu.
Next step is to configure a PST import job, which will import PST files based on settings configured in this section.
