5.1.How to create a new tenant
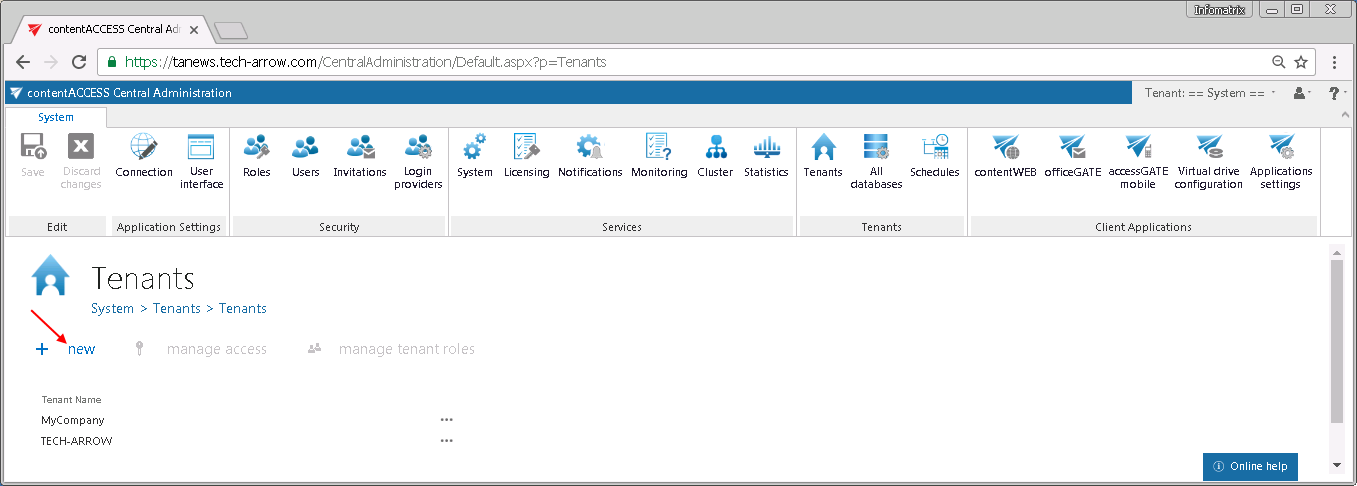
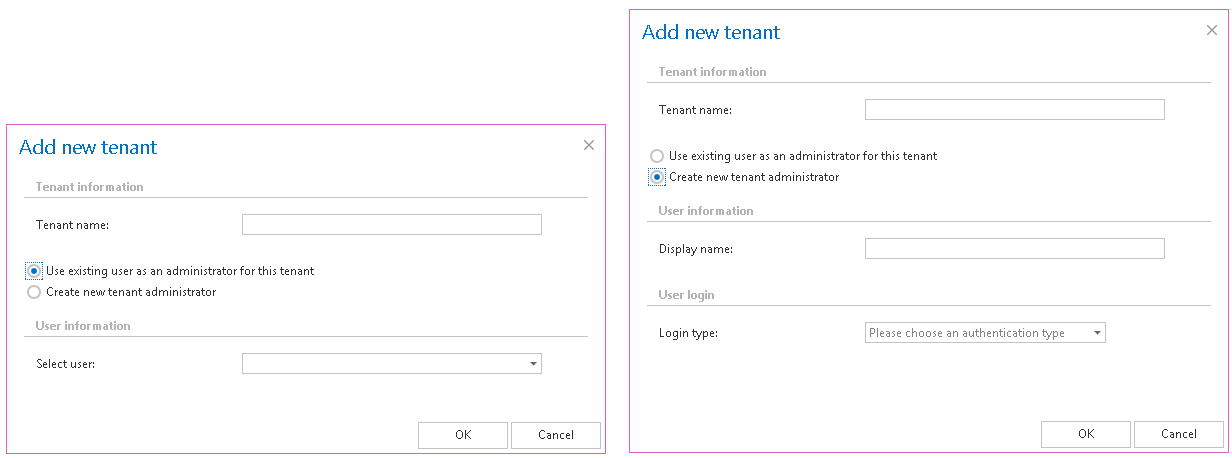
In contentACCESS, only a user with Manage tenant and Manage system permissions has the right to create a new tenant. If these permissions are not granted, the + new option (i.e. to create a tenant) is unavailable for the logged on user. The default system administrator role contains both these permissions. To create a new tenant, open the Tenants page in the Central Administration (System => Tenants => Tenants button). On this page you see the list of all tenants, which are present in contentACCESS. If you have not added a tenant to contentACCESS yet, the list is obviously empty. To add a new tenant to the list, click on + new. The Add new tenant dialog will open.


A) With selecting Use existing user as an administrator for this tenant radio button — select an existing contentACCESS user from the Select user dropdown list and click OK. This user already has contentACCESS credentials which he will use to log into contentACCESS Central Administration;
B) If you choose option Create new tenant administrator radio button:
1. Type a Display name for this new user,
2. Select a login provider configuration from the Login type dropdown list (Forms, Windows etc.). Only a provider configured in Login providers control (System tab ⇒ Security ⇒ Login providers) can be selected here. Forms and Windows are enabled by default. Login name and Login password are needed only in case that the Forms type has been selected from the list. In case of Windows, only the login name must be filled in.
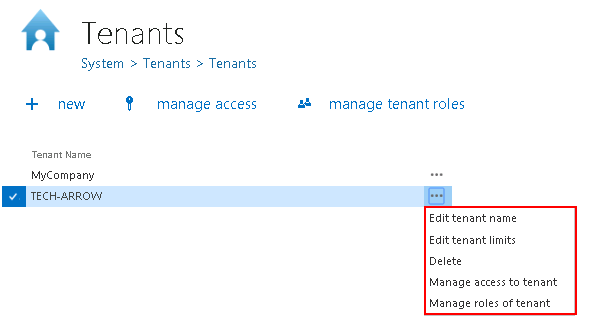
If you filled the required fields click OK. The already created tenant will appear in the tenant list on the Tenants page. With a left click on the ellipsis (…) the tenant context menu can be opened. The menu allows to edit the tenant name or tenant limitations, to delete the tenant, manage access to it (manage access = create new tenant administrator), and to manage the roles of the tenant (manage roles of tenant = add custom roles that will be available for the selected tenant; see more in chapter Roles).

