12.15.PST import
Go to Email archive -> Remote agents -> PST import.
On this page it is possible to manage the PST files that were uploaded by Remote File archiving agent (read more here). The PST files are stored in the resource storage.
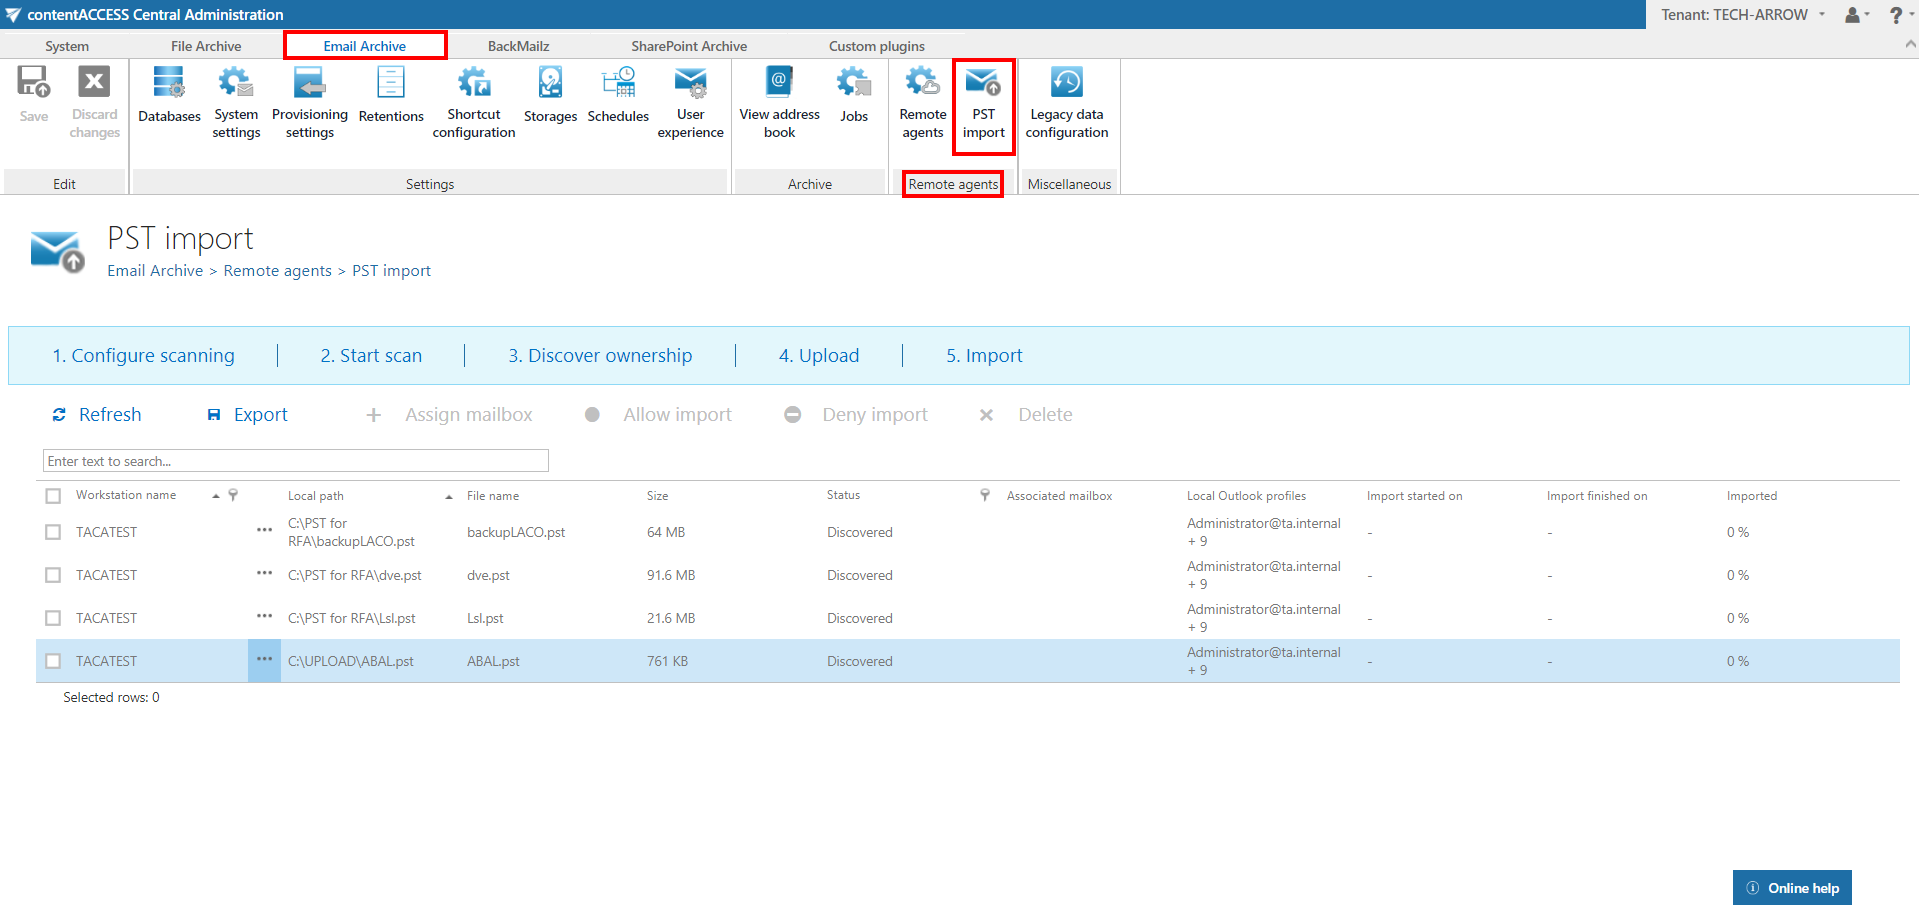
To make PST files appear on this list (and be able to manage them), one of the following needs to be done as the first step:
1) Upload PST files via RFA
If the PST files are uploaded this way, they can be managed right away.
2) Use the 1. Configure scanning and 2. Start scan options
First, click on the 1. Configure scanning button. The configuration page of the global PST import rule opens. On this page it’s possible to add new folders to the global rule, assign it to remote agents, disable it or view its statistics.
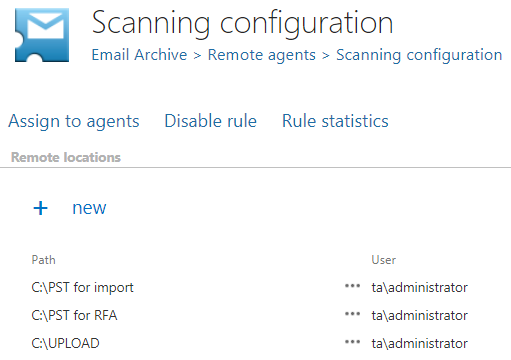
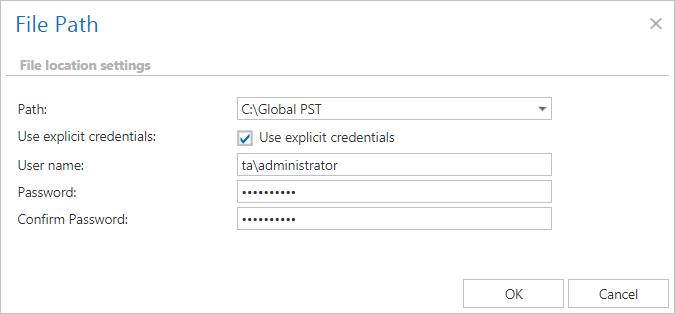
To add new folders to be scanned to the global PST import rule, click on + new. Enter the path of the folder, where the remote agents have their PST files to be imported located. Specify explicit user credentials if necessary and click OK.
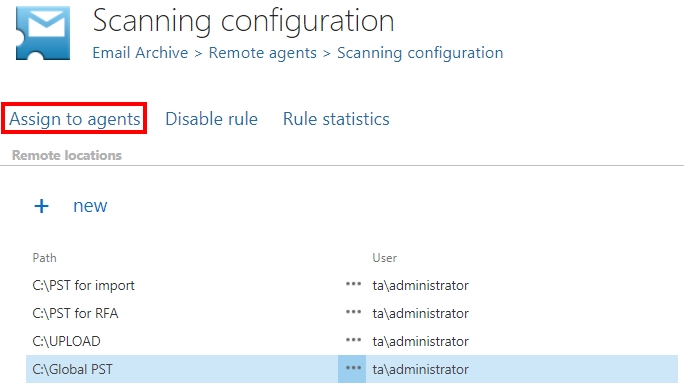
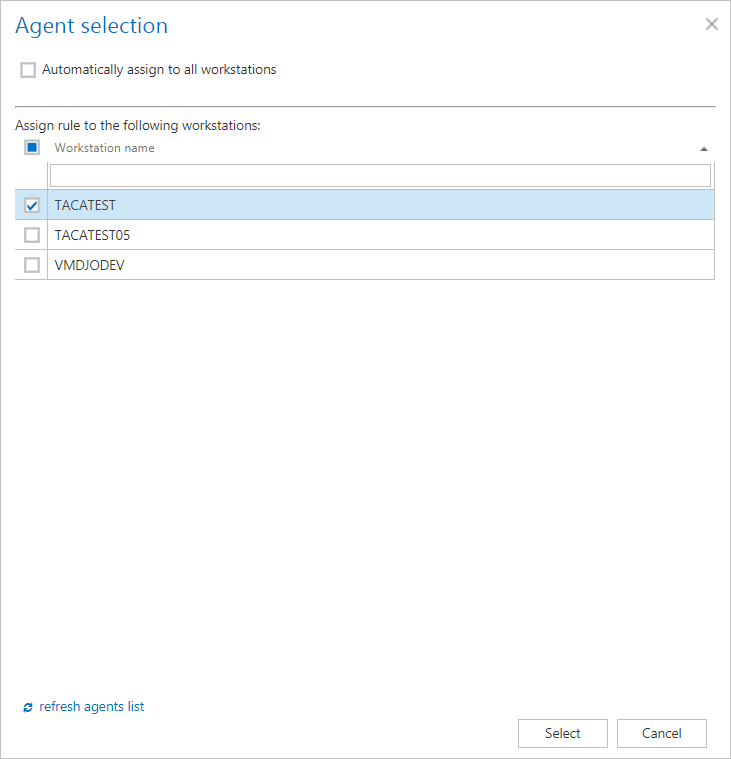
Click on the rule and then on Assign to agents. The agent selection window will open. Pick the agent(s) whom you want to assign the rule to or check the Automatically assign to all workstations checkbox. Click on Select.
Save your changes using the Save button in the upper left corner.
Go back to the PST import page. Click on the 2. Start scan button. This will make the global rule appear in the list of PST import jobs for the selected remote agents.
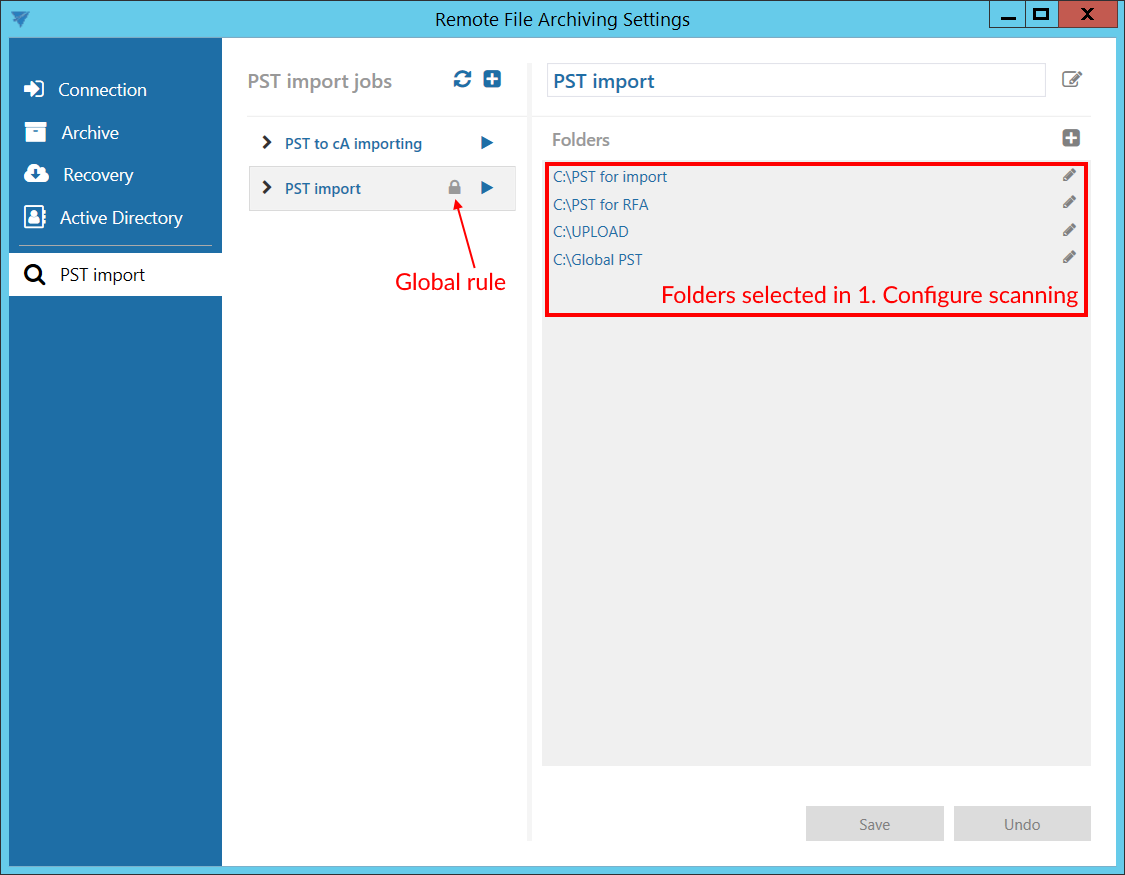
The remote agents now have to start the job (rule). After the rule is finished, the PST files from the global rule folders will appear in the list of PST files in PST import tab and the administrator will be able to manage them.
The second step is to match the PST files with target mailboxes. This can be done by one of the following:
1) Manually assigning the mailboxes
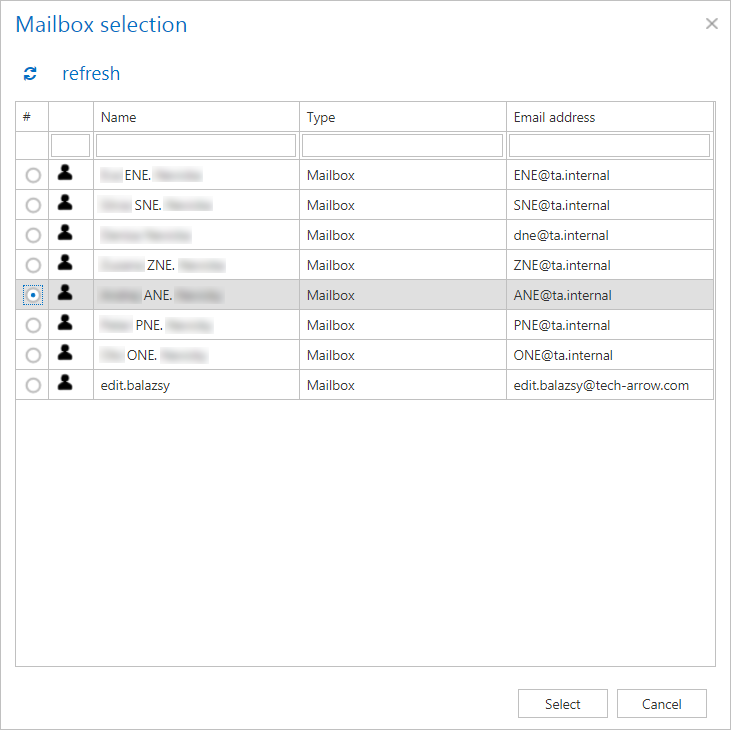
Select the desired PSTs by checking their checkbox on the left, then click on the + Assign mailbox button (or select the option from the context menu of a file). The mailbox selection window will open. Pick one of the available mailboxes and click Select.

2) Automatically assigning the target mailbox
By selecting a PST and clicking on the 3. Discover ownership button, the system will try to match the selected PST with one of the available mailboxes based on its name.

The third step is to upload the files to contentACCESS. This can be done by using the 4. Upload button. It is also possible to Allow import by checking the corresponding checkbox in this step. Click OK.

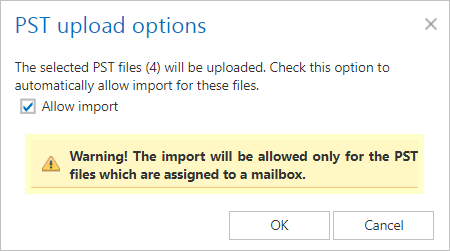
If the import was not allowed in the third step, it needs to be allowed in the fourth step by selecting the desired PST file(s) and clicking on the Allow import button.

The fifth step is to configure the PST import job. This can be done by clicking on the 5. Import button. The job will assign Database and Storage to those mailboxes that are associated with at least one PST file and don’t have a database and/or storage assigned yet. Database, storage and index zone can be assigned also from the context menu of the mailbox in Address book.

The job configuration page opens. Here, the following has to be set:
✓ Database settings
Select an already configured connection from the dropdown list. Here the metadata will be stored. For further information on how to set database connections please refer to section Databases.

✓ Scheduling settings
In this step, the running time(s) of the PST import job must be selected. It is possible either to select a scheduler from the list or to create a new scheduler via create new … option from the dropdown list. For more information about how to set schedulers refer to the section Schedules.

✓ Storage settings
Choose an already configured storage from the dropdown list. The processed binaries will be stored here. For more information on how to set storages check section Storages.

✓ Retention settings
Choose an already configured retention time from the dropdown list. The processed PSTs will be stored during this time in the storage, and it will be impossible to delete them from there. It is highly recommended to select a retention time that is required by the law of your country. For more information about how to set retentions check section Retentions.

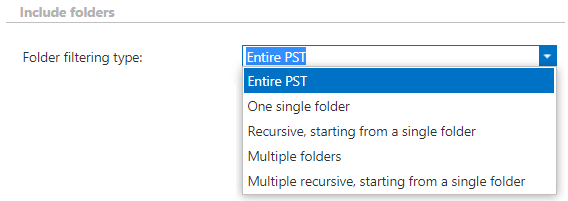
✓ Include folders
PST import job is crawling the entire mailbox or recursive folder structures from the PST files for further processing. Before you enter the folder name(s) to be crawled, it is necessary to select the folder filtering type. The folder filtering type is described in more details in this section.
✓ PST processing settings
Root folder – if you specify a folder here, emails from the root folders will be imported into the folder defined here.
Prefix – all of the PST files will be imported into a folder defined here.

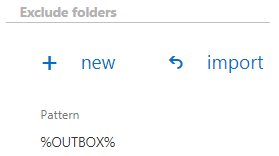
✓ Exclude folders
With this function, you may set which folders/subfolders should not be imported. If you would not like to exclude any folder from the process, you can skip these settings.
The folders may be excluded using one of the available methods: a) They may be added manually via the + new option; b) they may be imported in one of the available file formats via the import option. Folder excluding is described in more details in this section.
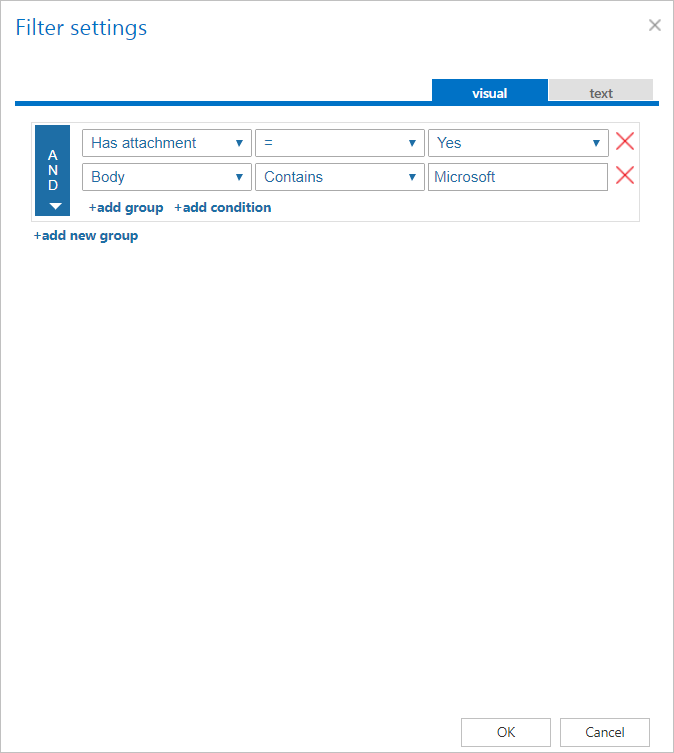
✓ Filtering settings
Click on the Change filter button and set the filtering according to your needs and/or regulations. To learn more about how to work with filtering settings, please, check this section of our documentation.
✓ Notification settings
Select here, when you will need to get notification emails from the PST import job. It is possible to set here if you need such a notification email always/never, or you need it only in case that an error/warning occurred during the importing process − for example, if the import of one or more items failed, then you may get a notification email about this error. Into the Recipient list textbox insert the email address(es) of the person(s), who will get such notifications. Notifications should be used if the administrator does not use the monitoring feature.

✓ Resource settings
Set the value, which will determine how many items will be processed simultaneously by the PST import job. The recommended value is “2”.

Save your changes and start the job! The PST files will now be imported to the associated mailboxes.
If the import was allowed for a PST file, but the user then decided not to import that file, it can be denied by clicking on Deny import button (or select the option from the context menu of a file).

In case a PST file is not needed anymore, it can be deleted from the list by clicking on the Delete button (or select the option from the context menu of a file).

It is possible to export the list of available (or just selected) PST files to XLS or CSV file.

