10.Filtering in jobs
This configuration enables the user to filter among items by several conditions:
File archive jobs conditions:
- All text = file name and content of the file
- Creation date – the creation date of the file
- Extension – important to specify also with the dot, like: .jpg, .png, .pdf
- File name
- Modification date – the modification date of the file
- Path – folder path of the parent folder, where the item is located
- Size – the size of the item
Email archive jobs conditions (also Shortcut repair and PST import):
- All text = Body, Recipients, Sender, Subject, Attachment filenames and Attachment content
- Bcc
- Body
- Category
- Cc
- Folder path – folder path of the parent folder, where the item is located
- Has attachment
- Importance
- Is from In-Place Archive (this option is present only if there is at least one In-Place Archive in the Address book)
- Message class
- Received date
- Recipients
- Sender
- Sensitivity
- Sent date
- Size – the size of the item
- Subject
- To
SharePoint archive jobs conditions:
- All text = file content and also metadata
- Creation date – the creation date of the file
- Extension – important to specify also with the dot, like: .jpg, .png, .pdf
- File name
- Modification date – the modification date of the file
- Size – the size of the item
- Url
GDPR File system job conditions:
- All text
- Creation date – the creation date of the file
- Extension – important to specify also with the dot, like: .jpg, .png, .pdf
- File name
- Modification date – the modification date of the file
- Path – folder path of the parent folder, where the item is located
- Size – the size of the item
GDPR Exchange job conditions:
- All text = Body, Recipients, Sender, Subject, Attachment filenames and Attachment content
- Bcc
- Body
- Category
- Cc
- Folder path – folder path of the parent folder, where the item is located
- Has attachment
- Importance
- Message class
- Received date
- Recipients
- Sender
- Sensitivity
- Sent date
- Size – the size of the item
- Subject
- To
To specify a filter:
- click on the Change filter button, or

- click on the Change button

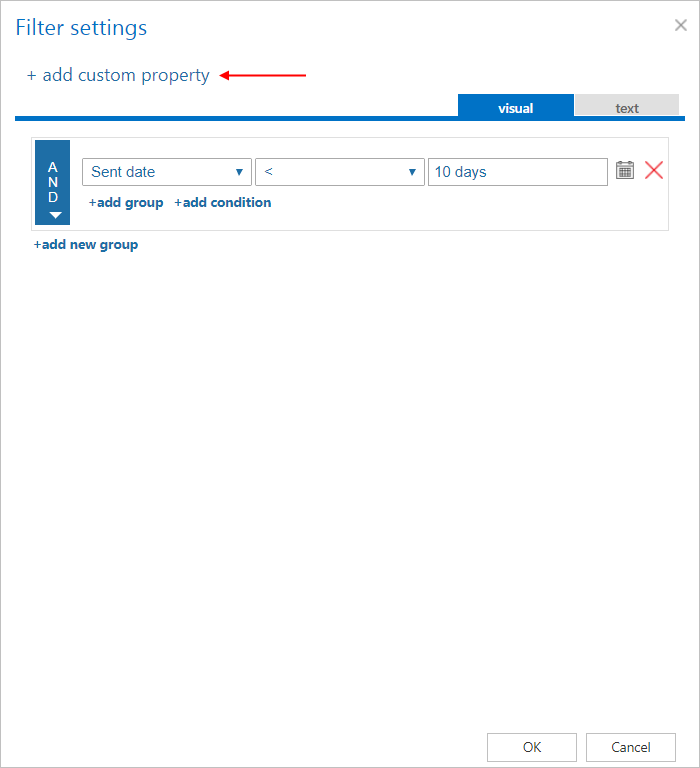
The Filter settings window will open. You can set filtering options in a user-friendly way (visual tab) or in a more technical way (text tab). It doesn’t matter which tab you work with – if you change something on one, it will be changed on the other, too. In this section we will explain how to set filtering by working with the visual tab.
To add a new filtering condition, click on +add condition. Pick a type from the first dropdown list (one of the conditions mentioned above), then an operator from the second and specify the value to the third box.
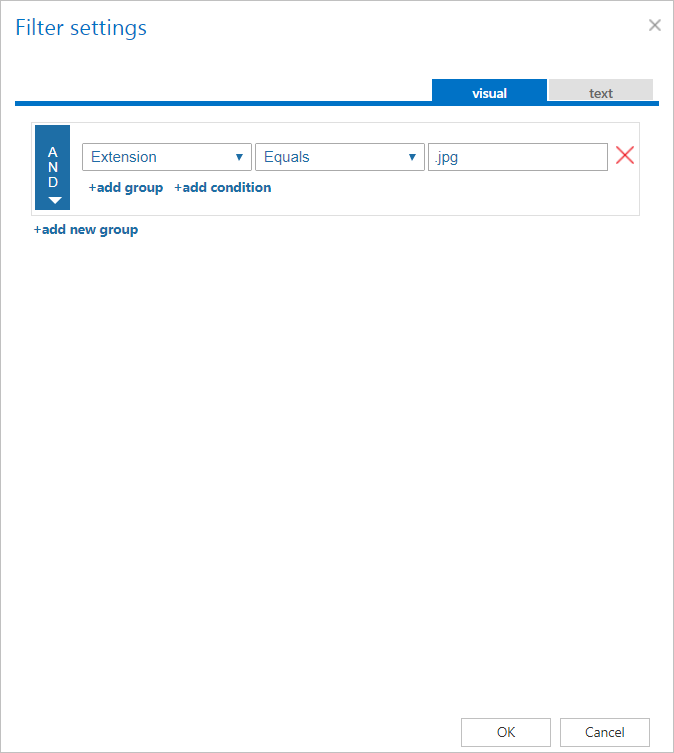
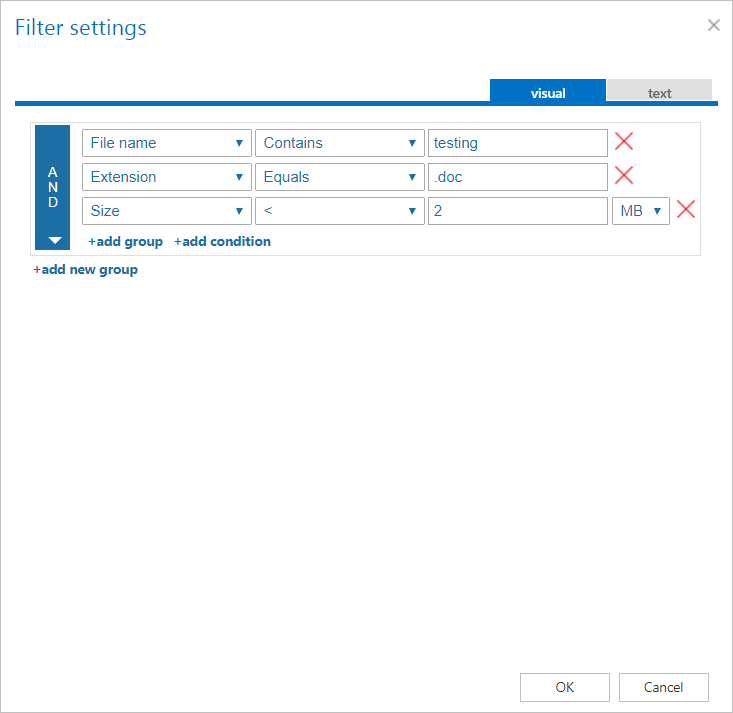
Filtering conditions can be merged to groups. To add a new group, click on +add group. There are 3 different operators that can be set for a group by clicking on the arrow in the blue part of the window:
- AND – by using this operator, items meeting all the set conditions will be processed
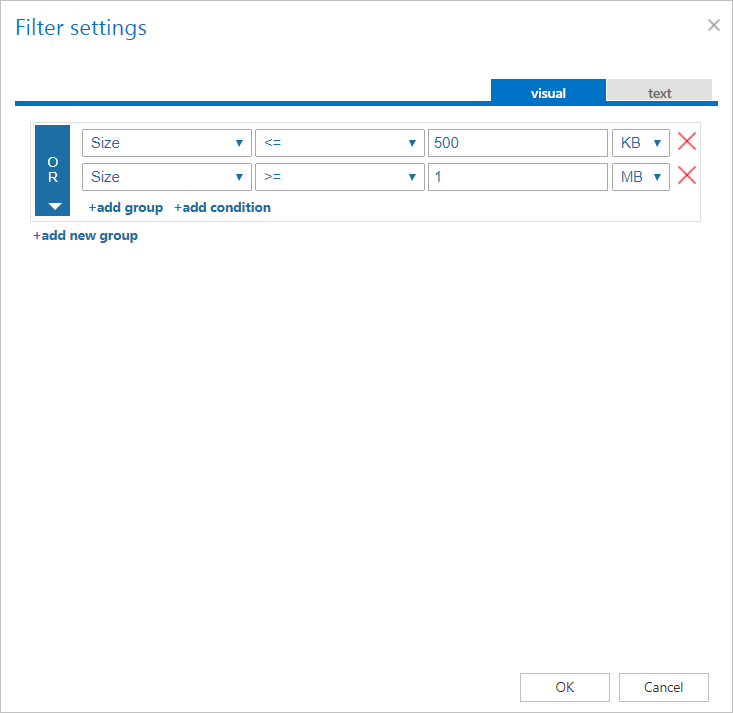
- OR – by using this operator, items that meet one OR another condition (or one OR another group of conditions) will be processed
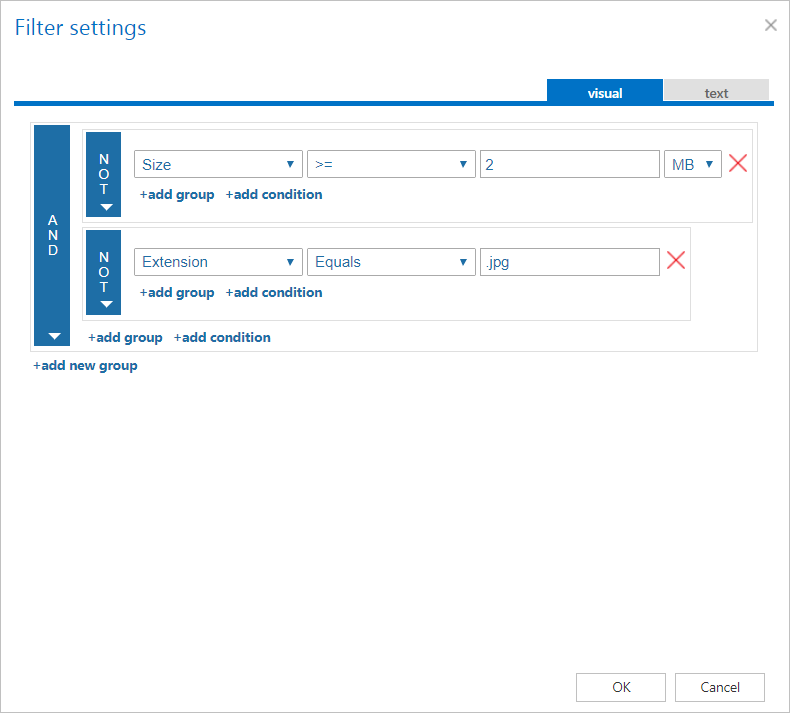
- NOT – by using this operator, items meeting the conditions will be excluded from processing. If you want to add more than one NOT condition, they have to be added as shown on screenshot below.
Filtering conditions and groups can be removed by clicking on the X.
For some job types, it is also possible to add another filtering condition that isn’t preconfigured. Click on the +add custom property button in the upper left corner of the Filter settings window.
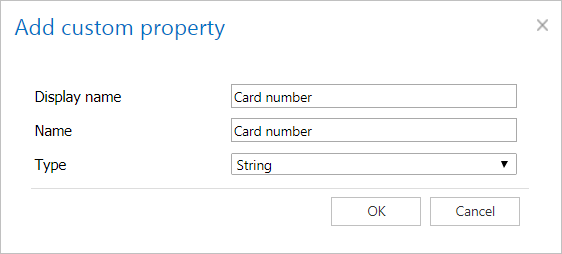
The Add custom property window will open. Here you have to specify Display name, Name and Type (String, Numeric, Date, Boolean, Lookup, Customizable lookup) for your new criteria. Click OK.
When you are done, click on OK. The filter(s) will be added to the Filtering settings or Shortcutting settings section of the job configuration.
