25.24.Azure app registration
In this section, we will explain how an app is registered on the Azure portal.
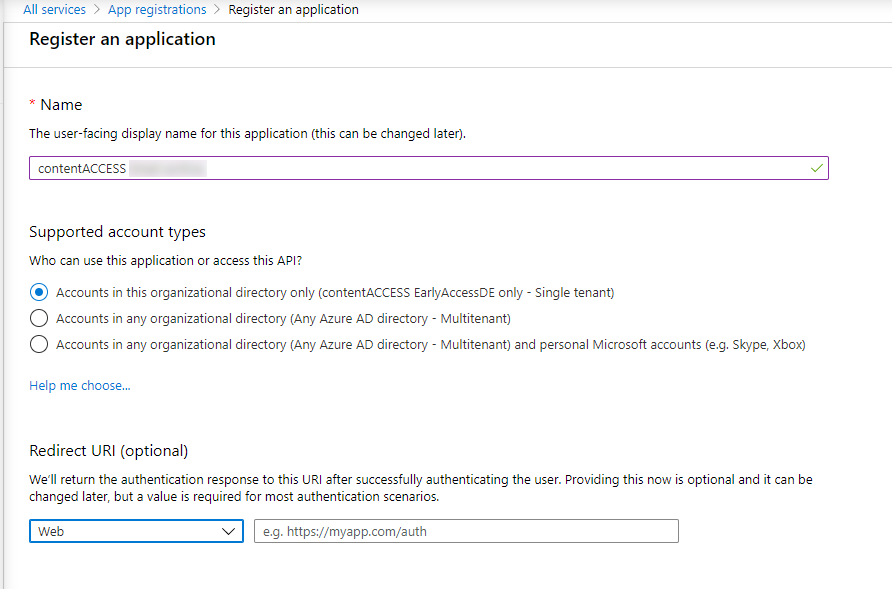
Navigate to portal.azure.com. Go to All services -> App registrations -> + New registration. Fill in the details of the new application. The only mandatory field that needs to be changed is the name of the application, the other options can be left as-is.
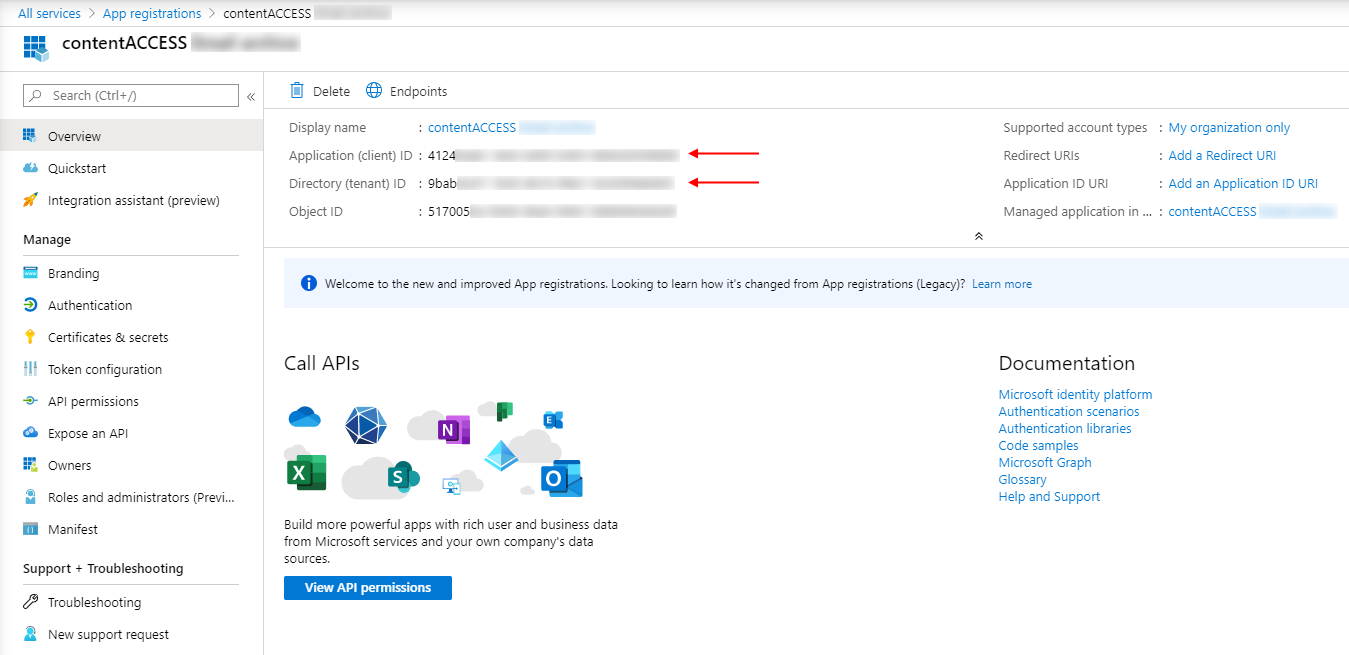
After the app is successfully registered, you will be able to see the Application ID and Directory ID in the app’s Overview.
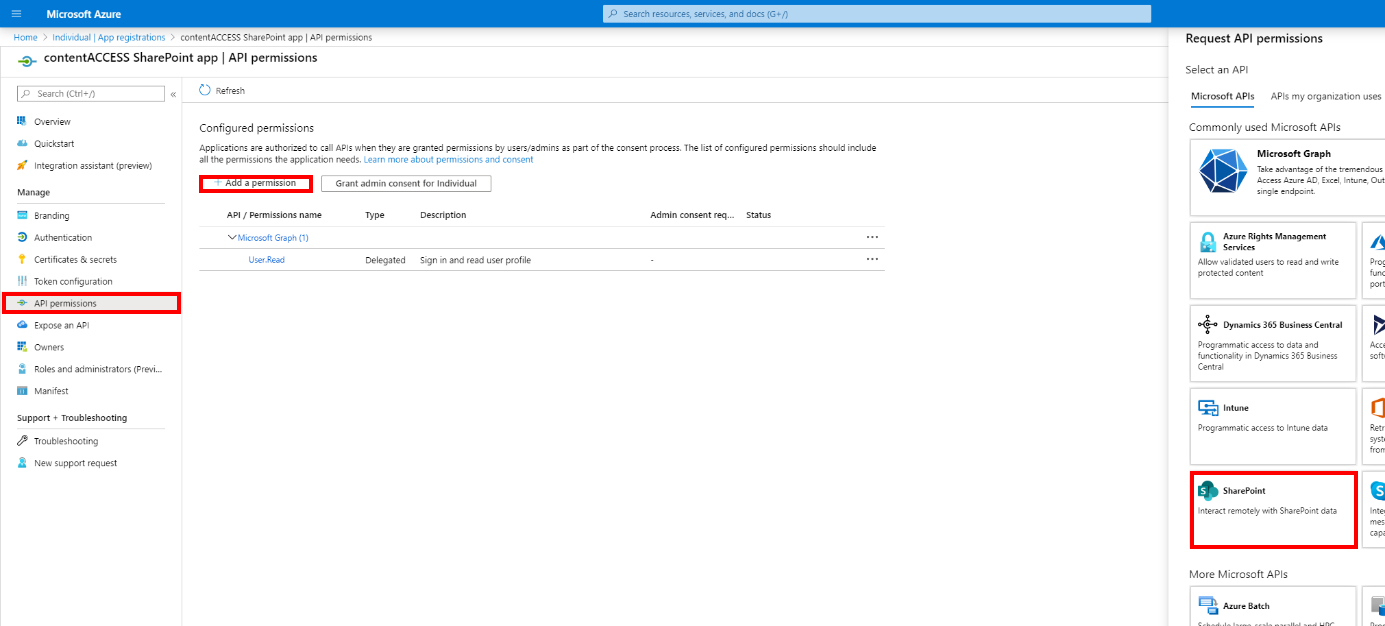
In this step, the necessary permissions will be granted to the application. On the application details page, click on the API permissions button on the left menu. When the configured permissions page loads in, click on the “Add a permission” button, then select “SharePoint” from the right-side menu (when registering Teams archive app, select Microsoft Graph)..
On the next screen we can decide whether we want to grant Delegated or Application permissions to our app. We need the Application permissions.
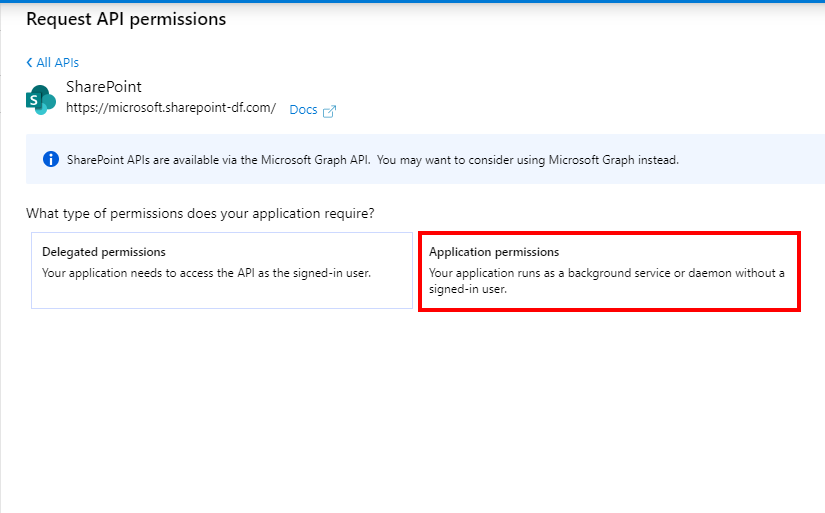
After the application permissions option is chosen, a list with the available permissions will appear. Select
- for SharePoint – to support all the functions of contentACCESS and other client applications (including AAD groups support in SharePoint archive), all the following permissions need to be added:
- for Teams archive – some permissions need to be selected from the Delegated option, some from the Application option
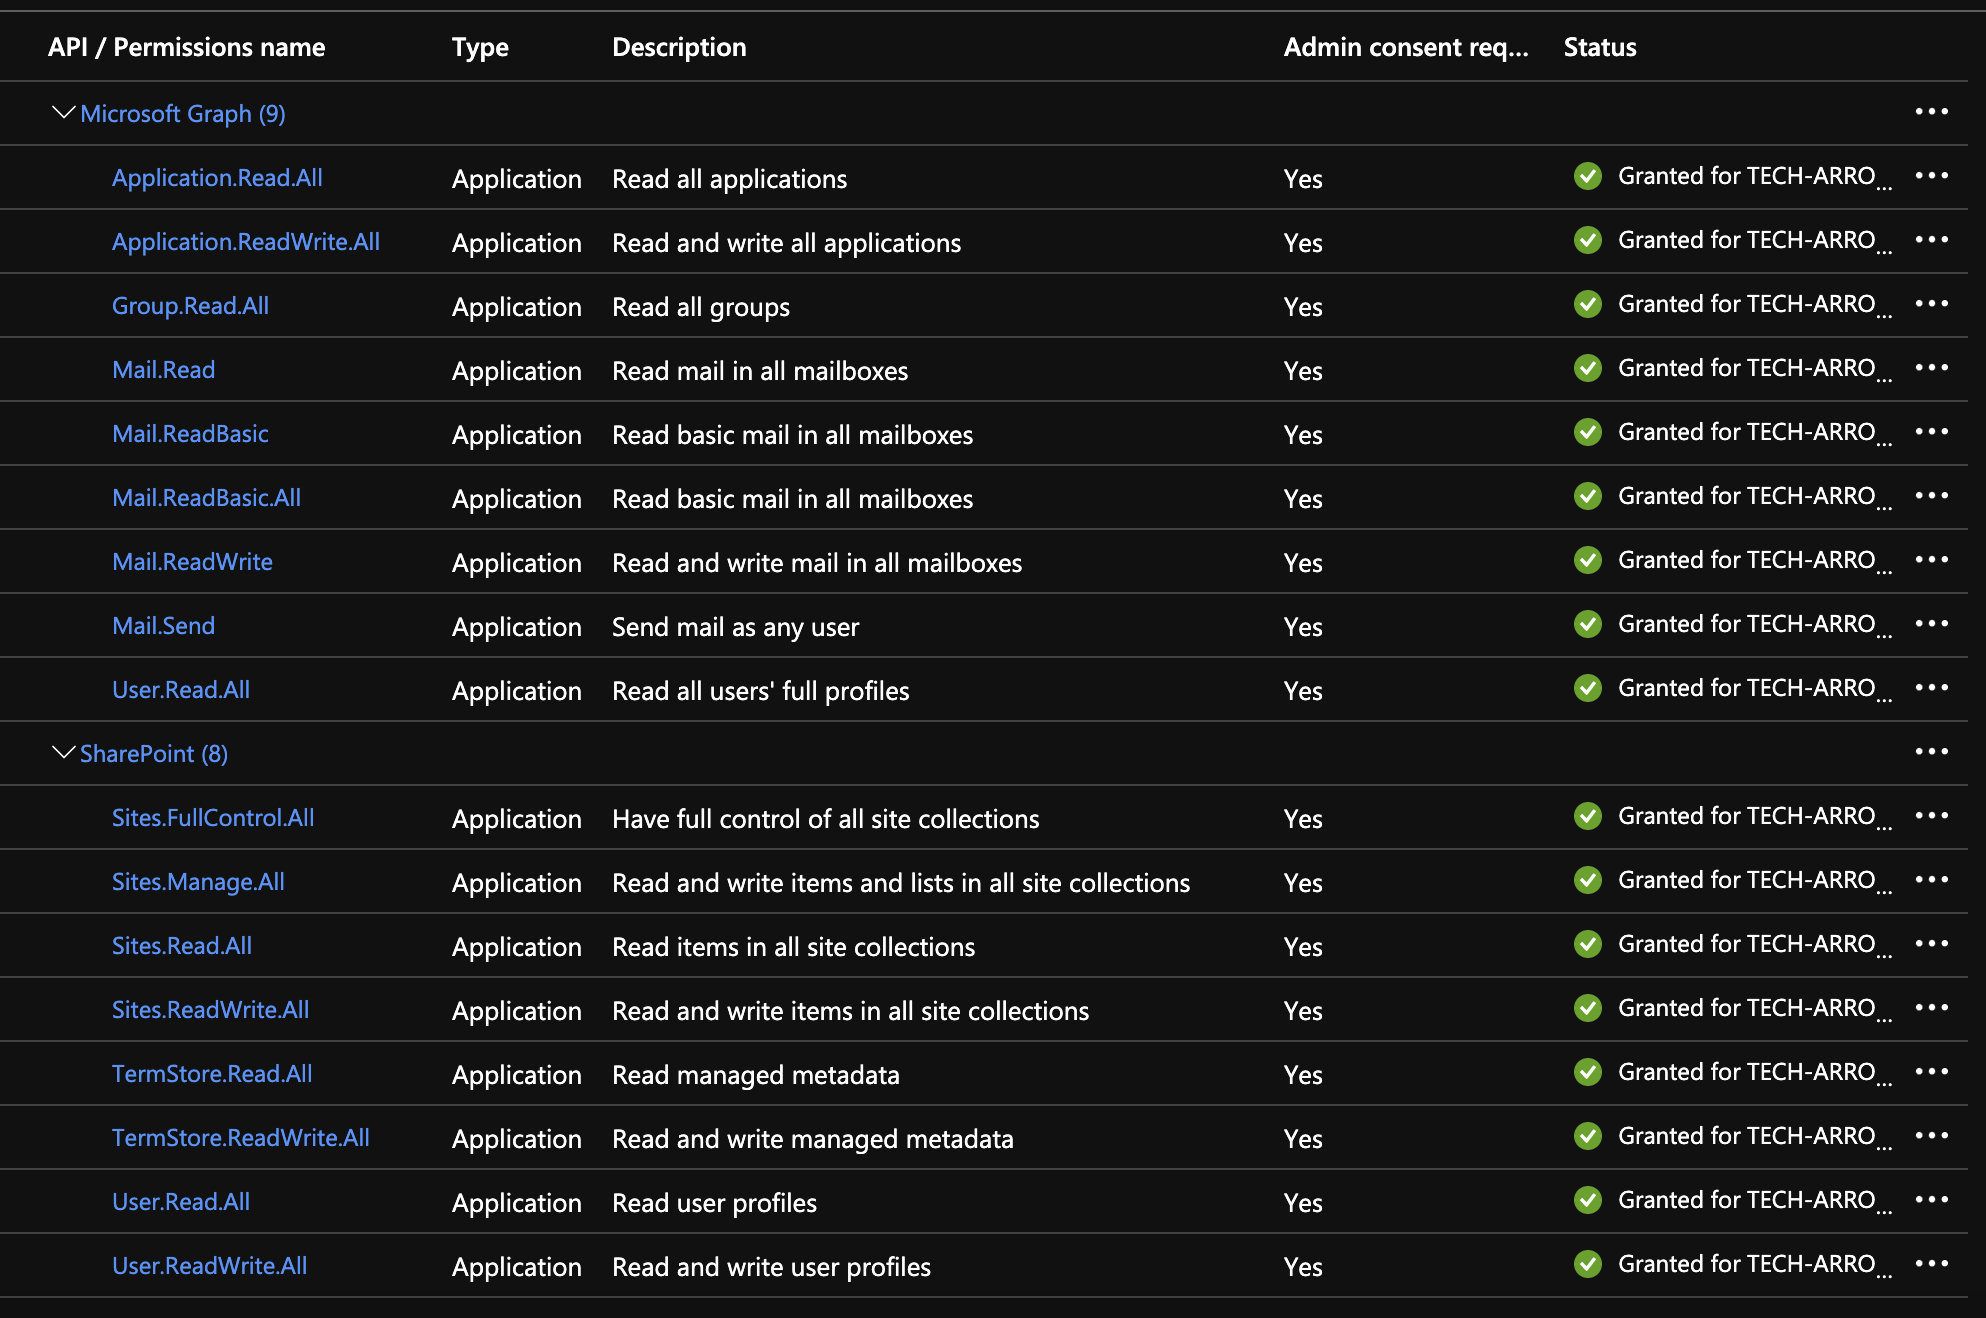
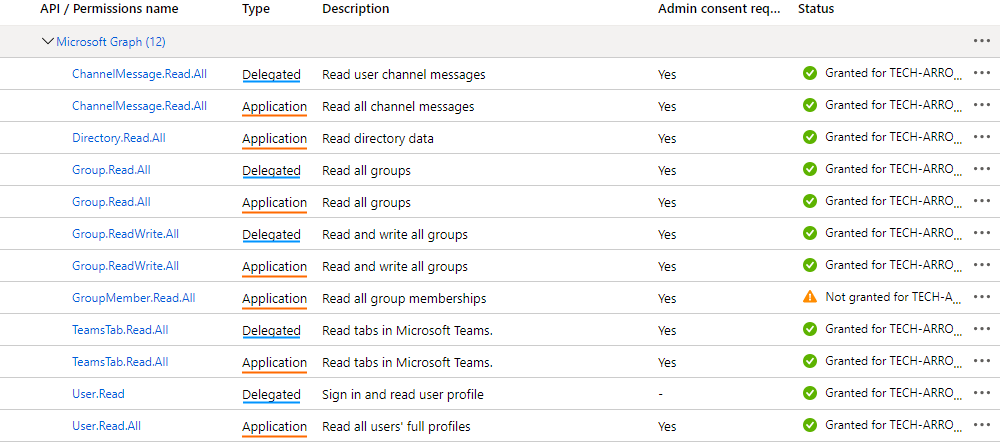
Click on Add permissions.
After the permissions have been assigned to the application, the administrator must grant consent for these permissions. Click on the Grant admin consent for “TENANTNAME” button.
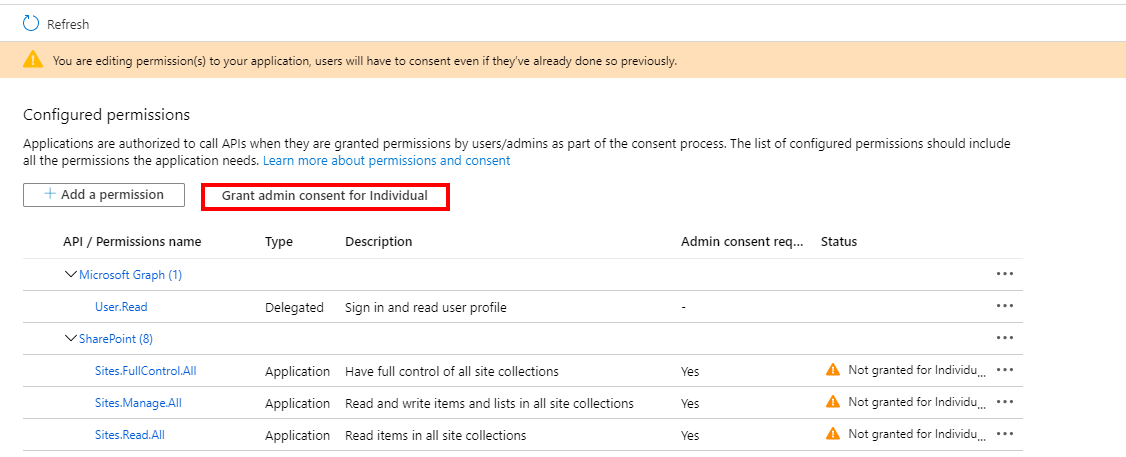
When the permissions are assigned to the application and the admin consent is granted, the client access certificate needs to be assigned to the application. Click on the Certificates & secrets option in the left side menu. On the certificate management screen click on the Upload certificate button. Browse the client certificate you want to use and upload it. It can be a self-signed certificate or an already existing one. PowerShell script for creating a self-signed certificate can be downloaded here.
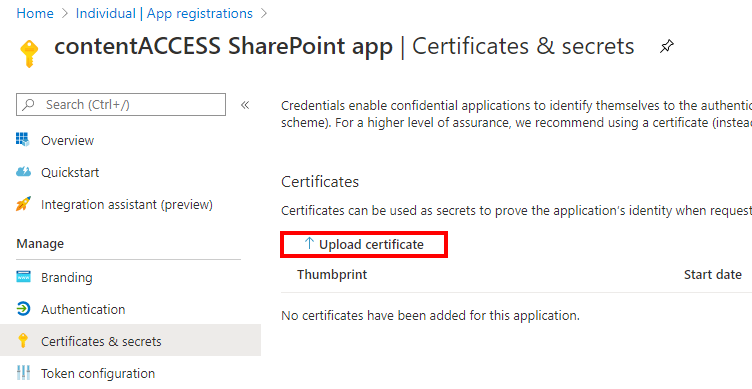
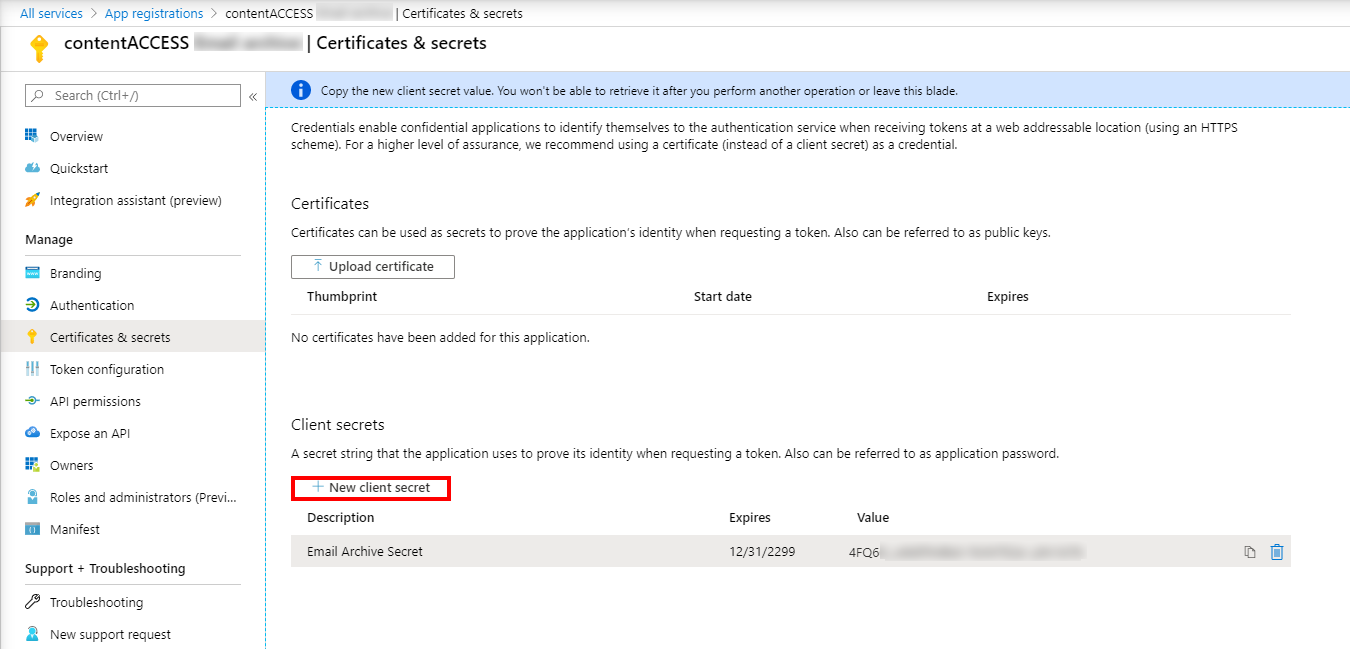
Next, add a new client secret by clicking on the + New client secret button. This is necessary for some plugins and client applications.
