6.6.2.1.Configuring Google OAuth
contentACCESS supports Google authentication as well. If you would like to use it, you need to apply for a Client ID and Client Secret by registering the contentACCESS application on the Google Developers Console page first. Open the page, sign in with your Google account and follow these steps:
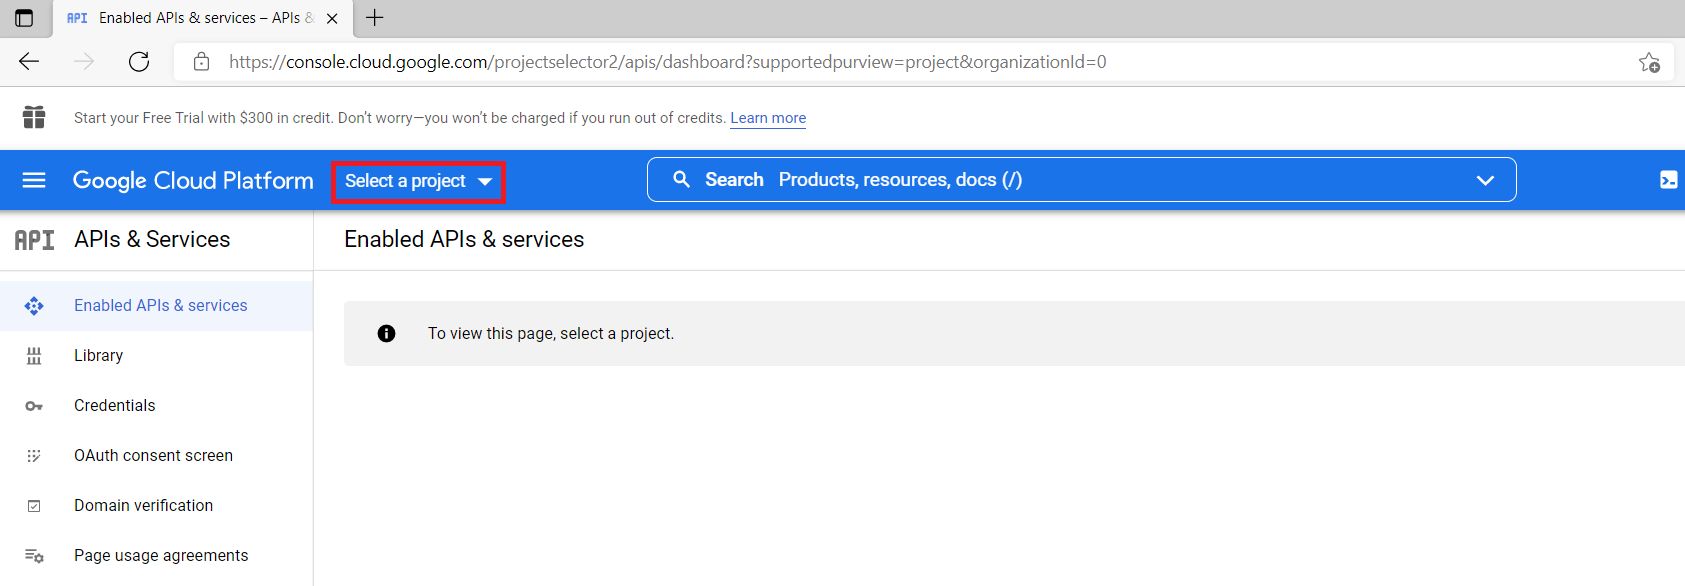
- Click Select a project in the upper left corner of the menu:
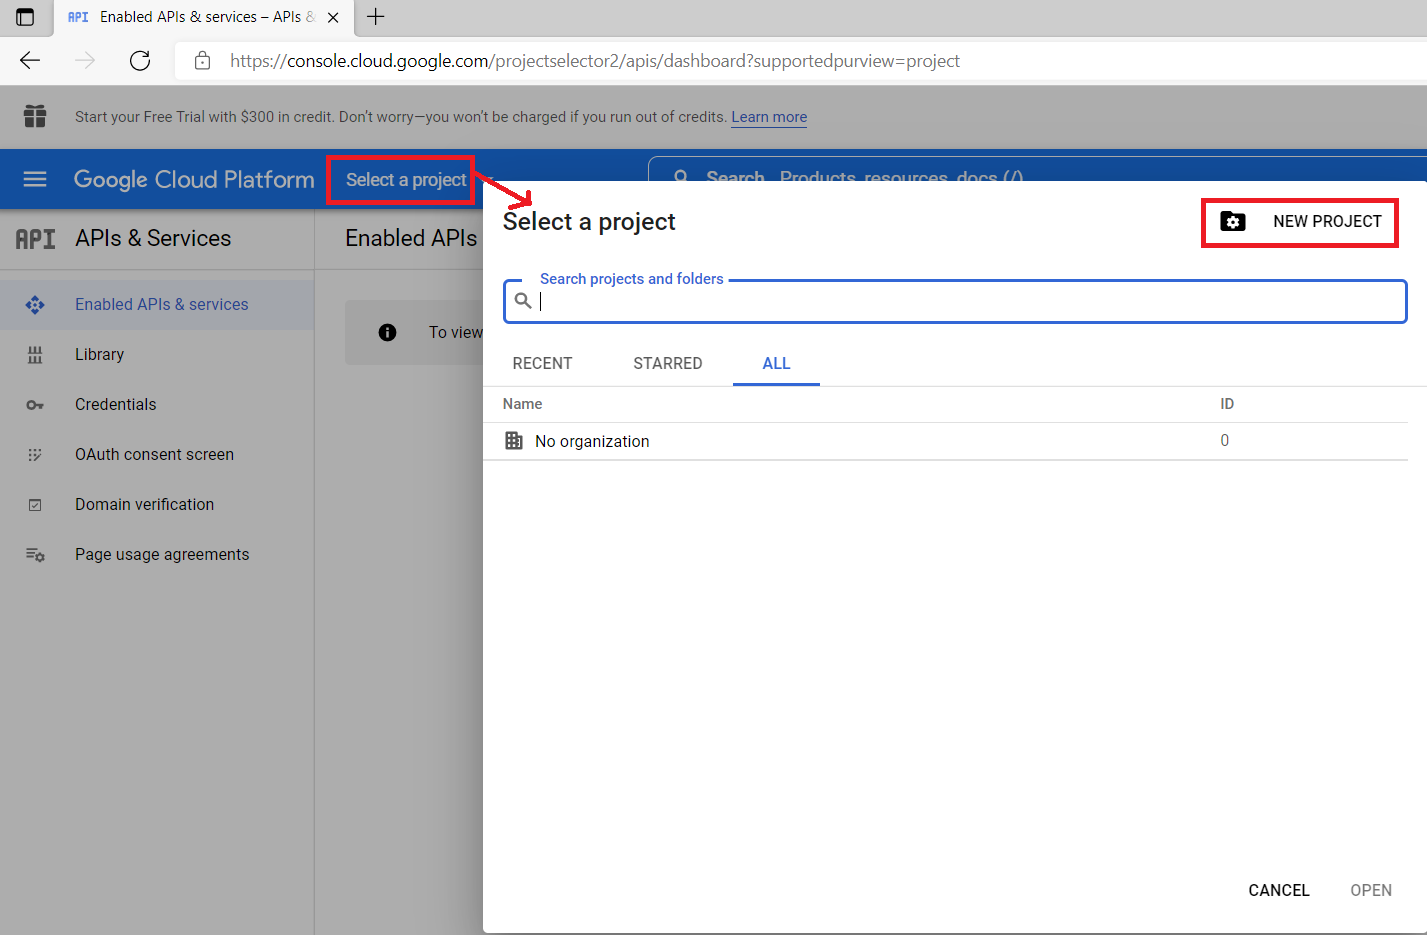
- Click on Create project in the upper right corner:
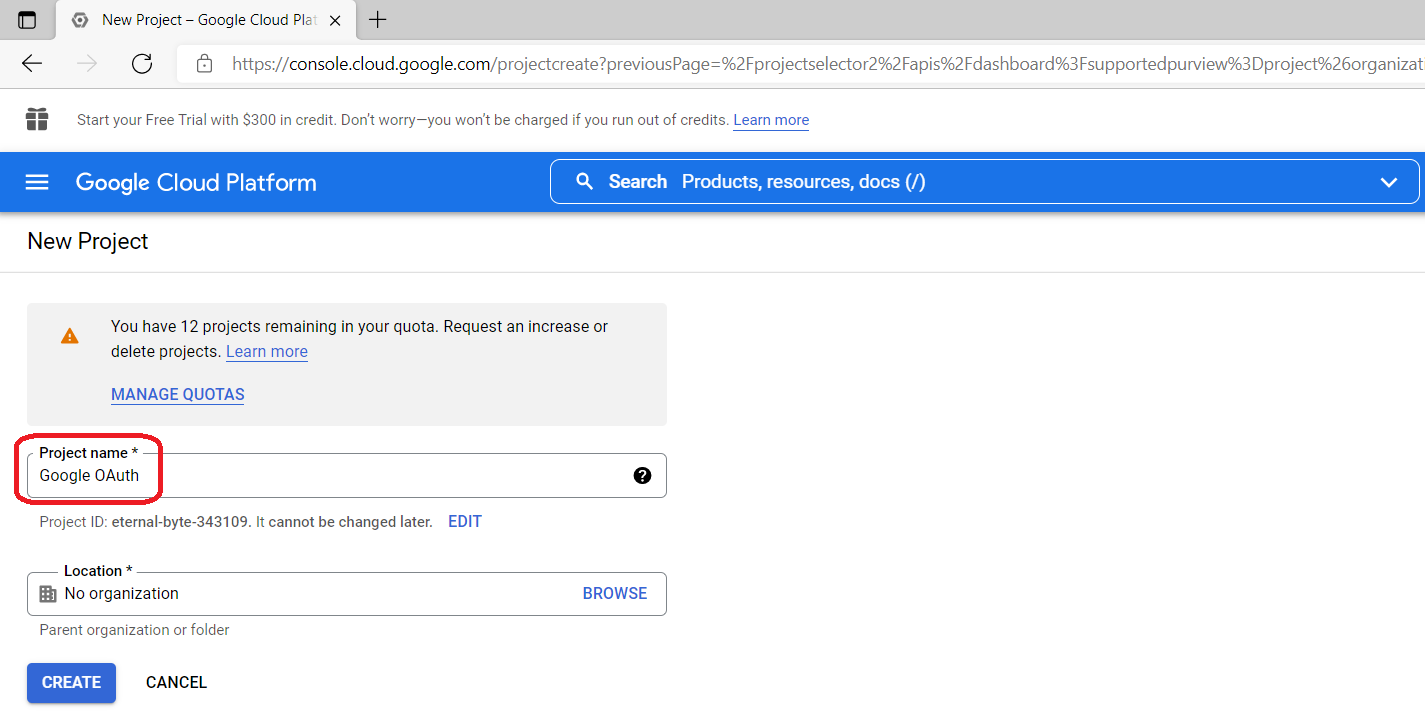
- Name your project and create it:
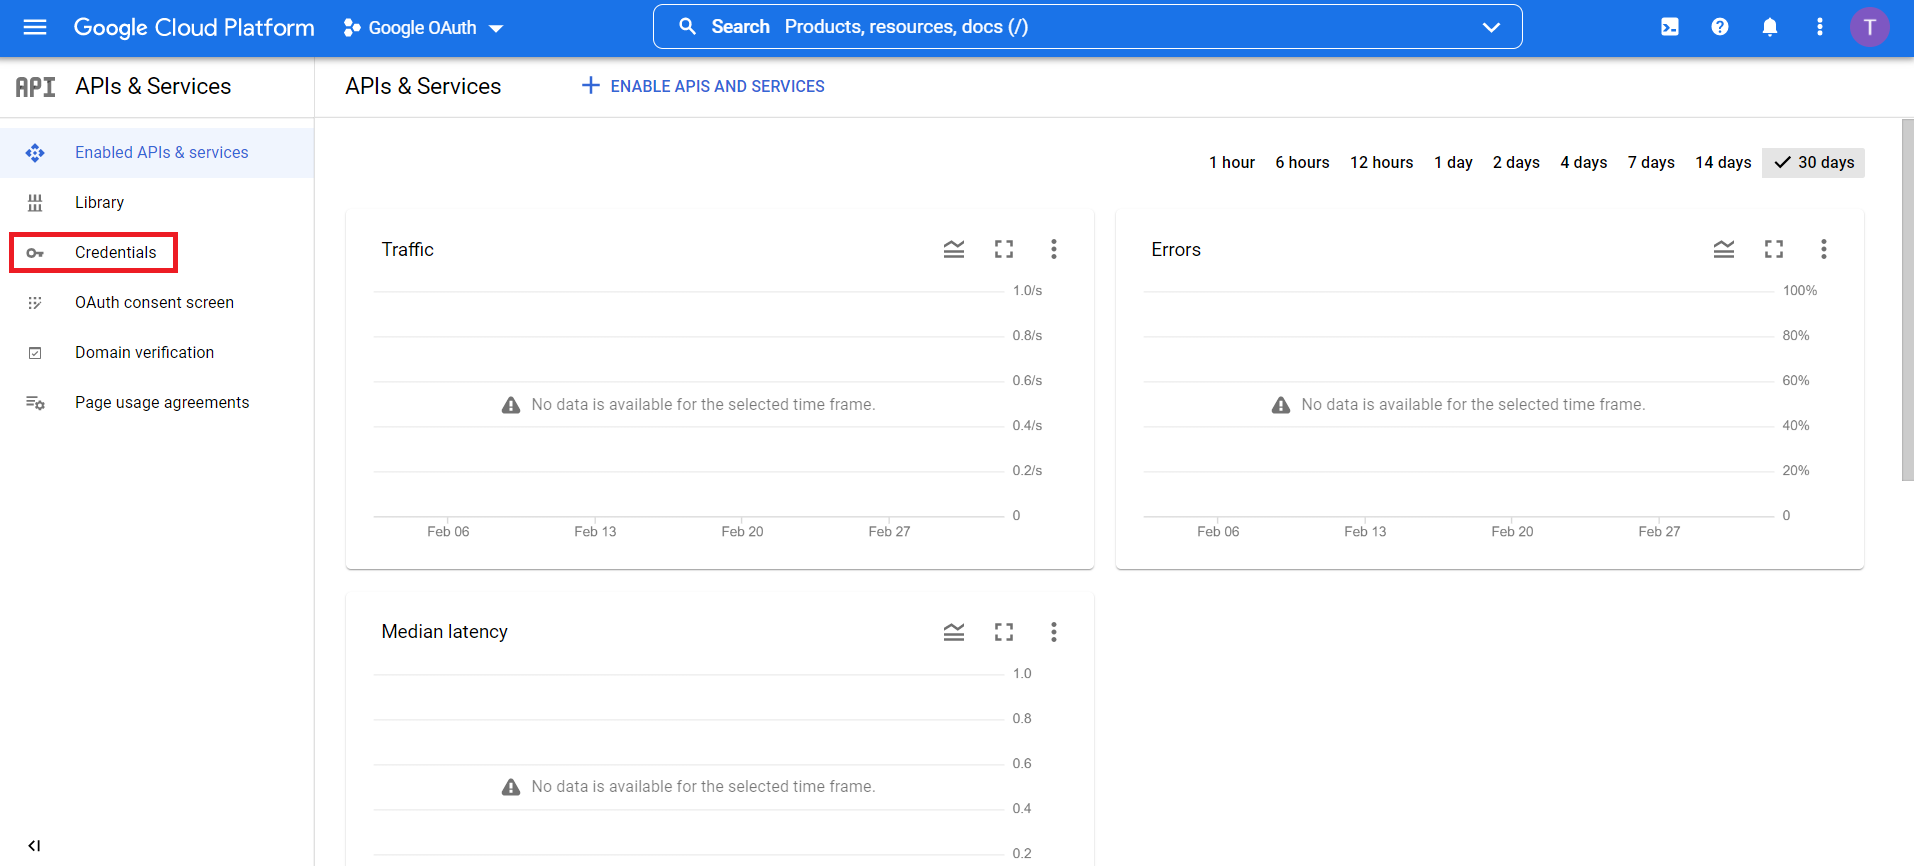
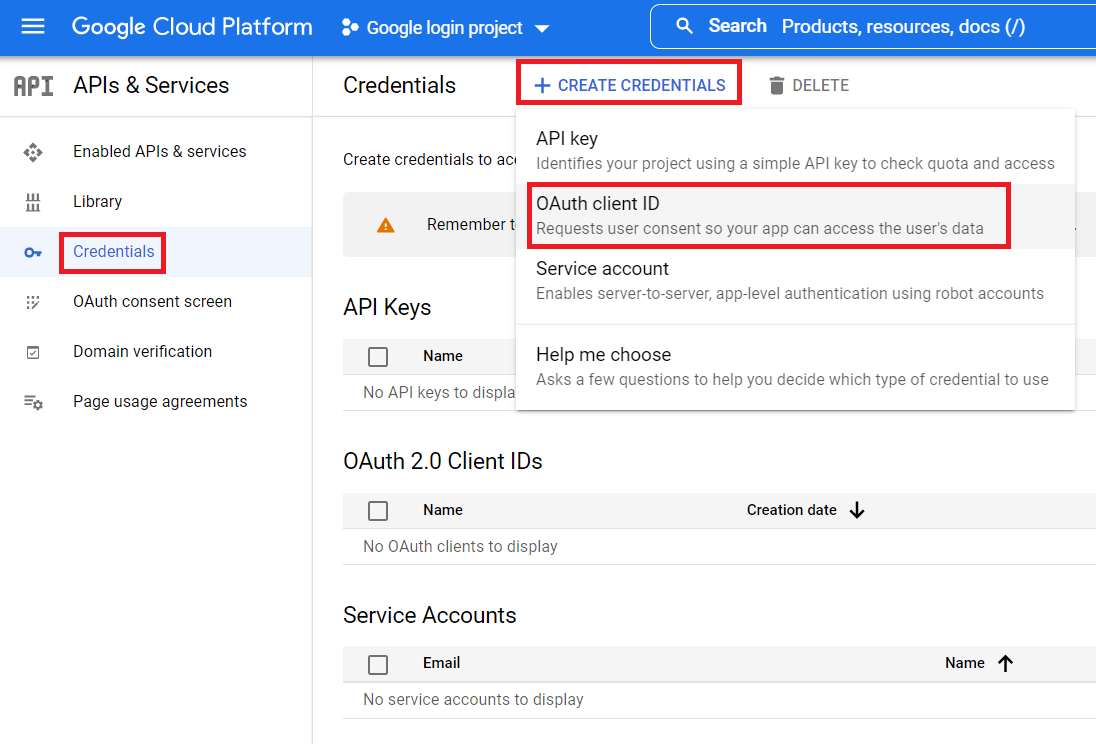
- After you create the project, the APIs & Services page will appear. On the left, click “Credentials” and then select your project.
- Click “Create credentials”, then select “OAuth client ID”.
- If this is your first time creating a client ID, configure your consent screen by clicking “Configure consent screen”.
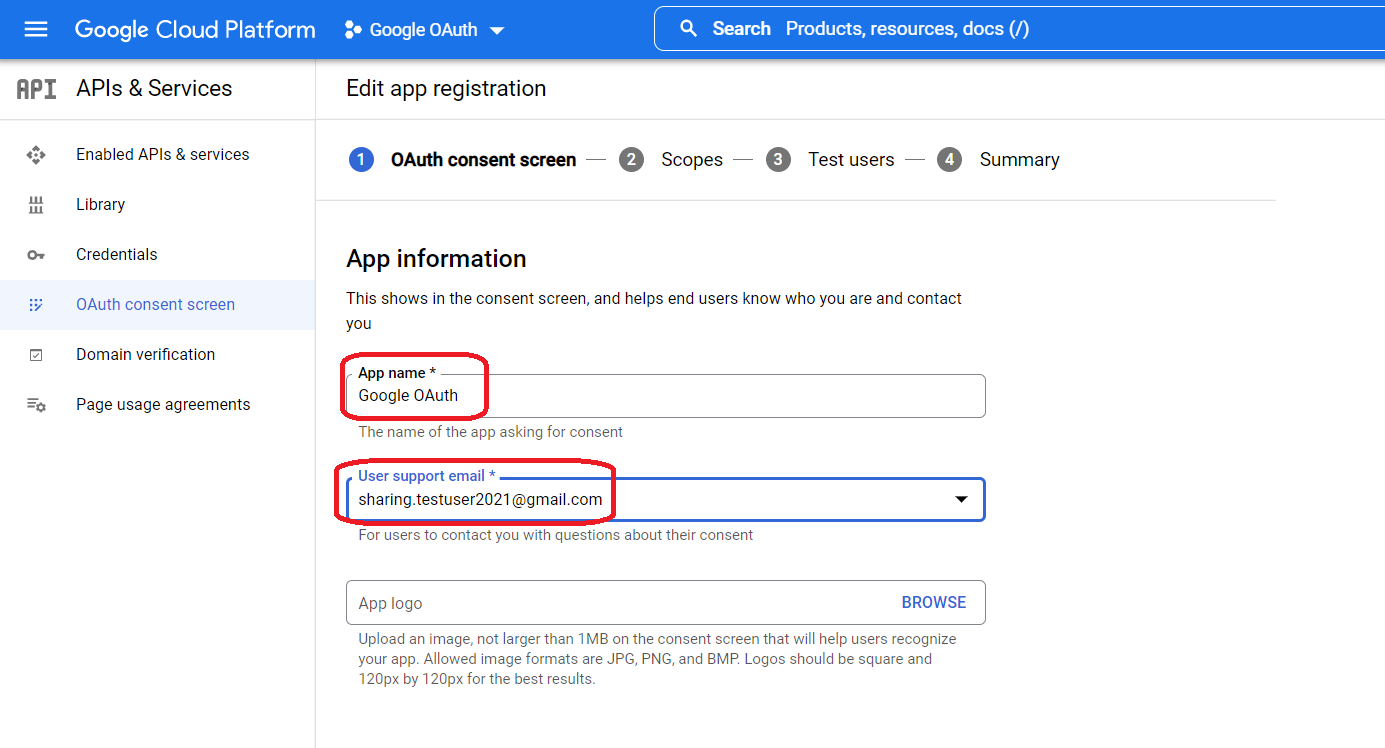
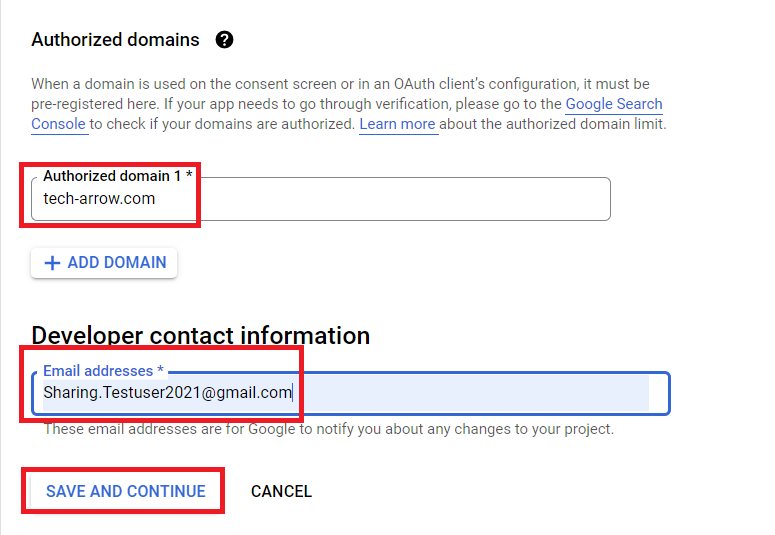
- Click on the Configure consent screen button, select “External” as User Type, and click on Create. On the next page, enter the App name, User support email, and on the bottom of the page (second screenshot) Authorized domain and Email addresses (Developer contact information). Also, fill the optional fields if you want. Save your settings.
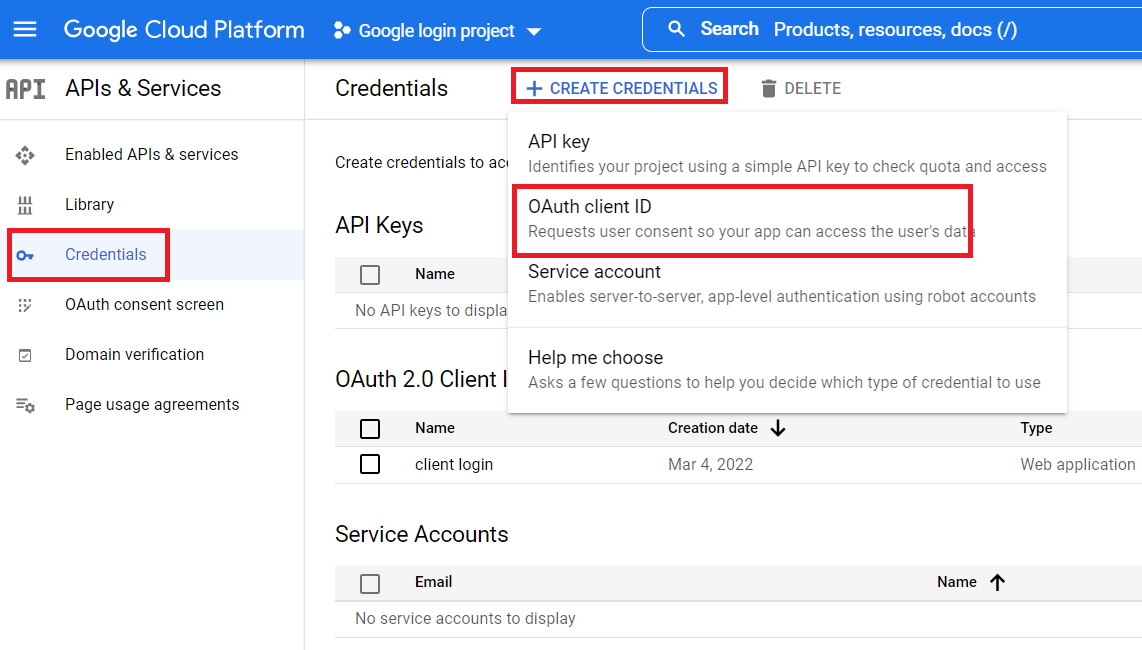
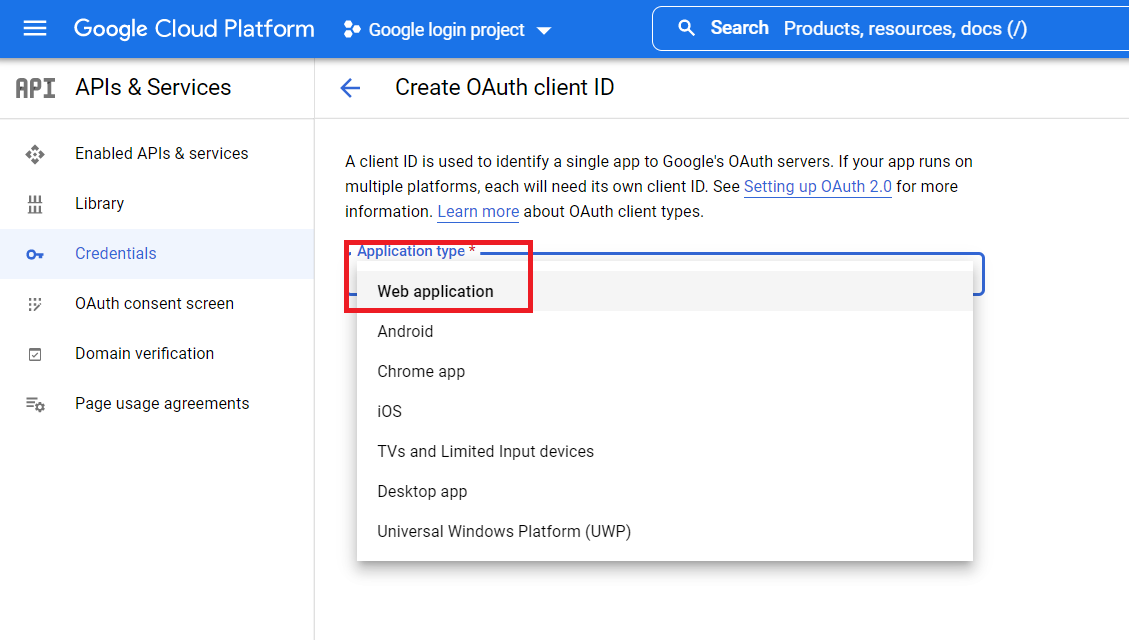
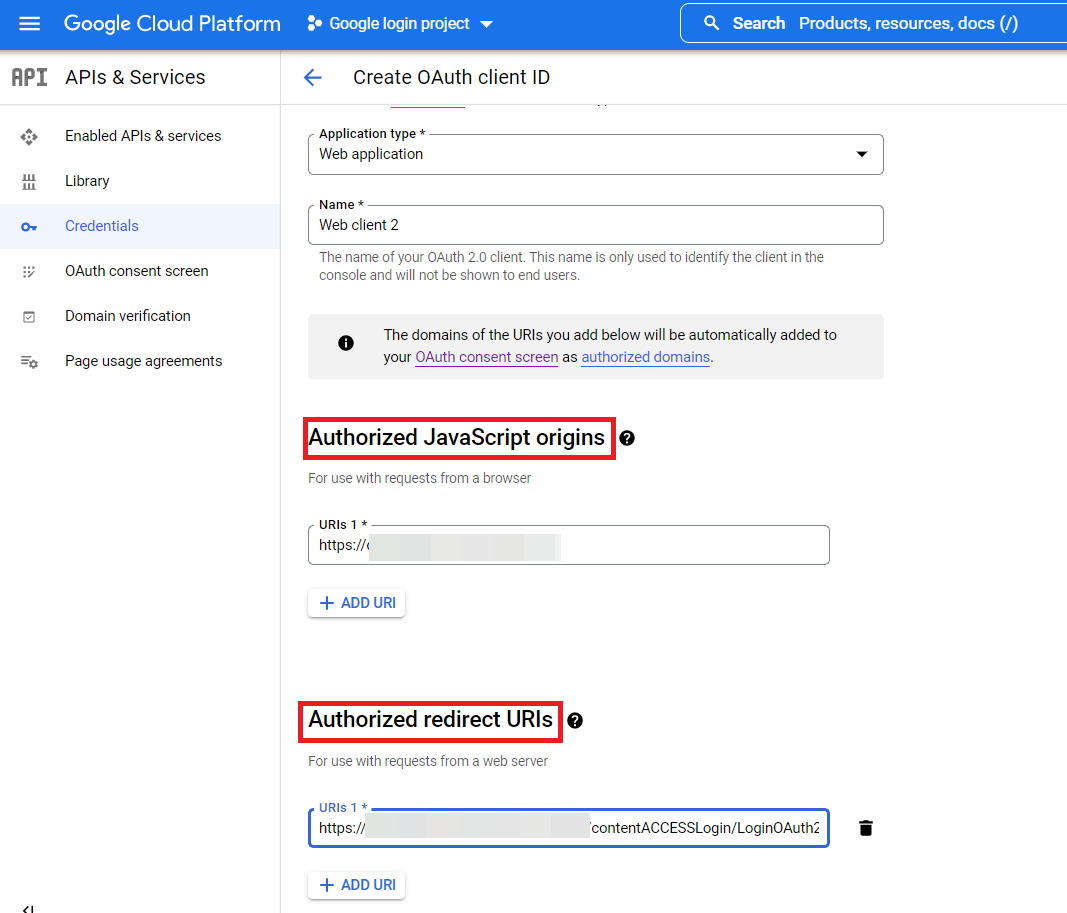
- After you finished the configuration of the consent screen, go back to the Credentials, click on Create credentials, and select “OAuth client ID”. Select the WEB application type for your project and enter JavaScript Origins, redirect URLs, or both to the appropriate text fields.
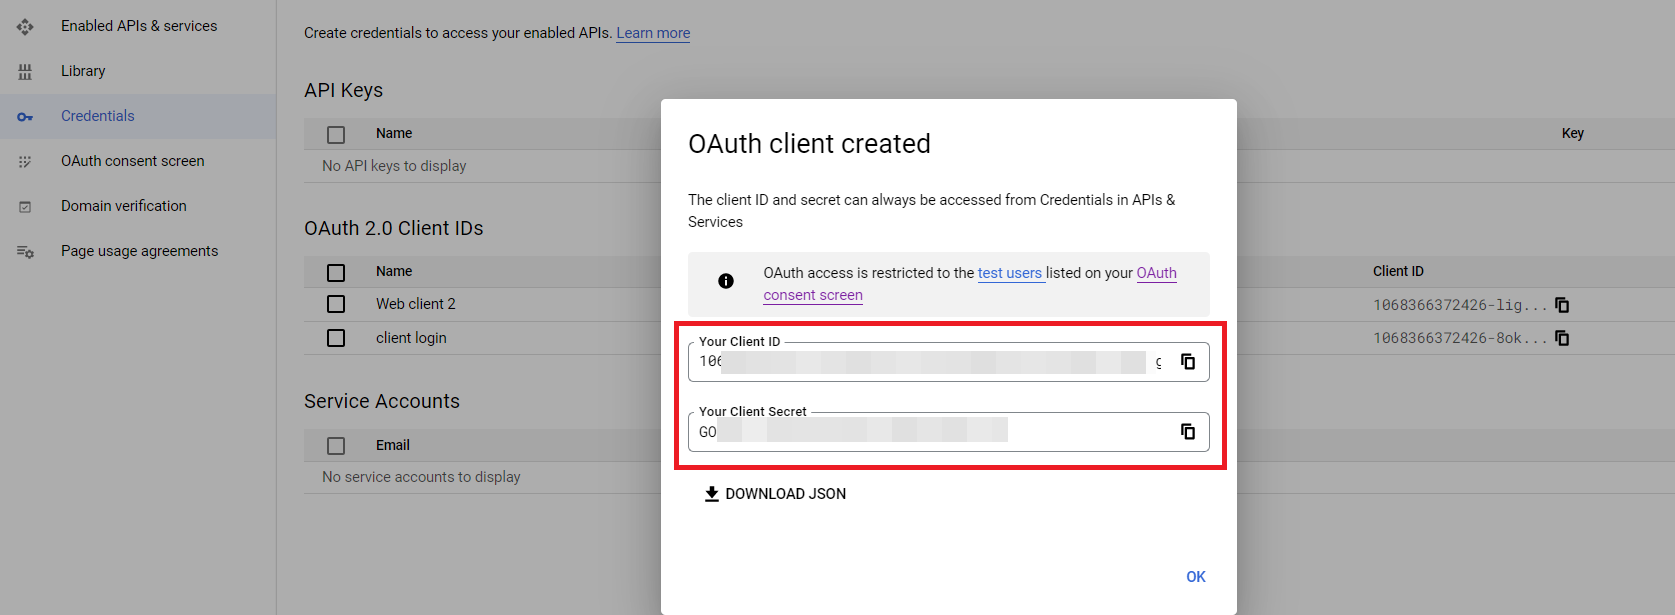
- Click “Create” on the Google developers console and the Client ID and Client Secret will be created automatically. Save these values somewhere on your computer:
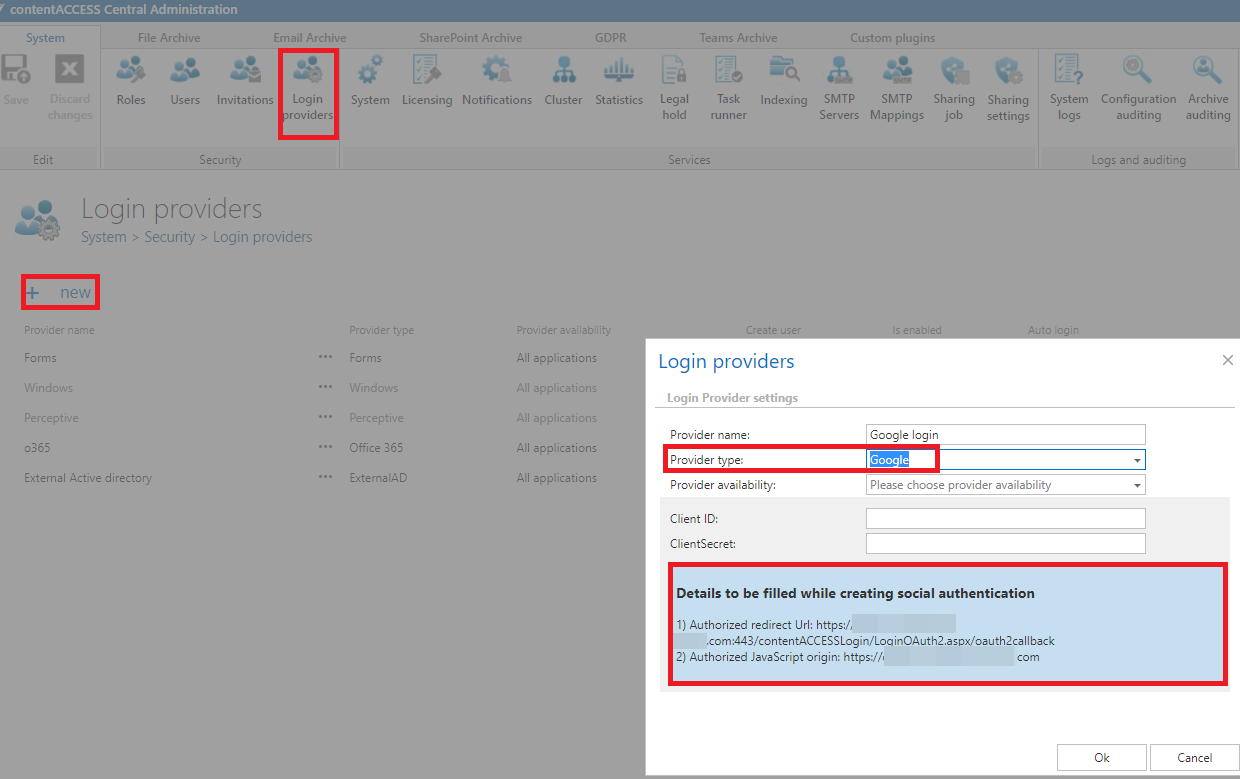
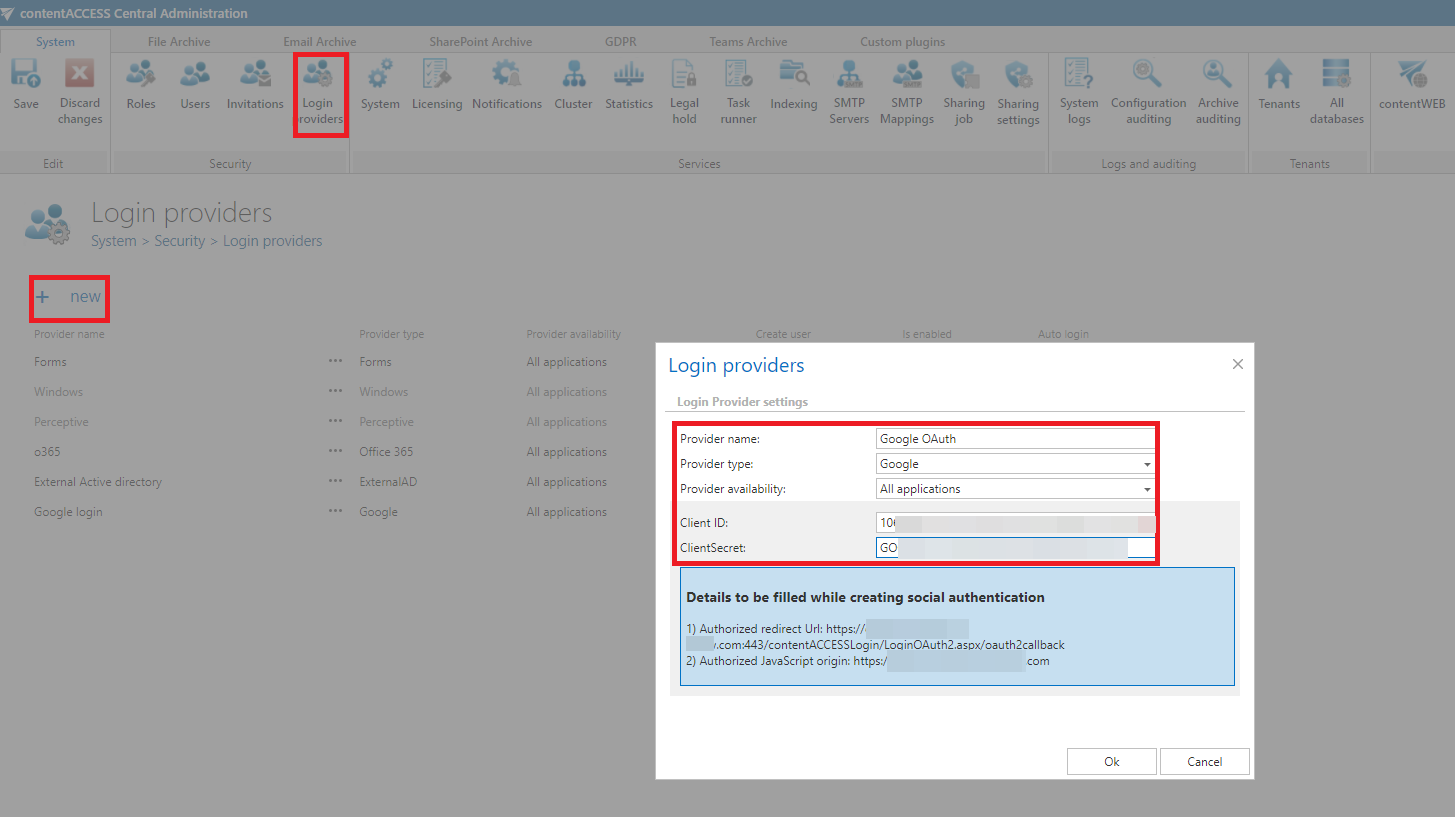
The required URLs are accessible from the login provider’s window in contentACCESS Central Administration. Click on button “NEW”, select Google as provider type and copy the links from the blue frame.
Now configure your Login provider in contentACCESS Central Administration. Open the Login providers page (System => Security => Login providers), click here on “+new”. In the Login providers window name your provider, select Google provider type and choose the application that should use this authentication type. Further enter the Client ID and Client Secret from step 9) to the respective text fields, click OK, and Save the changes on the Login providers page.

