12.23.1.Mailbox move job configuration
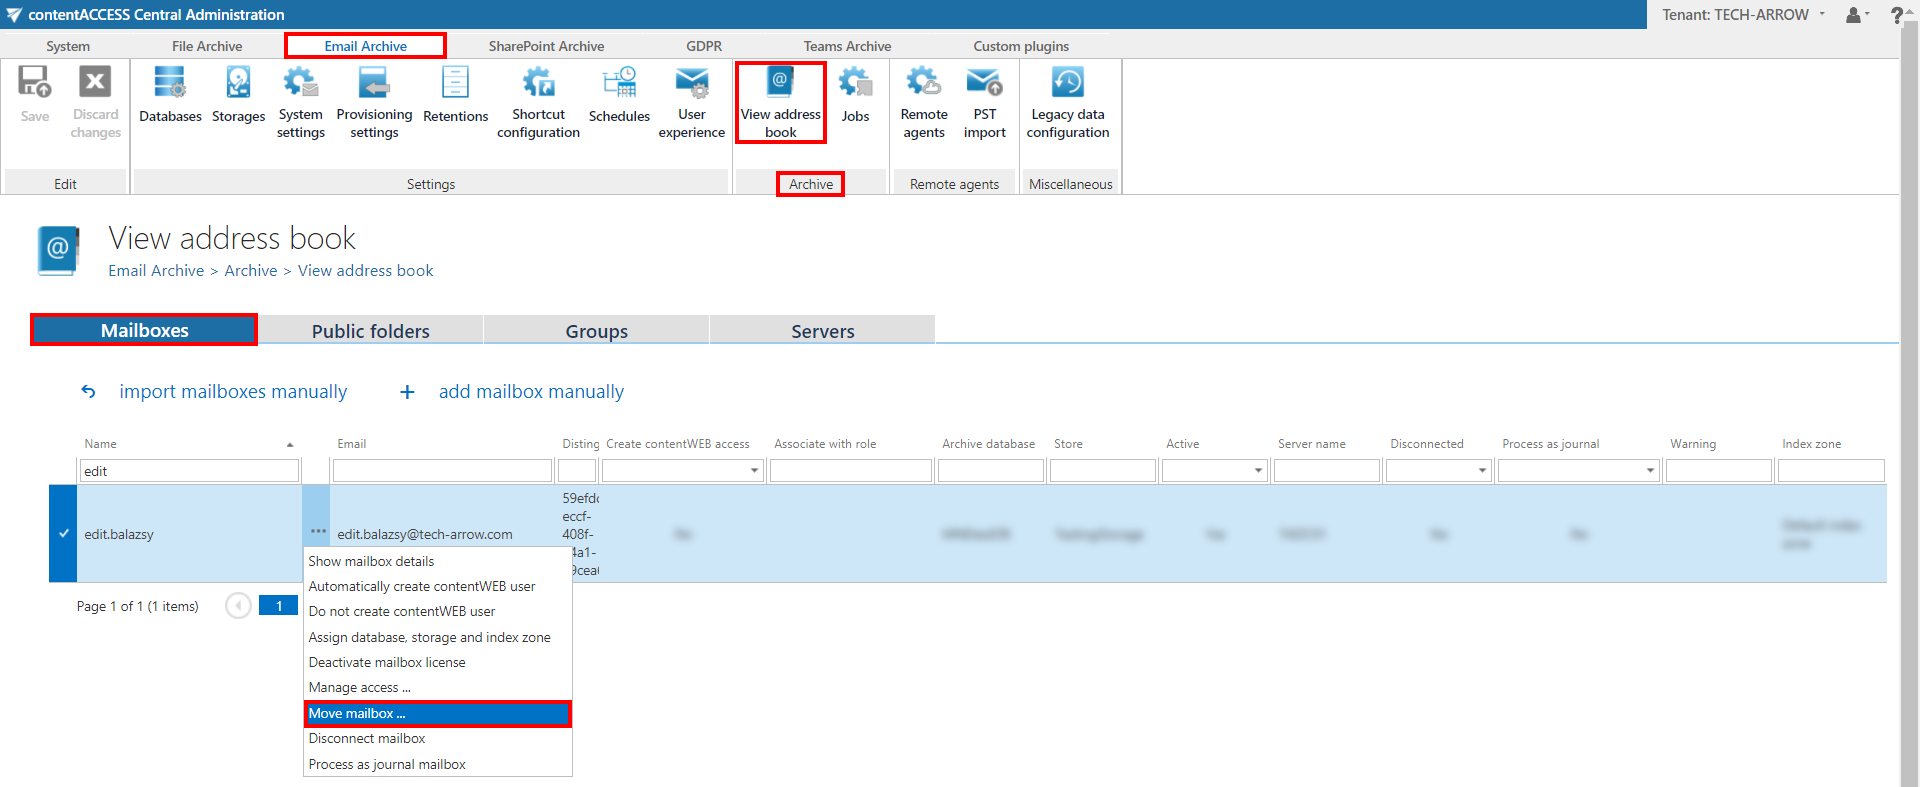
There are multiple options how a mailbox move job can be created; you can add it as a new job from the Email archive’s Jobs page or you can create a mailbox mover job directly from the address book by selecting the “Move mailbox” option from the desired mailbox’s context menu. On the screenshot below it is possible to see how a mailbox move job is created for mailbox “edit.balazsy@tech-arrow.com” directly from the address book.
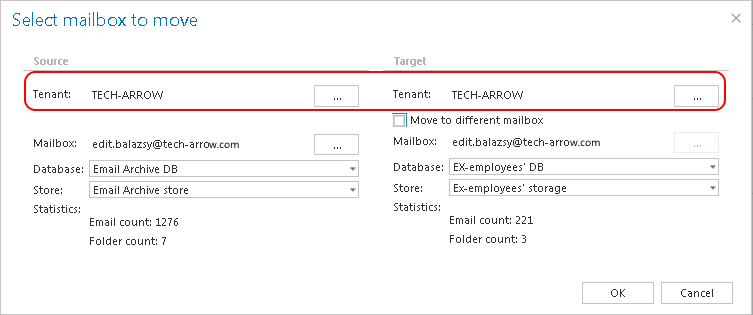
By clicking on the “Move mailbox” option in the mailbox’s context menu, the Select mailbox to move dialog will automatically open. The desired source mailbox will be already preselected in this dialog. The new mailbox mover job will be created with the name of the selected mailbox. By default, the job will be able to run on any available node.
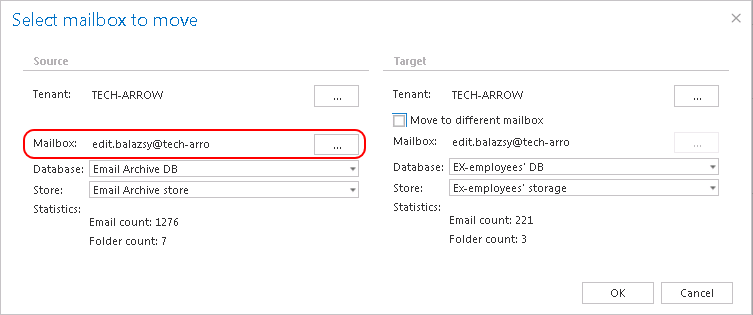
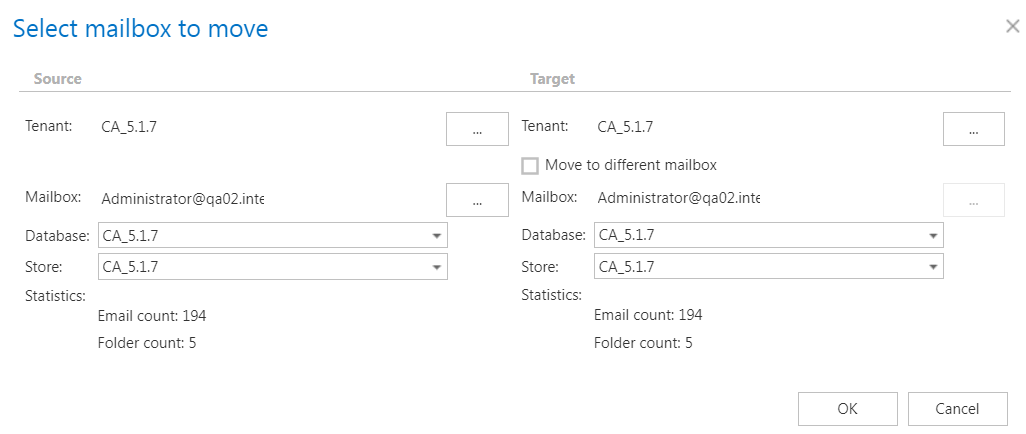
In the Select mailbox to move dialog the administrator may set the following:
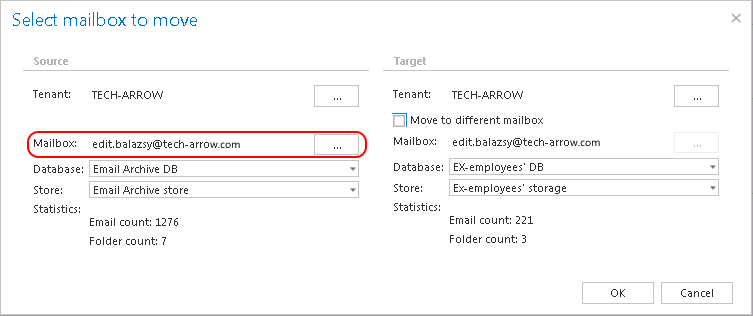
A. A) The source mailbox containing the archived data to be moved: if the job has been created from the address book, the source mailbox will be preselected; if the job has been created from the jobs page, the source mailbox has to be configured manually.
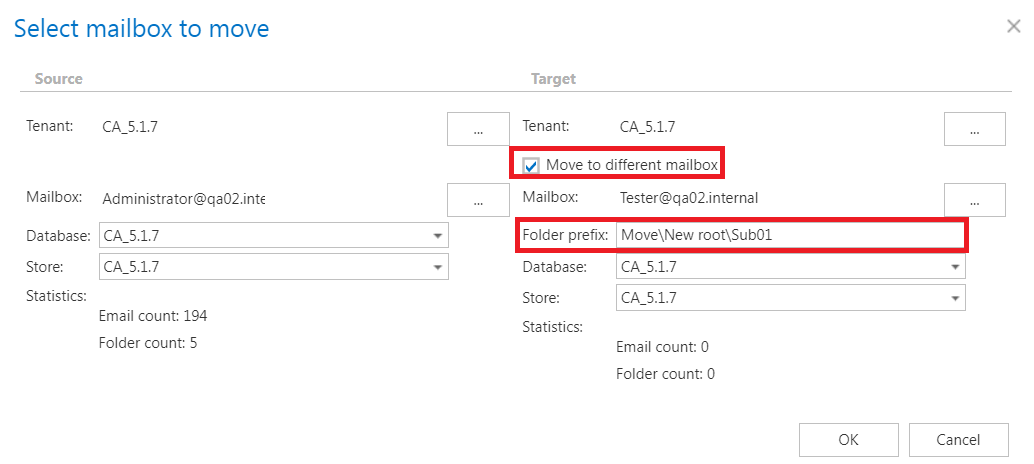
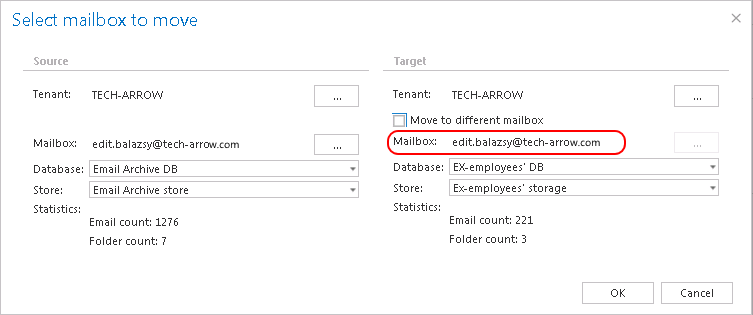
B. The target mailbox; in special cases the archived data of the source mailbox may be moved to a target mailbox archive. To achieve this, check the “Move to different mailbox” option on the target side and specify a new target mailbox. If you would not like to move the source mailbox archive data to a target mailbox archive, select the source mailbox on the target side, too (by default it is configured like this).
C. Folder prefix: allows the user to move the data into a custom subfolder in the target mailbox during the mailbox move. This function lets the user separate the original and the moved data in the mailbox. When “Move to a different mailbox” is enabled, the Folder prefix textbox appears, and the user can enter a different root in the target mailbox. It is also possible to add multiple subfolders under the new root, but the folders must be separated by ‘the following character: \’. The user doesn’t have to create the root and subfolders manually. Just enter the root into the Folder prefix row, and the job will automatically establish the folder and move the data under it.
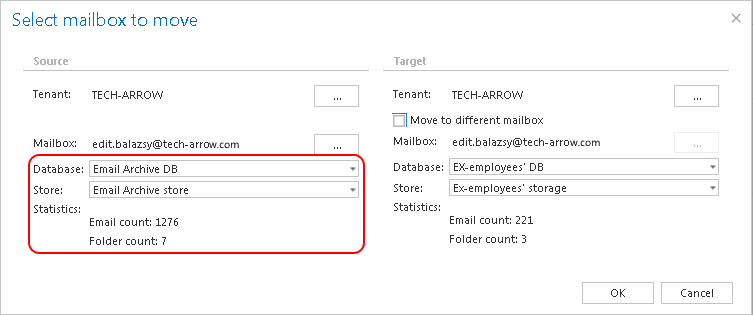
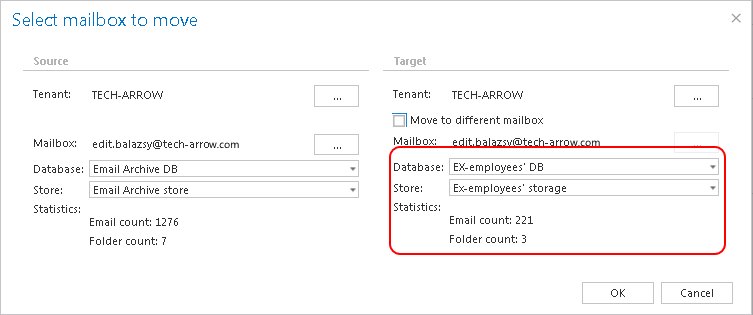
D. The source database and storage: by default the already associated database and storage of the source mailbox are set here. The source mailbox statistics (email count, folder count) can be seen in the source column.
E. The target database and storage: the user may select here the target destinations, where the archived data of the source mailbox should be moved. On Screenshot D we have selected Ex-employees’ DB and Ex-employees’ storage. The target mailbox statistics (email count, folder count) can be seen in the target column as well.
F. An across tenant move is also supported:
You have some configuration options – based on them the behavior of the Mailbox move job will change.
If you :
When configuring a Mailbox move job the administrator is also required to set the running time of the job, notification settings and the resource settings on the job’s configuration page:
✓ Scheduling settings: the administrator may select a scheduler from the dropdown list, which will determine when the moving process will run. For this plugin type it is recommended to set one time scheduler, or to start the job manually. For more information about how to set up schedulers please refer to section Schedules.

✓ Notification settings: if you want to use notification emails to be informed about potential failures of the mailbox move process, then select a) in which cases such notifications need to be sent, b) who will be the recipient of such emails. It is recommended to set here Errors or warning occur option (or to check the job events on the System logs page).

✓ Resource settings. Set the value, which will determine how many items will be processed simultaneously by the mailbox move job.
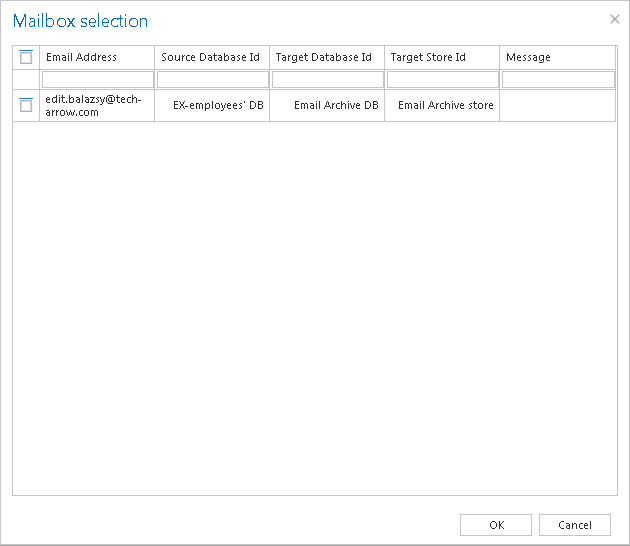
Option “consolidate” on the job’s configuration page: Consolidation option is the fastest way of correcting your mistake if you have archived the same mailbox into multiple databases. By clicking the consolidate button, the system will find all mailboxes, which are in two or more databases, and will list them on the Mailbox selection page. The target database/target store are the already assigned ones based on the View address book. So, once you have the list, you just select one or more mailboxes and click OK.
How to check if the mailbox move was finished successfully?
The user may check on the System logs page if the mailbox move job successfully moved the selected mailbox archive to the desired database/storage. To check this, navigate to the email archive jobs’ page on the ribbon (Email Archive tab ⇒ Archive ⇒ Jobs). Open the context menu of the mailbox move job and click on “Show last logs”. This will redirect the user to the System logs page, where the last run of the selected job will be preselected, and the correspondent job events can be viewed.

