16.6.5.Configuration of Teams chat archive retention changer job
This job changes the retention time of chats/messages of the selected Teams chat(s), group chat(s), and meeting(s) if it’s allowed to change the retention on the storage level. Storages that support this change are: Disk, Azure, and Amazon S3.
Go to Jobs -> click on +new -> select Teams chat archive retention changer.
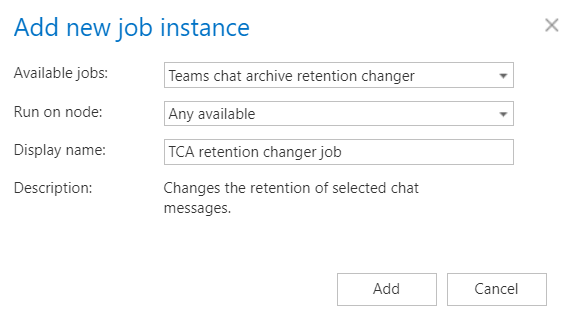
On the job’s configuration page, go through the following sections:
✓ Running mode settings (mandatory)
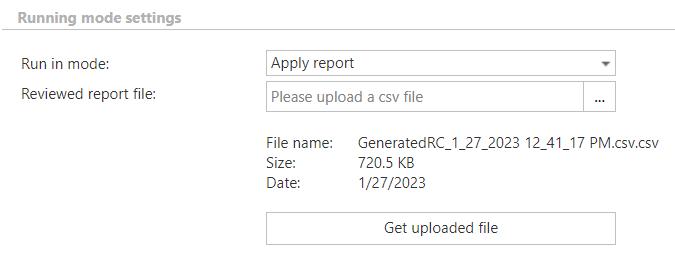
The job can be run in 3 modes:
- 1. Immediate processing – collects the chats/messages and changes their retention.

- 2. Create report – collects the chats/messages and provides a CSV file with a list of items. The administrator can review and edit the list of affected items.

- 3. Apply report – a CSV file with a list of items to be processed must be uploaded. The administrator can delete items from the list before running the job (only chats/messages in the list will be processed). The job reads the list and changes the retention of the items on the list.
✓ Scheduling settings (mandatory)
In this section, the running times of the retention changer job must be selected. It is possible either to select a scheduler from the list or to create a new scheduler via the “Create new…” option.

✓ Retention settings (mandatory)
Select the new retention to be applied for the items.

✓ Address book objects to process (mandatory)
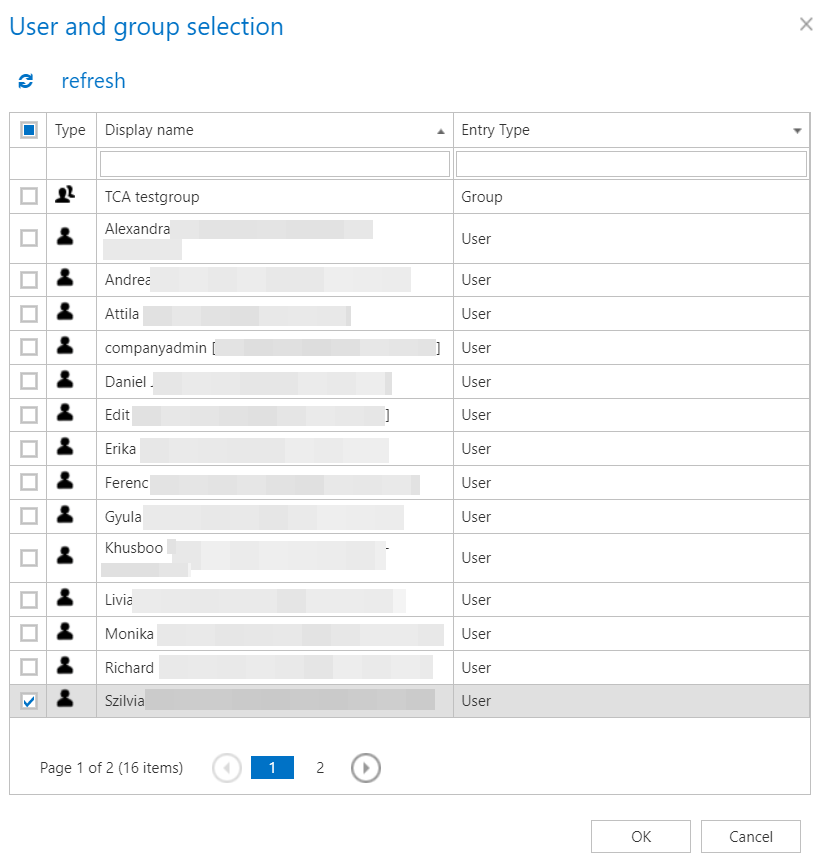
In this section, the user must select the user(s) who will be processed. There are two available options for how the list of the user(s) may be specified:
- a) Process All users – in this case, the retention will change on all previously provisioned and archived users.

- b) Process Selected users – in this case, the users may be added via select option, and they must be added manually, one-by-one. Click on select to open the User and group selection dialog.

✓ Filtering settings (optional)
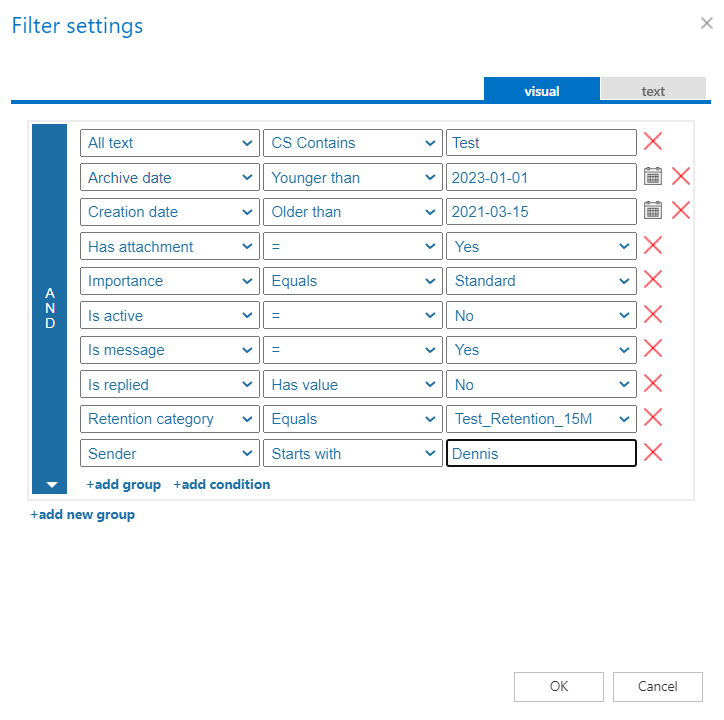
The user can define which chats and messages (of the selected users) will be processed during the retention changer job.
Without filters, the job will process all chats and messages for the selected user(s).
To set the filtering settings, click on the Change filter or not set button, and set the filtering according to your needs and (or) regulations. To learn more about how to work with the filtering settings, refer to this section of our documentation.

- Chat filtering – the chats can be filtered out based on the following conditions:
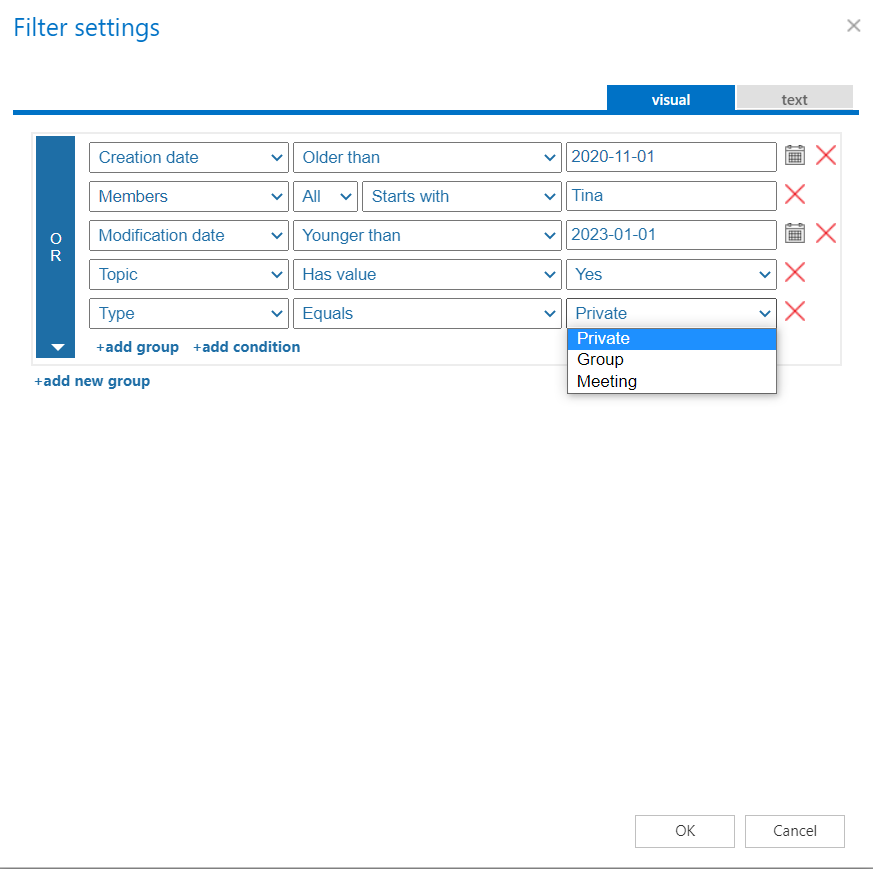
- Message filtering – the messages can be filtered out based on the following conditions:
✓ Notification settings (mandatory)
Select here when you will need to get notification emails from the Retention changer job. It is possible to set here if you need a notification email always/never, or you need it only if an error/warning occurred during the process – for example, if the retention change of one or more items failed, then you may get a notification email about this error. Into the Recipients list textbox insert the email addresses of the people to whom you would like to send these emails – if there are multiple recipients, then addresses must be separated by “,”, or “;”.

✓Resource settings (mandatory)
Set the value, which will determine how many items will be processed simultaneously by the Retention changer job. The recommended value is 2, as in our case.

In the end, never forget to save your job configurations: click on Save in the left upper corner of the UI. After you saved the configuration, the job can be started by clicking on the “Start immediately” button.
