16.6.1.Teams archive job
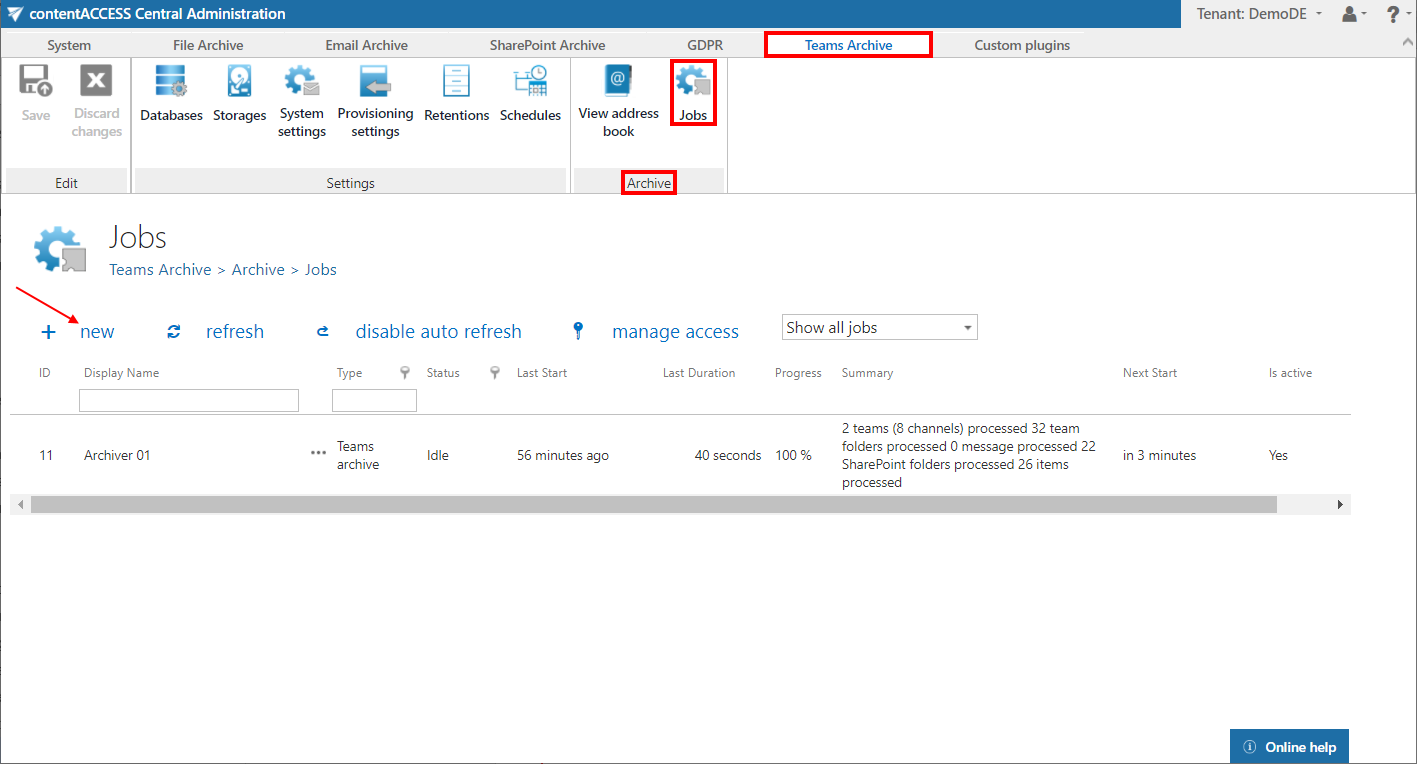
To configure a new Teams archive job, navigate to Teams Archive -> Archive -> Jobs. Here, click on +new.
In the Add new job instance dialog select Teams archive from the Available jobs dropdown list, the node where the job will run (option Run on node) and fill a Display name into the Add new job instance pop-up window. Then click on Add.
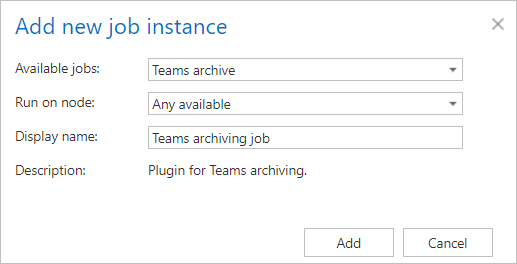
If you want to configure the job immediately, then click OK in the pop-up window and the job configuration page opens immediately. If not, the configuration page is accessible any time using the Configure option in the given job’s context menu.

On the job’s configuration page go through the following sections:
✓ Report mode settings
If the Use report mode checkbox is checked, the job will run in report mode. After the job finishes its run in this mode, the user will be able to download a .csv report file here in this section. The file will contain a list of items that belong to the objects selected in section Address book objects to process of the job and some information to them, including whether they will be processed or not.

✓ Scheduling settings
In this step, the running time(s) of the Teams archive job must be selected. It is possible either to select a scheduler from the list or to create a new scheduler via create new … option from the dropdown list. For more information about how to set schedulers refer to the section Schedules above.

✓ Address book objects to process
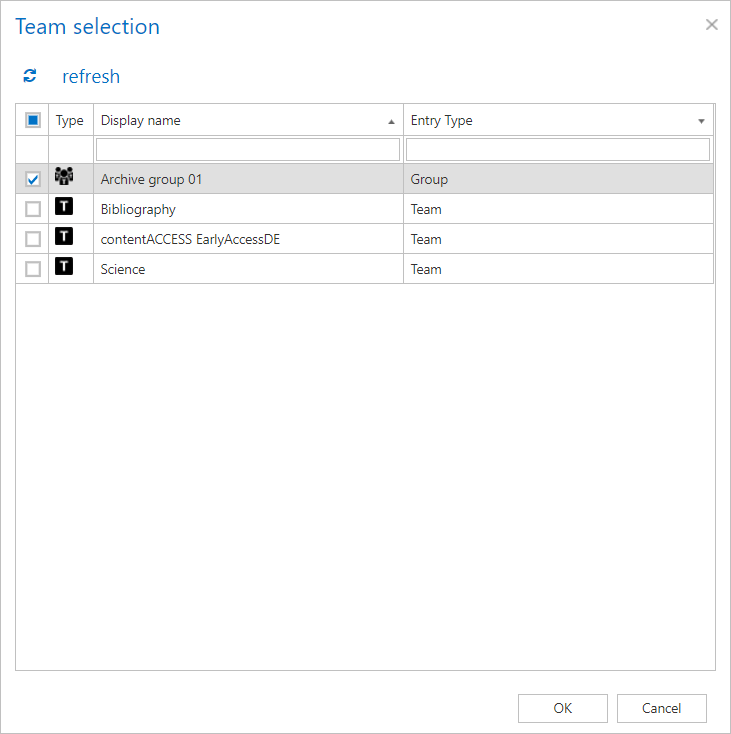
Here the administrator may select the Teams and groups, which will be processed by the archive job. Click on the  select option and check the desired Teams or groups in the Team selection window, then click on OK.
✓ Database settings
Select an already configured connection from the dropdown list. Here the metadata will be stored. We have configured for our archived Teams the database named “DemoDE”, so we set it here. For further information on how to set database connections please refer to section Databases.

✓ Storage settings
Choose an already configured storage from the dropdown list. The processed binaries will be stored here. On the screenshot below we selected our already configured disk type store: “Default”. For more information on how to set storages check section Storages above.

✓ Processing and filtering settings
In this section, the user can define which items will be processed during the archive job. First, select what to process: all data or selected data. In the case of the all data option, the archive job will include all channels‘ messages, files, and non-channel related SharePoint data.

If the user selects the selected data option, the Filter team data settings appear. Here are the following options can be selected and defined:

- Process all channels (or filter them out) – the user can decide whether all channels will be archived or just the channels matching the filtering settings. The channels can be filtered out by the name or the type (IsPrivate=Yes/No).
Note: The default channel in Teams is General, which is created automatically with the team. This channel will be displayed in the background as „General“ even if the users set/use different languages for the Teams client. Because of this, when the user wants to filter out the default channel by the channel name, it needs to be added in English (the other channels can be filtered out with the supported languages), otherwise, the job won’t process this channel.
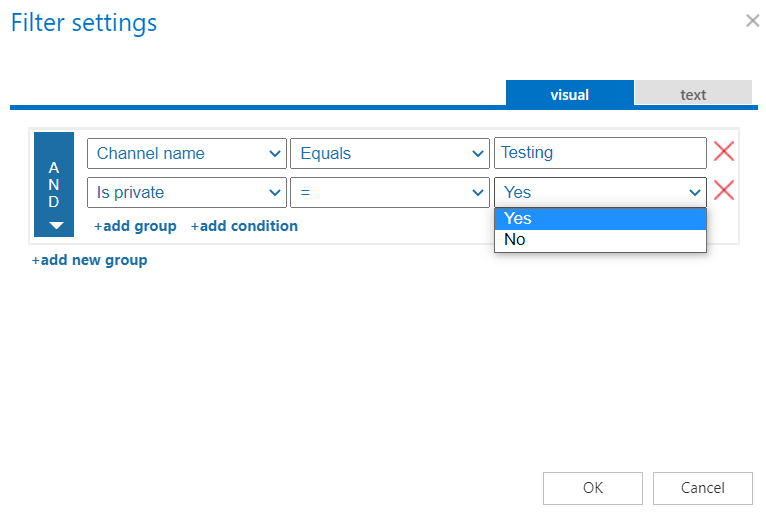
- Process messages where filter is [not set] – only the messages (all or filtered out) will be archived if this checkbox is selected. If the user does not add a filter to the job, then all messages will be processed from the defined channels. It is also possible to archive only the selected messages from the team(s) by clicking on the Change filter button (or on the not set). In this case, the Filtering settings window appears, and the user can set the filters for the archive job.
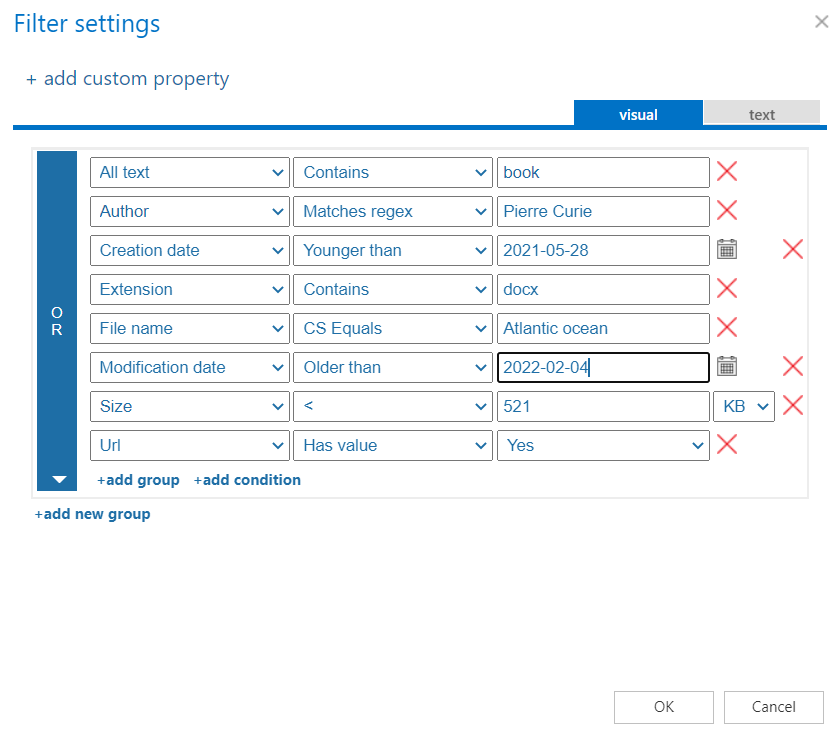
- Process files where filter is [not set] – only the files (all or filtered out) will be archived from the selected team(s) if this option is selected. If the user does not add filters to the job, then all files will be processed from the defined channel(s). It is also possible to archive only the selected files by clicking on the Change filter button (or on the not set). In this case, the Filtering settings window appears, and the user can set the filters for the archive job.
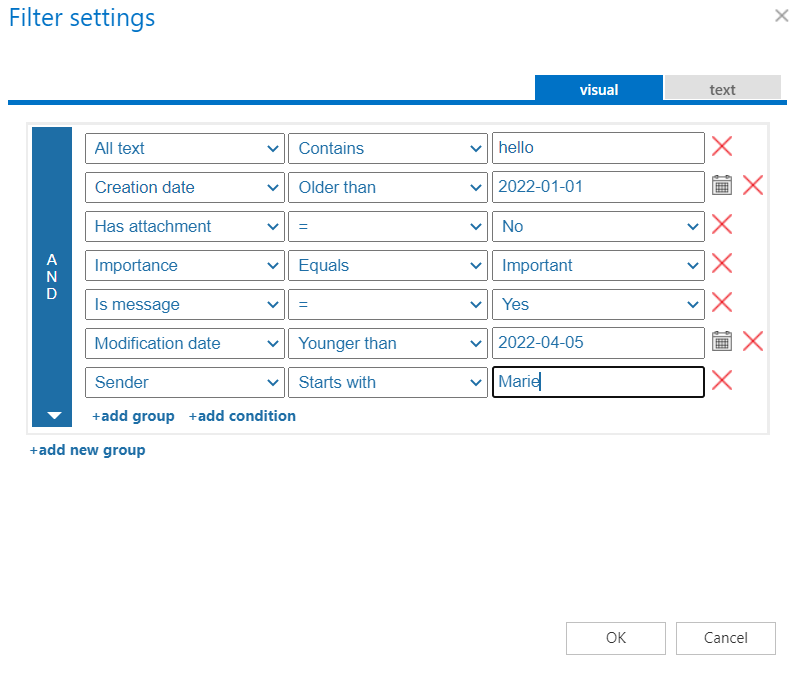
- Process non-channel related SharePoint data – SharePoint is deeply integrated into Teams. Files that are stored in Teams are in Sharepoint sites, and these sites can be used by Teams for file storage (these are called Teams-connected sites). These sites are created automatically whenever a user creates a team. The files stored in both Teams and SharePoint sites can be processed by the Process files option, but those items which are available only on the SharePoint sites (lists, tasks, calendar items, contacts, manually created document/picture libraries) are skipped with that option. To be able to archive those items, the Process non-channel related SharePoint data option needs to be selected. This option allows the user to process/skip the custom SharePoint lists/document libraries. For more information about Teams and SharePoint integration, read this article.
 Important: The Process non-channel related SharePoint data function does not work by itself. The Process files option is also needed to be selected, otherwise, the job will run without doing anything. But the files can be easily filtered out (for example: NOT Creation date has value=no), so only the SharePoint data will be processed.
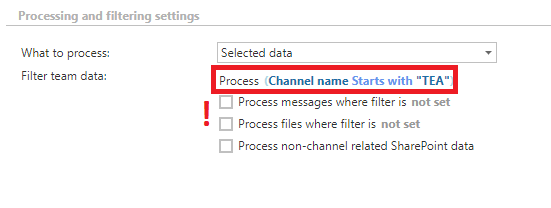
To set the filtering settings, click on the Change filter or not set button and set the filtering according to your needs and/or regulations. To learn more about how to work with filtering settings, please, check this section of our documentation.
✓ Retention settings
Choose an already configured retention time from the dropdown list. The archived objects will be stored during this time in the storage, and it will be impossible to delete them from there. It is highly recommended to select a retention time that is required by the law of your country. For more information about how to set retentions check section Retentions above.

✓ Notification settings
Select here, when you will need to get notification emails from the Teams archive job. It is possible to set here if you need such a notification email always/never, or you need it only in case that an error/warning occurred during the archiving process − for example, if the archiving of one or more items failed, then you may get a notification email about this error. Into the Recipient list textbox insert the email address(es) of the person(s), who will get such notifications. Notifications should be used if the administrator does not use the System logs feature.

✓ Resource settings
Set the value, which will determine how many items will be processed simultaneously by the Teams archive job. The recommended value is “2”.

Save your changes and start the job manually or wait until the scheduler starts the job automatically.
