16.7.8.Configuration of Delete job in Teams archive
This job type deletes the team(s) messages and files with expired retention time from the archive.
Go to Jobs -> click on +new -> select Delete from Teams archive.
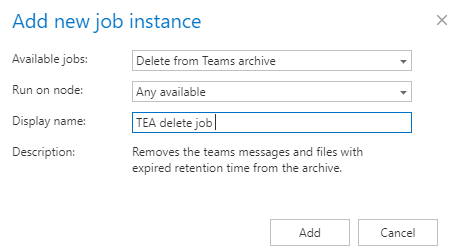
On the job’s configuration page go through the following sections:
✓ Running mode settings (mandatory)
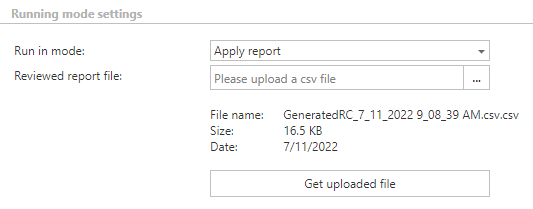
The job can be run in 3 modes:
1) Immediate processing -> collects the expired items and deletes them.

2) Create report -> collects the expired items and provides a csv file with a list of documents. The administrator can delete documents/messages from the list.

3) Apply report -> a csv file with a list of items to be deleted must be uploaded. The administrator can delete documents and messages from the list before running the job (only items which are in the list will be processed). The job reads the list and if the documents/messages are expired, deletes them.
✓ Scheduling settings (mandatory)
In this section the running times of the delete job must be selected. It is possible either to select a scheduler from the list or to create a new scheduler via the “Create new …” option.

✓ Processing settings
In this section, you may check the Delete even if not marked for delete checkbox. If you do so, the Delete job will delete the expired item without them needing to be marked for delete.

✓ Address book objects to process (mandatory)
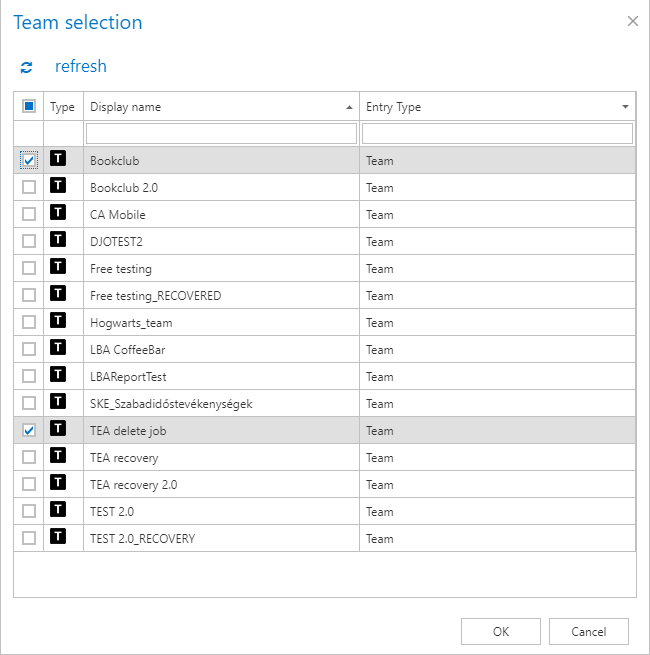
In this section, the user must select the team(s) which will be processed. There are two available options for how the list of the team(s) may be specified:
a) Process All teams – in this case, the job will delete the items from all previously provisioned and archived teams.

b) Process Selected teams – in this case, the teams may be added via select option, and they must be added manually one-by-one. Click on select to open the Team selection dialog.

✓ Processing and filtering settings (mandatory and optional)
The user can select what will be processed during the delete job in this section. First, select what to process: all data or selected data. In the case of all data option, the delete job will process all channels’ messages, files, and non-channel related SharePoint data.

When the user select the selected data option, the Filter team data settings appear. Here are the following options can be selected and defined:

- Process all channels (or filter them out) – the user can decide whether all channels’ items will be deleted or just the items defined by the filtering settings. The channels can be filtered out by the name or the type (IsPrivate=Yes/No)
Note: The default channel in Teams is General, which is created automatically with the team. This channel will be displayed in the background as „General“ even if the users set/use different languages for the Teams client. Because of this, when the user wants to filter out the default channel by the channel name, it needs to be added in English (the other channels can be filtered out with the supported languages), otherwise, the job won’t process this channel.
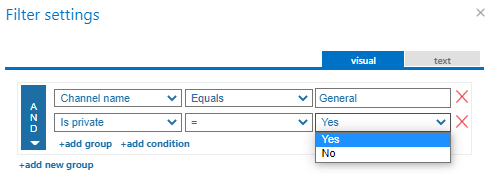
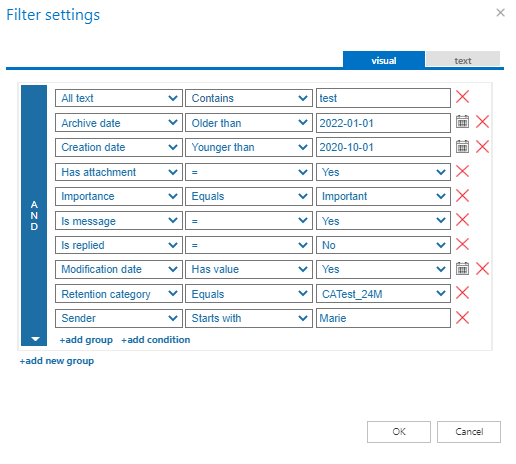
- Process messages where filter is [not set] – only the messages (all or filtered out) will be deleted from the archive if this checkbox is selected. If the user does not add filters to the job, then all messages will be processed from the defined channels. It is also possible to decide which messages will be processed and skipped by clicking on the Change filter button (or on the not set). In this case, the Filtering settings window appears, and the user can set the filters for the delete job.
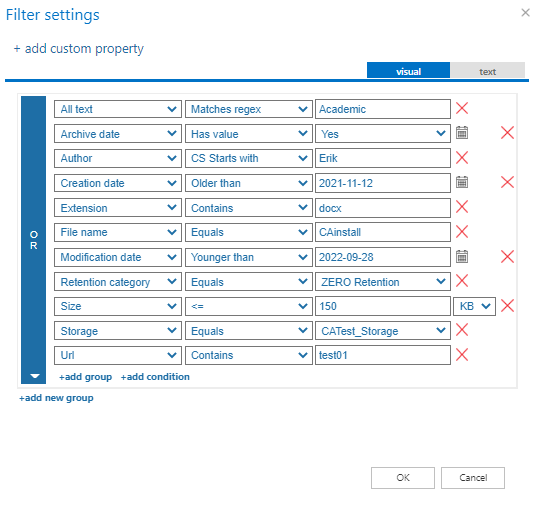
- Process files where filter is [not set] – only the files (all or filtered out) will be deleted from the archive if this checkbox is selected. If the user does not add filters to the job, then all files will be processed from the defined channels. It is also possible to decide which items will be processed and skipped by clicking on the Change filter button (or on the not set). In this case, the Filtering settings window appears, and the user can set the filters for the delete job.
- Process non-channel related SharePoint data – SharePoint is deeply integrated into Teams. Files that are stored in Teams are in Sharepoint sites, and these sites can be used by Teams for file storage (these are called Teams-connected sites). These sites are created automatically whenever a user creates a team. The files stored in both Teams and SharePoint sites can be processed by the Process files option, but those items which are available only on the SharePoint sites (lists, tasks, calendar items, contacts, manually created document/picture libraries) are skipped with that option. To be able to delete those items, the Process non-channel related SharePoint data option needs to be selected. This option allows the user to process/skip the custom SharePoint lists/document libraries. For more information about the Teams and SharePoint integration, read this article.
 Important: The Process non-channel related SharePoint data function does not work by itself. The Process files option is also needed to be selected, otherwise, the job will run without doing anything. But the files can be easily filtered out (example: AND archive date has value=No/ NOT storage equals CA_ret), so only the SharePoint data will be processed.
To set the filtering settings, click on the Change filter or not set button and set the filtering according to your needs and/or regulations. To learn more about how to work with filtering settings, please, check this section of our documentation.
✓ Notification settings (mandatory)
Select here, when you will need to get notification emails from the Delete job. It is possible to set here if you need a notification email always/never, or you need it only if an error/warning occurred during the process − for example, if the deleting one or more items failed, then you may get a notification email about this error. Into the Recipient list textbox insert the email addresses of the people to whom you would like to send these emails – if there are multiple recipients, the addresses must be separated by “,” or “;”.

✓ Resource settings (mandatory)
Set the value, which will determine how many items will be processed simultaneously by the Delete job. The recommended value is 2, as in our case.

In the end, never forget to save your job configurations: click on Save in the left upper corner of UI.
