16.4.Shortcut configuration in Teams archive
The archive methods and shortcut types can be configured on the Shortcut configuration page. To open it, navigate to Teams Archive -> Settings -> Shortcut configuration control button.
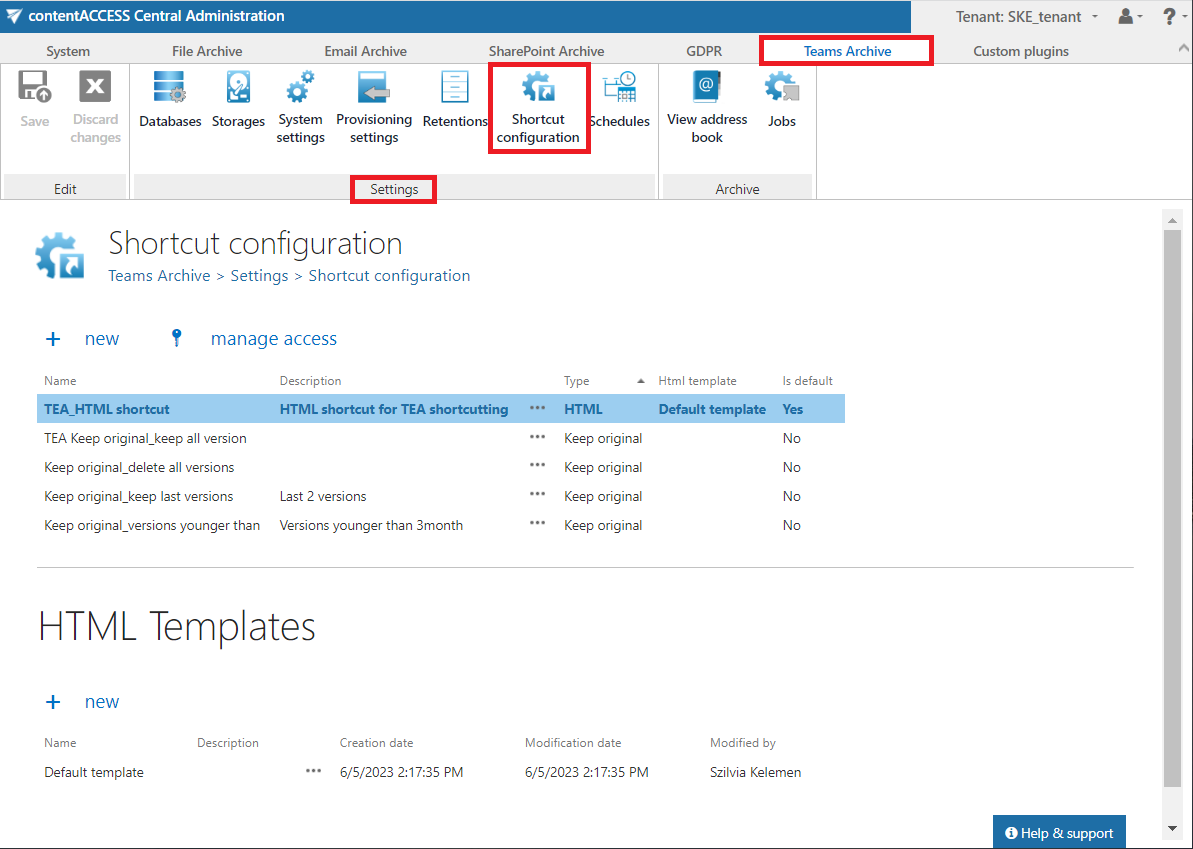
You may find the complete list of already configured shortcuts on this page under the Shortcut configuration section. The grid also contains the configuration information of the respective shortcuts. The bold color of a shortcut means that it was set as default (i.e. if they are used by manual archiving).
Under the HTML Templates section, you may see all HTML templates configured for the HTML shortcuts. The date of creation, modification, and the modified by information can be viewed in the templates’ grid, too.
The shortcuts configured by the admin on this page can be selected when configuring a Teams archive job instance on the job’s configuration page.
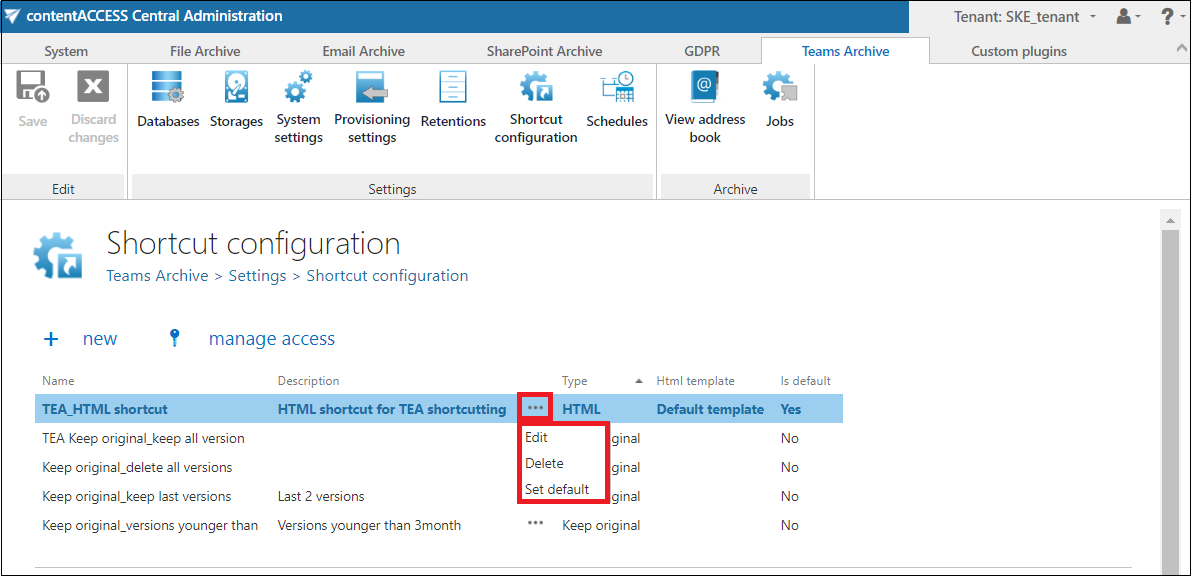
It is also possible to delete/edit/set as default the listed items from their context menu with a click on the ellipses (…).
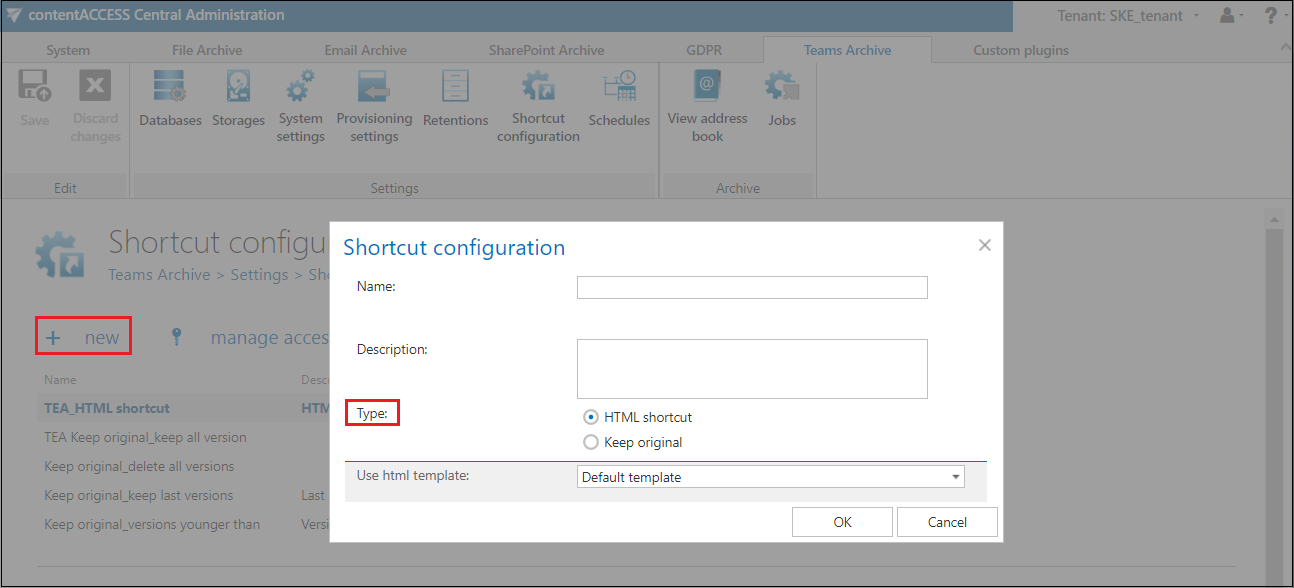
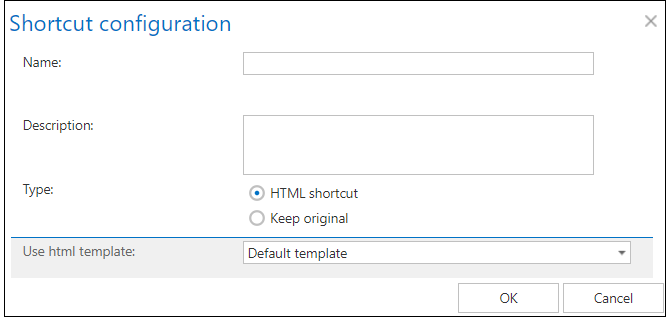
To create a new shortcut, click on + new under the Shortcut configuration section, and select a shortcut type from the Type list of the Shortcut configuration dialog.
There are 2 types of shortcuts in contentACCESS’s Teams Archive, namely:
√ Keep original shortcut
√ HTML shortcut
Keep original shortcut
By using this option, the original document will be kept in the original location/folder. It is recommended to select this processing type for archiving items younger than 1 year.
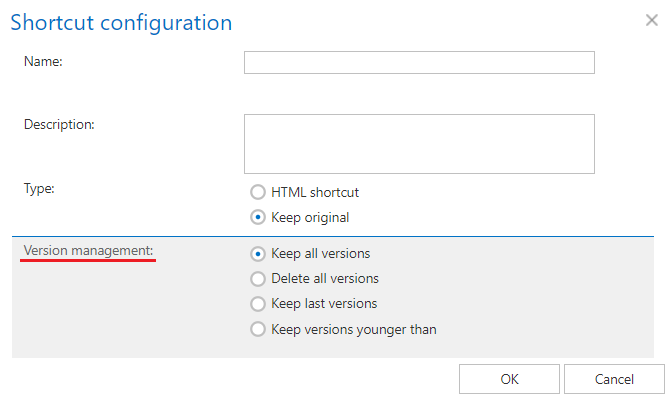
In this case, it is also possible to define the version management option:
- Keep all versions – the archive job won’t touch the version history
- Delete all versions – all previous versions will be deleted, except for the current version
- Keep last versions – delete all versions but keep X last versions (e.g.: 2 last versions; possible values: 1-100)
- Keep versions younger than – the job will keep versions younger than a selected date (this value is counted in months – e.g., versions younger than 2 months)
HTML shortcut
If the user is archiving with a job using an HTML shortcut, the file will be replaced by HTML code which is based on the HTML template. Currently, the Default template is available for the Teams archive. In this template, the version management is set to “Delete all versions”.
The default template can be downloaded (and edited) with a click on + new under the HTML Templates section, and then by clicking on the Edit template button in the HTML template dialog, or by selecting Edit from the context menu and then clicking on Edit template.
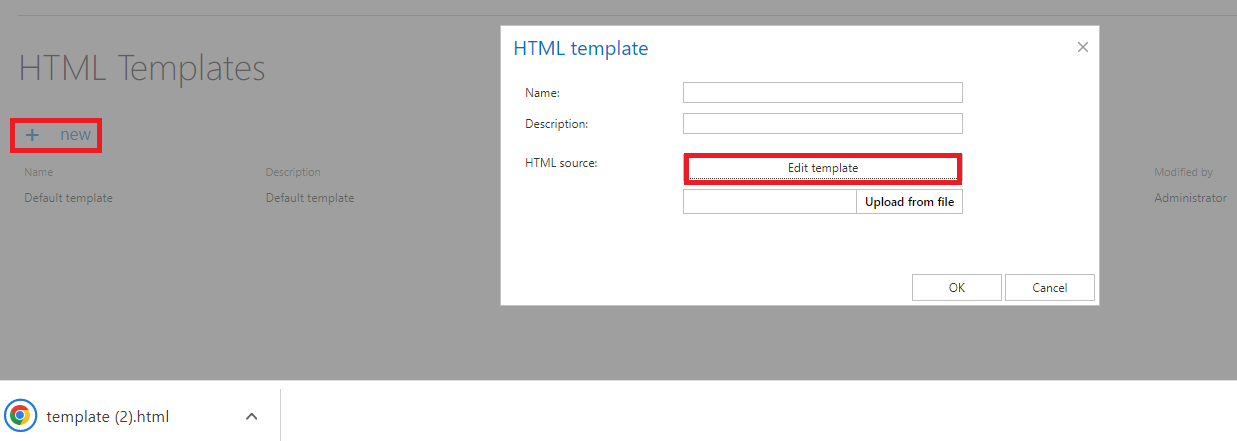
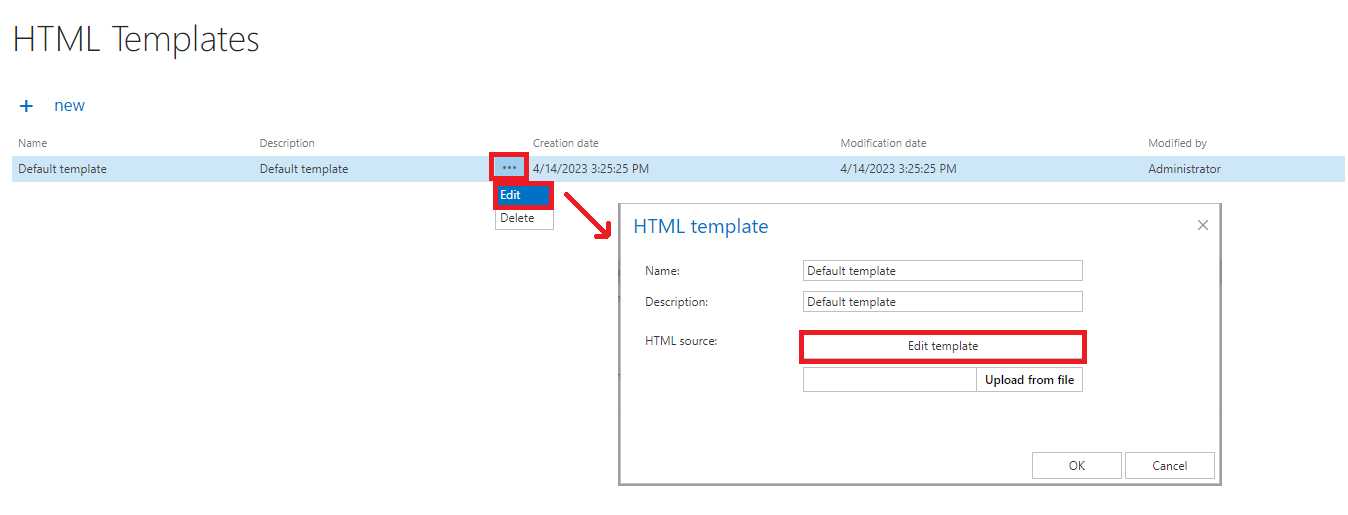
After downloading the template, download an HTML editor from the web and edit your template, then save it. The default/edited HTML template can be uploaded to the template list. Under the HTML Templates section click on + new. The HTML template dialog will open. Here, give a Name for the HTML and fill in the Description field (not required), then click on Upload from the file and browse for the desired template that you have created. Upload it to the template list.
Once your desired template is uploaded, a custom HTML shortcut can be configured. Navigate to Teams archive -> Settings -> Shortcut configuration and click on + new under the Shortcut configuration section. The Shortcut configuration dialog opens. Enter a name for the shortcut into the Name field. In the Use HTML template dropdown list select the HTML template that you have created.
After filling in all required data in the Shortcut configuration window, click OK.
Editing of shortcuts
Select the shortcut, which you would like to modify from the grid and open its context menu.

To modify shortcut settings, click on Edit and change the settings in the Shortcut configuration dialog so that the shortcut contains the information that you require. You can also set the selected shortcut as default from the shortcut’s context menu, or you can delete the selected shortcut.
