2.1.2.1.2.Settings
On this page, the contentACCESS components are configured in the Basic installation mode using the following settings:
![]()
External contentACCESS server accessibility: Specify the name under which contentACCESS will be accessible externally. This field is automatically filled in when you enter the Settings page.
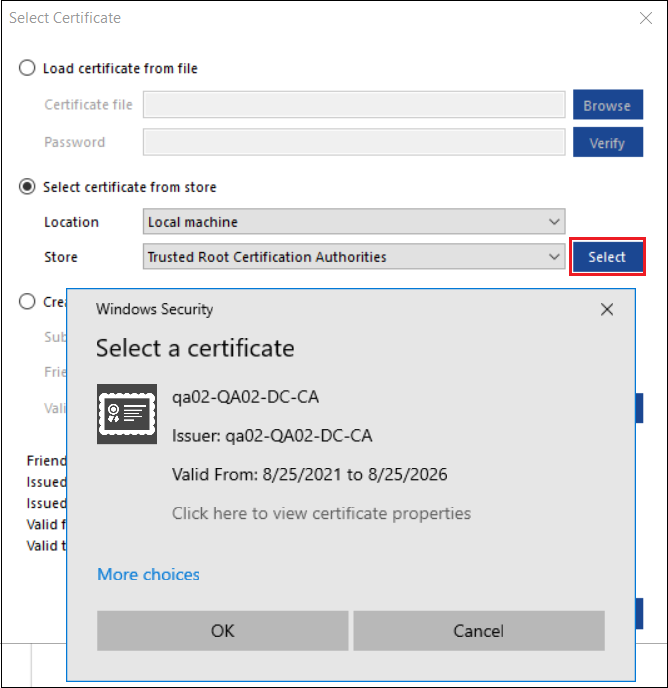
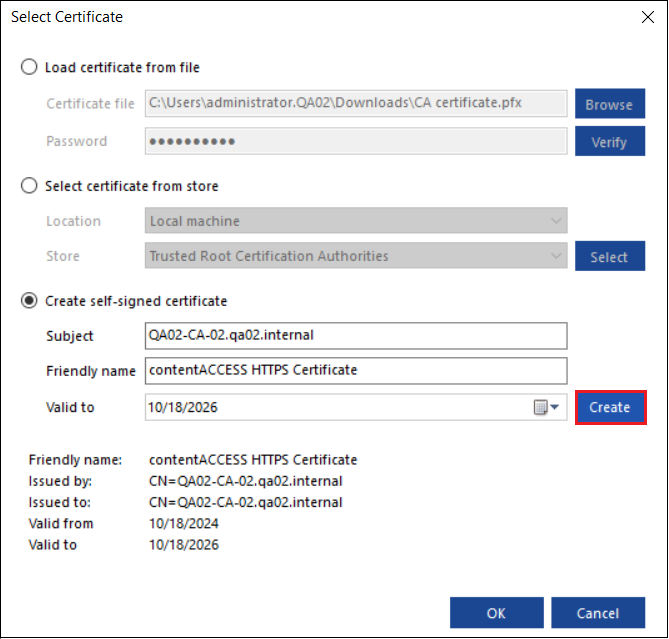
SSL certificate: Configure or select an SSL certificate by clicking the Configure button. In the pop-up window, you can choose from three options to configure the certificate:
- Load certificate from file – If you already have a certificate, click the Browse button to select the file and enter the password in the designated field. Use the Verify button to check the certificate’s validity. Once the verification is complete, the certificate details will be displayed at the bottom of the window.

- Select certificate from store – choose the location (Local Machine or Current User), then select the desired option from the drop-down list in the Store field. Click Select to open the list of available certificates and choose the most suitable one.
- Create self-signed certificate – use this option to generate a self-signed certificate. Enter the domain for which the certificate will be valid, provide a unique name for identification (especially for distinguishing certificates in IIS), set an expiration date, and click Create. Please note that this option generates the certificate, but it will only be added to the store during the installation process.
Once you have completed the certificate configuration, click OK to apply the changes.
Location of your data: Specify the storage path for contentACCESS data. The database and resource storage information will be saved here. Click the ![]() button and browse to select the desired destination.
button and browse to select the desired destination.
Location of temporary data: Define a temporary storage location for logs and cache by specifying the path where log files and cache data will be stored. Click the ![]() button and browse to select the desired destination.
button and browse to select the desired destination.
Database server: Configure the database server used by contentACCESS. For PostgreSQL, ensure that the database name starts with a lowercase letter. The dropdown menu provides three database types:
- PostgreSQL (built-in) – for automatically installing the PostgreSQL server locally, if it’s not already installed on your machine
- PostgreSQL (existing) – to configure an already existing PostgreSQL server
- SQL Server – allows configuration of an existing SQL database
The built-in option is available only if the PostgreSQL server is not yet installed. In this case, the contentACCESS installation package will automatically install PostgreSQL locally.
All configuration settings are pre-filled for all three options but can be modified and customized by the user. The port is set to the default value, though you can specify a different port using the “Use the following port” option.
In the Authentication section you can view the password (Show password icon), generate a new password (Generate password icon), or copy the password (Copy password icon).
For PostgreSQL configurations, the authentication method is automatically set to “Password Authentication” and cannot be changed. For SQL Server, you can choose between “Password Authentication” or “Windows Authentication (Local System)“. If you select Windows Authentication, the User name and Password fields will be disabled.
The “Create new user” option is only enabled for PostgreSQL (existing) and SQL Server options, allowing you to create a new user within the database configuration window. This user can later be used in contentACCESS to configure tenants and databases.
The Test connection button is disabled for the PostgreSQL (built-in) database type, as the database does not yet exist. It will only be enabled for the PostgreSQL (existing) and SQL Server options.
![]()
Fully qualified contentACCESS server name: FQDN allows users to access contentACCESS from everywhere (from home, from the office etc.). Just like in the External contentACCESS server accessibility section, this field is automatically filled in when you enter the Settings page.
The System administrator password is automatically generated during the installation process. However, you can modify it or generate a new one by clicking the Configure button. In the pop-up window, you can manually enter a new password or generate a new password using the “Generate password” button. You also can view (Show password) and copy (Copy password) the current password by clicking the respective buttons.
Add Firewall Exceptions (External Access, SMTP Server): enabling this option allows contentACCESS sites and the SMTP server to be accessible externally. Selecting this option creates two Inbound Rules for contentACCESS in the Windows Defender Firewall with Advanced Security console: contentACCESS External Accessibility and contentACCESS SMTP Server.
The Copy Credentials button allows you to copy or save the database and system administrator credentials. This action is mandatory during the installation process because retrieving this information from the database later can be difficult. Therefore, we strongly recommend saving the credentials in a secure and easily accessible location. The installation cannot proceed to the next step until the credentials are copied as a TXT or saved as a CSV file.
![]()
Once you have completed the configuration and saved or copied the credentials, click NEXT to proceed to the Overview page, where you can review what contentACCESS will install during the Installation step.
![]()