25.15.How to configure contentACCESS for Microsoft 365 with limited permissions
Background
When Microsoft 365 archiving is configured, a Microsoft Entra App registration is created. This application registration requires either the Exchange Administrator or Exchange Recipient Administrator role. However, this requirement might be a problem for some administrators who need a more restricted role for archiving. A solution to this issue is configuring custom administrator role(s) in Exchange Online with limited permissions for the Entra app registration.
Configuring custom administrator role(s) with limited permissions
In this section, we will go through a step-by-step process of configuring custom admin roles with limited permissions for the Entra app registration, provided that the app registration has already been completed. If it has not yet been set up, please refer the following section for guidance on the app registration process.
During the process of configuring custom admin roles with limited permissions, we will:
- collect information about the App registration (AppID, ObjectID)
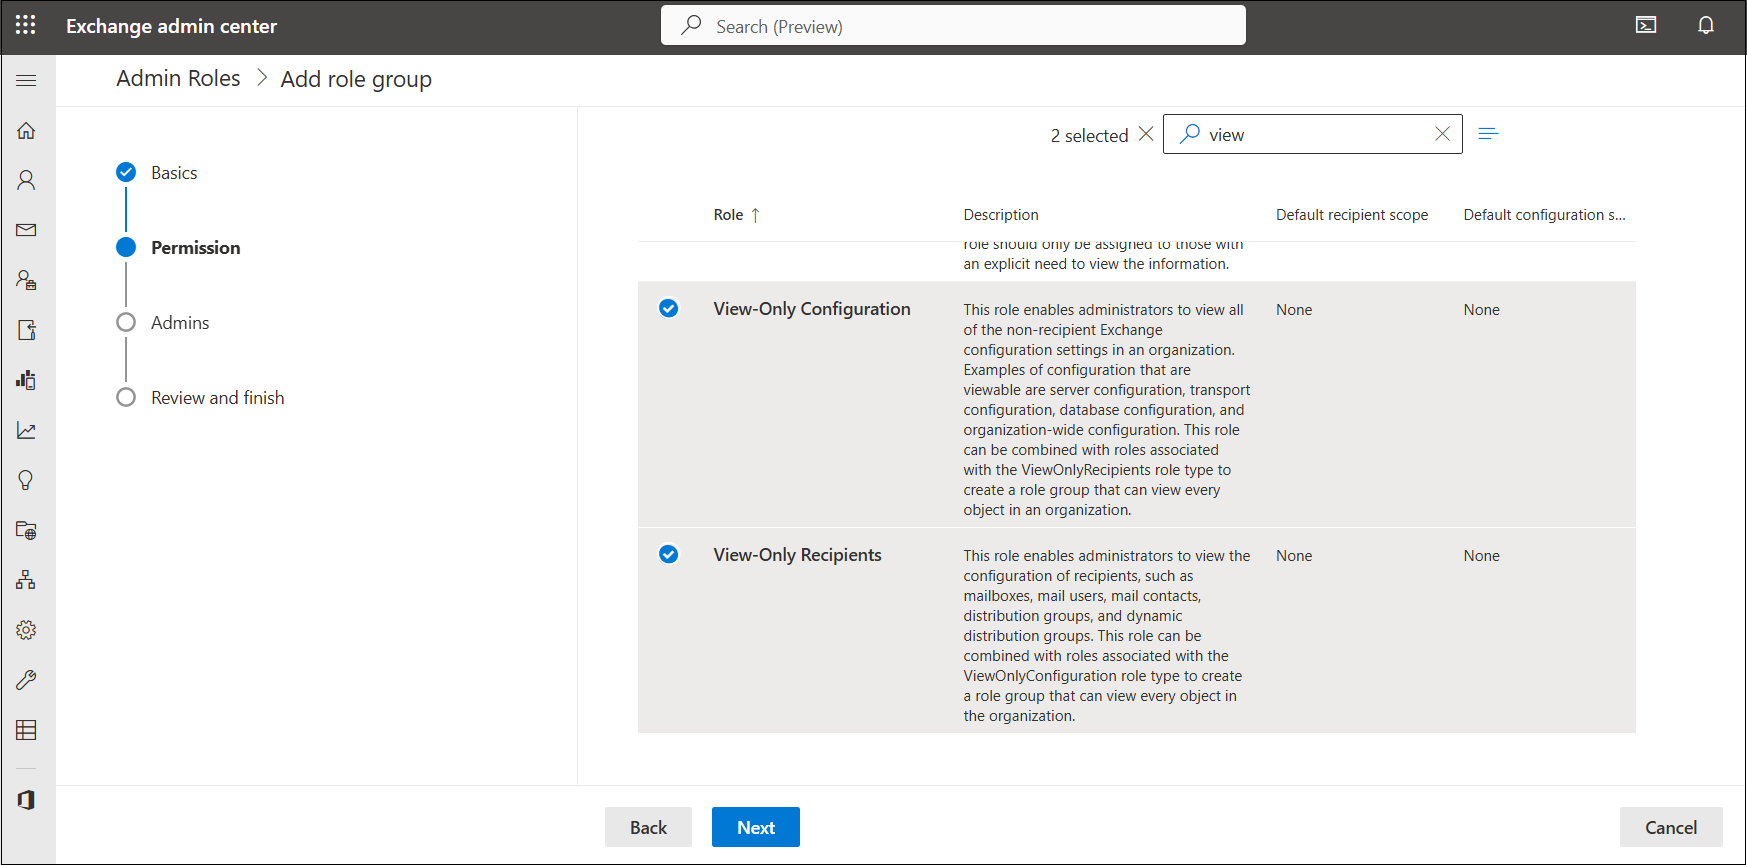
- create a custom admin role in Exchange Online with limited permissions: View-Only Recipients and View-Only Configuration
- connect to Exchange Online using PowerShell
- create a service principal for the App registration in Exchange Online
- assign the service principal to the custom admin role
1. Collect information about the App registration
Open the Azure Portal and navigate to Microsoft Entra ID. Then, open Enterprise Applications and locate the App registration in the list. (You may need to adjust the filter to display all applications.)
![]()
Once you have located the required application registration, open it and collect the following information: Application ID and Object ID.
![]()
The next step is to create a custom admin role in Exchange Online.
2. Create a custom administrator role in Exchange Online with limited permissions
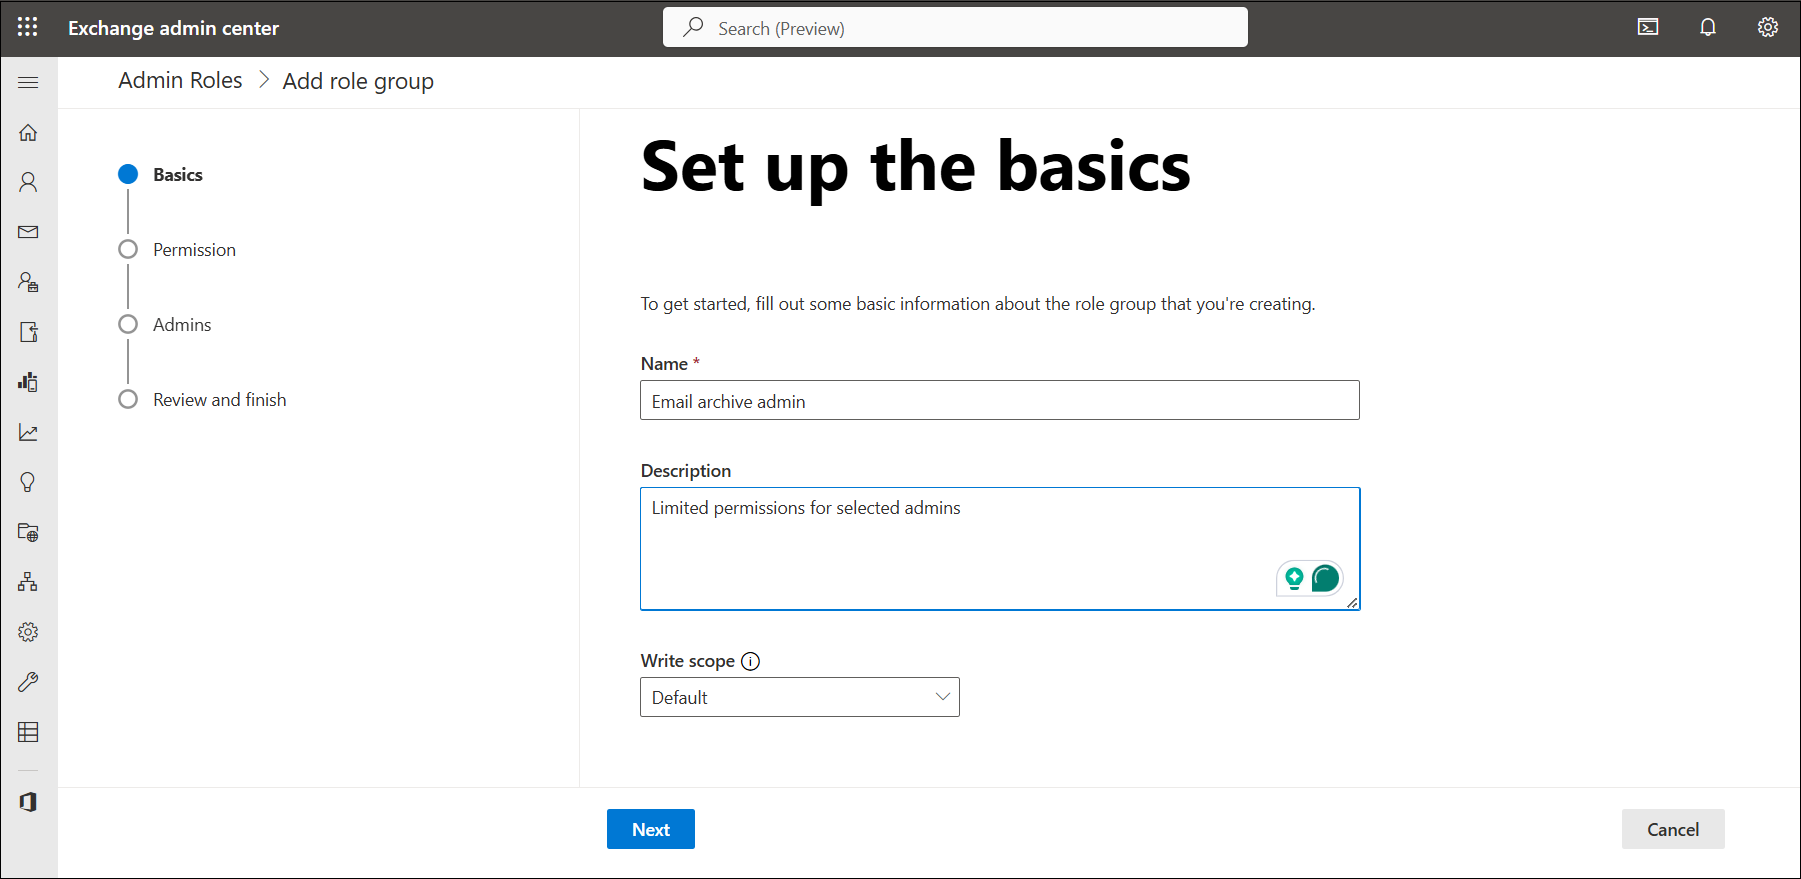
First, open Exchange admin center and navigate to Admin Roles (Exchange admin center -> Roles -> Admin Roles). Then, create a new group by pressing the Add role group button.
![]()
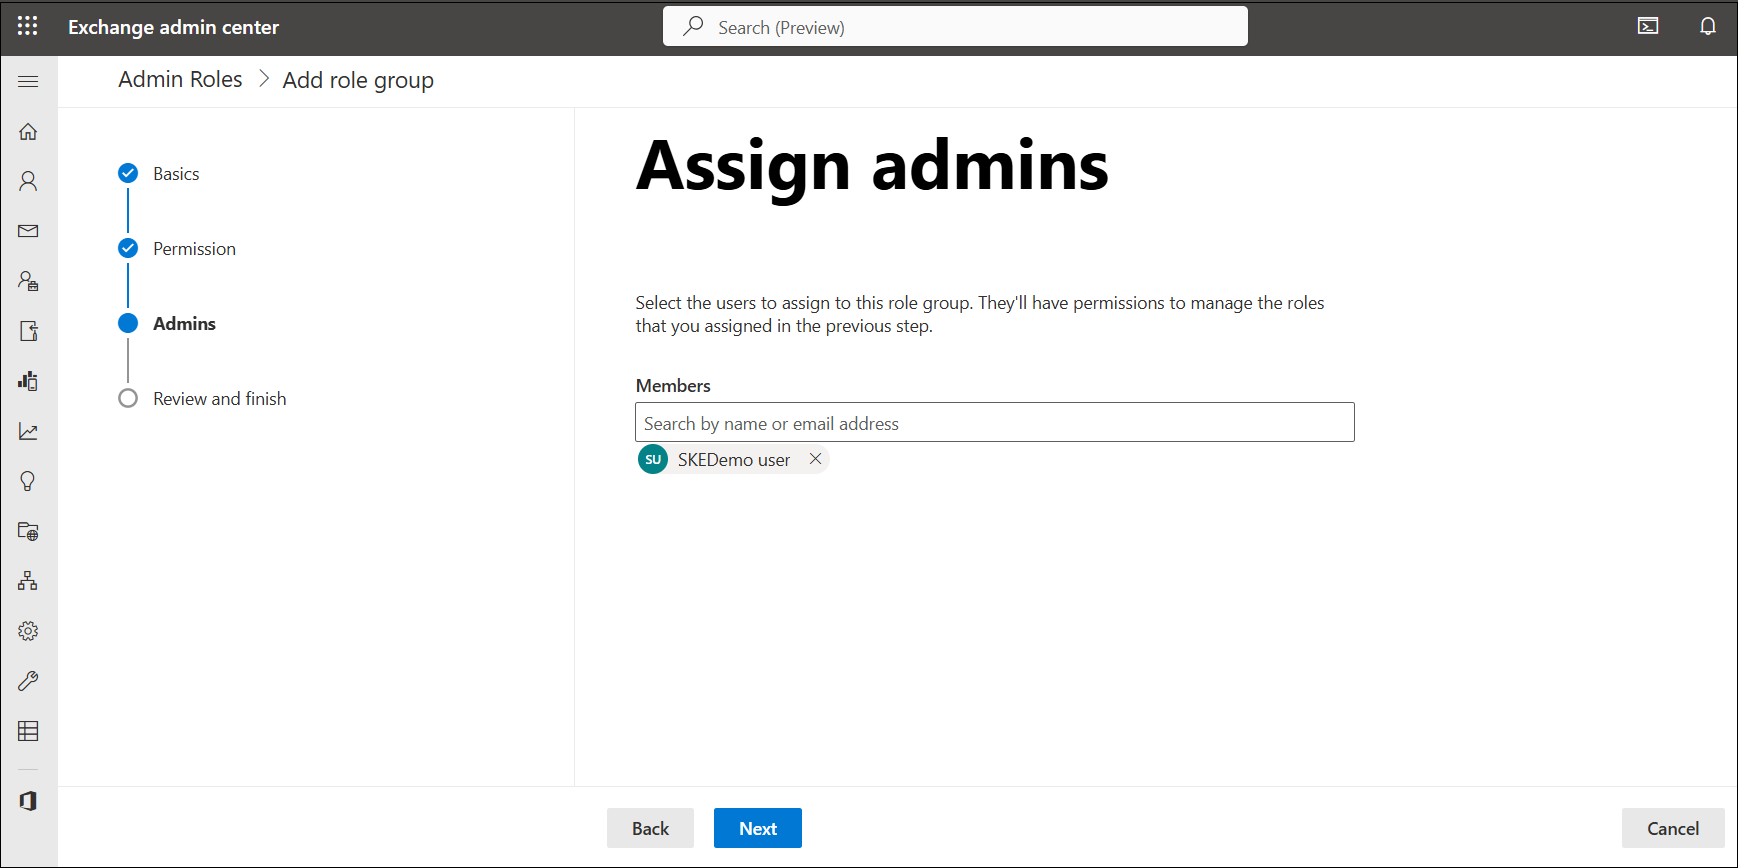
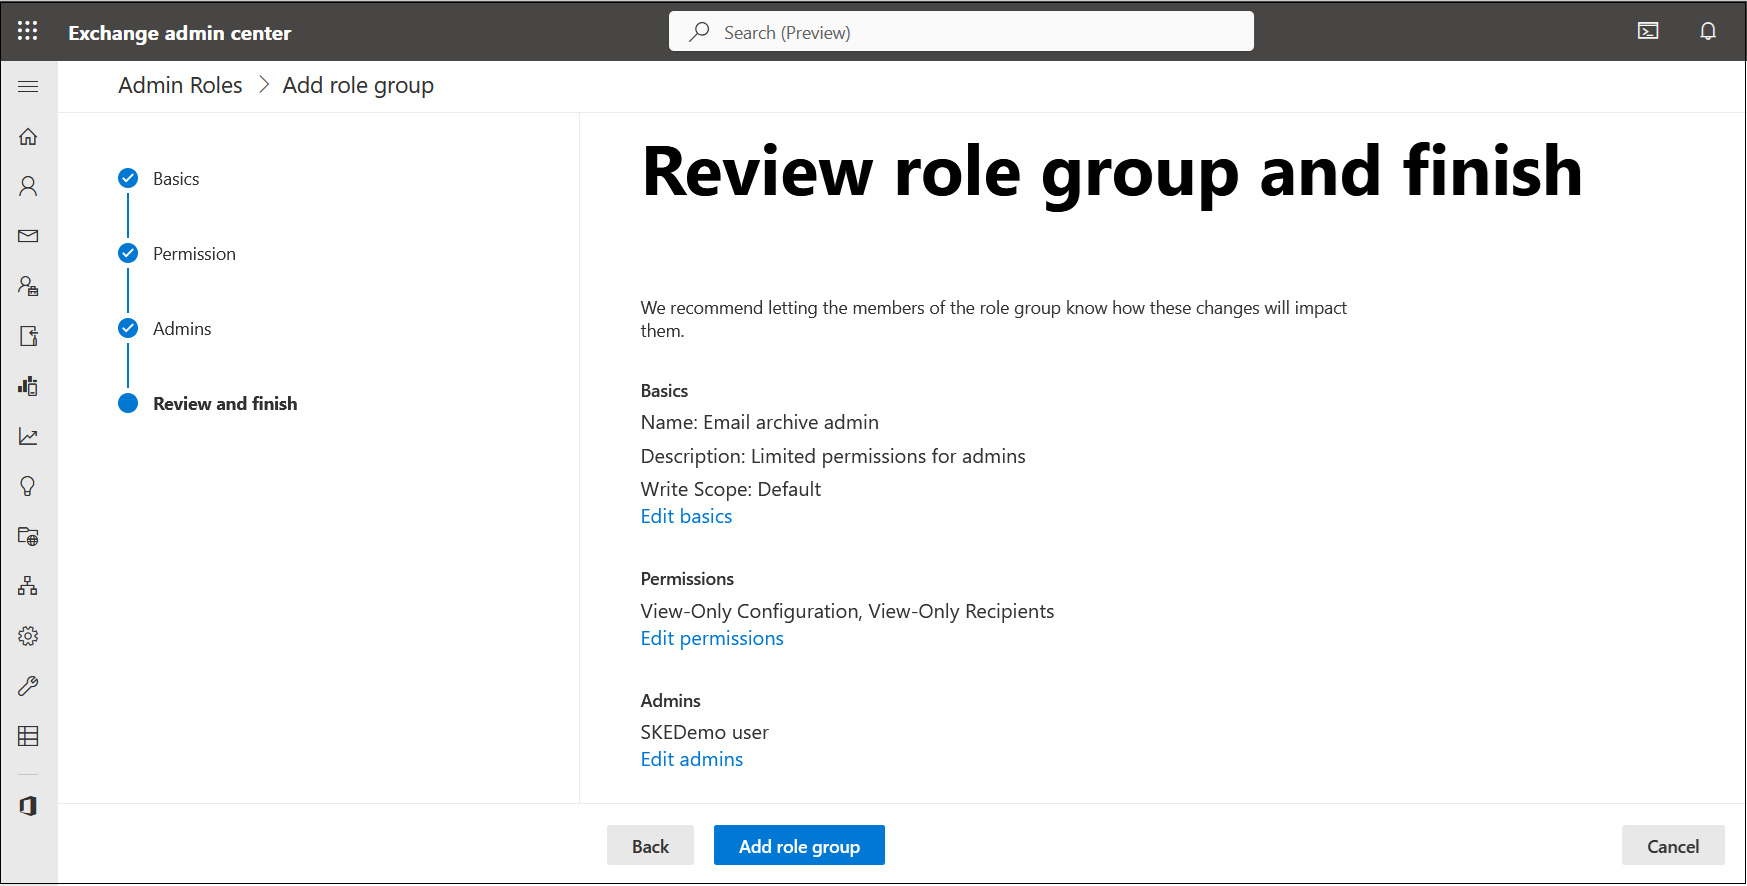
In the page that appears, the following steps need to be configured:
- Basics – give a name and description to the new group. We recommend choosing a unique name for the role to distinguish it from others.
- Permissions – select the required permissions for the group: View-Only Recipients and View-Only Configuration.
- Admins – select the users to assign to this role group.
- Review and finish – review and edit the settings if necessary, then complete the process by pressing the Add role group button.
3. Connect to Exchange Online using PowerShell
Upon completing the role group configuration, proceed to the next step, where you will connect to Exchange Online through PowerShell. Before connecting, you must install the Exchange Online PowerShell module. For more details on the installation process, refer to this article.
![]()
After the module installation is complete, open a PowerShell window and load the module by running the “Import-Module ExchangeOnlineManagement” command. Then, connect and authenticate using “Connect-ExchangeOnline -UserPrincipalName example@youraccount.com”. Please refer to this article for a detailed explanation of this step.
![]()
4. Create a service principal for the App registration in Exchange Online
Once the connection is established, create a service principal using the command New-ServicePrincipal -AppID “AppID” -ObjectID “ObjectID” -DisplayName “Display name” in PowerShell. You will need the previously collected App ID, Object ID, and display name of the application.
![]()
5. Assign the service principal to the custom admin role group
As the final step, assign the service principal to the role group using the following PowerShell command: Add-RoleGroupMember -Identity “Email Archive Admin” -Member “Object ID”.
![]()
In the case that the service principal has been successfully assigned to the custom admin role, PowerShell will not return any message. If you want to verify the success, you need to enter another command: “Get-RoleGroupMember -Identity “insert identity here”.