14.Configuring and running the File archive provisioning job
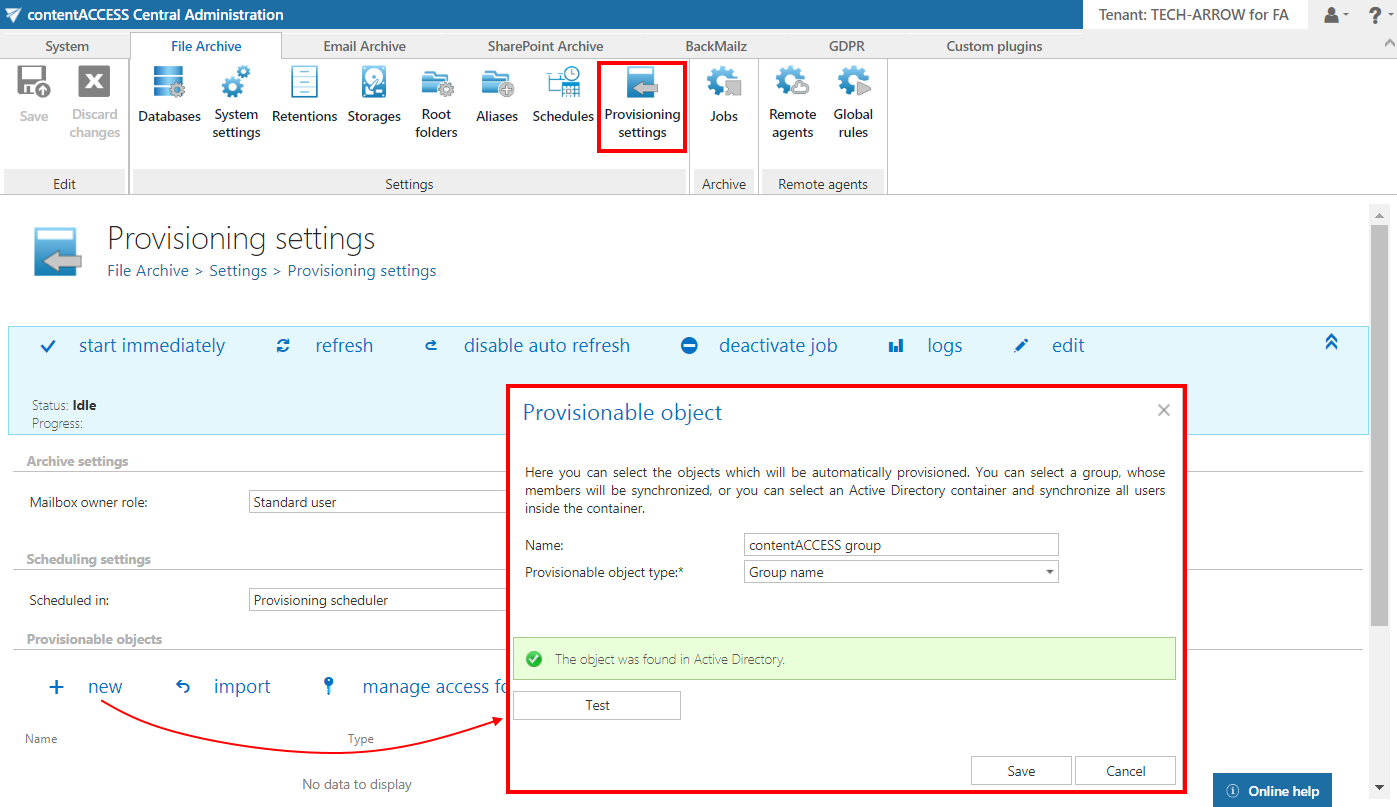
Open the Provisioning settings page (File Archive tab => Settings group => Provisioning settings button).
To configure the File archive provisioning, the administrator is required to set:
- The role that will define the file archive user’s permissions in contentACCESS Portal. Standard user role is available in the list by default, other roles with other permissions must be first configured on the Roles page.
- The time periods, when the provisioning will run – this must be configured in section “Scheduling settings” – in our case, we will use the “Provisioning scheduler”
- The objects to be provisioned – must be set in section “Provisionable objects”
- Notification settings (optional)
Save your settings. If you do not want to wait until the scheduler starts the provisioning, start it manually by clicking on “Start immediately” in the blue status bar.
Note: The provisioning job synchronizes the Active Directory with contentACCESS. The provisioned object (this may be a group or LDAP path in the Active Directory) will automatically get log on rights to the contentACCESS Portal File Archive and can view its associated archive folders. Provisionable objects can be also imported from files using the “import” option on the same page. contentACCESS Portal access right for a single user can be granted using the “manage access” option. For more information, refer to the online guide here.
Now, you can create a File archive job.
Help Guide Powered by Documentor

