8.Share page ↑ Back to Top
The Sharing option is enabled in contentACCESS MailApp. You can access it in three ways:
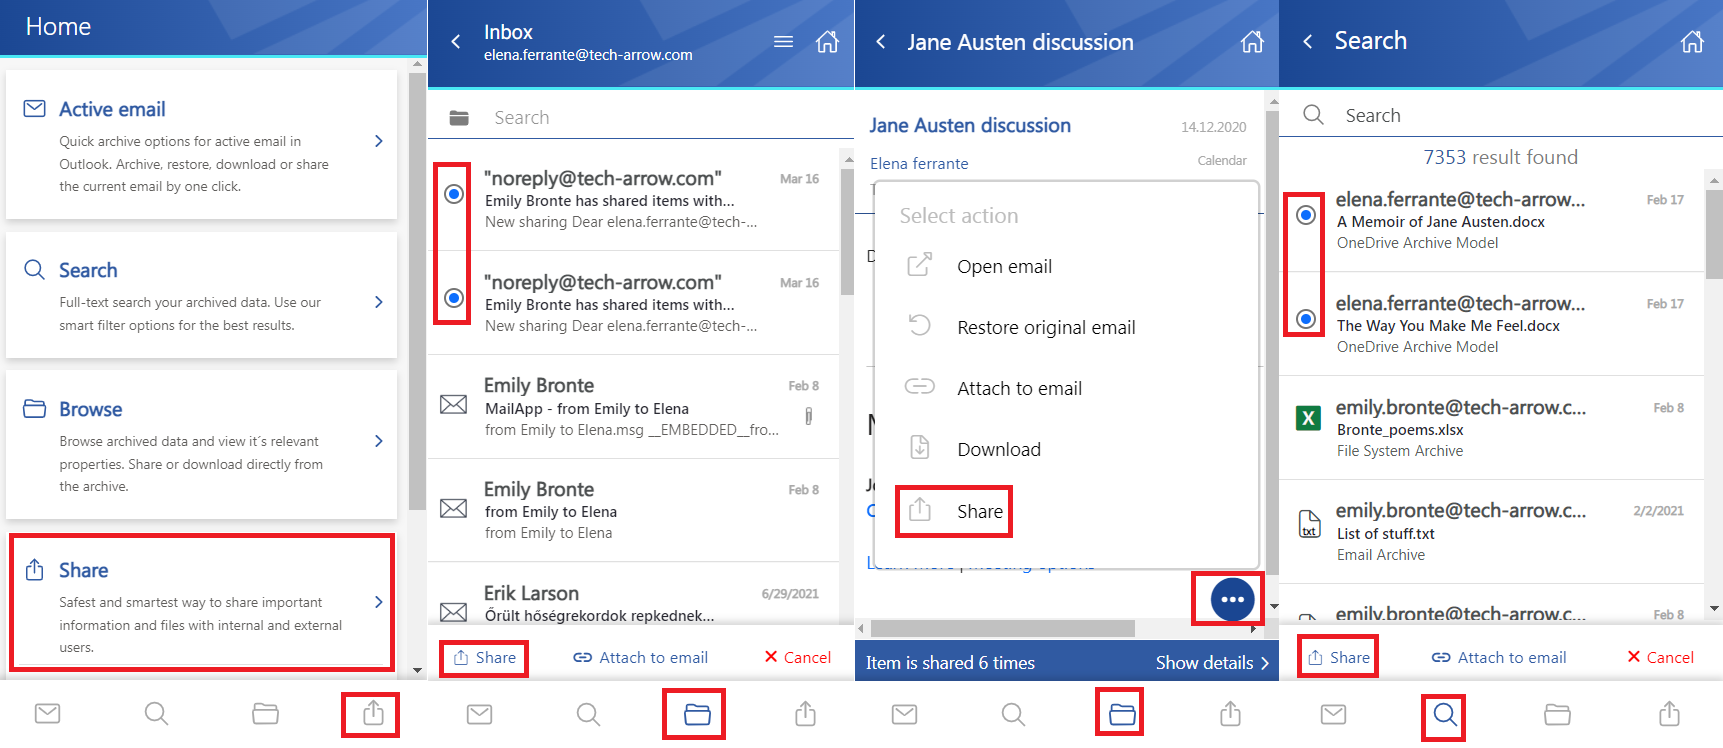
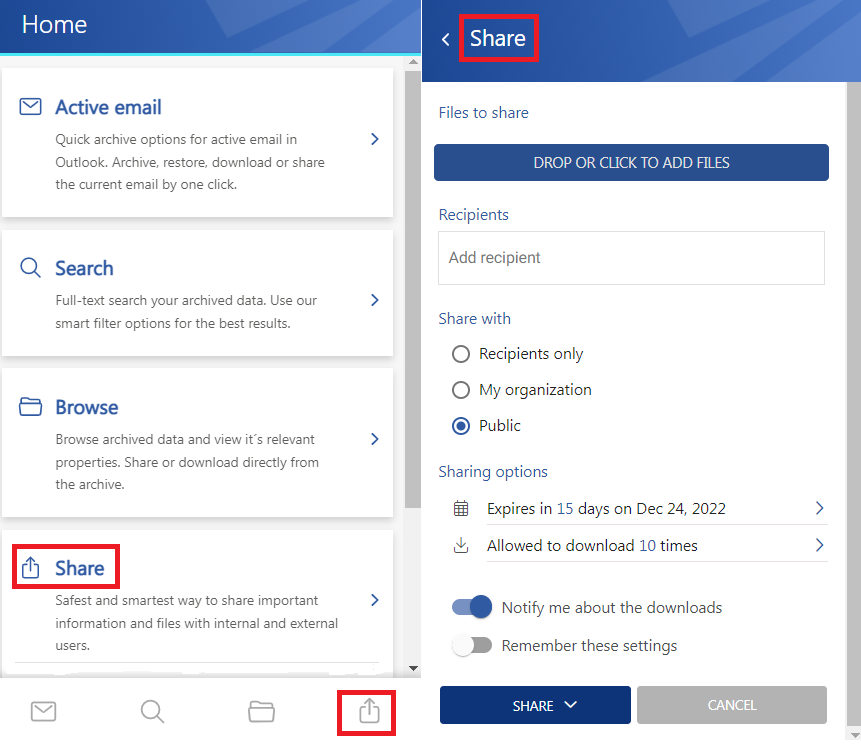
- 1. open the Sharing from the Home page by either selecting the Share tab or clicking on the Sharing icon at the bottom of the page. It is also possible to open the My shares and Shared with me folders in the Sharing entity directly by clicking on the buttons on the Home page.
- 2. share from the Browse page (from the models/entities)- select item(s) from the list and click on the Share function, or open an item’s preview and select Share from the context menu. Multiple items can be selected and shared from the item list in the entity.
- 3. share from the Search page – choose item(s) from the search results list and click on the Share function, or open the preview of an item and select Share from the context menu. Multiple items can be selected and shared from the list.
Share items from the Share page:
After clicking on the Share option, the Share view opens.
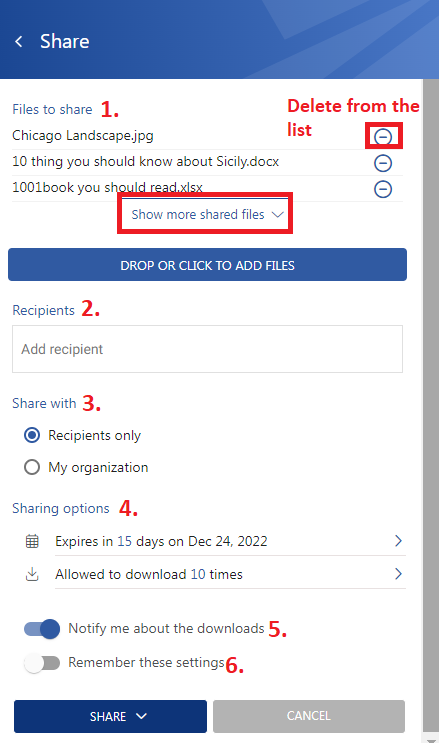
In the section Files to share, you can see items selected for sharing. In the case of using the Share from the Home page, you will need to browse and add items by clicking on the Drop or click to add files button or by Drag and Dropping an item into the field. Multiple selections are possible. In that case, a Show more shared files button appears to extend the list of the selected items.
Also, the user can remove items from the Files to share list by clicking on the delete icon.
In the section Recipients, specify the recipient(s) you wish to share the items. Start to type the email address in the Recipients field, then select the user from the search suggestion list with whom you would like to share item(s). You can also delete previously added recipients from the list by clicking on the “X” next to the email address.
The following section is the Share with. Here you can specify to whom you would like to make the item(s) accessible:
- 1. Recipients only – even if the email with the link is forwarded, only the recipients will be to access the shared item(s)
- 2. My organization – only people from your organization (specified in Central Administration => System => Services => Sharing settings) will be able to access the shared item(s)
- 3. Public – anyone with the link will be able to access the shared item(s)
In the section Sharing options, specify the expiration date of the sharing (by selecting the date from the calendar or adding the number of days). It is also possible to limit the number of downloads (or set it as unlimited) based on the option selected in Share with:
- 1. Recipients only – number of downloads per recipient
- 2. My organization – number of downloads per user
- 3. Public – number of downloads together
Also, the sharing settings include the following checkboxes:
- 1. Notify me about the downloads – the owner can get information about the downloads from the recipient’s side. As soon as the users download the shared item, a notification email will be sent to the owner with the following information: user, who downloaded the item, downloaded file, downloaded time, and downloaded remaining.
- 2. Remember these settings – you can save the sharing settings for future use by checking this checkbox. This way, you won’t need to fill in the Sharing options next time.
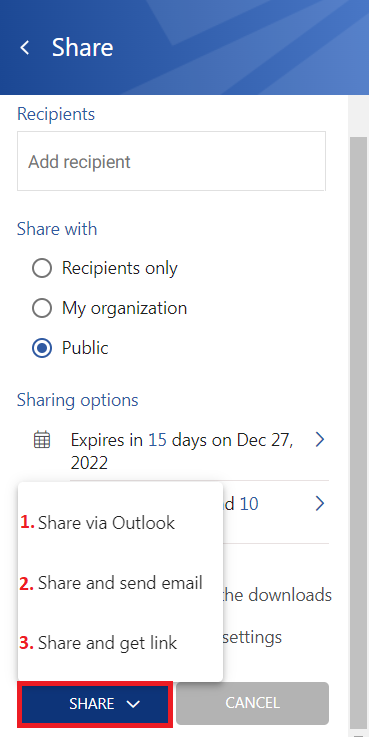
Finish the sharing by clicking on the Share button or Cancel it anytime. If you click on the Share button, 3 options will appear:
- 1. Share via Outlook – links to the shared files are inserted into the body of a new email. The from and to sections will be automatically filled with the owner’s and recipient’s email addresses.
- 2. Share and send email – lets you write a message in the Share with contentACCESS window, then click on Send and send the email (links are also inserted into the body). First, at least one recipient must be specified to use this option since the notification email is sent via contentACCESS.
- 3. Share and get link – opens a pop-up window with the link of the shared item(s) that you can copy and send to the recipients (via Teams, pasted into a notepad, etc.).
Share from the entities and context menu
As it was mentioned before, the sharing is also accessible from the entities (Browse page), search results (Search page), and context menu. The only difference from the sharing on the Share page is that the item(s) are shared from the archive models. In this case, you can select a single file (or multiple items) from the list and click on the Share button, or you can open an item’s preview and share it from the context menu. In both cases, the Share view opens, where you can specify the sharing.
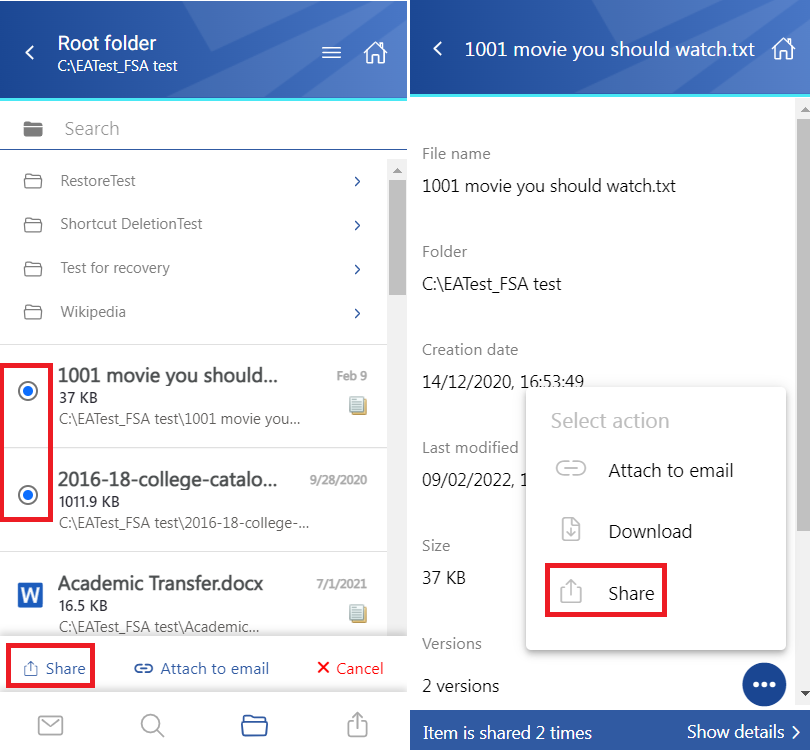
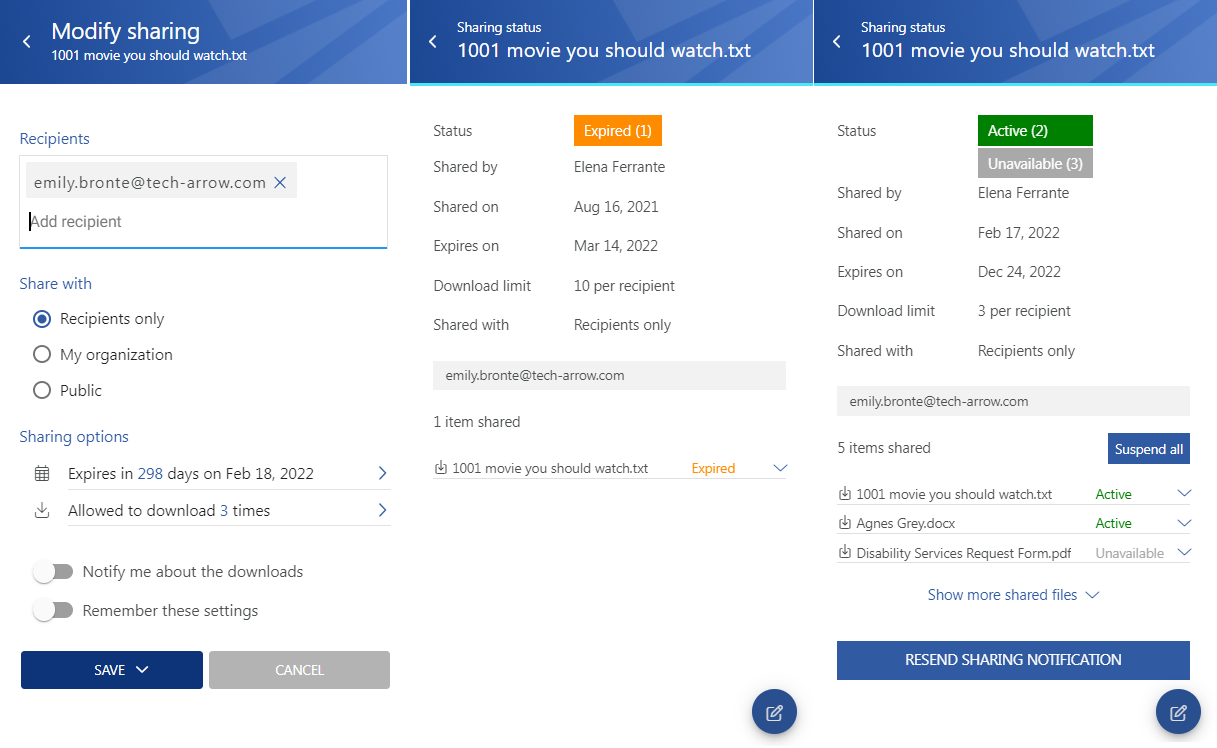
If the item was shared previously, a Sharing ribbon appears at the bottom of the page. By clicking on the Show details, the ribbon can be expanded.
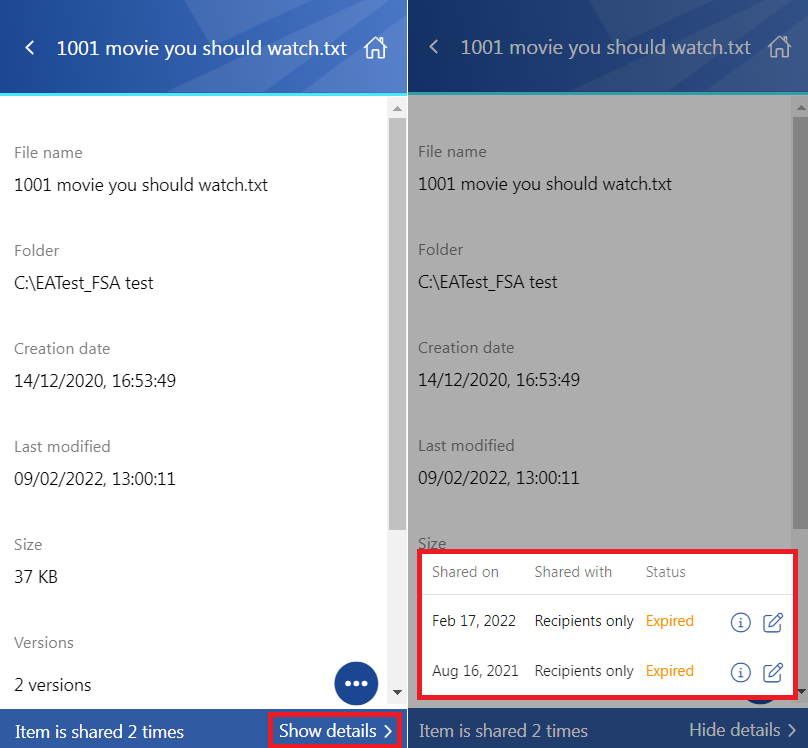 You can modify the sharing settings if you have applicable rights and permissions. It works by the same logic as the Modify sharing options window in the Sharing entity.
When you click on the Status option, the Sharing status window opens. Here, you can check the status of the sharing. From here, it is also possible to Activate, Suspend, or modify the sharing and resend the sharing notification by clicking on the Resend sharing notification button.
It is also possible to download the shared items on the Status page, but it depends on the user’s role. The owner can download all items regardless of their status (expired, unavailable, suspended, active). The recipients can download only the active items. If the shared files are inactive/suspended/expired, the download icon is not available for the logged-in user.
