contentACCESS Portal documentation – version 6.4

  1. What is contentACCESS Portal?
  2. Main contentACCESS Portal functions:
  3. Requirements
    1. Hardware requirements
    2. Software requirements
    3. Other requirements
    4. Supported browsers
  4. Installation
  5. Logging into contentACCESS Portal
  6. contentACCESS Portal user interface
    1. “Connect to” menu
    2. contentACCESS Portal’s navigation pane
    3. Item list and item preview
    4. Layout selector
    5. Download from the item list/item preview in contentACCESS Portal
    6. Hide/show function
    7. Sorting in contentACCESS Portal
    8. User profile page
    9. User interface settings
  7. Search functions in contentACCESS Portal: “Connect to search”, quick search, advanced search, GDPR search
    1. Search query language
    2. “Connect to” search
    3. Quick search
    4. Fulltext search
    5. Advanced search
    6. Periodical search
    7. GDPR search
    8. Editing Quick, Basic and Advanced search criteria
    9. eDiscovery process
  8. Folder selection methods
    1. Multi-selection
    2. Recursive folder selection
  9. Tasks supported by entities (models)
    1. Enabling/disabling tasks
    2. Create report
    3. Share item(s)
    4. Legal hold
    5. Tasks list
    6. Tasks page
    7. Download of export actions
    8. Manifest file and its settings
  10. File System Archive
    1. File versions
    2. File Archive tasks
  11. Email Archive
    1. Email Archive tasks
  12. GDPR Application
    1. GDPR Application tasks
  13. GDPR Exchange
    1. GDPR Exchange tasks
  14. GDPR File system
    1. GDPR File system tasks
  15. SharePoint Archive
    1. Item versions in SharePoint Archive
    2. SharePoint archive tasks
    3. Opening shortcuts from SharePoint
  16. OneDrive Archive
    1. Item versions in OneDrive Archive
    2. OneDrive Archive tasks
    3. Opening shortcuts from OneDrive
  17. Sharing
    1. Sharing tasks
  18. Teams archive
    1. Item versions in Teams archive
    2. Teams archive tasks
    3. Teams chat archive tasks
    4. Opening shortcuts from Teams

7.7.GDPR search

The general data protection regulation, or as most people know it GDPR, brought new rules about data storage and regulation. Having a proper overview of all company and personal data – where it is stored, for how long, who is accessing it, may seem like a hard task now. That’s why we programmed our GDPR search, so it would be much easier and faster for our customers to find all the personal data they need. The predefined search patterns allow the user to search for the most common, sought, requested, and necessary data in a very user-friendly way.

Does your customer want you to find and delete his personal data? Or do you just want to check where a credit card number was mentioned? No problem!

To get to the GDPR search page, click on the search type dropdown list and choose the GDPR search.

Note: When searching in multiple archives, the sorting of results may be a bit “out of order”. The reason is that the search engine is not able to merge and sort data coming from multiple sources(archives) and sorts results from every archive separately.


On the GDPR search page, it is possible to choose between two tabs – Search for personal data and Search for all sensitive data. The user can change the predefined search patterns by clicking on the Change template button on both tabs, but we don’t recommend it. If the patterns were changed, the user can also reset them back to their original state.
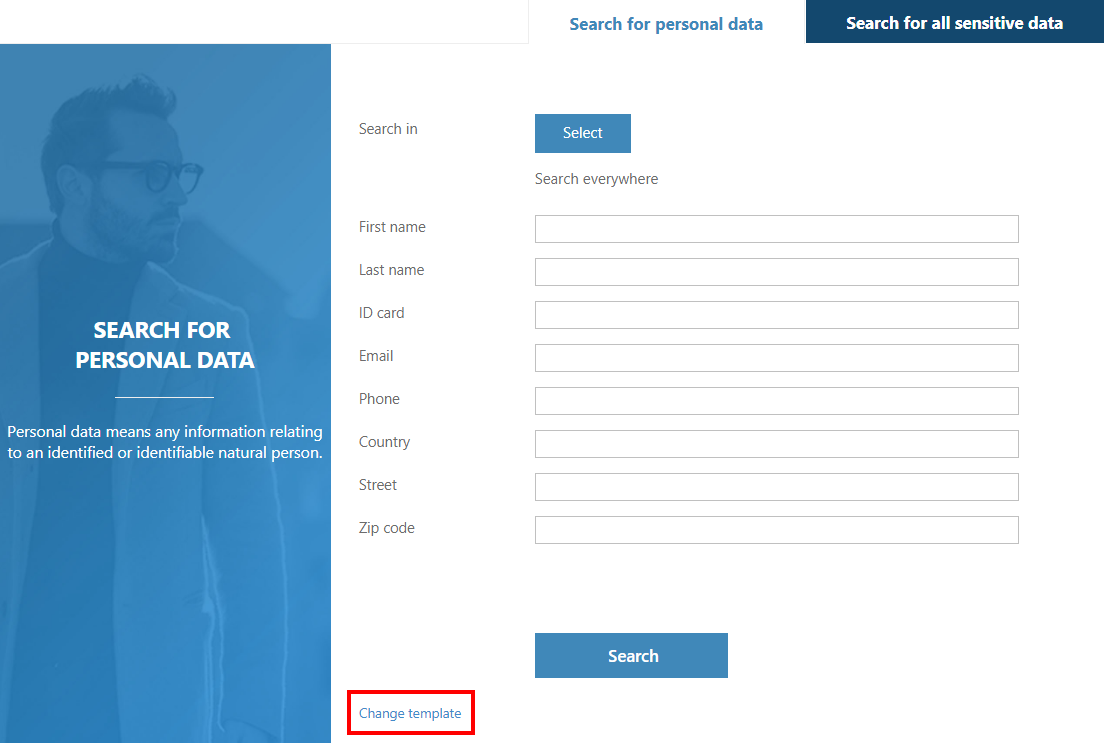
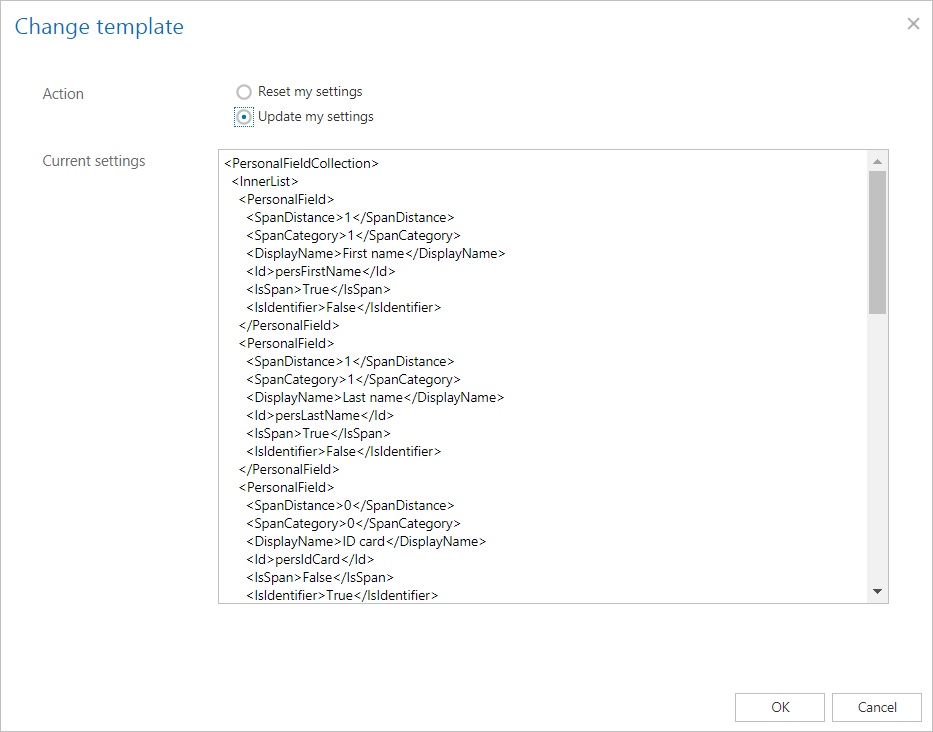
Note: To be able to change the patterns, the user must have the Customize GDPR search permission allowed in his role, otherwise this option won’t even be visible.


Search for personal data
On this page, the user can search for any information related to an identified person.
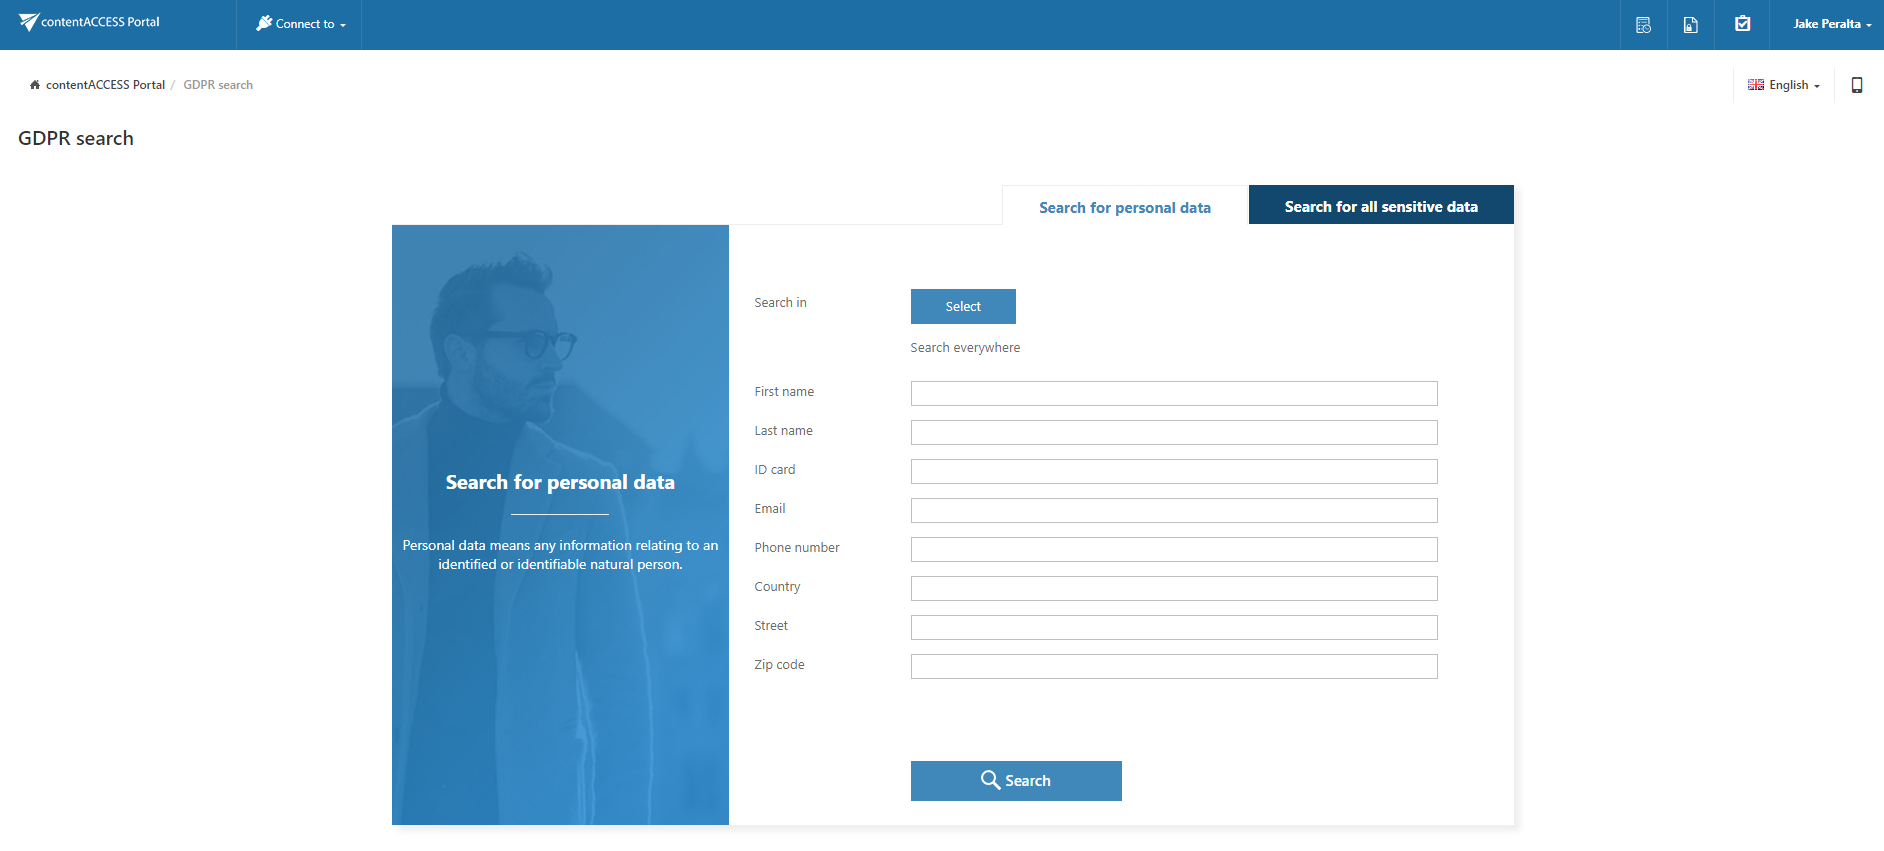
By clicking on the Select button, the entity selector popup window will open. Here the user may select entities he wants to search in. It is also possible to filter the entities by model type. Select the desired entities and click on OK.
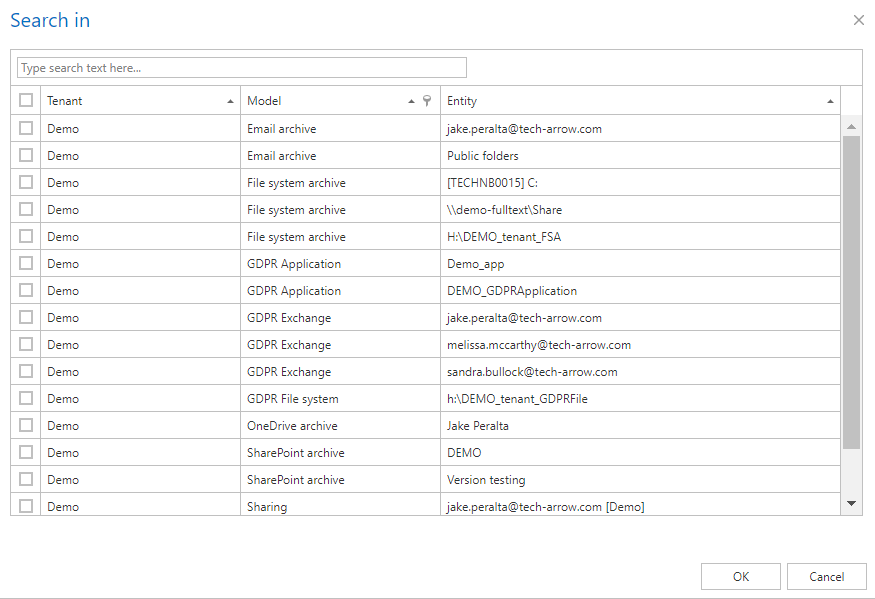
Note: The search can be performed only on the entities allowed by the user’s roles and permissions.


The selected entities will be displayed under the Select button. Specify the information you want to search for and click on the Search button.
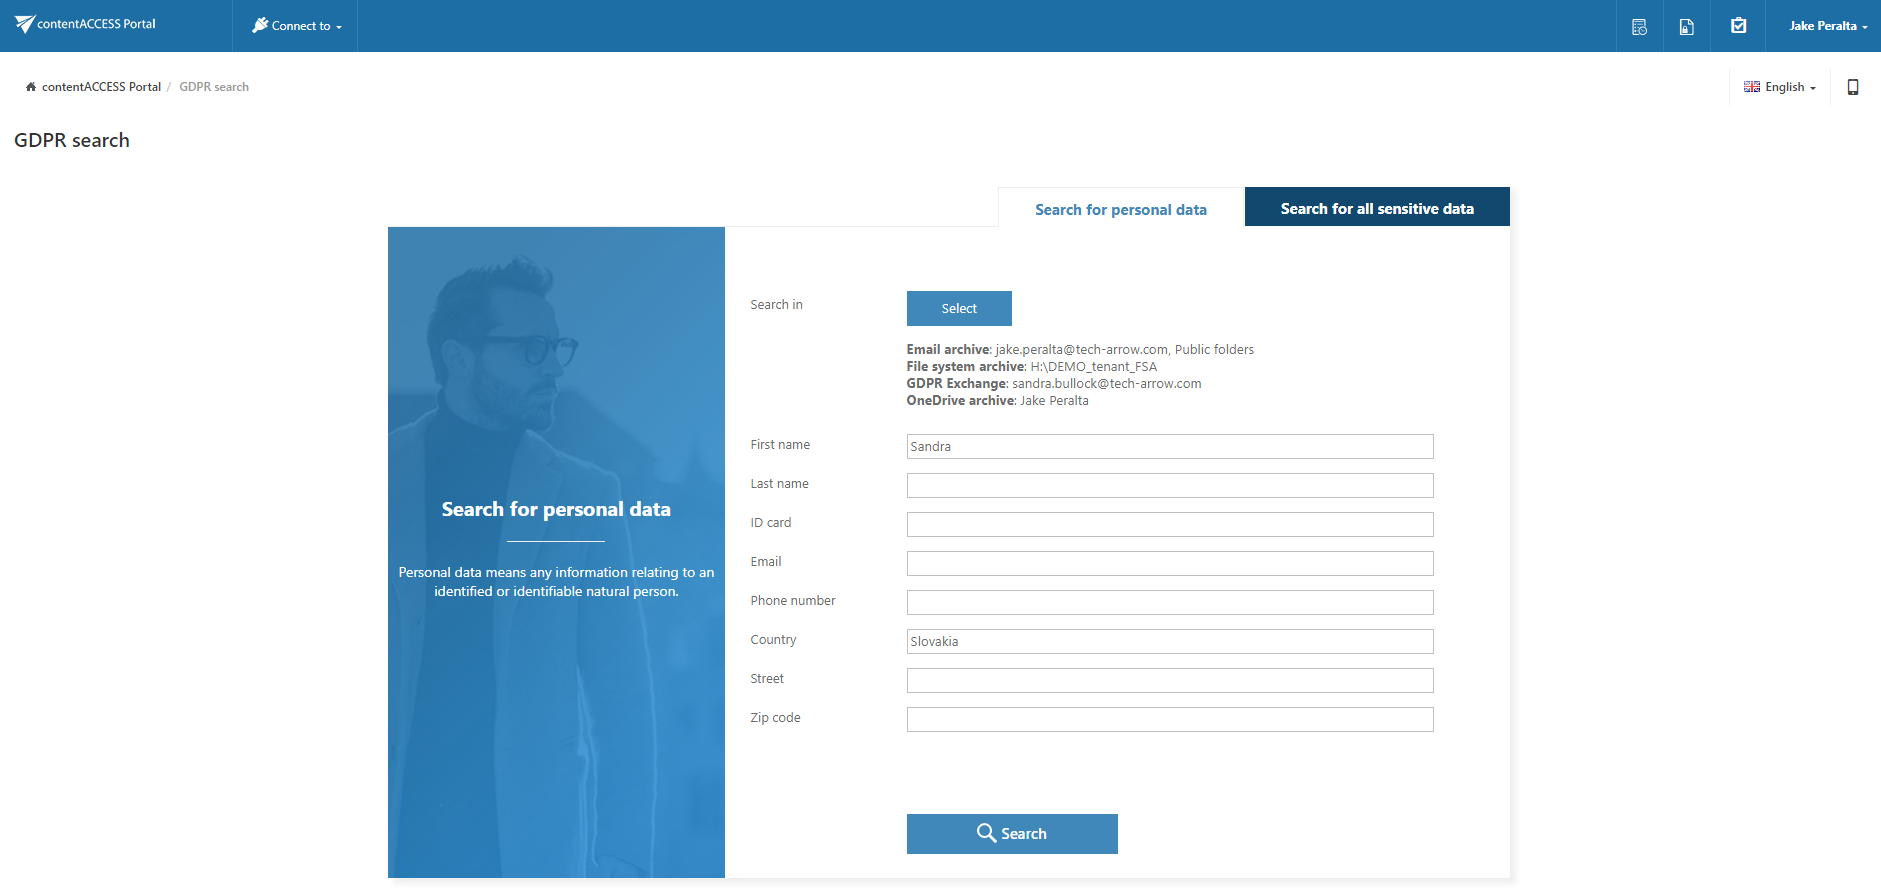
The search results will be displayed and you can perform all the actions as with results of Quick search or Advanced search – export, create report, legal hold, mark for delete and even create periodical search.

Search for all sensitive data
On this page, the user can search for bank accounts, credit card numbers and phone numbers.
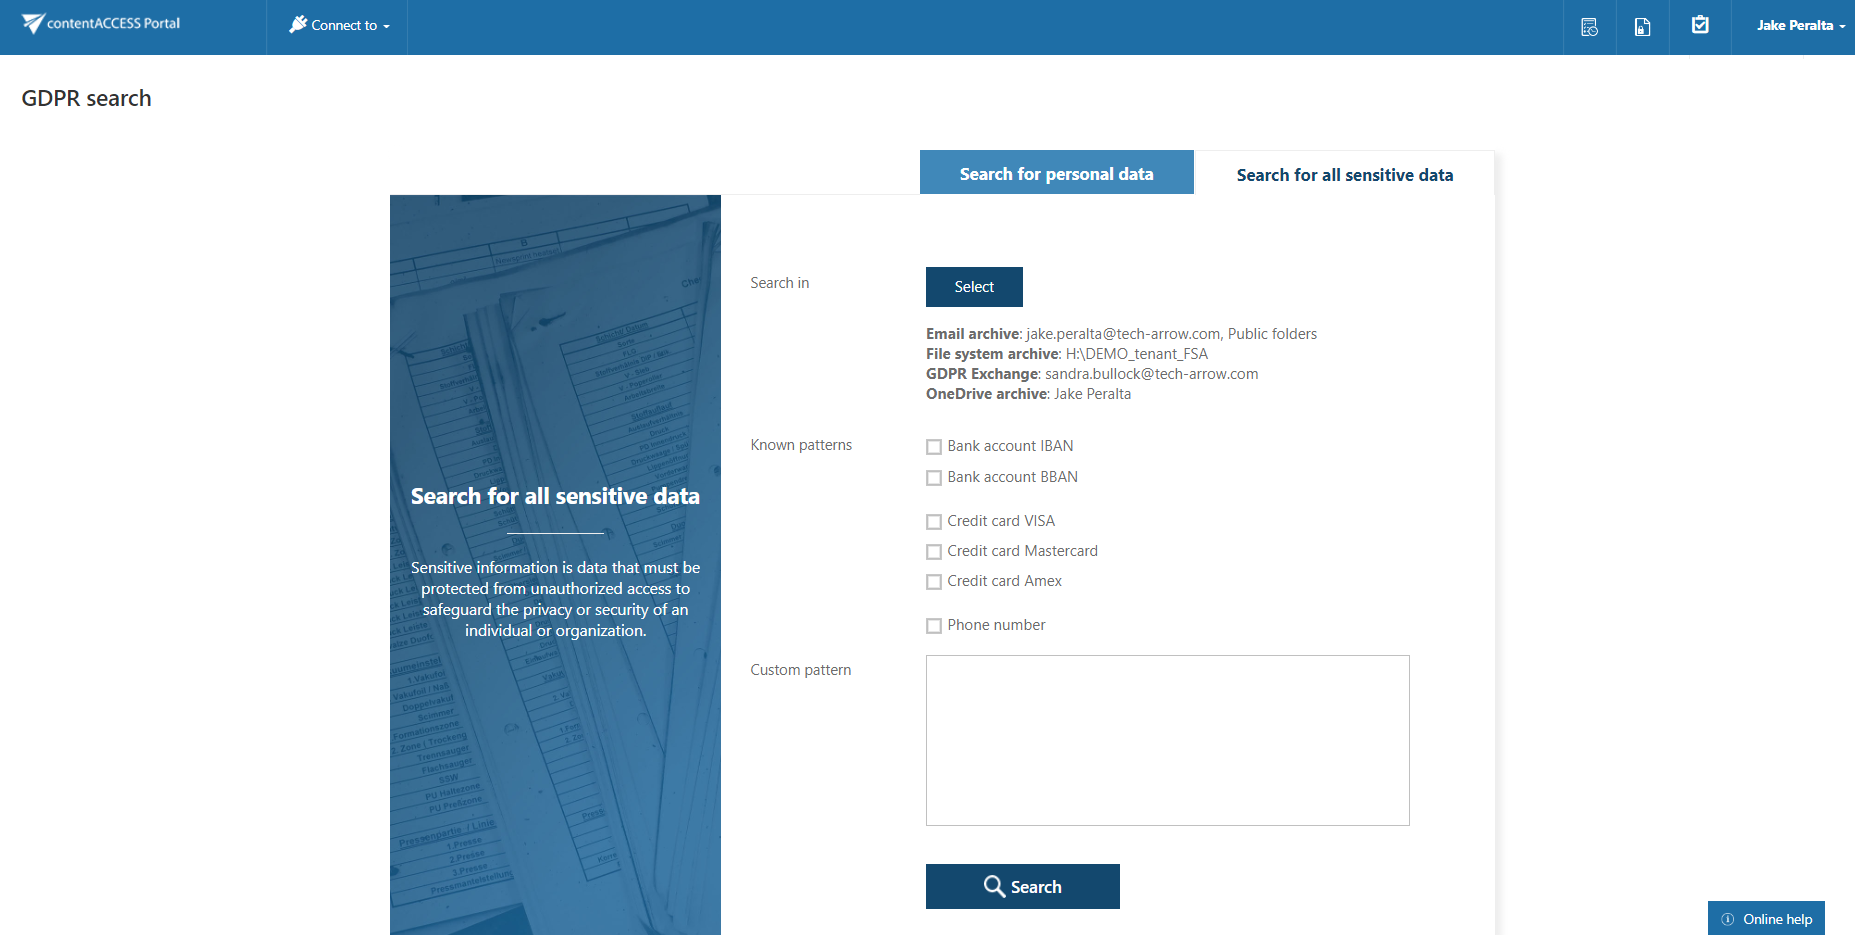
By clicking on the Select button, the entity selector popup window will open. Here the user may select entities he wants to search in. It is also possible to filter the entities by model type. Select the desired entities and click on OK.
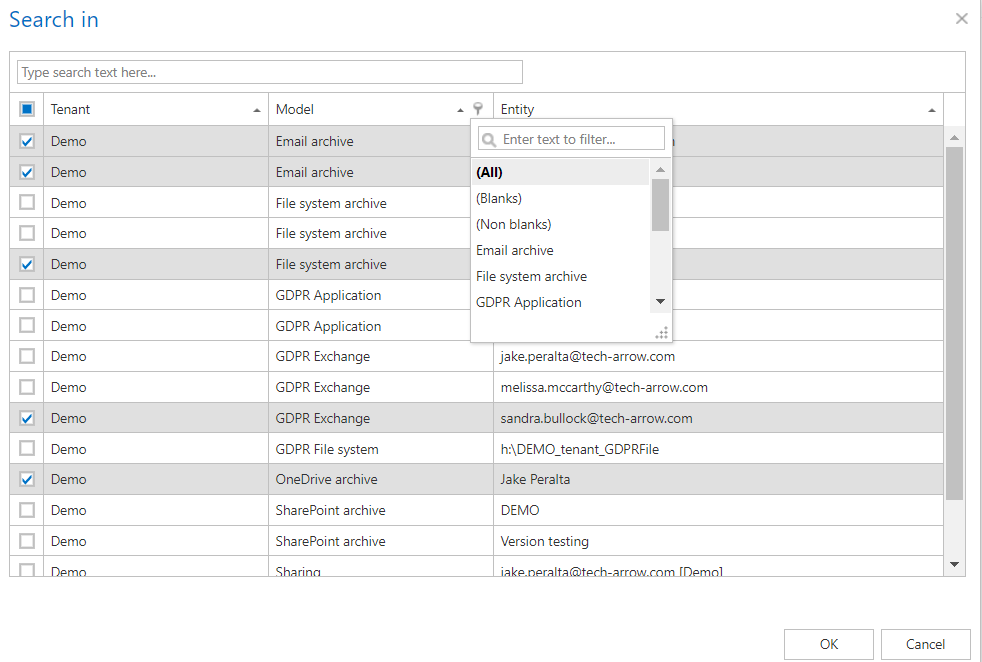
Note: The search can be performed only on the entities allowed by the user’s roles and permissions.


The selected entities will be displayed under the Select button. Select the information you want to search for, or define your own pattern and click on the Search button.
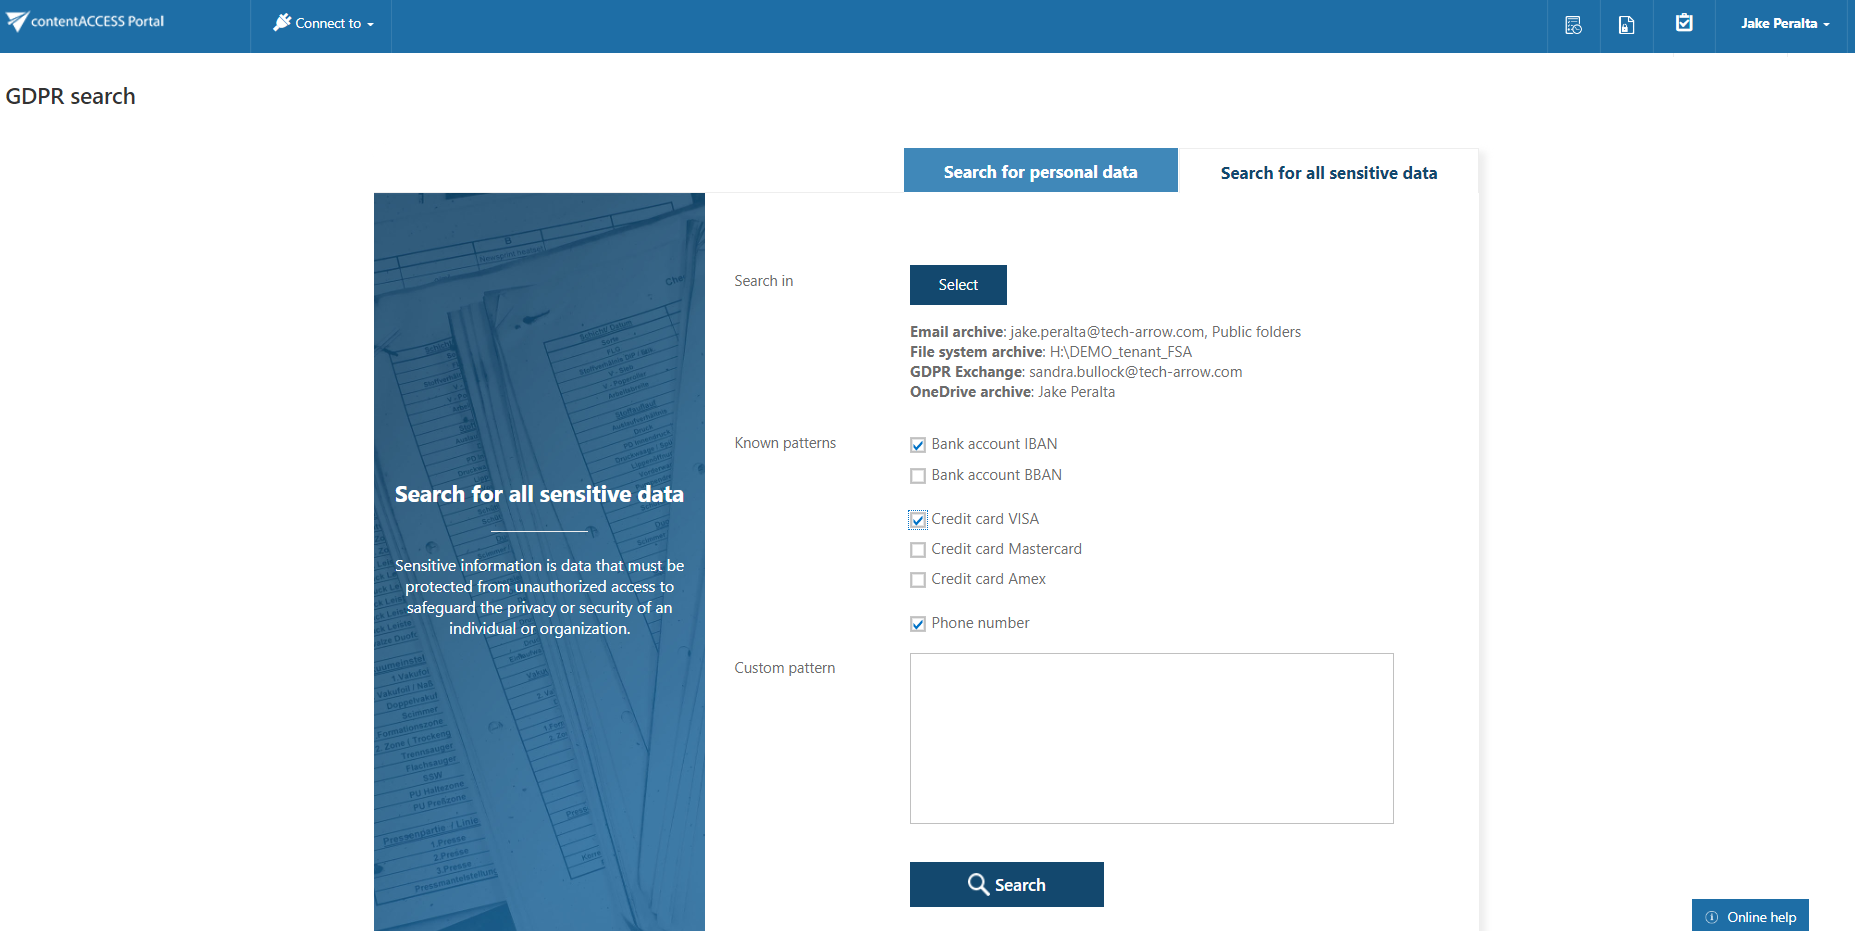
The search results will be displayed and you can perform all the actions as with results of Quick search or Advanced search – export, create report, legal hold, mark for delete and even create periodical search.

Note: If Enable hit highlighting is turned on in Central administration, the located words will be highlighted with a yellow color.
Yes No Suggest edit
Help Guide Powered by Documentor
Suggest Edit