3.Compose mode activation and usage
- Create a new mail item
- Choose Upload to contentACCESS (from ribbon or from the list of add-ins, depends on the client application)
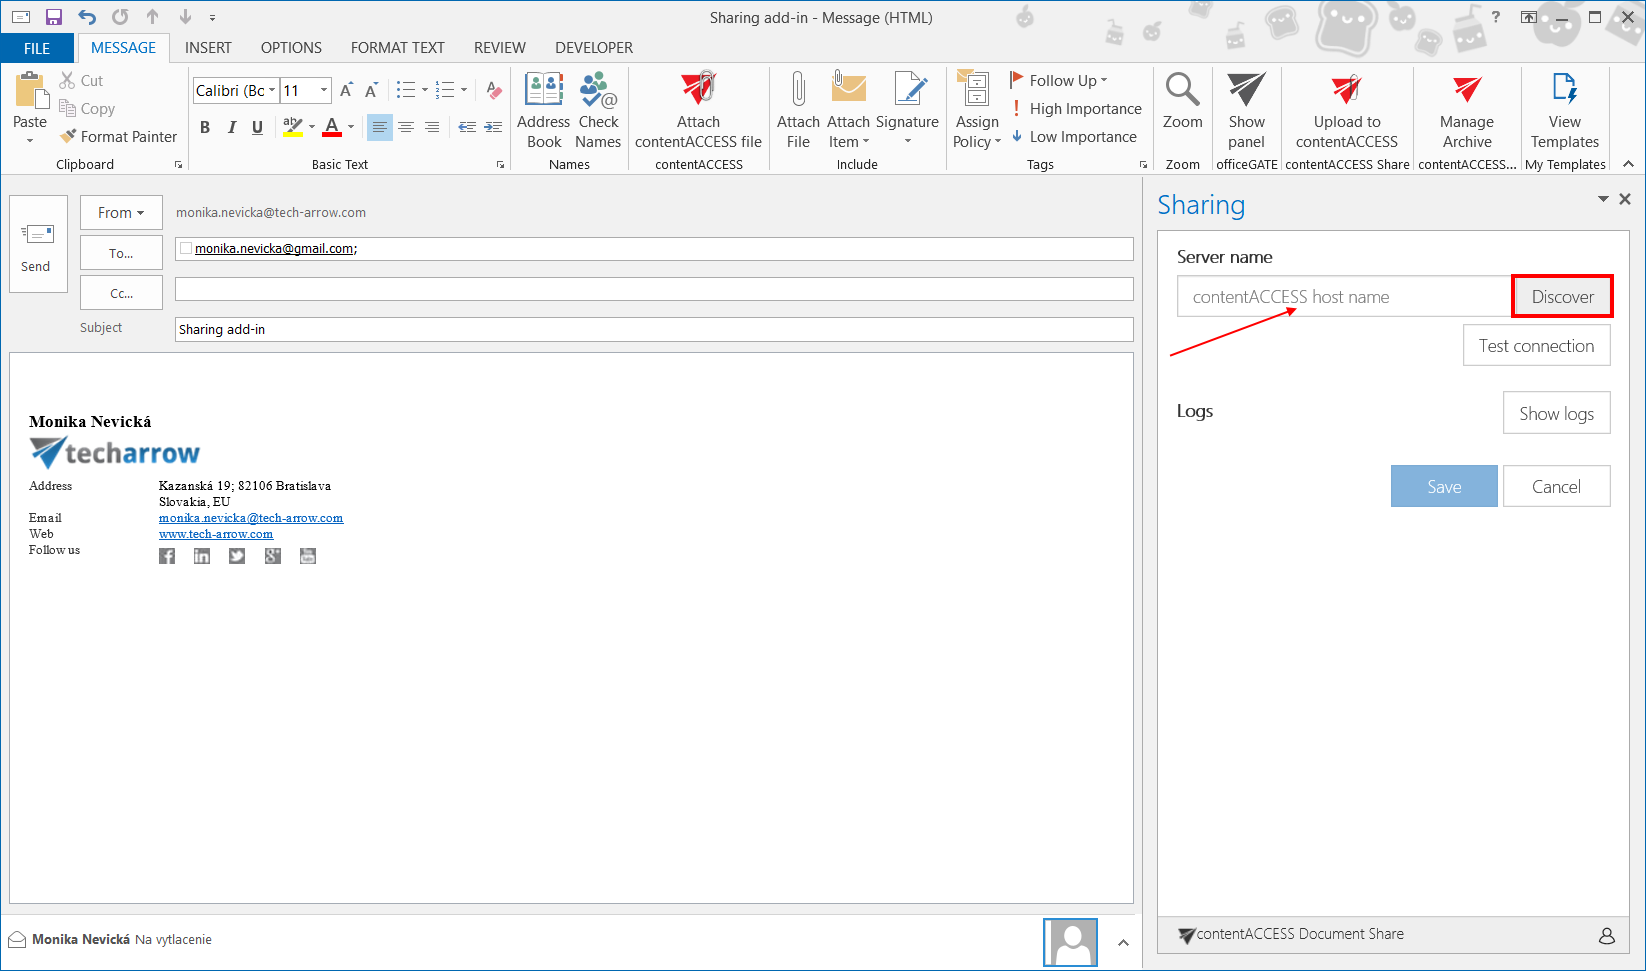
- If Office loads the add-in UI and it is the first run, the user should see the Get started page. After clicking on the Get started button, the connection page opens. Here the user can define server name (only the host name!), where contentACCESS is running. It is enough to type the host name, no need to type the protocol. If you don’t know the exact contentACCESS server host name, you can use the Discover functionality, which will check available contentACCESS servers for you. Logs can be viewed by clicking on the Show logs button.
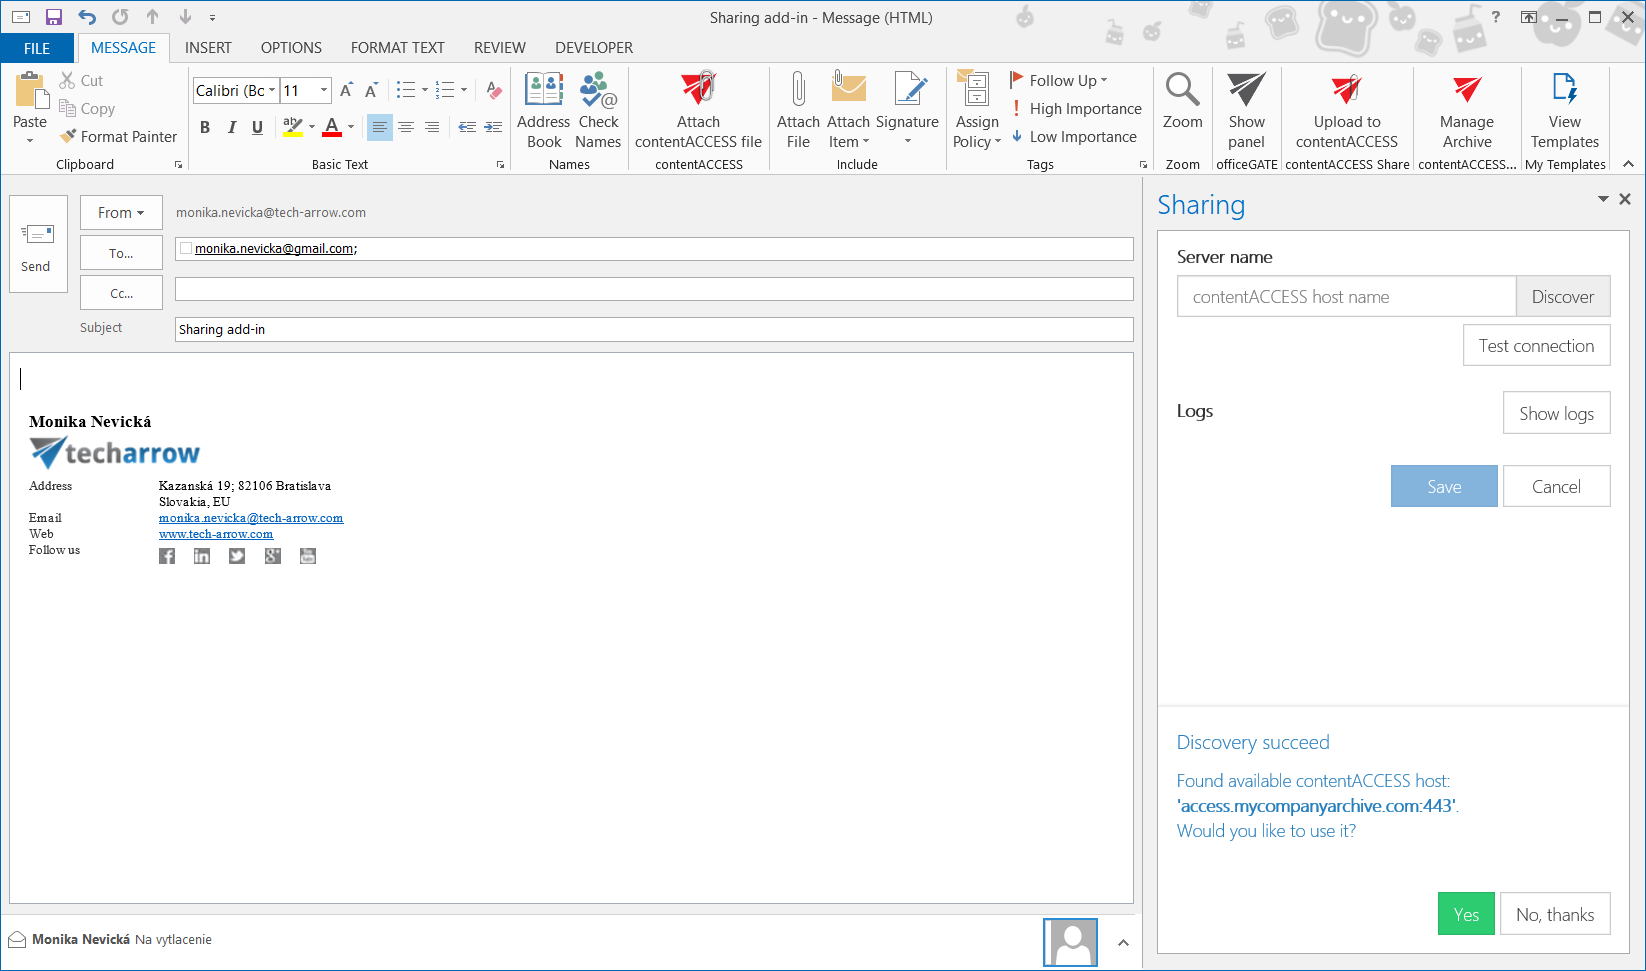
- If a server was successfully discovered, you should see the following message, where the name of the discovered server will be written. If discovery didn’t find any server, you can still set the contentACCESS server name manually.
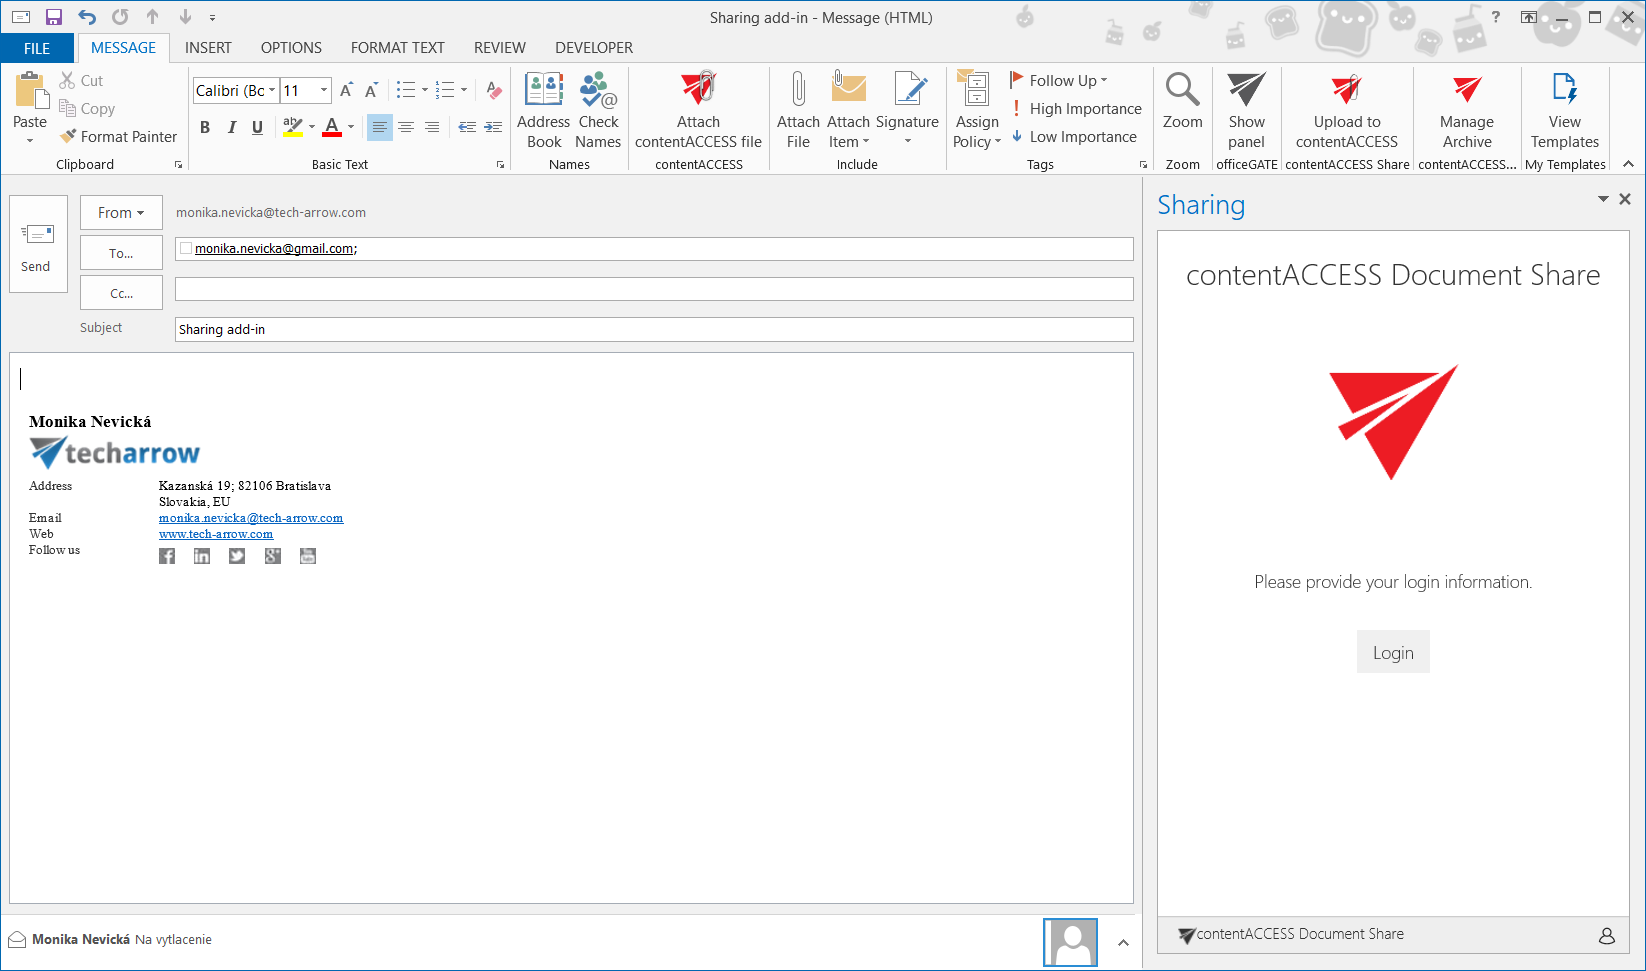
- After connecting to contentACCESS server, you will need to authenticate yourself.
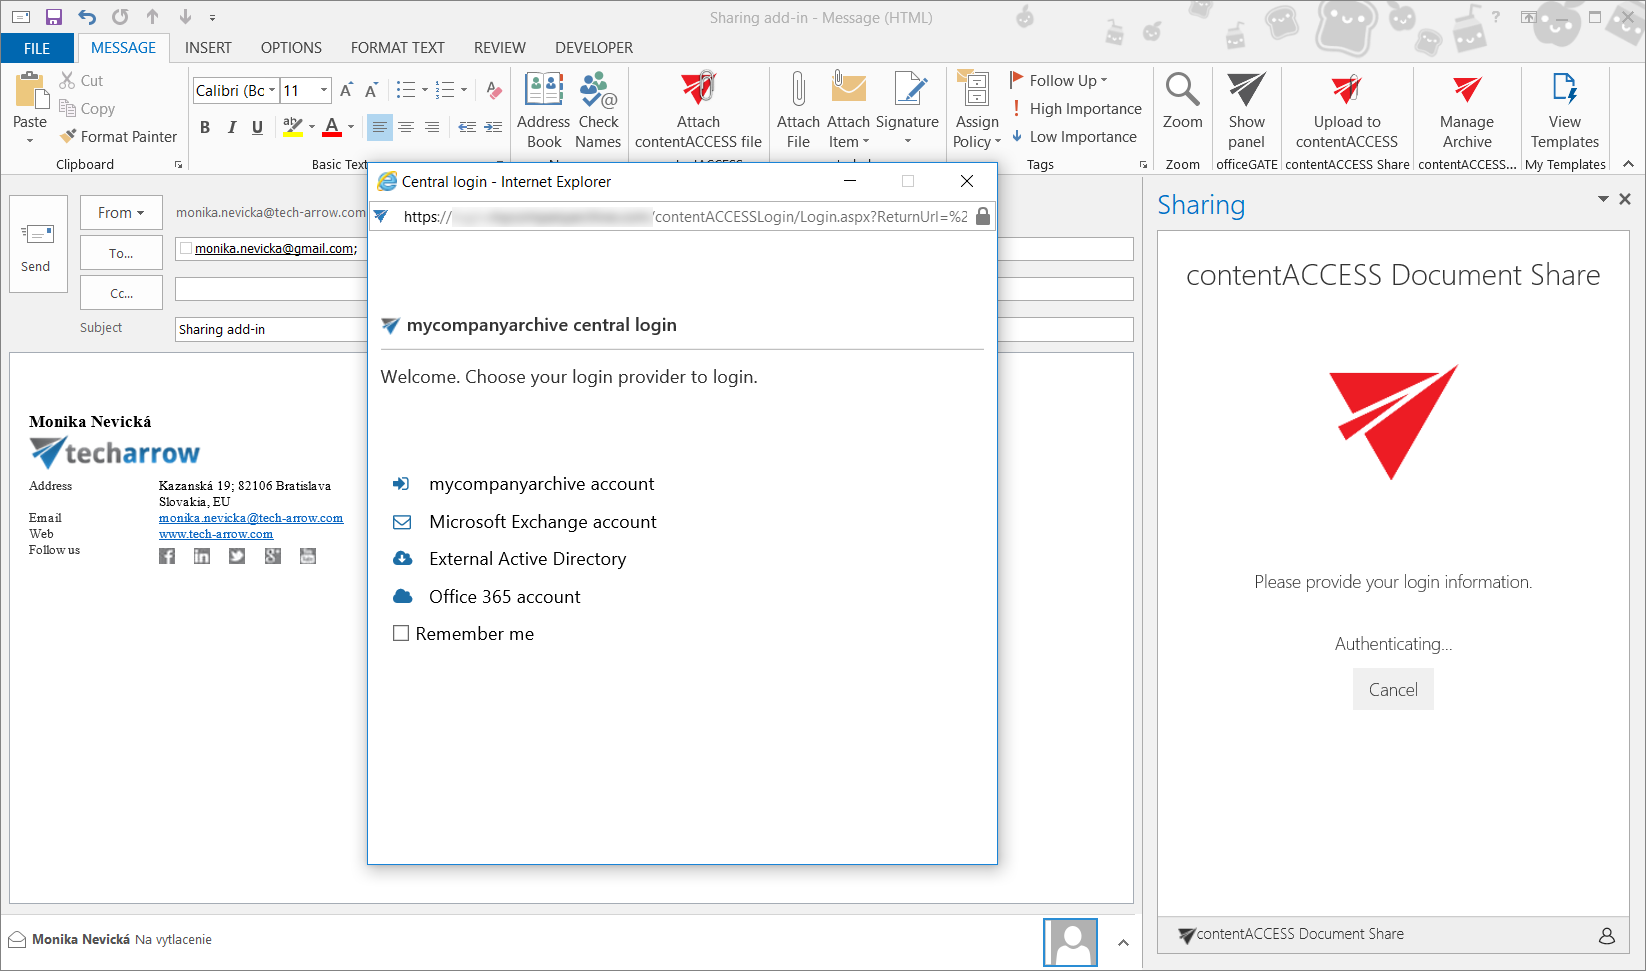
- After clicking on the Login button, a pop-up with configured login providers will open. Choose one provider and log in.
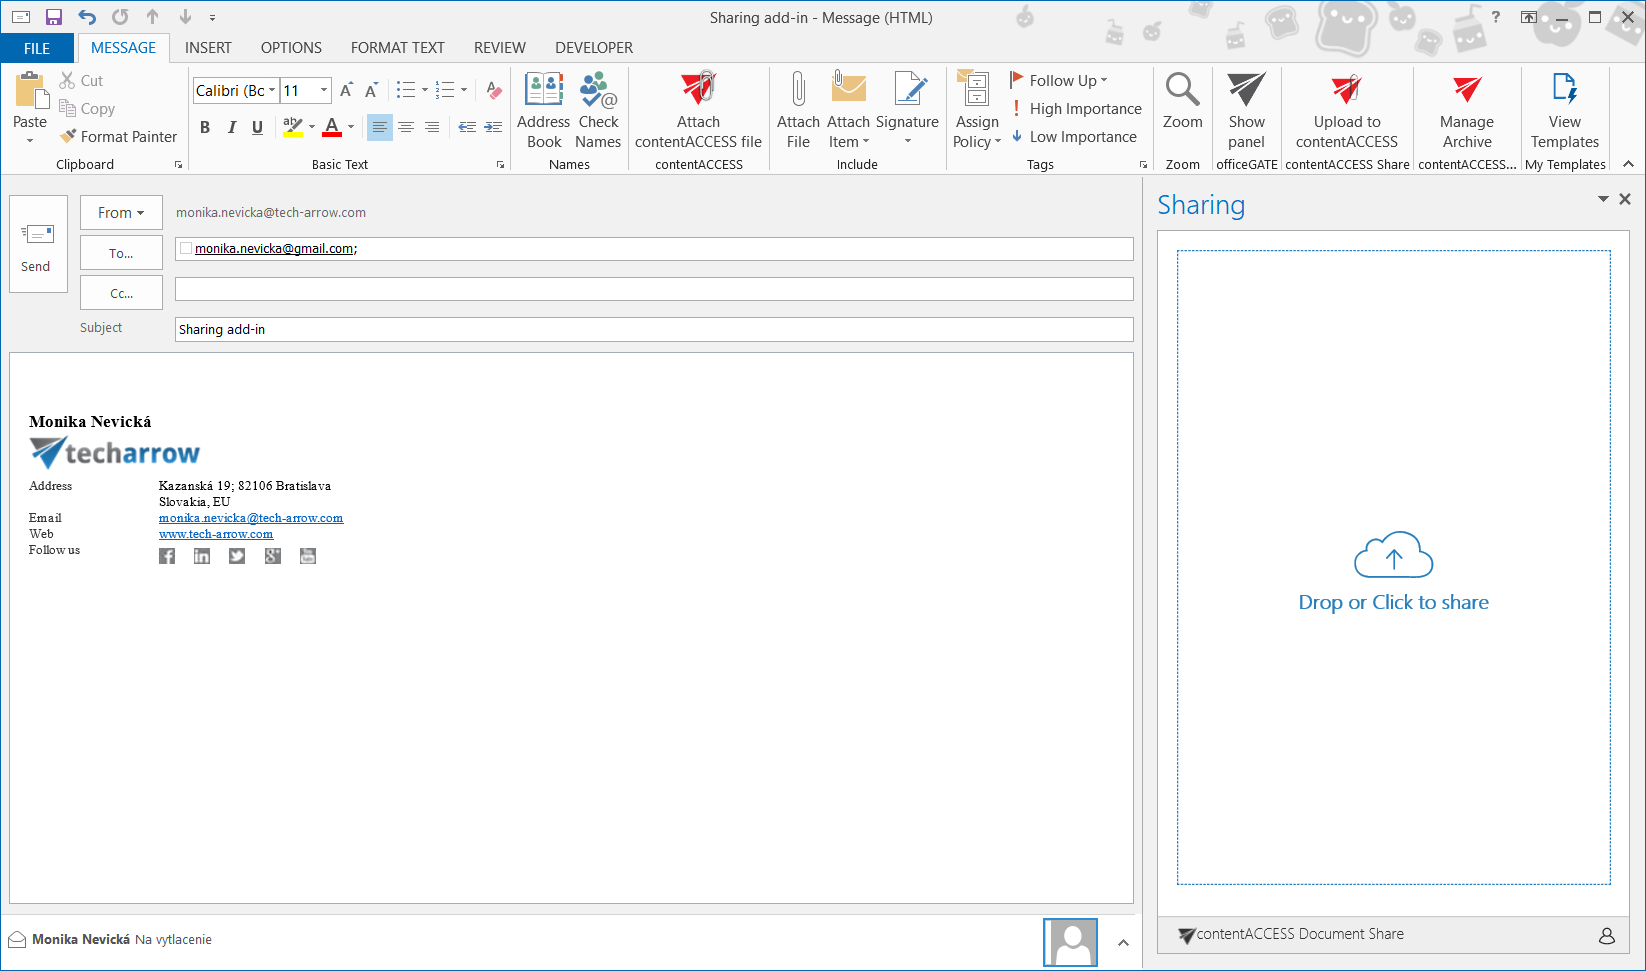
- After entering the credentials for selected login provider and successfully logging in, the user should see the upload page. He can drag and drop files – those will be uploaded, or click on the upload area, which will open a dialog where the user can select file(s) to be uploaded.
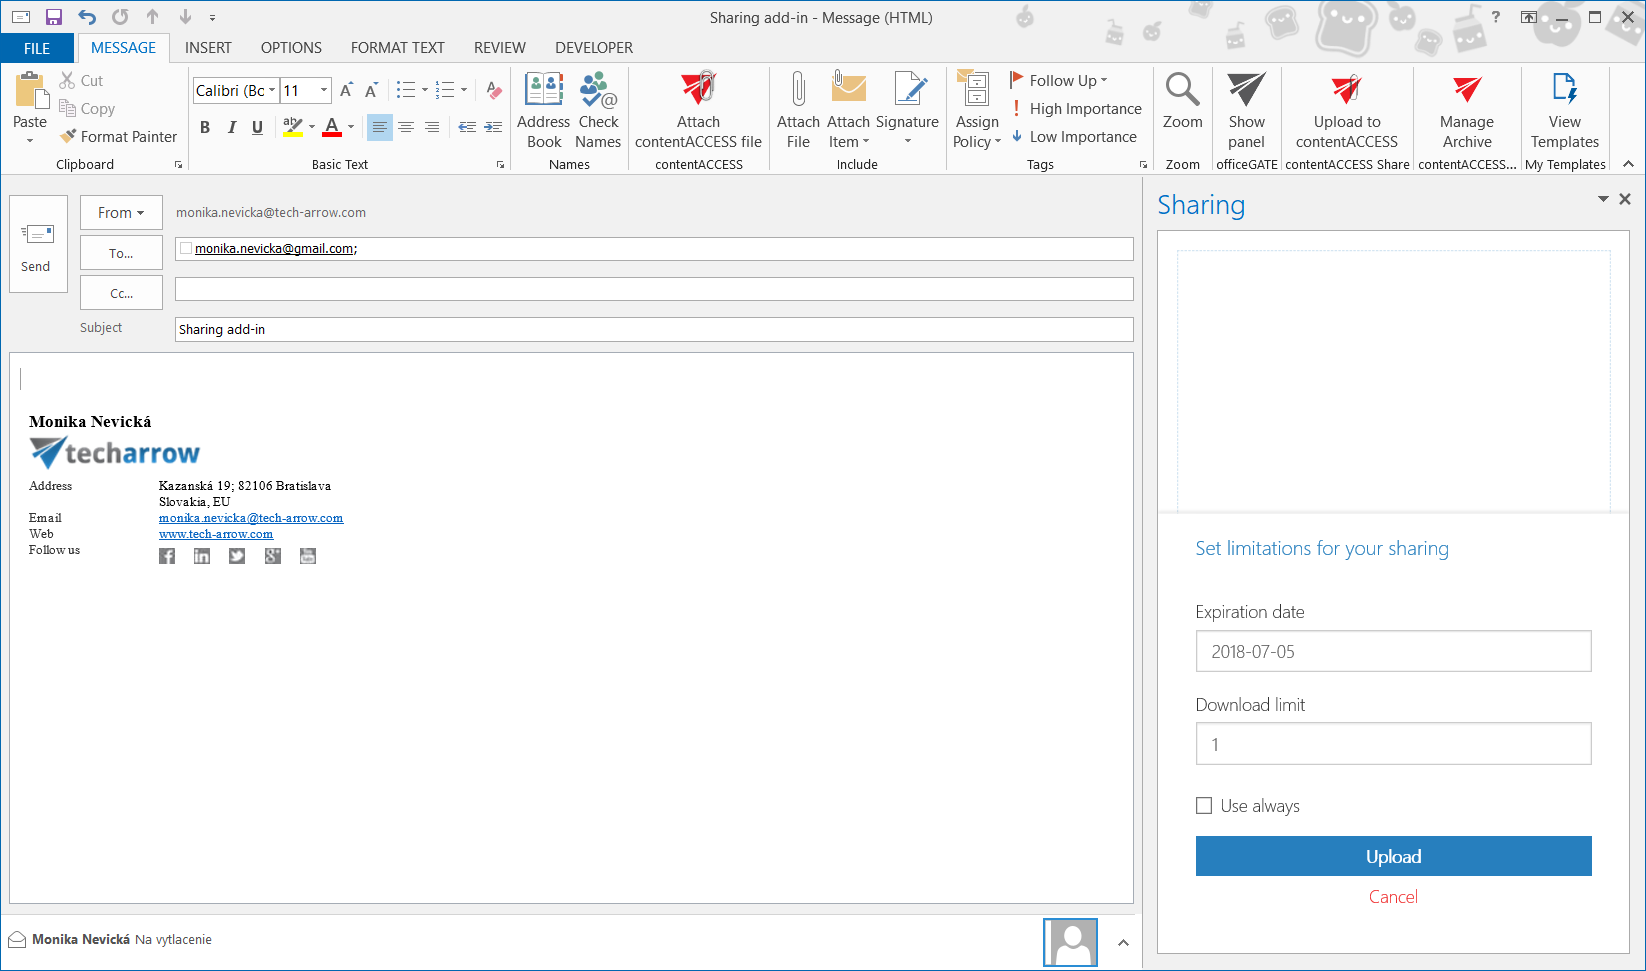
- Before the upload is completed, a dialog, where expiration date and download limit for the shared item has to be set, opens. If the user checks the Use always checkbox, the app will use the values defined here for every sharing (the values can be changed from menu).
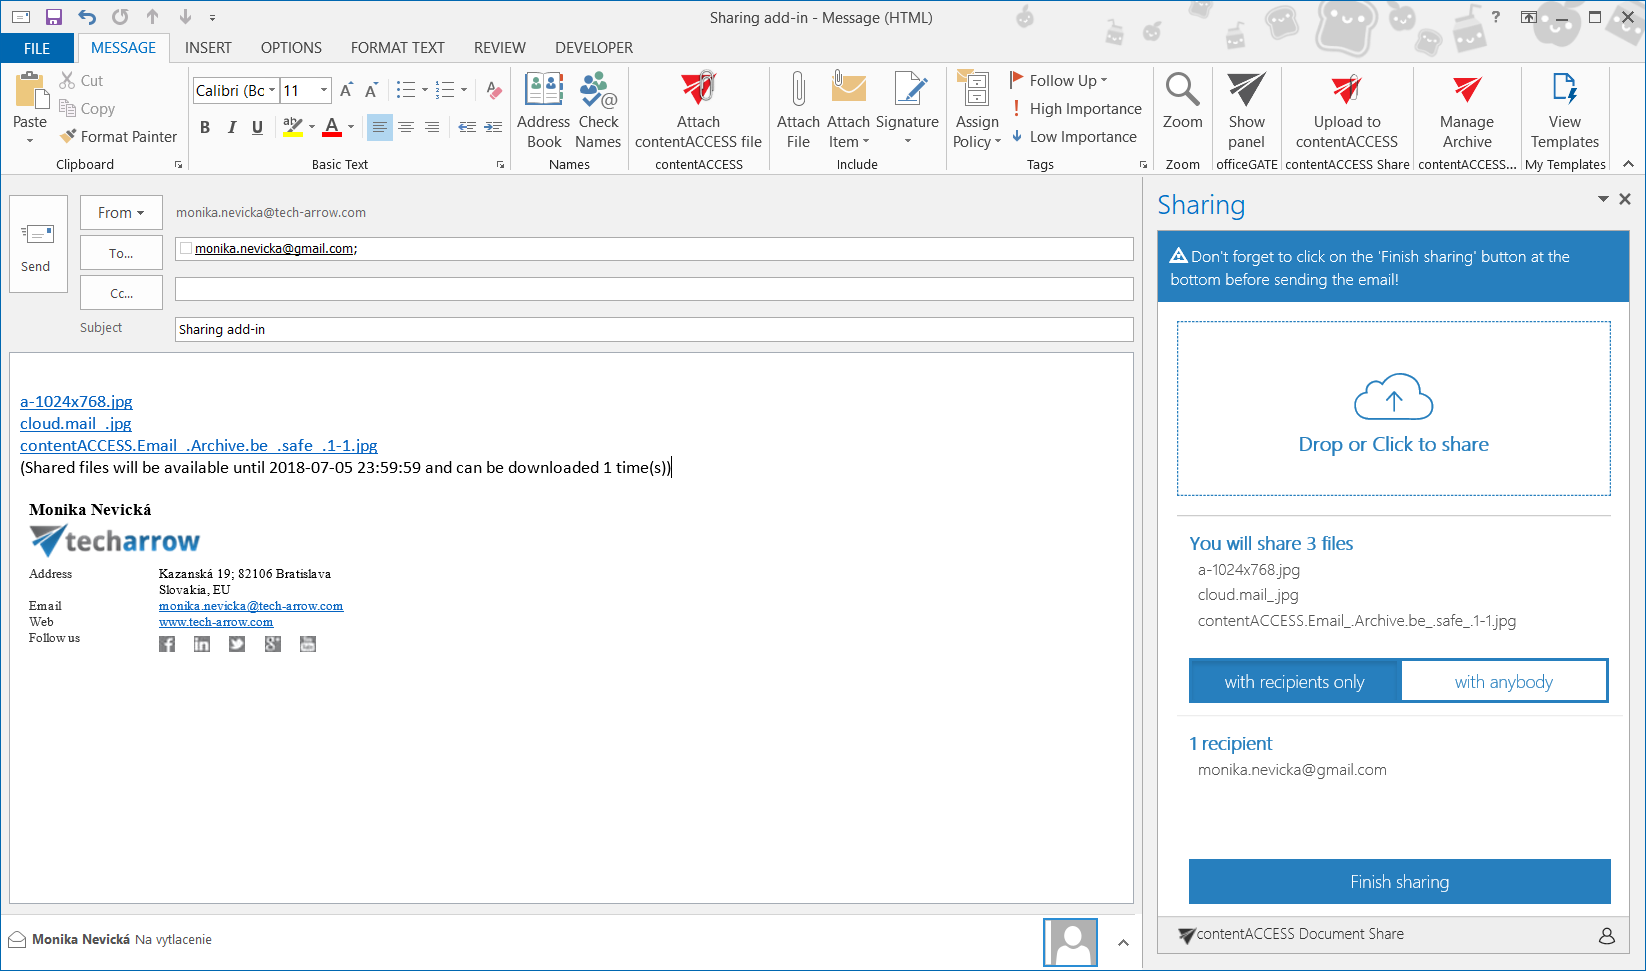
- After clicking on the Upload button (if the Use always checkbox was checked, step 8 will be skipped), the secure sharing page opens. On this page it is possible to see what item(s) will be shared and select who should be able to download the shared item(s) – if Recipients only (only recipients of the email) or Anybody (for example if the email is forwarded to other people). If the link should be accessible only for the recipients of the email, the user needs to click on the Finish sharing button before sending the email.
- After the item has been successfully uploaded and recipients were set, the link will be injected into the body of the email. There is a known issue that on mobile devices it is not possible to inject HTML into body. The link (HTML formatted) is displayed as text in the body.
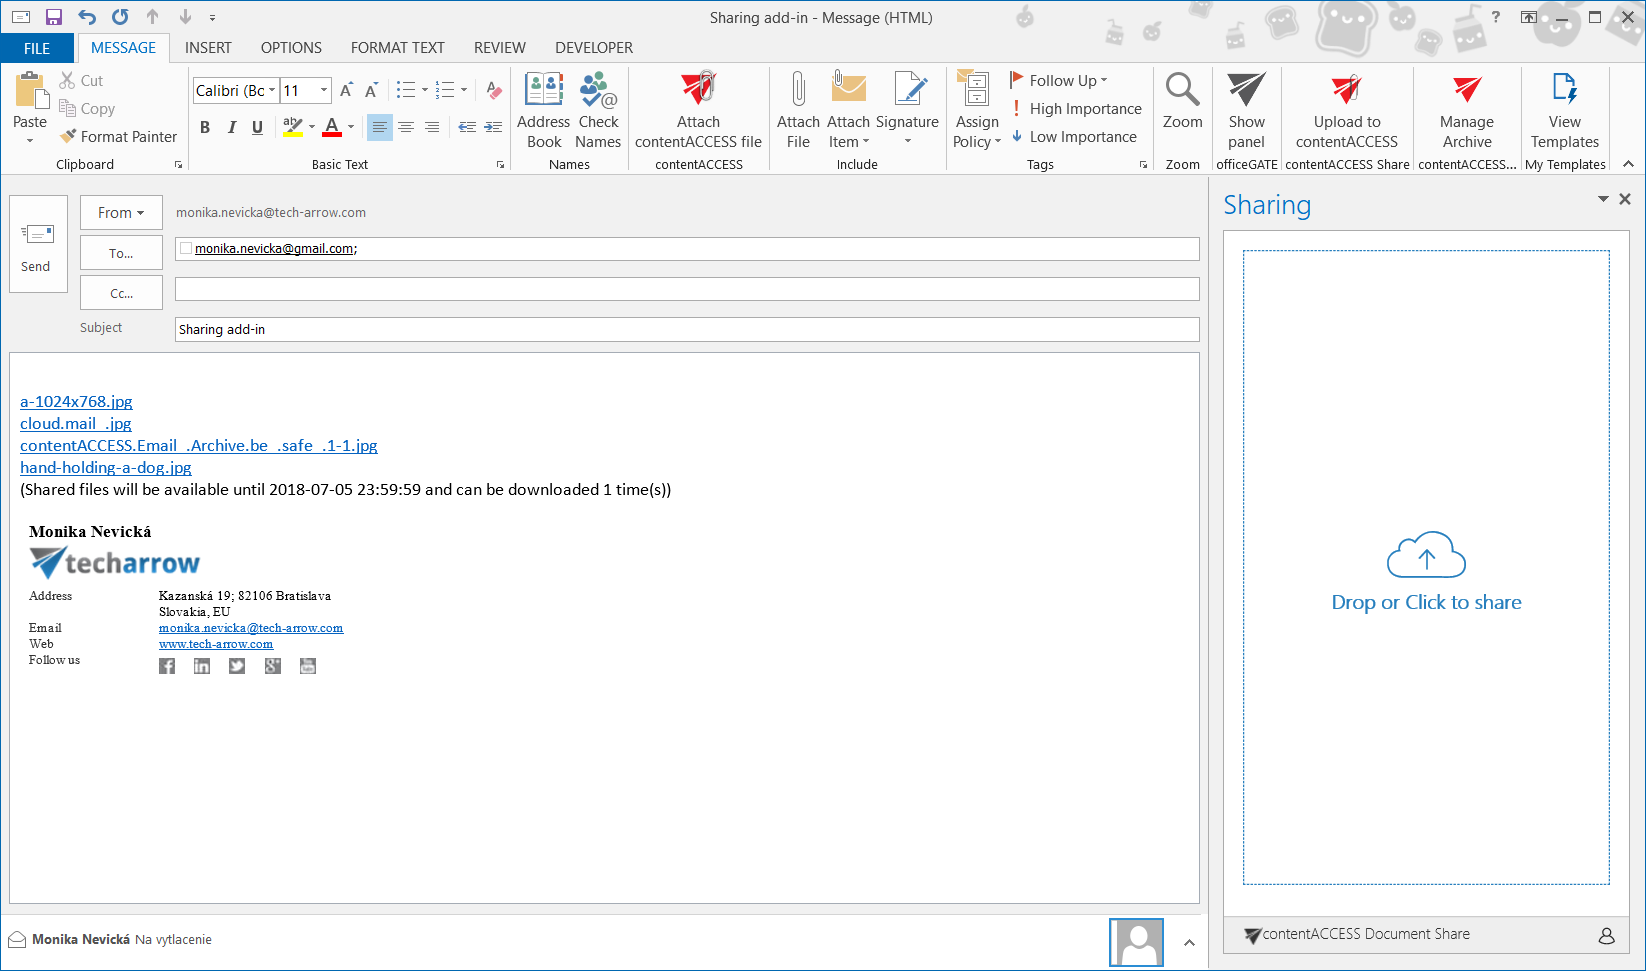
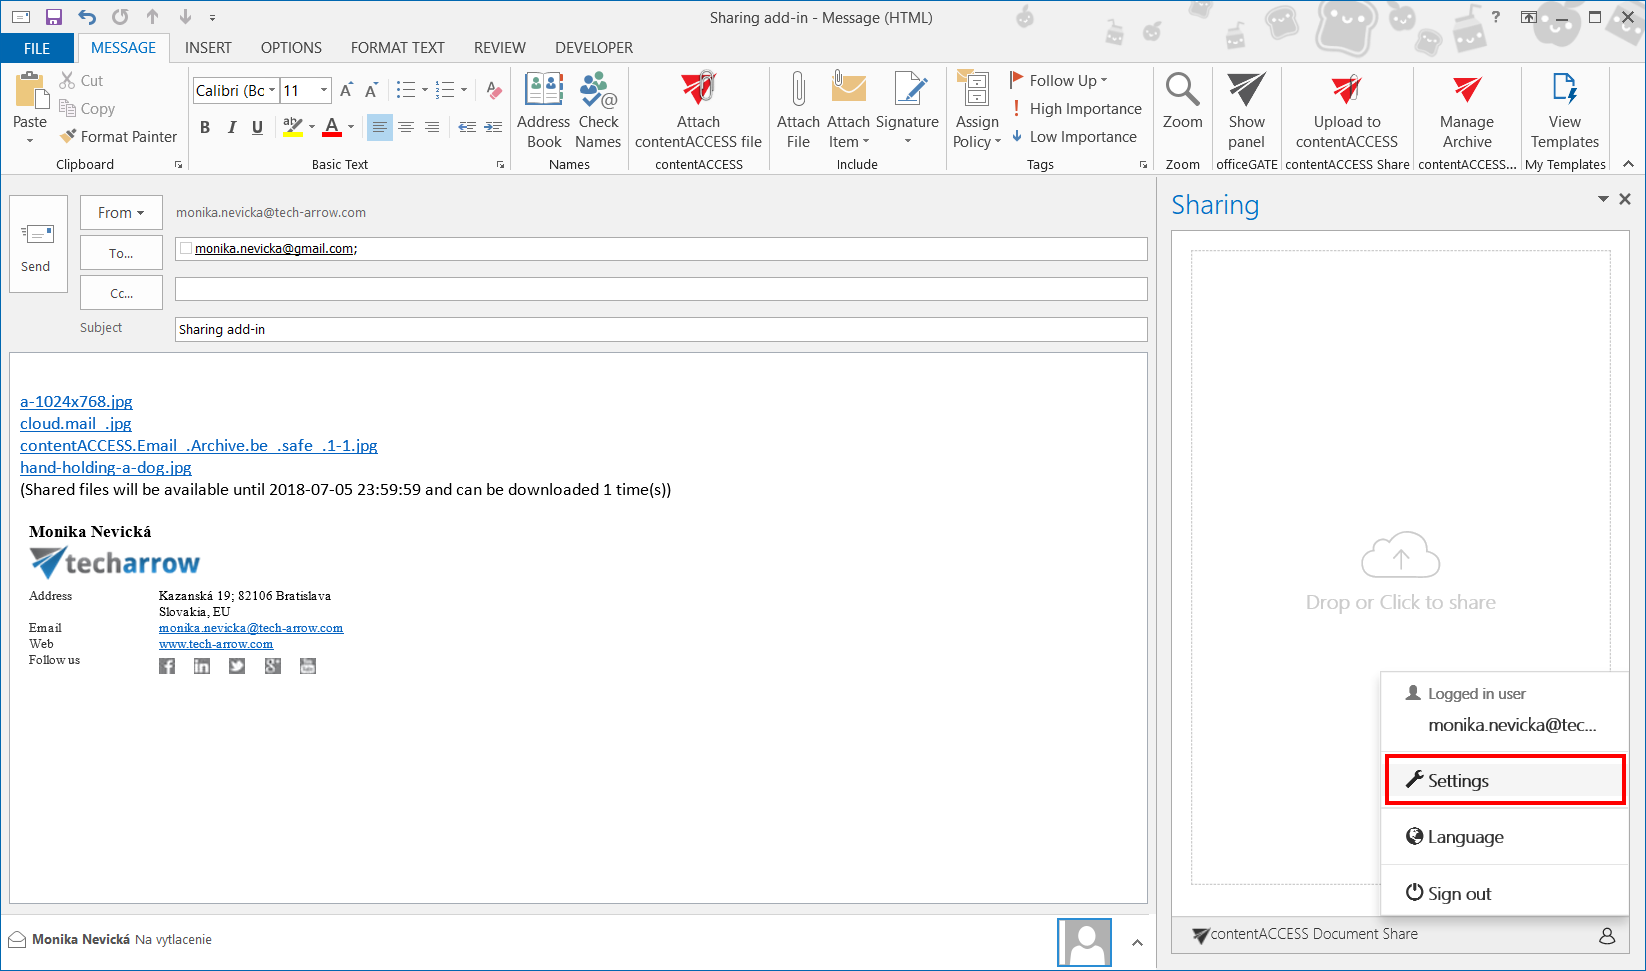
In the Compose mode we can configure advanced settings such as Expiration and Download count limit for the uploaded item(s). To open the Configuration page, click on the icon in the lower right corner – it will open the drop-down menu. Select Settings.
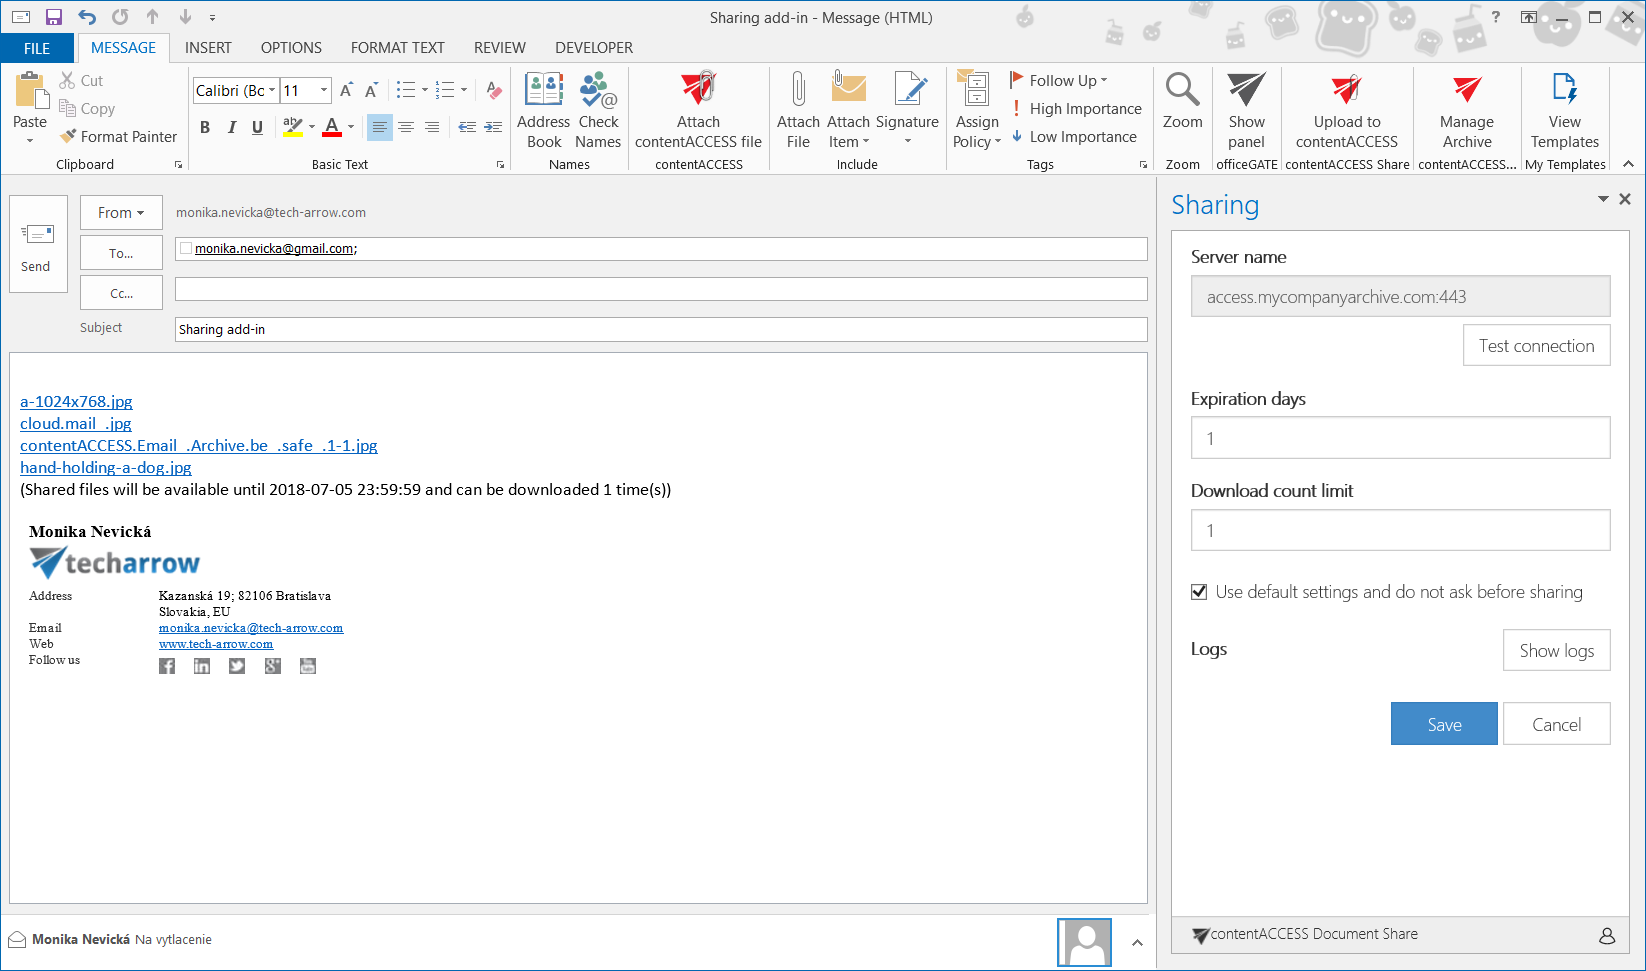
It is possible to check/uncheck the Use default settings option here – if checked, then before uploading the dialog asking for limits won’t appear, but the limits will be taken automatically from the settings. Any change has to be saved by clicking on the Save button. To check if the connection with the server can be established, click on the Test connection button.
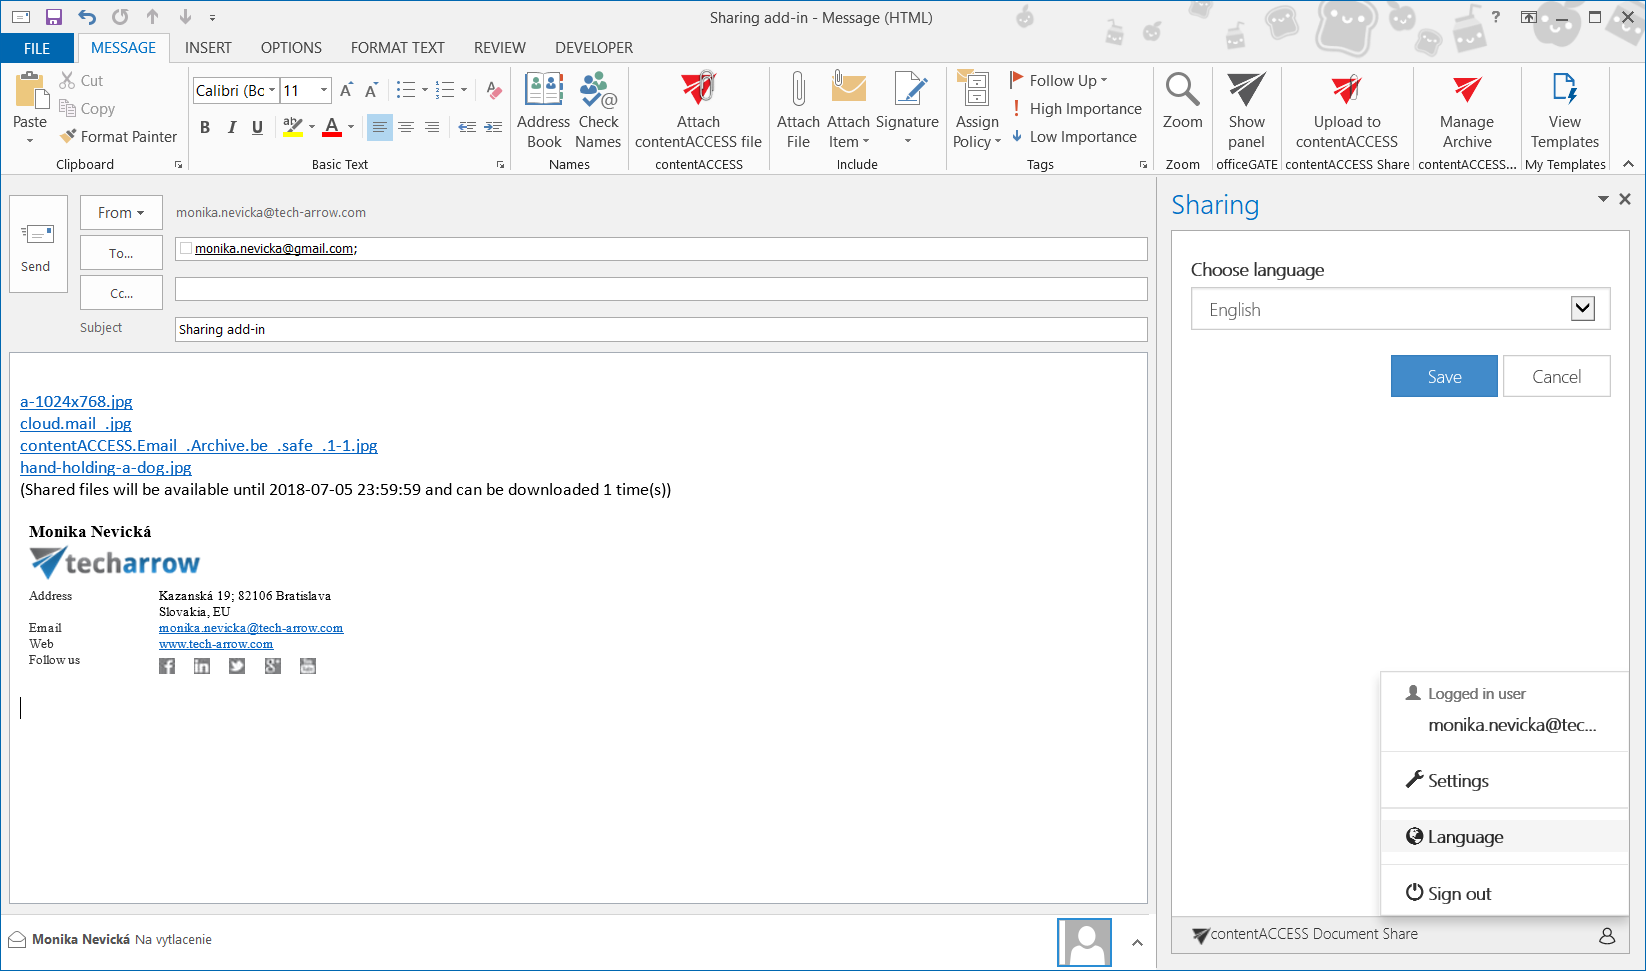
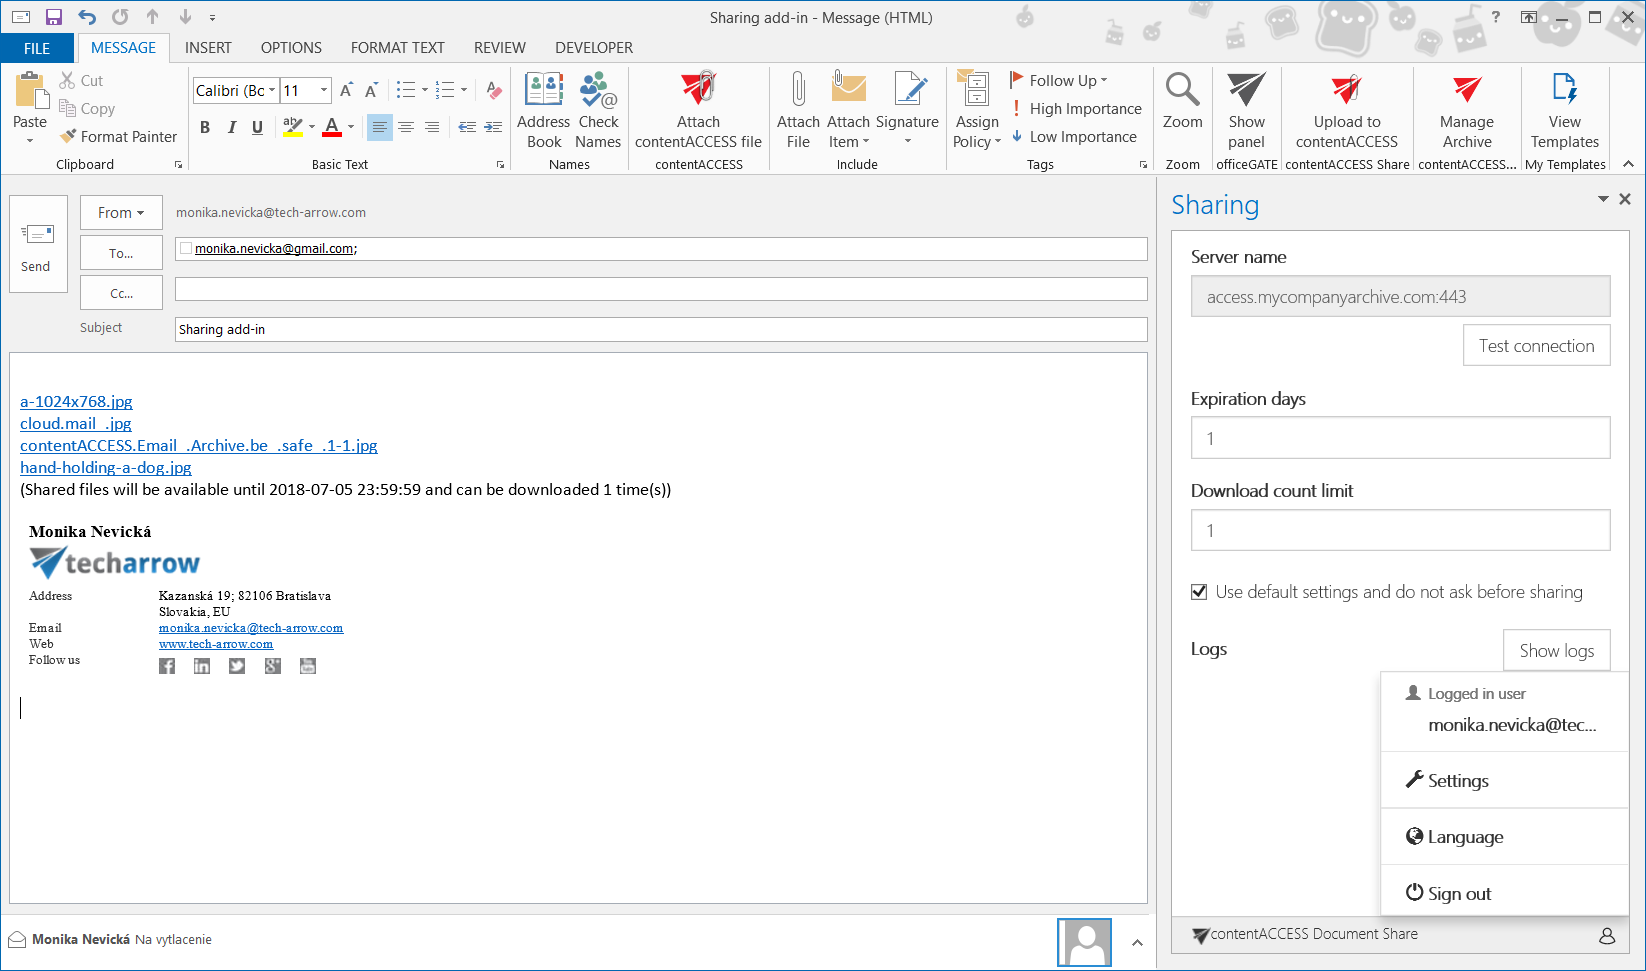
Currently logged in user is displayed on the top of the drop-down menu. The user can also logout from the app by clicking on Sign out in the menu. The connection to the contentACCESS server will be broken, and the user has to configure the connection once again.
The add-in also supports localization. Currently we are supporting Arabic, English, German, Norwegian, Chinese (simplified), Portuguese and Slovak language. The user can change application’s language on the Language settings page. The change needs to be saved by clicking on the Save button.
