8.Creating new jobs in contentACCESS
contentACCESS is a modular product, and its functionality is extended with plugins, which are intended to manage certain data management processes. The licensed plugins can be also customized and fitted to ones needs. To achieve this, it is necessary to create new jobs from an available plugin.
A new job is created from a type of a built-in plugin, which is characteristic with its own configuration settings (scheduling, retention, database, storage settings etc.). These configurations assign to the job certain tasks of how to process data. It is possible to create numberless jobs from the same type of a plugin. Each of them will have different configurations regarding the database where the processed metadata will be located, the storage where the processed binaries will be stored, the frequency of their running etc.
In contentACCESS plugins can be categorized into 3 main plugin groups:
- Email Archive plugins,
- File Archive plugins,
- and Custom plugins (all licensed plugins except of Email Archive and File Archive plugins are accessible here).
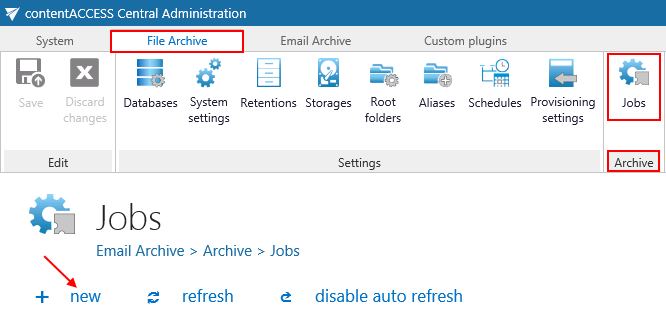
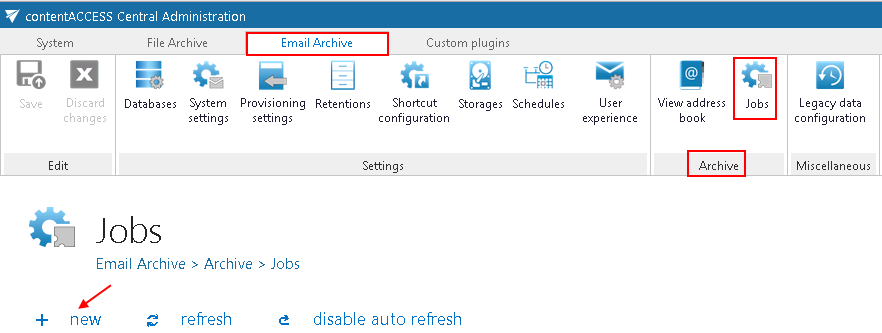
To create a new job from any of these plugins, the administrator should open the Jobs page and here click on + new. The Jobs page can be opened with navigating to the following button on the Central Administration ribbon:
- File Archive ⇒ Archive ⇒ Jobs (by the File Archive plugin type);
- Email Archive ⇒ Archive ⇒ Jobs (by the Email Archive plugin type);
- Custom plugins ⇒ General ⇒ Jobs (by the Custom plugin type).
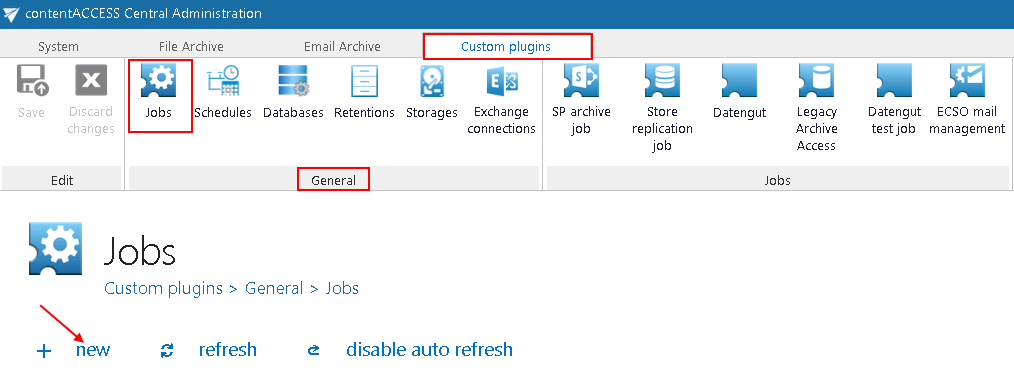
On the same page, the user may refresh the status information to all jobs. This can be done either manually with the refresh button, or by enabling/disabling automatic refresh with the enable/disable auto refresh button.
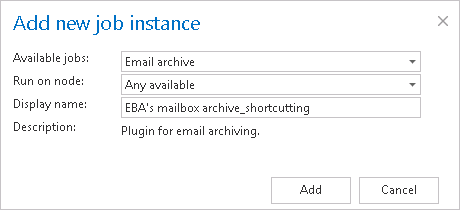
How to create new jobs: Open the Add new job instance dialog with a click on + new on the Jobs page. Select an available plugin from the dropdown list (the list contains the licensed plugins only). Open the Run on node dropdown list, and select a node from the cluster, where the job should run. If you would not like to specify a node, select Any available from the list. Enter a Display name for your job. In the same window below you can read a very short description about the selected plugin type. Click on Add.
A pop-up window will ask you if you would like to configure the newly created job immediately.
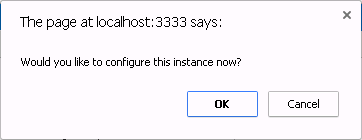
With clicking on OK the Job’s configuration page will be automatically loaded. If you would like to configure the job later on, click on Cancel in this window. In this case the job will be only added to the list of jobs on the Jobs page (but will not run as it is not configured yet).
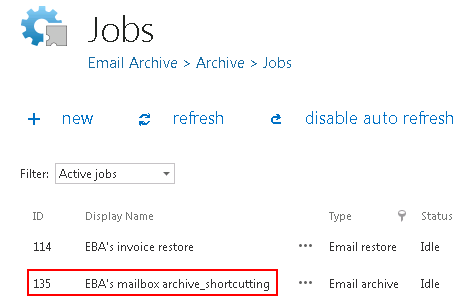
Further information about how to configure jobs in contentACCESS can be read in the respective subchapters.
