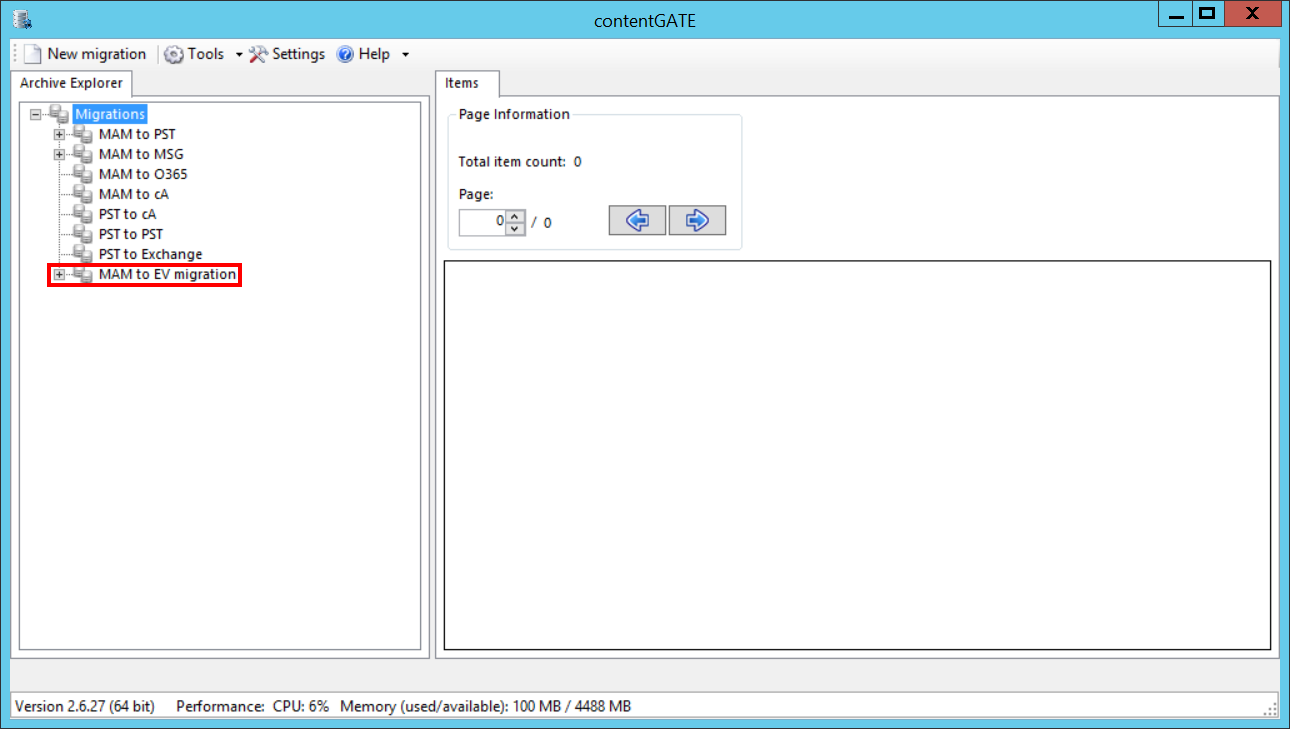
6.2.Configure your source (MAM) and target (EV) archive
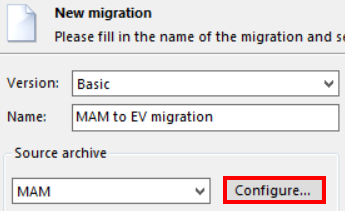
Now configure the Source archive (click on the “Configure…” button on the Source side):
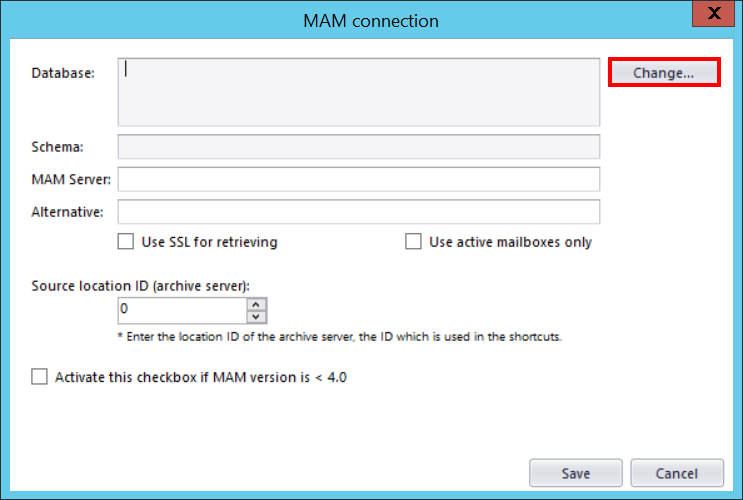
In the new “MAM connection” window click on the “Change…” button:
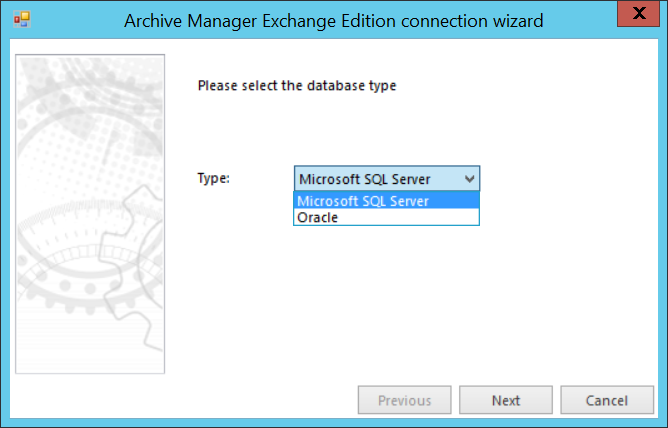
Select the database type from the dropdown list. Click Next.
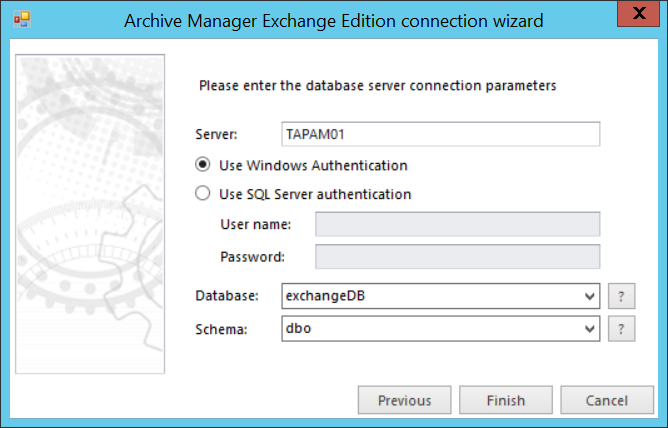
Specify the database server and the applicable database user credentials. You may use either Windows integrated authentication or specify an explicit user. The Database list lists all databases on the selected server. Pick the one where you have your desired data. Enter the scheme and click Finish.
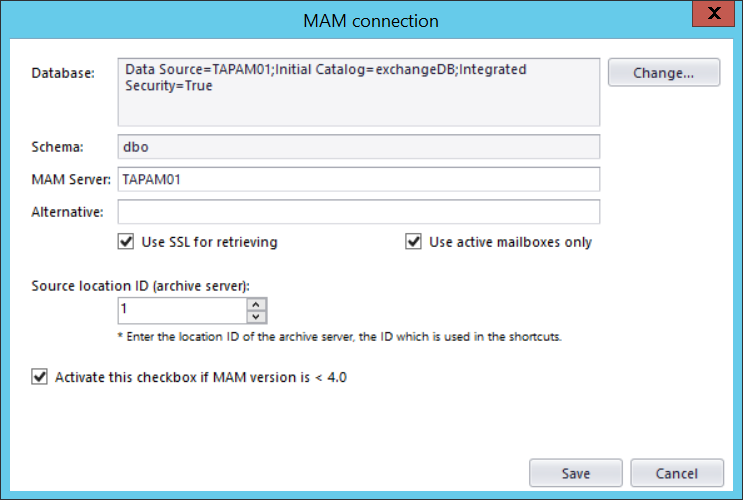
Back in the initial dialog specify the source MAM server. It is highly recommended to specify here the MAM retrieve server name. Use “localhost” if the MAM retrieve server is on the local server, where also contentGATE is installed. If you want to use SSL for retrieving or use only active mailboxes for the migration, check the respective checkboxes.
Source location ID must be defined due to shortcut retrieve. The location ID of MAM can be found in MAM.
If MAM version is lower than 4, the Activate this checkbox if MAM version is < 4.0 checkbox must be activated. Click Save to save your settings.
Now configure the Target archive.
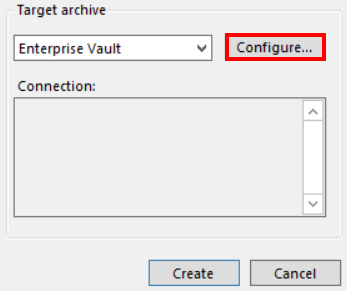
Back in the “New migration” window, click on the “Configure…” button on the Target side:
The “EV target configuration” dialog will be opened.
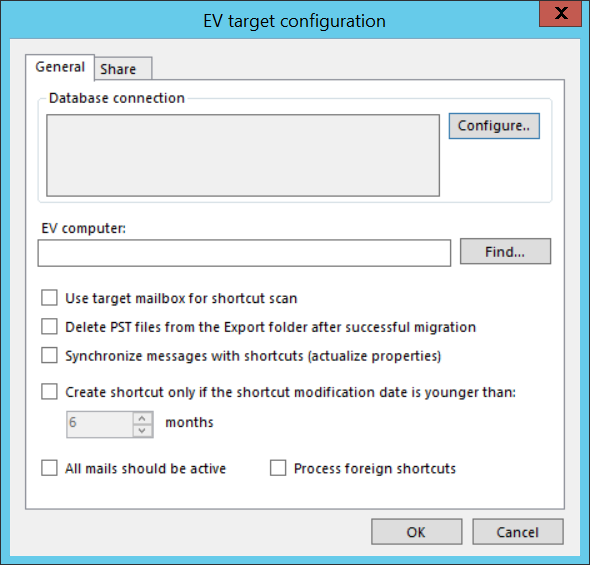
The Database connection must be defined, since other options might rely on it. Configure the database connection string using the “Configure…” button:
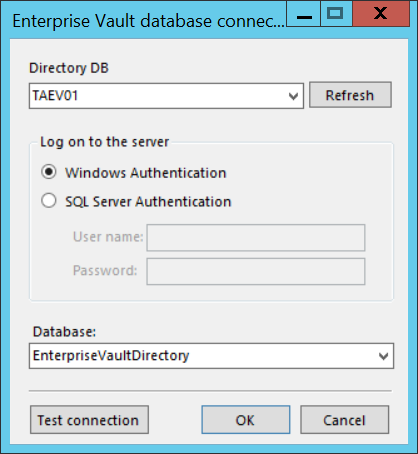
contentGATE requires access to the directory database of Enterprise vault. If Windows Authentication will be used, the user running contentGATE will need access to the database. Further click on the “OK” button.
Back in the “EV target configuration” dialog (General tab), go to section “EV computer”. Select the ID of the target EV computer.
Technical details:
The value format: <ComputerEntryID>|<ComputerName>
Example:
1B6B2657A4E6804468B235072FB0ED1851410000EV-TEST.TESTDOMAIN.INTERNAL|EV-TEST.TESTDOMAIN.INTERNAL
contentGATE is working with exactly one EV server at a time. If multiple EV servers need to be targeted, a second migration object needs to be created. Clicking on the “Find…” button lists all the available EV computers from the database:
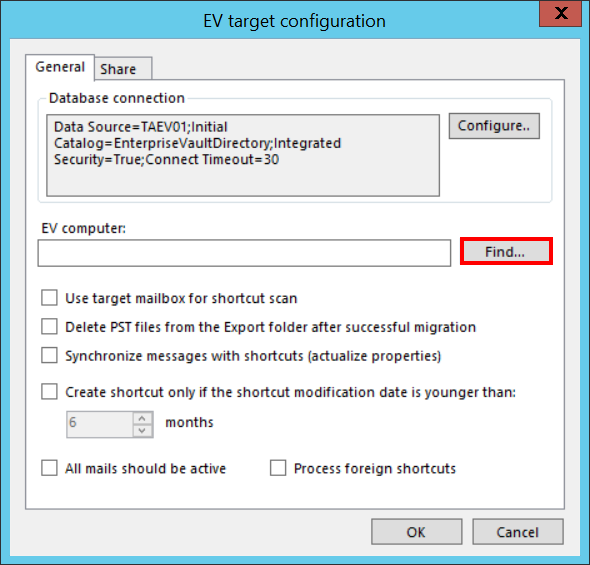
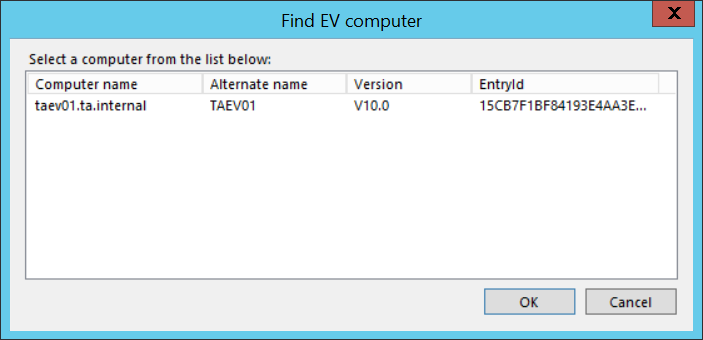
Select the correct record and click “OK”.
Back in the initial “EV target configuration dialog” on the “General tab”, specify the following settings:
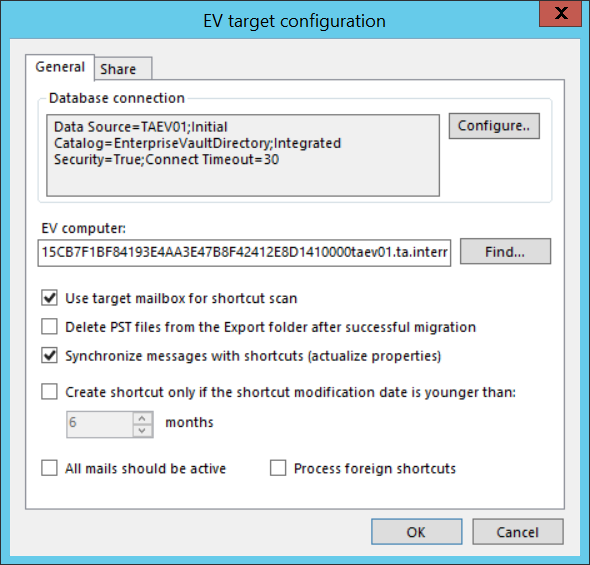
Use target mailbox for shortcut scan: this option should be allowed. When allowed, the target mailbox information (of the user mapping) will be used to access the mailbox and read MAM shortcuts.
Delete PST files from the Export folder after successful migration: If allowed, the PST files are immediately deleted once the file is successfully imported to EV. We recommend to leave this option unchecked – during the import process the mails from the PST file are removed, so there is no need to delete the files. Please keep in mind that if a mail is refused by EV, that mail remains in the PST file and therefore it can be used later to manually import it into the mailbox.
Synchronize messages with shortcuts (actualize properties): Allow this option if it is necessary to actualize the migrated emails with the latest changes in the shortcut. A selected set of properties is taken from the shortcut and is stored in the contentGATE database. Then, during the migration, the MSG file is updated with these properties. Please consider that this may slow down the migration process.
Create shortcut only if the shortcut modification date is younger than: use this option only if you want to remove the old shortcuts during the migration. Enter the number of months. The target Enterprise Vault shortcut is created only if the MAM document was archived not earlier than the entered value.
All mails should be active: use this option if you want to process only active mails
Process foreign shortcuts: use this option if you want to process shortcuts that don’t belong to the mailbox
Further configure the share (share = share folder = base folder). Back in the dialog, switch to the “Share” tab and specify the following settings:
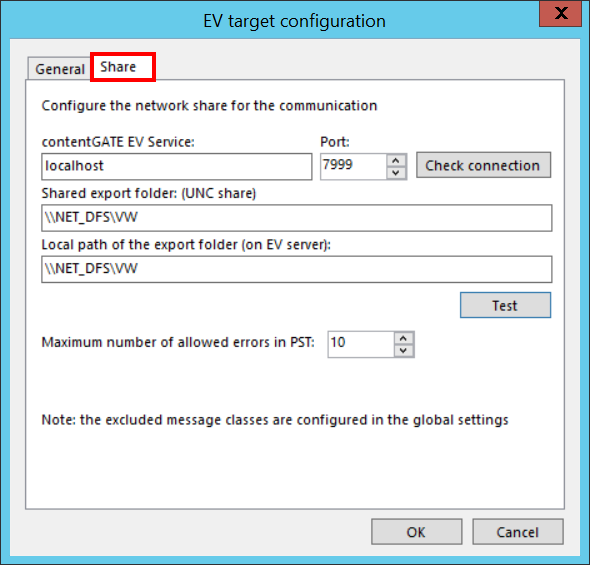
This section defines the communication with the EV server, where the contentGATE EV import service is installed (please note that the service must be installed and started on the selected EV server).
contentGATE EV Service: The IP or name of the server where the EV Importer Service is installed.
Port: The communication port number (default 7999), used between the contentGATE and the EV Importer Service. It has to be the same port as you have entered at the EV Importer Service installation (section Installation of EV Importer service)
Shared export folder (UNC share): This is the shared folder path in UNC format on the Enterprise Vault server as seen from contentGATE. It will contain all migration data. (It is called: <BASEFOLDER>)
Local path of the export folder (on EV server): The UNC path (or local path) of the same share as seen from the EV server. This will be used for storing the intermediate XML and PST files.
Usually, these 2 paths are looking the same.
Maximum number of allowed errors in PST: If the number of errors exceeds this number, the PST file will be marked as failed.
Click “OK”.
Now everything is configured. Close the “New migration” window by clicking on the “Create” button.
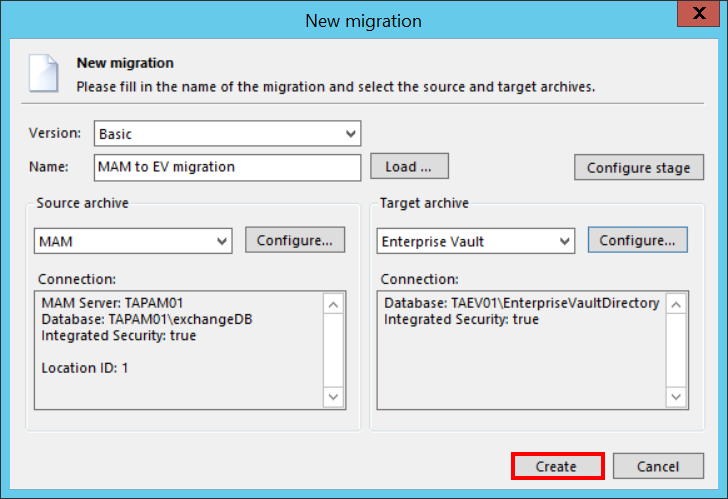
The new migration was successfully created and appears in the Archive Explorer pane of contentGATE.
