5.2.5.Mapping source objects to target objects
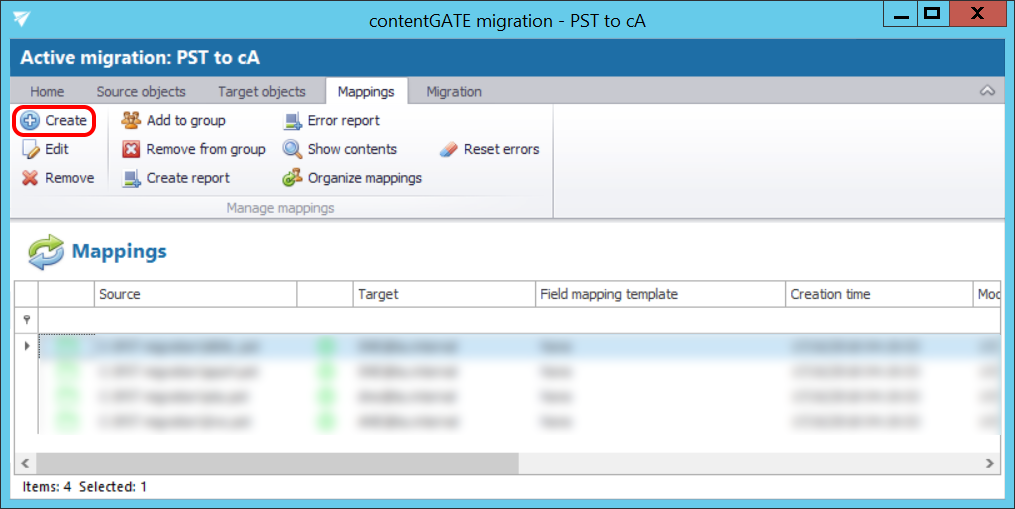
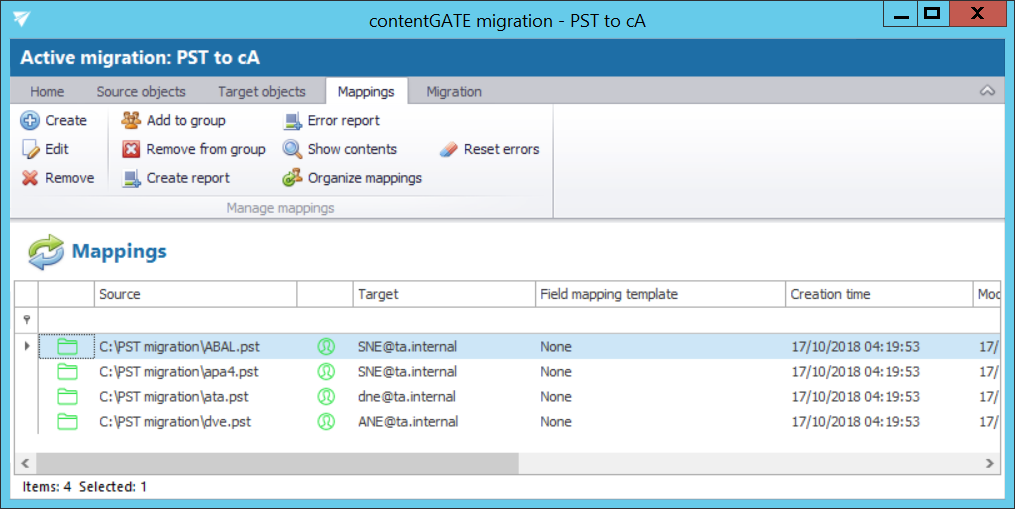
contentGATE migration requires to map the objects on the source side (in this case Outlook PST files) to the objects on the target side (contentACCESS Email archive mailboxes). Open the “Mappings” tab and click “Create” in the toolbar to create the desired object mapping(s).
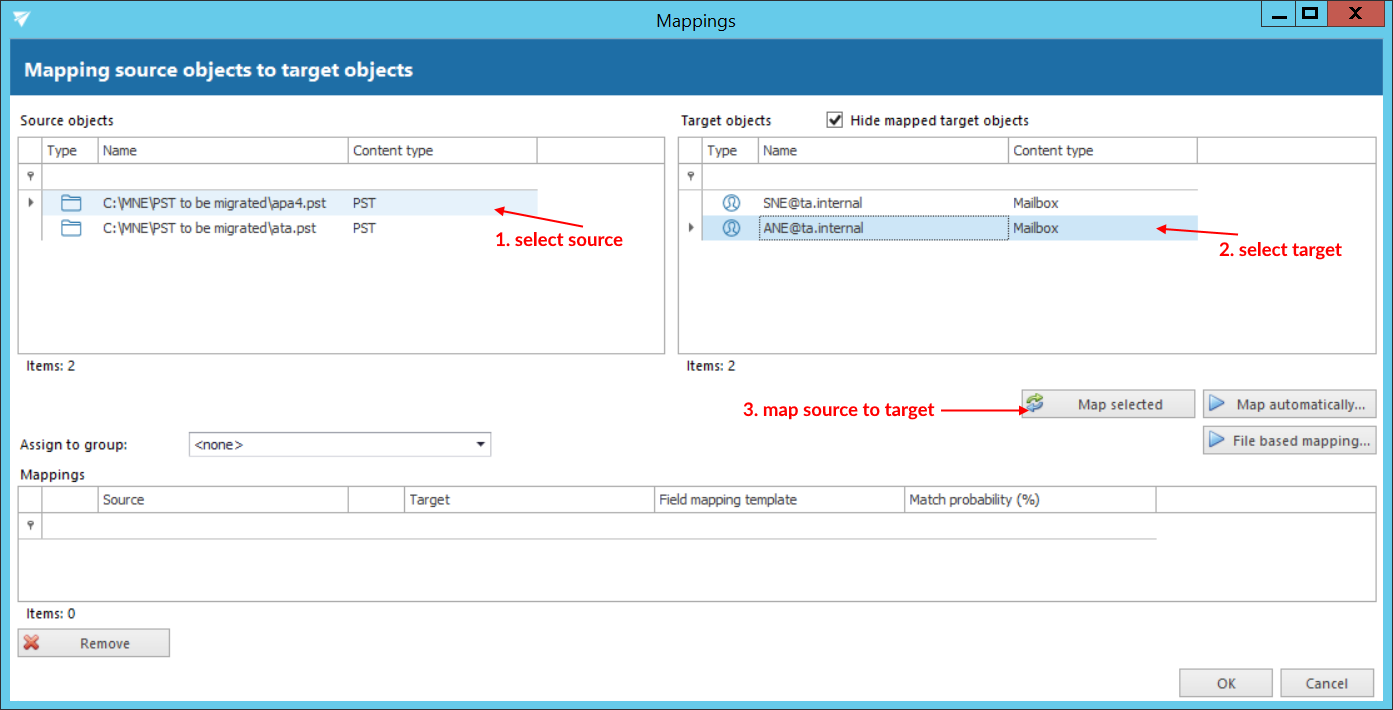
The “Mappings” dialog features the
- source object(s) TO BE MIGRATED on the source side, and
- target object(s) WHERE the source objects can be migrated on the target side.
Mappings in contentGATE may be specified either
- manually
- automatically
- file based
Automap is currently unavailable for PST files to contentACCESS Email archive migration type, so the desired mappings must be set manually. By manual selection select each source and target one-by-one, and map them together using the “Map selected” option.
Added mappings are shifted to the lower part of the Mappings dialog.
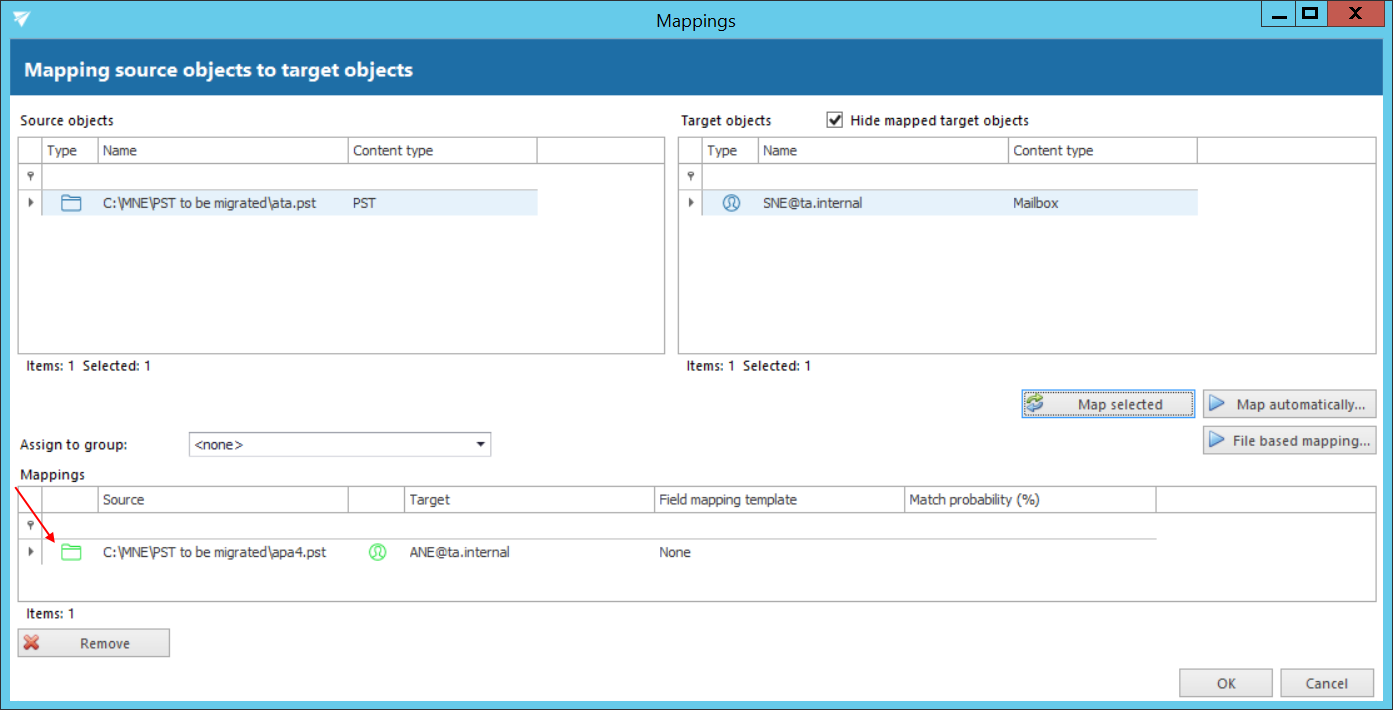
Click “OK” to add them to the grid.
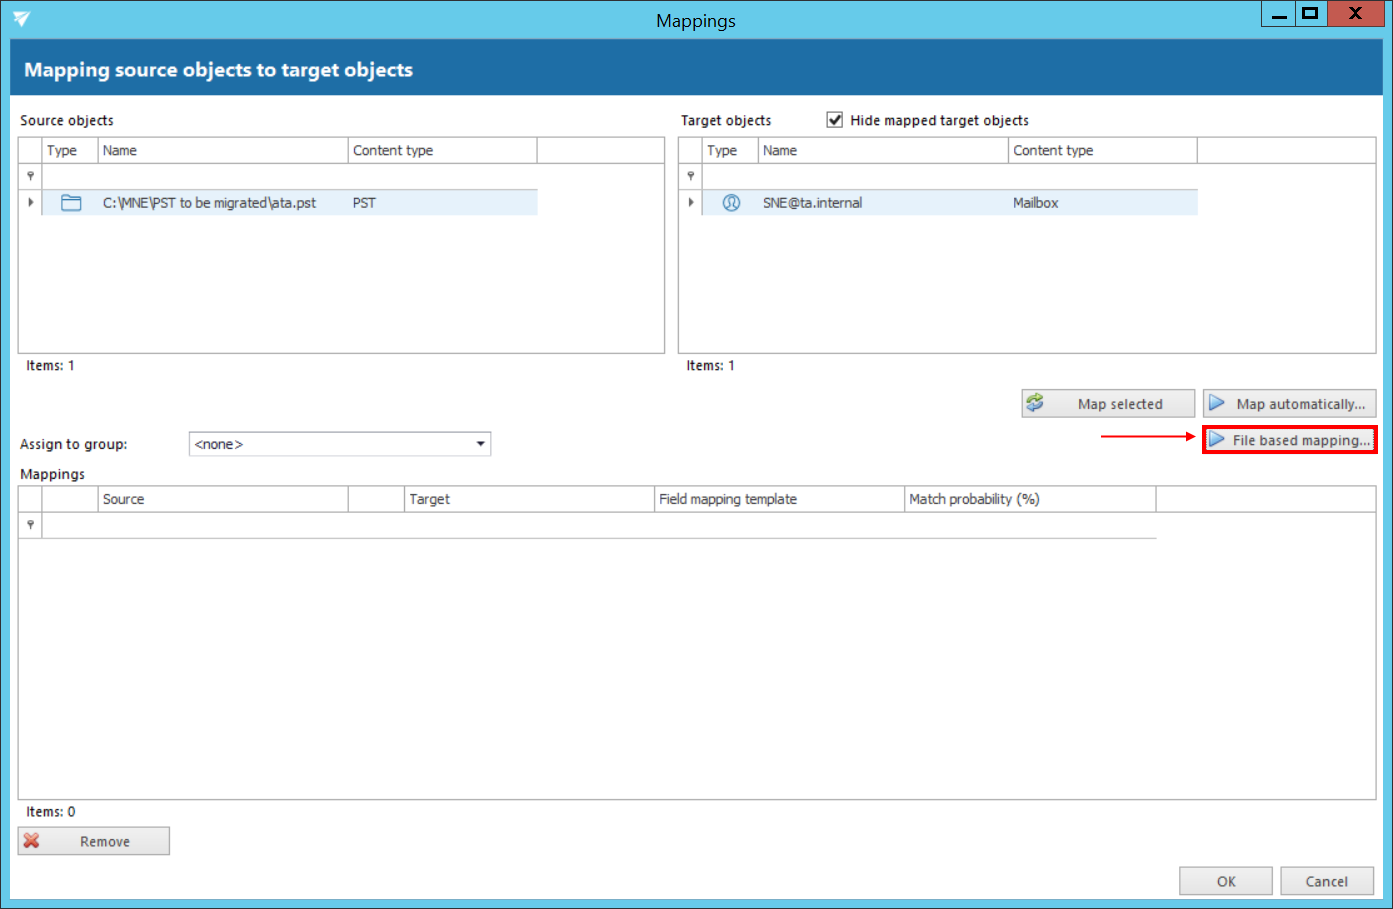
To map objects based on a file, click on File based mapping… in the Mappings dialog.
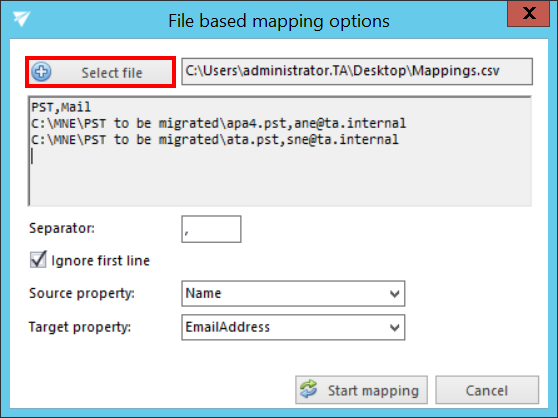
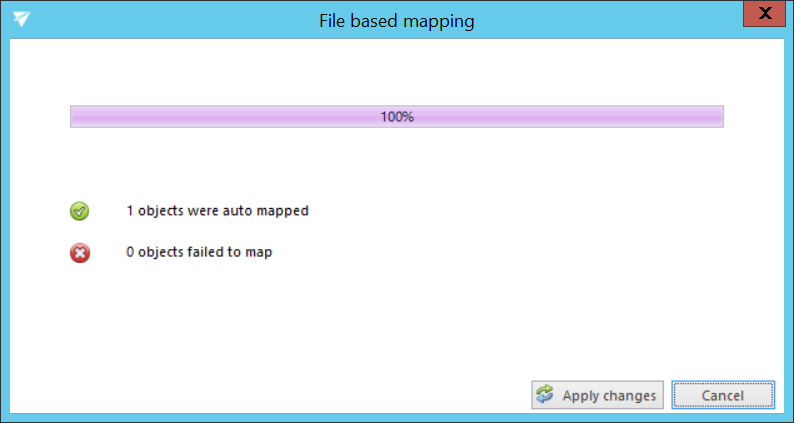
Click on Select file and select the file to load the data from. The location of the file will be displayed in the textbox next to the button, the file content will be displayed in the box under it. Specify the separator of the properties. If you want to ignore the first line of text in your file (e.g. header, as in our use case), check the Ignore first line checkbox. Select the Source and Target property from the dropdown lists respectively. Click on Start mapping and then Apply changes. The remaining steps are the same as when mapping manually and/or automatically.
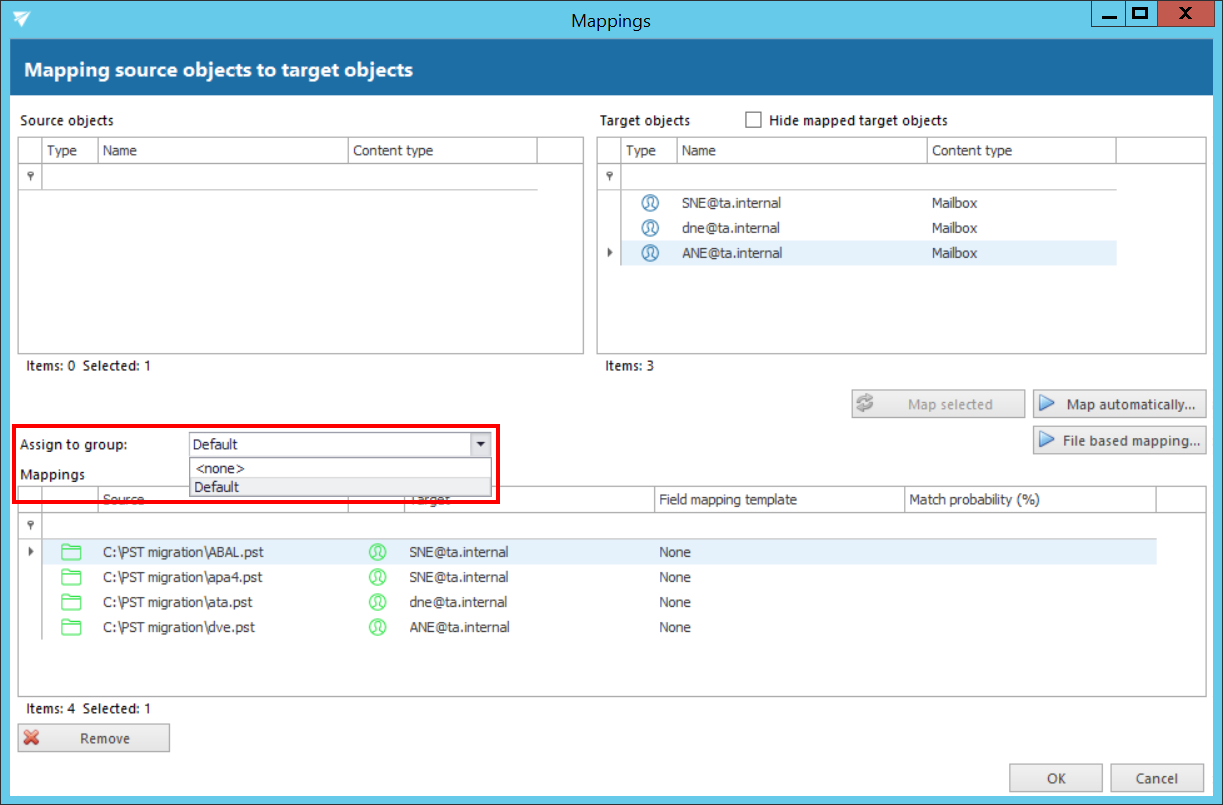
The created mappings can be assigned to a previously created group also from the Mappings dialog.
