4.1.1.Specify the Source and Target archive connection settings
The Source archive (Novell GroupWise documents)
To configure the Novell GroupWise documents source connection, select it in the Source archive dropdown-list and click the Configure button in the dialog. You will be required to specify the following settings:
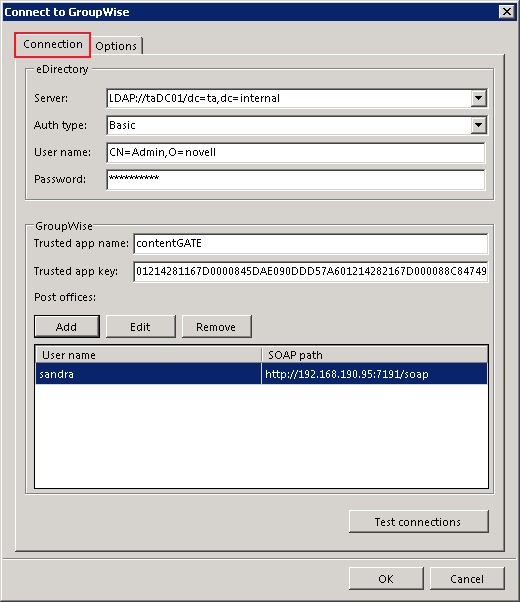
On the Connection tab:
Under section “eDirectory” specify the eDirectory server URL, the authentication type and the applicable user credentials with the necessary rights in form like on the 2nd picture below.
Under section “GroupWise” specify the
Trusted app name – generated upon registration into GroupWise
Trusted app key – received upon registration into GroupWise
Further specify the post offices that need to be migrated. It is possible to specify multiple post offices, too. Click “Add” and specify a post office user and the post office URL in the respective fields.
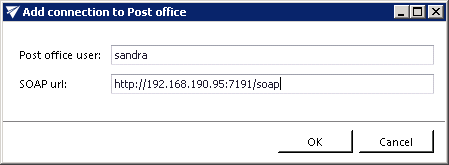
Post office user –with the necessary rights on the data to migrate. This user will be used to load the users of the respective post office.
Soap URL – the web service URL used to access the required objects in the eDirectory
Post office connections can be edited using the “Edit” option and also removed using the “Remove” option in the same dialog.
On the Options tab:
The user may filter only those GroupWise libraries that should be migrated. If you do not have any filters set, then every accessible library will be processed. To load all available libraries, click the “Load libraries” button.
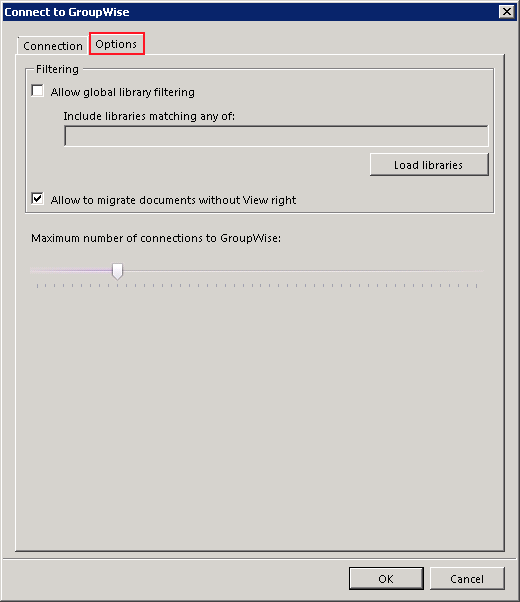
To filter only certain libraries to process, check the “Allow global library filtering” option and edit the list in the “Include libraries matching of” text box as desired.
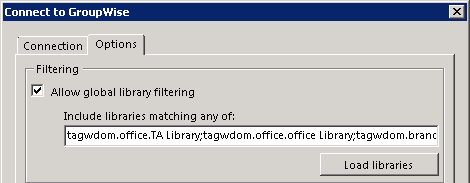
It is also possible to allow here the migration of the shared folder content without View right. If the target system (in this case enaio) can handle files without View right and you want to migrate them, check this option.
It is also possible to set here the maximum number of attempts to connect to GroupWise. Higher number may slow the application down, but will reduce possible failures on the other hand.
The Target archive (enaio target)
After choosing enaio target from the list of target archives, click the Configure button to configure it.
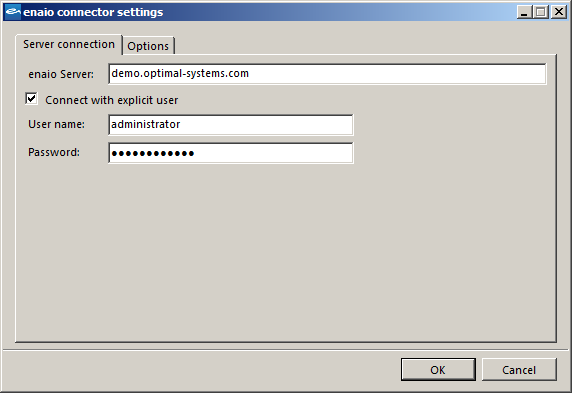
On the first “Server connection” tab of “enaio connector settings” dialog specify the enaio Server. Enter the applicable server user credentials and click OK. If you want to use a different user (with more rights), check the “Connect with explicit user” checkbox and enter the necessary credentials.
Enaio offers to test the migration process by migrating data into a local export folder before migrating the data in real. To use this feature, open the “Options” tab of the dialog and specify the export path, where your test data will be saved.
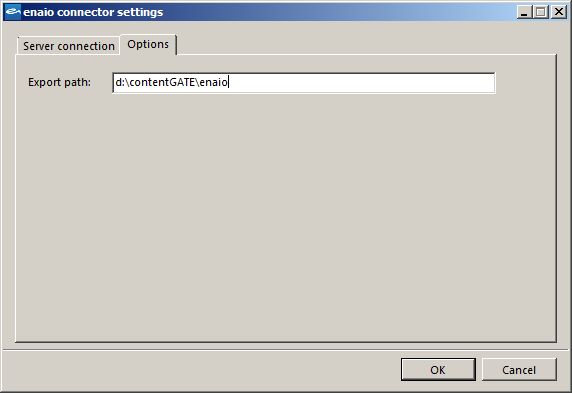
Once the source and target archive connection is set, click on “Create” back in the “New migration” dialog:
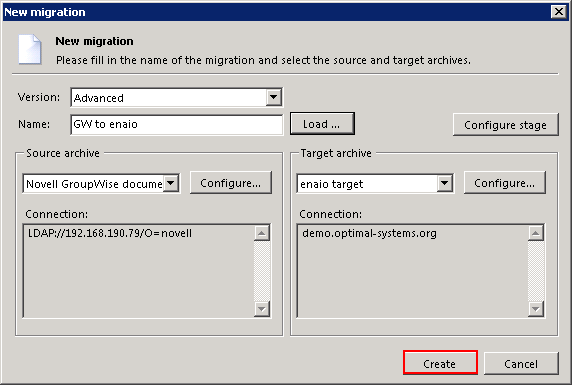
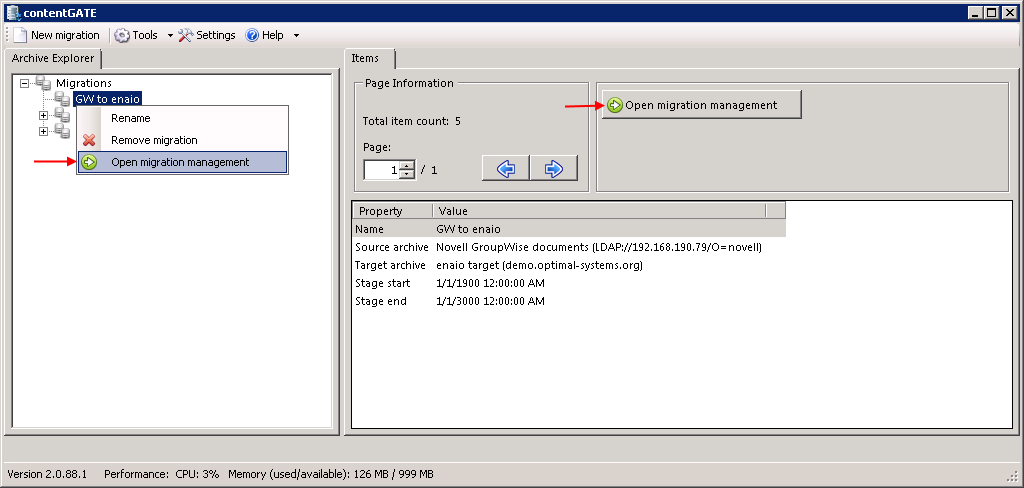
The migration project is now added to the Archive Explorer pane of contentGATE. Now the migration needs to be configured. Open its management interface from the context menu (or via the “Open migration management” button in the Items pane).
