4.2.1.Connecting to contentACCESS
officeGATE can be interconnected with contentACCESS, TECH-ARROW’s great document management software. With officeGATE the user can access the contentACCESS documents directly from MS Outlook, without a need to switch to another application.
To connect officeGATE with contentACCESS, click “Settings” in the context menu or in the officeGATE settings to open the contentACCESS connector settings dialog. Further specify the connection parameters:
1. If you use proxy (contentACCESSWS) with secure (HTTPS) connection to connect to contentACCESS, configure the connection as follows:
- Check the Generate connection URL checkbox;
- Enter the contentACCESS server name into the Server name field; with this action the connection URL will be generated automatically;
- Select an authentication type from the Authentication type dropdown list; if there were new authentication providers enabled in contentACCESS, but they do not appear in the list, click Reload to refresh the dropdown list;
- Enter your contentACCESS credentials (Login name and Password);
- Specify a maximum item count that should be displayed in the list view (by default this is set to 50)
- Specify a maximum number of lookup items (by default the value is set to 20).
- Specify your default sharing settings (if the Sharing plugin is not licensed in your contentACCESS, you can ignore these settings; more information here)
- Check the connection via the “Test connection” button and save your settings.
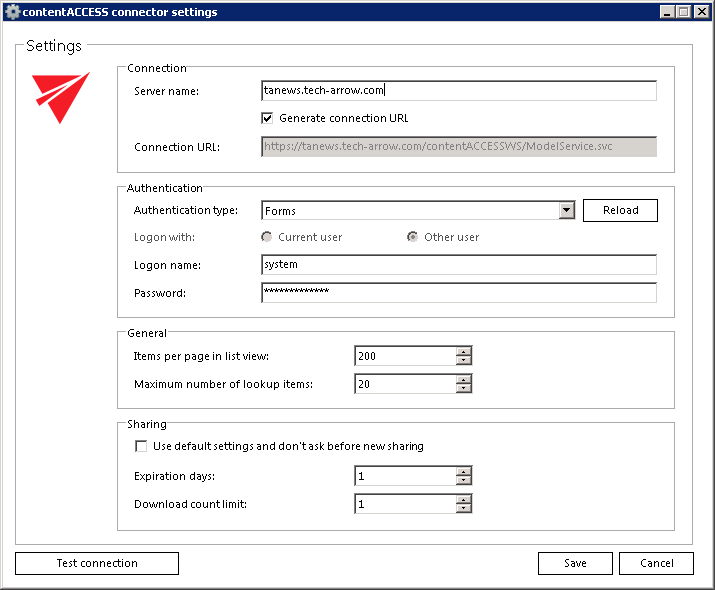
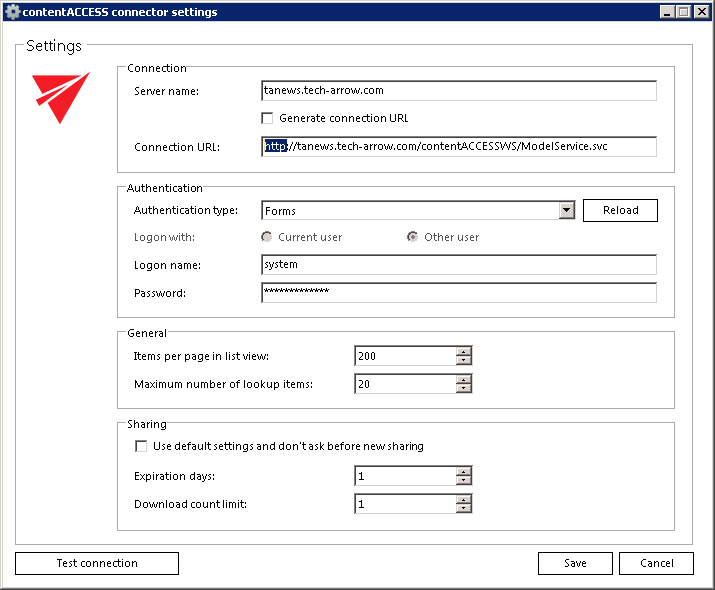
2. If you use proxy (contentACCESSWS) with unsecure (HTTP) connection to connect to contentACCESS (i.e. you use proxy but do not have a valid certificate), configure the connection as follows:
- Enter the contentACCESS server name into the Server name field;
- Enter the HTTP connection URL with the correct server name into the Connection URL field: http://[ServerName]/contentACCESSWS/ModelService.svc
- Select an authentication type from the Authentication type dropdown list; if there were new authentication providers enabled in contentACCESS, but they do not appear in the list, click Reload to refresh the dropdown list;
- Enter your contentACCESS credentials (Login name and Password);
- Specify a maximum item count that should be displayed in the list view (by default this is set to 50)
- Specify a maximum number of lookup items (by default the value is set to 20).
- Specify your default sharing settings (if the Sharing plugin is not licensed in your contentACCESS, you can ignore these settings; more information here)
- Check the connection via the “Test connection” button and save your settings.
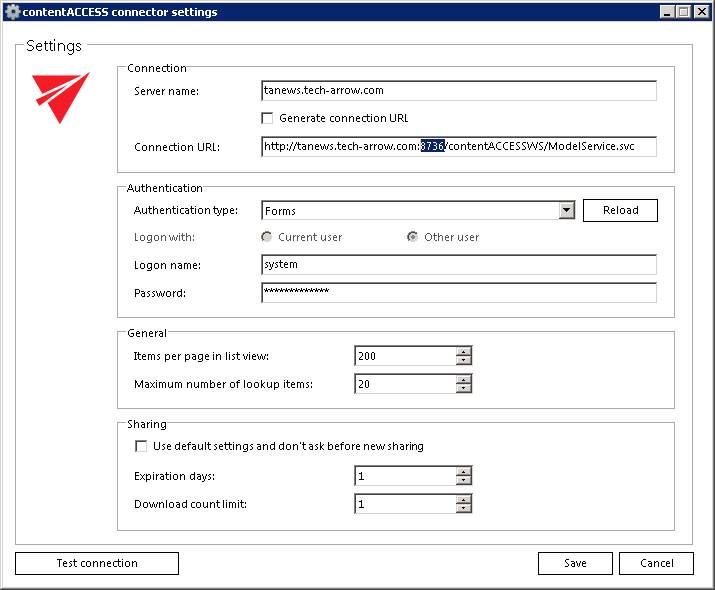
3. If you use direct connection to connect to contentACCESS (no proxy is installed), configure the connection as follows:
- Enter the contentACCESS server name into the Server name field;
- Enter the connection URL with the correct server name into the Connection URL field: http://[ServerName]:8736/contentACCESSWS/ModelService.svc
- Select an authentication type from the Authentication type dropdown list; if there were new authentication providers enabled in contentACCESS, but they do not appear in the list, click Reload to refresh the dropdown list;
- Enter your contentACCESS credentials (Login name and Password);
- Specify a maximum item count that should be displayed in the list view (by default this is set to 50)
- Specify a maximum number of lookup items (by default the value is set to 20).
- Specify your default sharing settings (if the Sharing plugin is not licensed in your contentACCESS, you can ignore these settings; more information here)
- Check the connection via the “Test connection” button and save your settings.
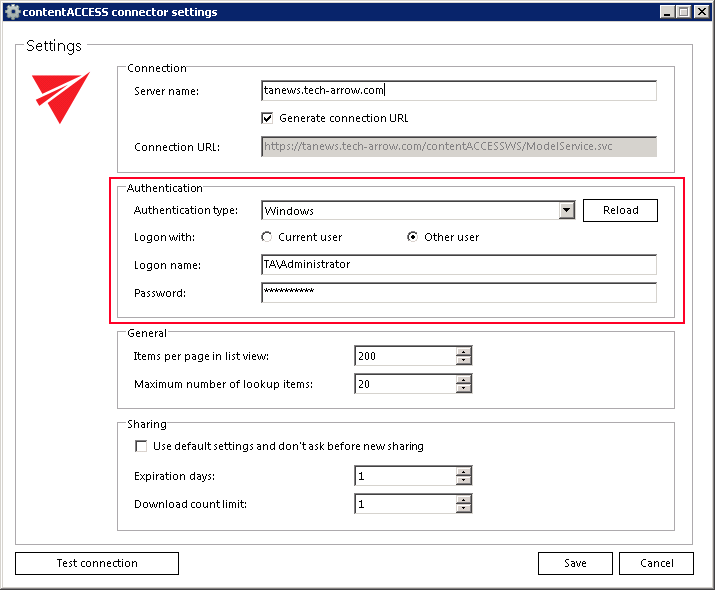
The Windows user login must be configured in contentACCESS Central Administration.
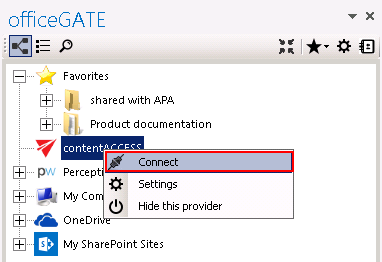
Provided that the connection settings are well established, open the provider’s context menu and select “Connect” from the list:
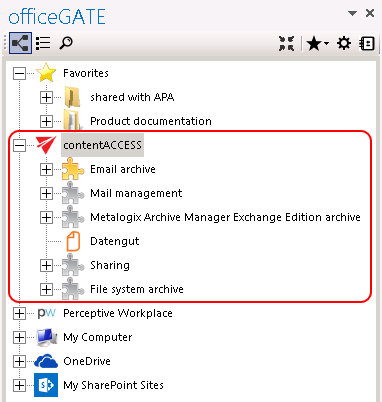
Once the connection is well established, the licensed plugins will be listed when extending the contentACCESS provider’s node in the pane:
First you have to install and configure Legacy MAM retrieve server on the MAM server, and configure it in the contentACCESS Central Administration. (For more information refer to the contentACCESS Manual.)
