8.7.SharePoint data handling
In the course of doing business, a typical organization produces many different kinds of content; for example: legal contracts, marketing proposals, product design specifications, manufacturing process documents, etc. Although these different types of documents might share a small set of common properties, each type of content has unique attributes, and each might be created, used, shared, and retained in different ways. An organization might want to maintain different kinds of metadata about these different kinds of content. Content types can be defined for any item type, including documents, list items, folders and document sets.
officeGATE enables for the user to use SharePoint’s content type selection and metadata fill directly from Outlook by uploading a document. This feature allows to categorize your documents better and helps to save important information about a file or list item for future use. Different content types have different fields (either optional or required).
In officeGATE, this option is configurable. The user may configure if he will specify these metadata in case that:
1) the metadata (fields) that are set on SharePoint are required, or
2) all the time, regardless the fields are required or optional.
To configure one of these options, open SharePoint site’s context menu in the officeGATE pane, and click on Settings.
![]()
The SharePoint connector settings dialog will open:
![]()
Check/uncheck the Show the content type selection dialog only if required fields are present checkbox depending on how you would like to use this feature. On the screenshot above we have configured, that we would like to specify these data only if there are required fields present.
Filling the content type and required fields into the “Upload document” dialog
When the user is uploading a file to SharePoint, the Upload document dialog will appear and he is prompted to fill in the content types and the required metadata. The dialog will open only if this feature was set in the SharePoint connector settings dialog (as described above).
On our illustrative picture below we are uploading (with a simple drag&drop) a file into our Projects library on our SharePoint site. We have set to specify the content type only if there are required fields to specify. The Upload document dialog automatically opens and prompts us to fill these fields in.
![]()
![]()
On the illustrative screenshot above there are 4 content types available for the user: Manual, Document, Installation protocol and Release notes. The user may select one of these content types. In our case, we chose Manual content type from the list. Required metadata fields are dependent on the selected content type, i.e. different content types have different fields. In case of Manual, the following fields must be filled in: Name, Title, Product and Version number. These required fields are marked with a star. If the required fields are not specified, the system will not allow to upload the document into the demanded place. An optional field (such as Release date) is not marked with a star, it is up to the user, if he fills it or not. After all required fields are specified click Save to upload your file into the stated library.
![]()
Since version 3.3, officeGATE is able to handle the following in My SharePoint Sites:
- Sites/Subsites

- Document libraries

- Document sets

- Folders

- Lists

Document library
- contains items with and without metadata
Document set
- acting like a common folder, but with metadata
- files can be uploaded to it
List
- contains only documents consisting of metadata, attachments can be added to these documents
The table below lists all available operations in the context menu of a SharePoint item. Locate your desired item in the pane, right click on it to open the context menu and work with it: add it to favorites, upload new files to it, rename it etc. The available operations are dependent on the item type. The table below gives a general overview about the available options:
|
|
||
|
|
||
|
|
Creating new SharePoint item
Depending on list type the user clicked on, one of the following items will be displayed in context menu:
Upload new file
The file selection dialog will open, followed by document metadata dialog (if they are required).
New
A submenu with the list of all available templates for the selected entity will open.
![]()
If you chose Folder, a pop-up window where you must name the folder will appear. Name it and click OK.
![]()
If you chose one of the available templates (Word document, Excel workbook, etc.) and some required values (metadata) are missing, you will get this warning:
![]()
If you choose Open document, officeGATE opens the document online and you can start directly editing it. After you are finished with the changes and close the document tab/window, you will need to fill in the required fields back in officeGATE.
If you choose Edit required fields, the item details window will open (same as when you select Properties from the item’s context menu). Here, you will need to fill in the required values (marked with red asterisk). Then you can Open and edit the document online.
![]()
The document is then created in SharePoint.
Another way of item creation is by Drag&Drop. If the user drops an Outlook item or a file into a list that supports attachments, one of these two behaviors will occur:
1. If the user drops the item to empty space of the list, the item creation dialog will open, with the item being pre-filled in the attachment list.
![]()
![]()
2. If the user drops the item to an existing item, a question whether he wants to create a new item using the dropped item or to attach the item to the existing item (drop target) will appear.
![]()
![]()
Opening and updating an item
The main content of a document library item is the file – double-clicking on it will download and open it in the suitable application. If the user wants to view and/or modify its properties, it is possible by selecting Properties from the item’s context menu: it will open the item properties dialog mentioned above (without attachment list), where the user can view and/or modify the document’s metadata.
![]()
On list items, double-click will open the dialog mentioned above (now with the attachment list displayed). The user will be able to view and modify the item’s metadata and the attachment list. The Properties context menu option is also available on list items, having the same function as double-click.
Viewing and editing metadata
Document metadata are displayed in the list view in officeGATE pane. To view/edit metadata and add/open attachments, the above mentioned edit dialog must be opened either by double-clicking on a list item or by selecting Properties from the item’s context menu.
![]()
Picking a user or a group from a SharePoint site
For some fields (like Assigned To on out screenshot), it is required to pick the user or group from the SharePoint site the item belongs to. To do this, click on the three dots:
![]()
The user/group selection window will open. Enter the name of the user or group you want to search for (1) and click on the Search button. Click on the desired user/group and add it by clicking on Select (2). If you want to remove a user/group, click on it in the lower field and click on Remove. To add more users and/or groups, repeat the steps above. When you are finished with selecting, click on OK (3).
![]()
Offline synchronization
Check-out/check-in and versioning in a library
Check out option allows the user to block a document while doing changes on it. When the changes are done, the blocking can be removed by selecting the Check in option, which also applies the changes that were made. If the user doesn’t want to save the changes that were made, he can choose to Discard check out. While a document is checked out, no other users can make changes on it, except the user that the document is checked out to.
To check out a document, select the Check out document option from its context menu.
![]()
When a document is checked out, it is marked the following way:
Details about the check out can be viewed by selecting Properties from the item’s context menu.
![]()
The next step is to edit the document. This can be done by selecting Open online from its context menu and editing it online. After the desired changes are made, you can close the browser.
![]()
If you want to apply the changes that were made, click on the Check in document option. This will also make the document available for other users and create a new version of the document. Older versions and version history can be viewed directly SharePoint, officeGATE always opens the latest version.
![]()
After selecting the Check in document option, a pop-up window with the possibility to add a comment will appear. It is recommended to always write down some notes in order to have a better overview later. Click OK.
![]()
If you don’t want to keep the changes that were made, you can choose to Discard check out.
![]()
After selecting Discard check out, a warning pop-up window will appear. If you confirm that you want to discard the check out, you will lose all the changes that were made while the document was checked out.
![]()
Version creating
When a document is uploaded to SharePoint, it is automatically checked out to the user that uploaded it. To make the document available to other users, first it must be checked in.
If versioning is enabled on SharePoint – When you upload a document to a library where the same document already exists, officeGATE will ask if the existing document should be overwritten and new version created. If you select yes, officeGATE will overwrite the document on SharePoint and create a new version.
![]()
If versioning is not enabled, officeGATE will ask if the existing document should be overwritten. If you select yes, officeGATE will overwrite the document on SharePoint.
Adding items to an email message
Sending as attachment
- Library item – create a new message with selected document as attachment
- List item – cannot be sent as attachment from its context menu
- Document set item – create a new message with selected document as attachment
Sending as link
- Library item – create a new message containing link to the selected document
- List item – create a new message containing link to the selected item
- Document set item – create a new message containing link to the selected document
Sending as ZIP file
- Library item – put the compressed document into a new message
- List item – compress the item properties into an HTML file together with item attachments to a single ZIP file and put it to a new message
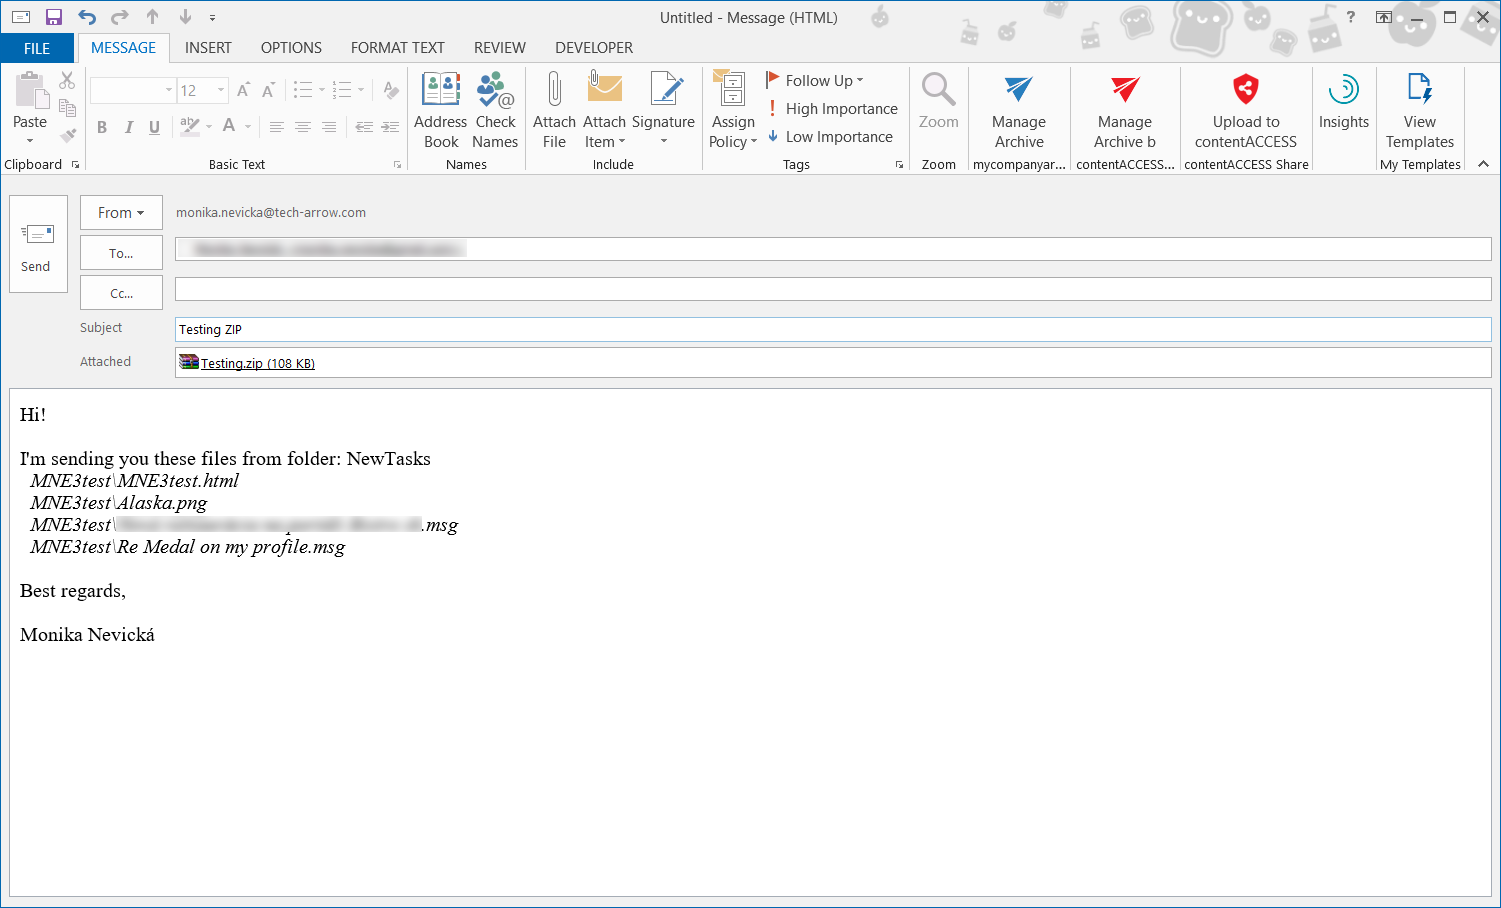
- Document set item – put the compressed document into a new message
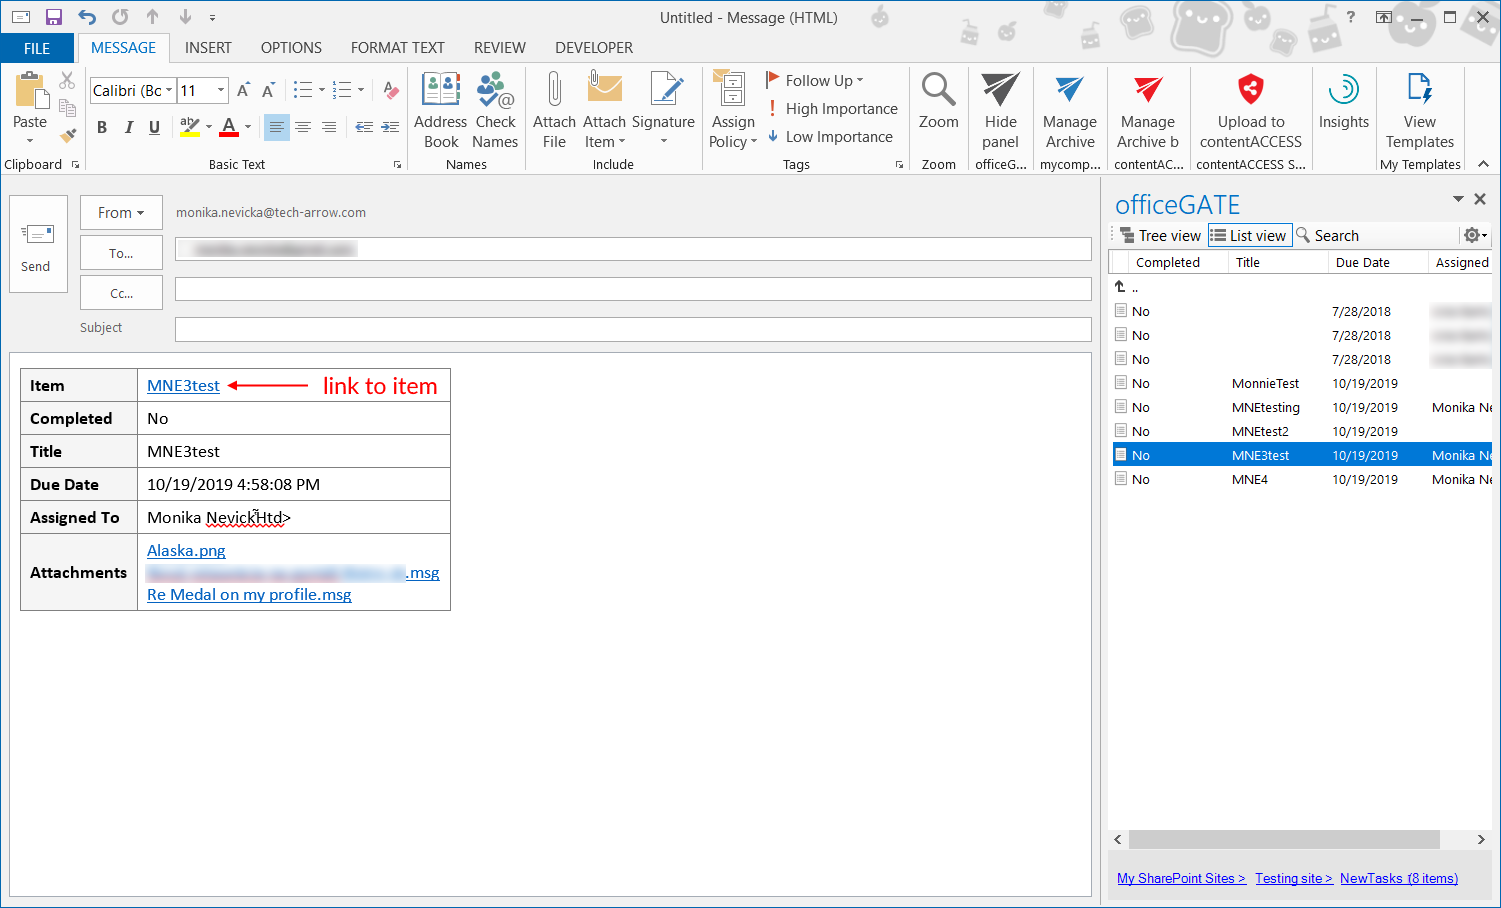
Drag & drop into a message
- Library item – add the document as attachment
- List item – creates a table with property information and link to the selected item and its attachments
- Document set item – add the document as attachment