8.2.View selection: Tree view, List view, Collapse all
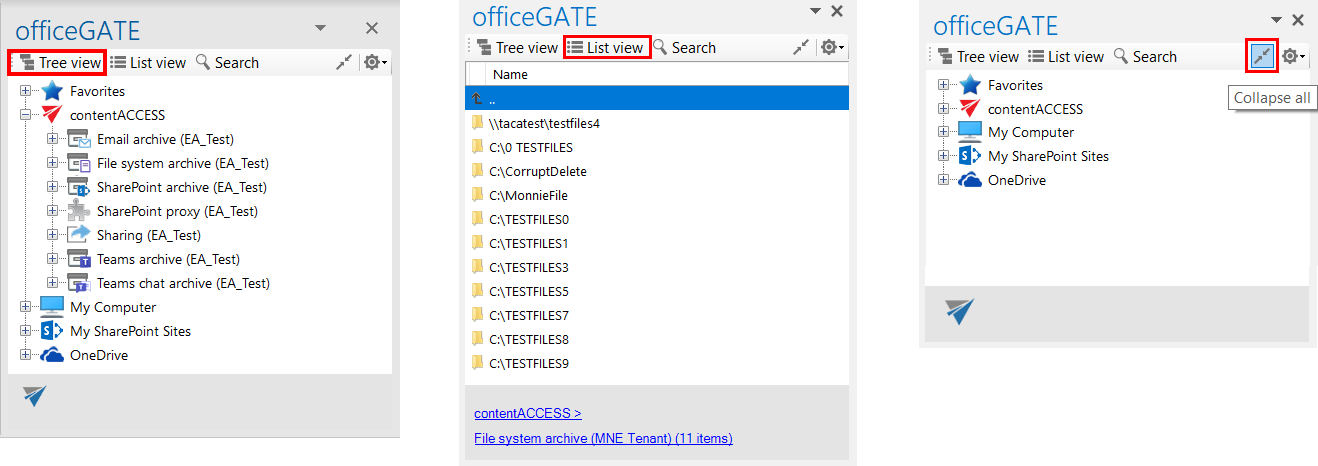
There are 3 main views available in the officeGATE’s status pane:
- Tree view (Screenshot A);
- List view (Screenshot B)
- and Collapse all (Screenshot C).
The user may also switch between tree view and list view a middle-mouse click, if this option is enabled in the General settings of officeGATE (read more in section General officeGATE settings).
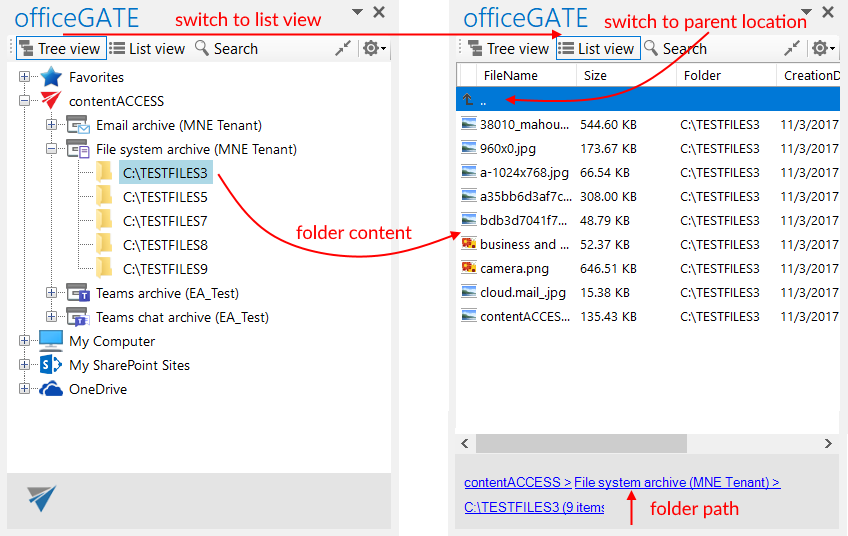
A) Tree view [ ]: This view displays all available providers and presents a hierarchical view of information. Each provider in the Tree view has a number of child nodes (a child node can either be a folder in a local or cloud file provider, a library or folder in SharePoint or a plugin in contentACCESS). A provider can be expanded to reveal child nodes, and collapsed to hide them. To expand a provider, click on plus sign “+” and locate the child node that you want to work with. With a right click on the child node you may open its context menu. The context menu options depend on the particular provider.
The user can add the selected child to the list of favorites, rename, delete, open selected folders, create new subfolders from the context menu directly or upload new files into it. The first table of chapter Working with nodes and files using the context menu gives an overview for the user about the nodes’ context menu options that are available in the respective officeGATE providers.
With the  Collapse all option you can collapse the nodes that have been previously opened in the Tree view mode (Screenshot C above).
B) List view [ ]: In this view the contents (folders, documents etc.) of the selected parent folder are listed. The topmost entry is displayed as “..” and links to the parent location when it’s clicked. In List view, at the bottom of the pane you can also see the path (breadcrumbs) where a certain document is located in your file system. The user can click on a breadcrumb element to easily navigate to a parent location.
Sorting in List view
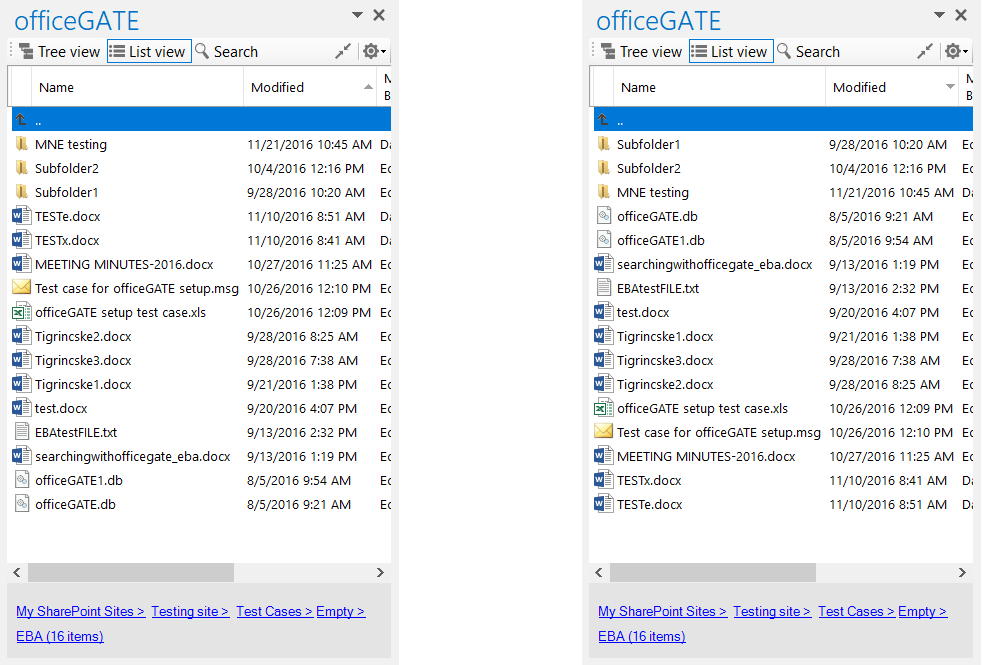
officeGATE enables to sort the items based on column headers in the list view. If you choose a different provider, then different headers are displayed. On our illustrative screenshot below a SharePoint folder is chosen, where the files can be sorted by 3 column headers (sorting criteria), namely: Name, Modified and Modified by. On the second picture the files are sorted by the date when they were last modified.
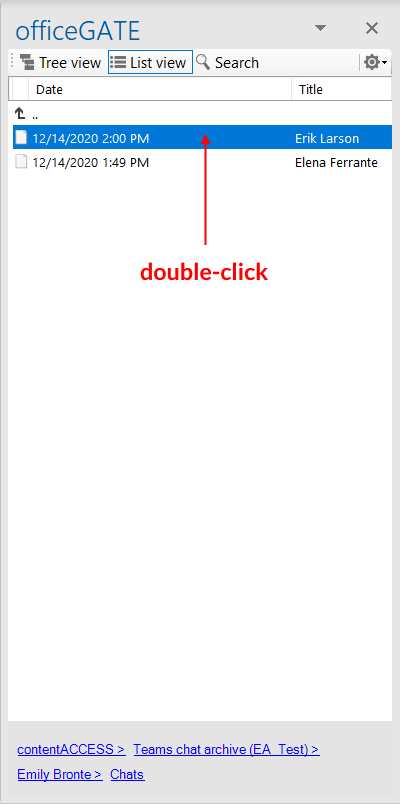
Double-click on contentACCESS items in List view
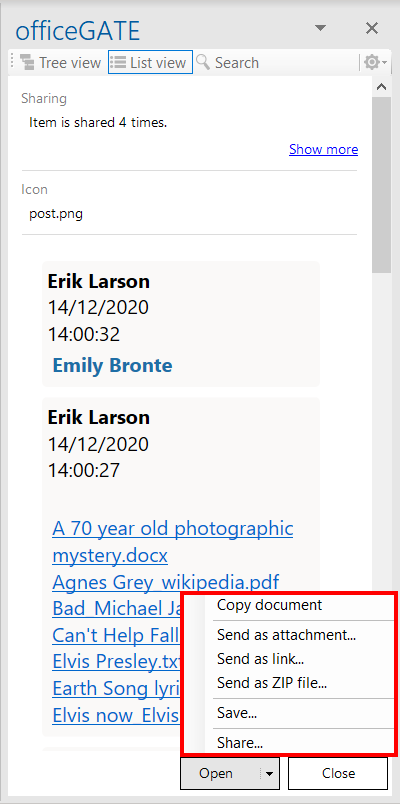
When you are in list view and double-click on a contentCCESS item, its preview opens (the context menu option Properties works the same).
From this preview, it is possible to Open the original item or Close the preview.
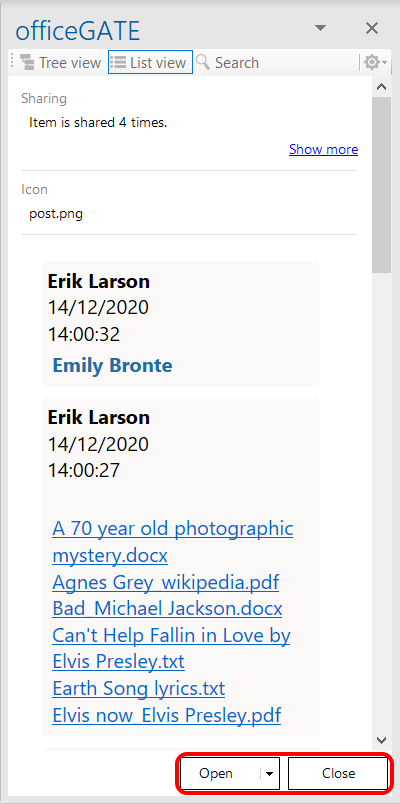
If you click on the little arrow on the Open button, the following options for the item appear:
- Copy document
- Send as attachment…
- Send as link…
- Send as ZIP file…
- Save…
- Share…
