8.4.12.1.Sharing with contentACCESS version 4.2 or older
An easy access to files (e.g. to big files that cannot be sent as attachments) can be ensured by saving them to a special folder (called “My share”), which is accessible under contentACCESS’s “Sharing” plugin in the officeGATE pane. This contentACCESS plugin is used to collect the file(s) to be shared with second users. When uploading a file to the “My share” folder the application automatically generates a link pointing to the file, and the user can share this link with second users. It is possible to send links to the already uploaded file using its context menu, too.
The following steps must be done before sharing files using officeGATE:
- Configure a “Sharing” job in contentACCESS. A “Sharing” job can be configured in the Custom plugins section (Custom plugins ⇒ General ⇒ Jobs) in the Central Administration interface of contentACCESS (more informations here).
- Connect your officeGATE with contentACCESS. Click “Connect“ in the contentACCESS node’s context menu to open the settings dialog and set the necessary parameters to connect to contentACCESS.
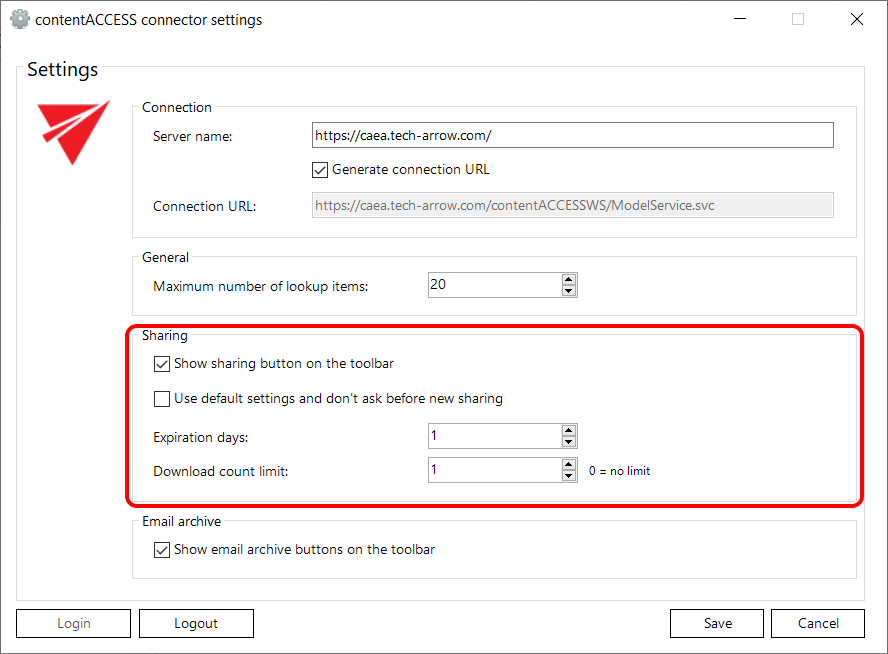
- Configure the values (download count and expiration date) of sharing the files. This option is available in the contentACCESS connector settings, in the Sharing section. The values can be changed directly from the upload dialog as well (described later).
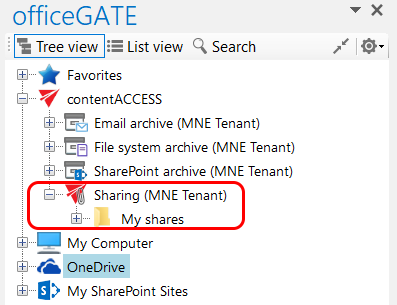
After successful connection expand the contentACCESS node. The sharing plugin is located under contentACCESS node in the officeGATE pane. The shared files will be saved into the folder located under this node.
- If contentACCESS is connected with officeGATE, you can share files. There are 2 options how to do it:
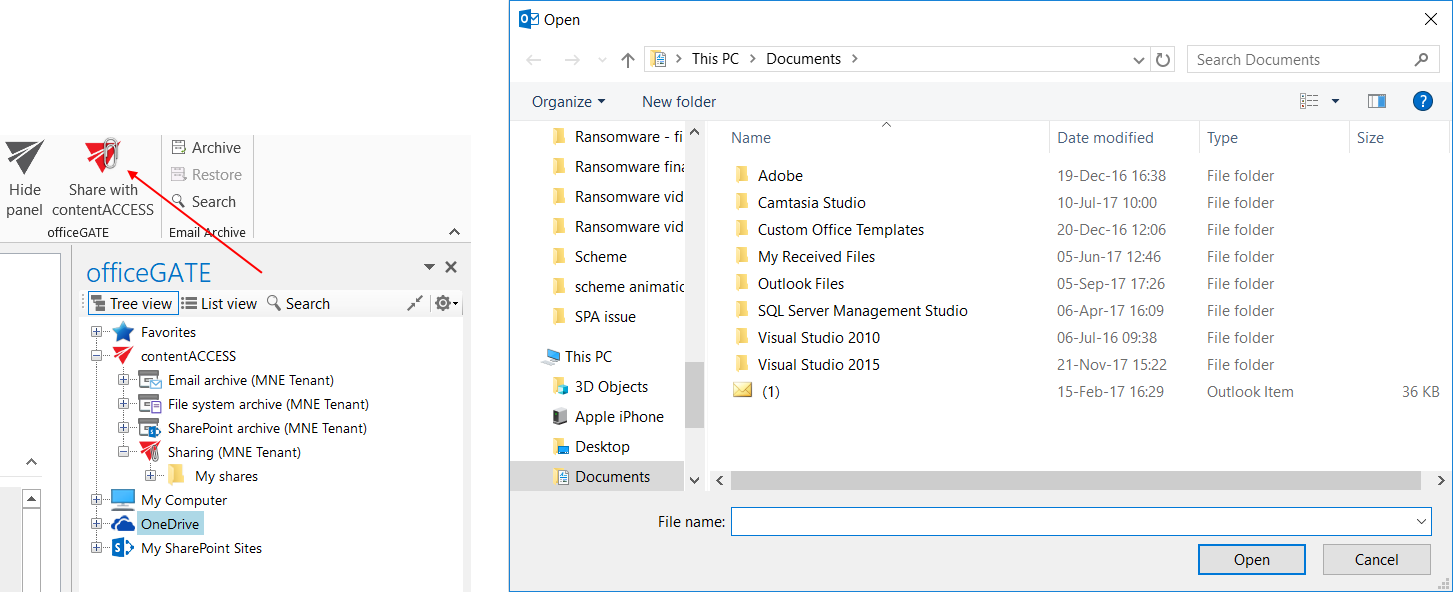
- From the toolbar: Click on the “Share with contentACCESS” button in the MS Outlook toolbar and locate the file that needs to be shared. Click “Open”. The main advantage of this first option is, that the user does not have to locate the Sharing plugin in the pane.
- From the share folder’s context menu: Open the context menu of the “My shares” folder under the “Sharing” plugin and select “Share new file“ from the menu. Select the file that needs to be shared and click “Open”.
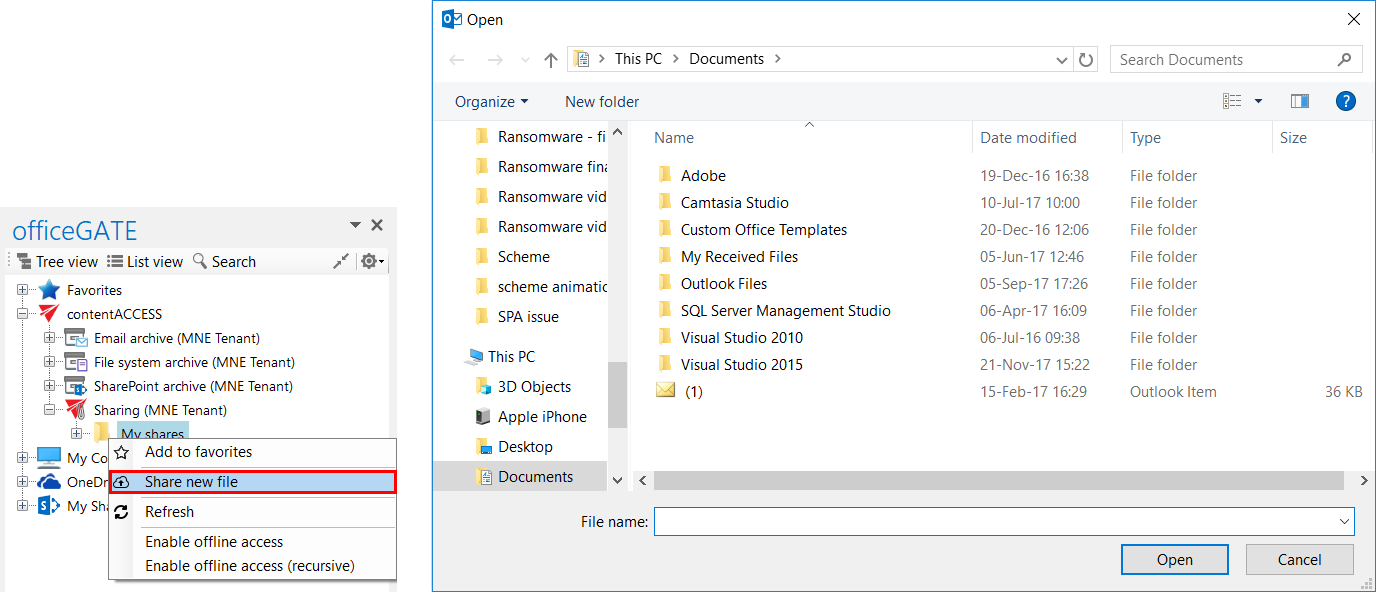
- From the toolbar: Click on the “Share with contentACCESS” button in the MS Outlook toolbar and locate the file that needs to be shared. Click “Open”. The main advantage of this first option is, that the user does not have to locate the Sharing plugin in the pane.
- The “Process document with contentACCESS” dialog will open automatically. The user may change here the
- Expiration date – the time period of keeping the file in the My shares folder
- Download limit – the maximum number of downloads
- The default values are automatically filled in according to the contentACCESS settings described in step 3 above. Change the values for your share if needed and click “Upload” to start the upload process.
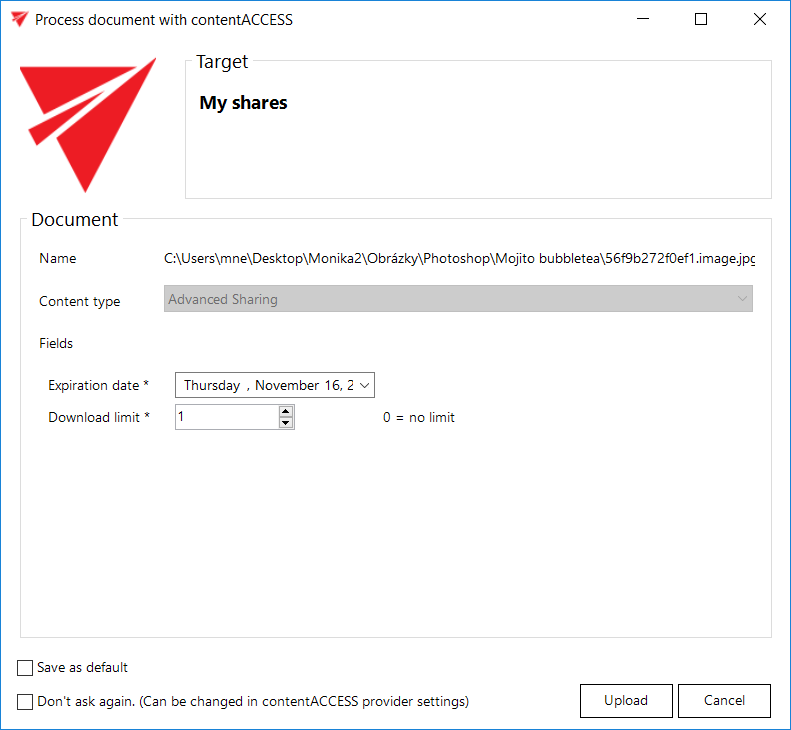
- You may change the default expiration date and download count directly in this dialog, too. Simply enter the desired values into the text boxes, check the “Save as default” checkbox in the down left corner and upload the file. The newly specified values will be applied by each new upload. With checking the “Don’t ask again” option the application will use the same default settings by each share, and won’t ask the user again. These settings can be modified again in the contentACCESS connector settings dialog, on the Sharing tab.
- After the upload is completed, a compose email window with a link to the file will automatically open. The user can send the message with the link to somebody else.
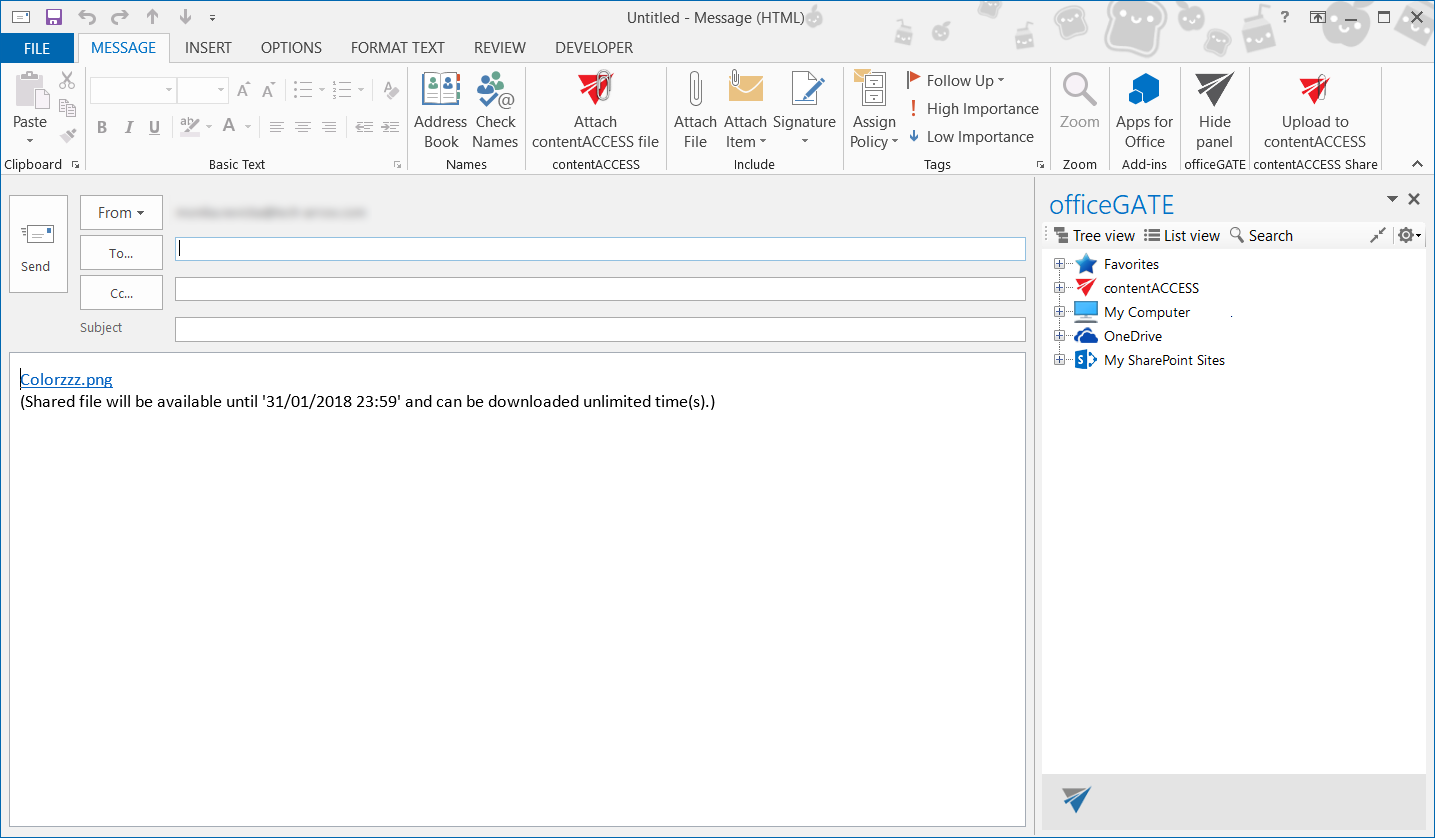
It is also possible to attach a contentACCESS file directly from the compose window. Click the Attach contentACCESS file button in the toolbar and opt for the file that should be attached.
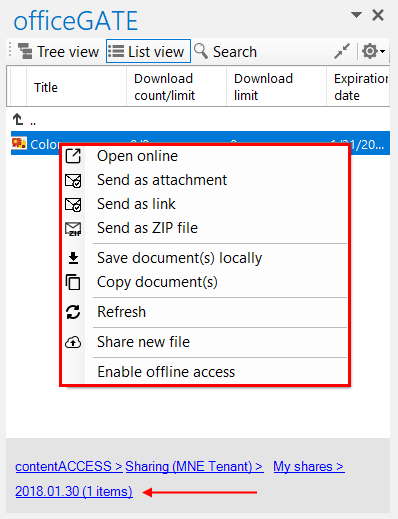
- Wish you open/edit/share a file from the “My shares” folder later on, locate it in the pane, open the context menu and work with it:
