3.Installation
- Open Outlook and turn on the Developer ribbon if it is not visible yet.
In Outlook 2010: navigate to File – Options – Customize Ribbon: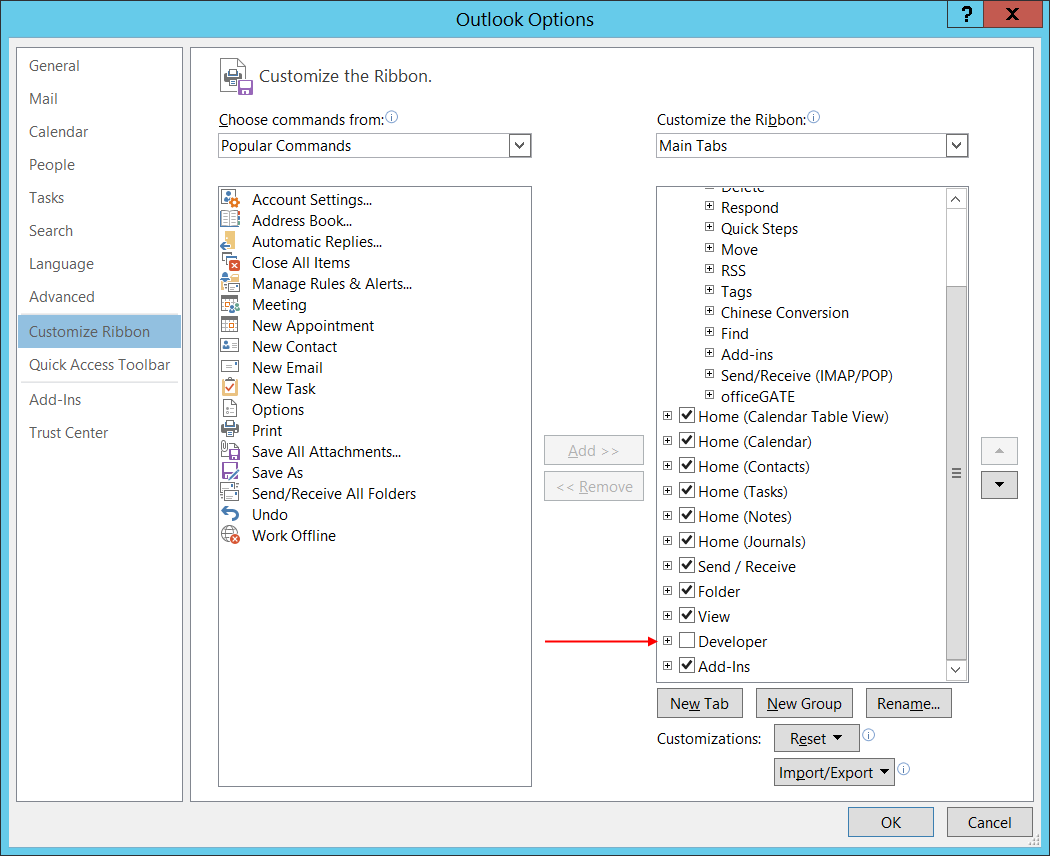
- In the tree on the right side, check the Developer group.
- On the Developer tab of the ribbon, select the option Design a Form:

- In the Look In dropdown, select the option User Templates in File System and locate the CA_techarrow.oft file first.

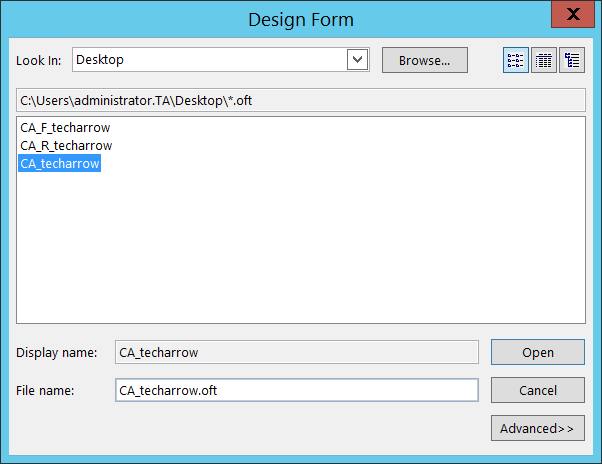
- Select CA_techarrow, click Open and the form opens in design mode.
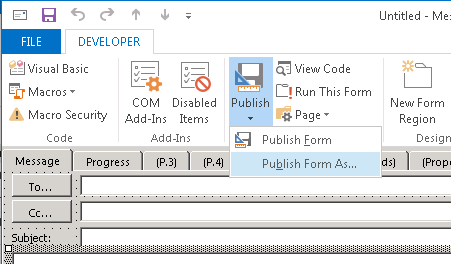
- Now click on the Publish button and select Publish Form As….
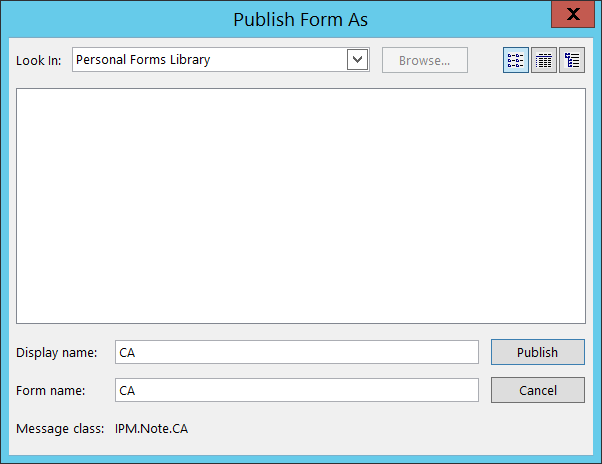
- Depending on where you want to install the form, select either Organizational Forms Library (Exchange wide installation) or Personal Forms Library (user installation).
- Change the Display name to “CA” and click Publish.
The form is published and can be used to open the archived messages.
- Close the designed form and answer No to the question whether the changes should be saved. The form was already published and there is no need to save it anywhere.
- Now repeat steps 3–9., and install forms CA_F_techarrow.oft and CA_R_techarrow.oft as well. In step 8, CA_F_techarrow.oft must be published as IPM.Note.CA.F (Display name is CA.F), and CA_R_techarrow.oft must be published as IPM.Note.CA.R (Display name is CA.R):
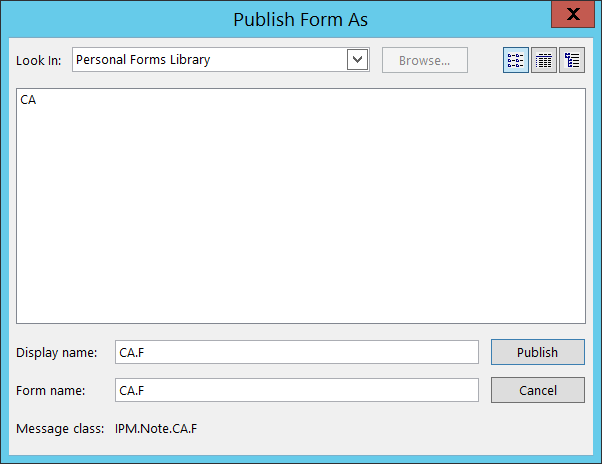
Publishing CA_F_techarrow.oft 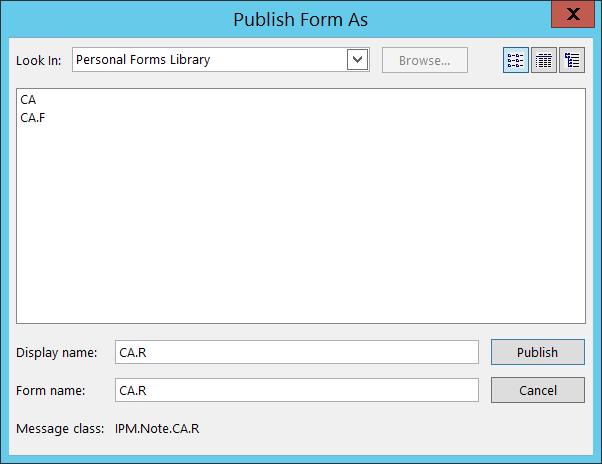
Publishing CA_R_techarrow.oft
Help Guide Powered by Documentor