11.4.Email archive Provisioning settings
The provisioning job
- Synchronizes the Exchange server objects specified on the Provisioning settings page to the contentACCESS Address book
- Verifies the user’s permissions on the mailboxes on the Exchange server and synchronizes these permissions to contentACCESS
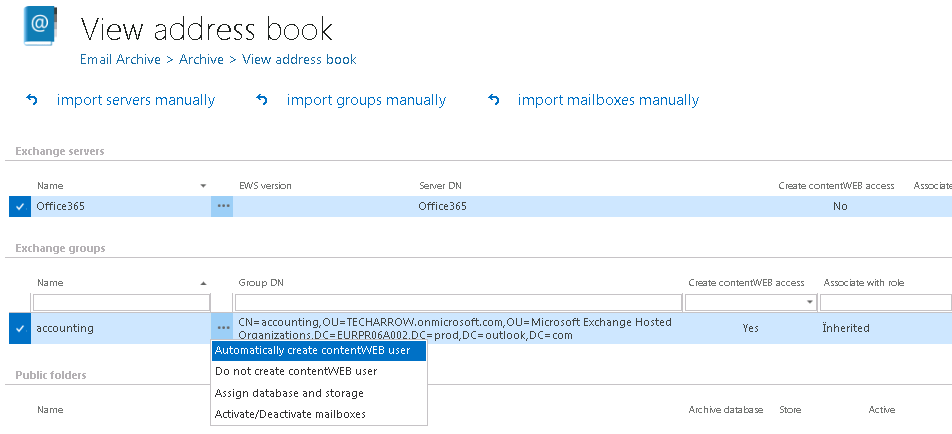
- If contentWEB user creation is turned on in the Address book for an object (Exchange mailbox/group/server), it creates a contentWEB user for mailboxes
- Based on the roles assigned in the Address book, it gives permissions on the specific archive mailbox(es)
The mailbox provisioning job is an elementary job, which is intended to extract Exchange groups and subgroups on the Exchange server, and synchronize their changes with contentACCESS. For example, if a new user has been added to an Exchange group which is under archiving process, the provisioning job will “point out” this change and the mailbox of this new user will be crawled/archived automatically. Provisioning job will synchronize the mailbox permissions as well.
In contentACCESS, a provisioning job is created automatically when activating email archive for the first time.
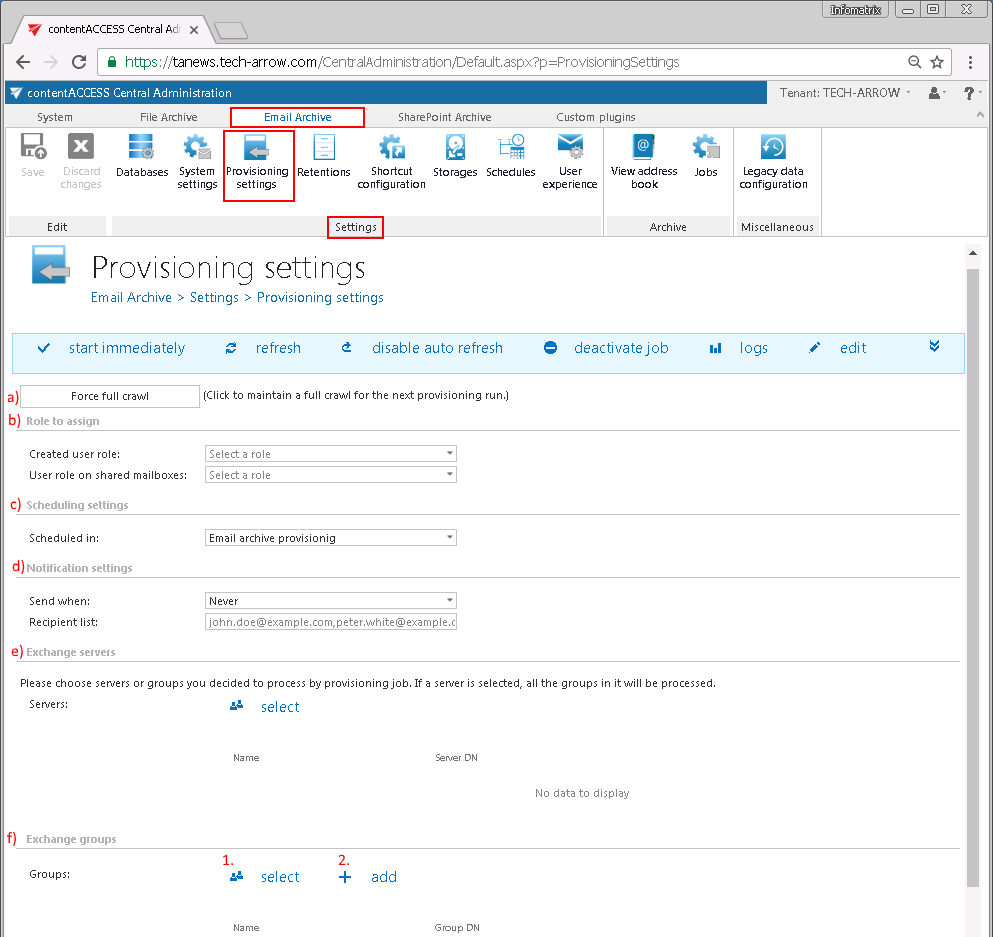
Email Archive provisioning settings are available on the Provisioning settings page (Email Archive ⇒ Settings ⇒ Provisioning settings):

The status bar of the provisioning job offers the following options:


 ) at the right side of the status bar the user may collapse or expand the progress information about the provisioning job’s running. The status bar’s last state is always stored, and the last state will be opened by navigating to the page again.
The following configuration sections are available on the Provisioning settings page:
- Force full crawl: The Exchange provisioning job is performing an incremental crawl of the Exchange objects (mailboxes and groups). This means that if an object is not changed, it is not necessary to access it. This makes the provisioning job faster and helps to use less resources. In some situations however it is necessary to perform a full crawl of the objects – need to synchronize every object, independently whether it was changed or not from the last synchronization. This can be done with a single click on the „force full crawl“ button, which is located under the status bar if the provisioning job.

- Role to assign: This configuration section allows to assign default contentWEB user roles. The provisioning job will assign the role defined here for the Exchange objects, which are already synchronized to the Address book, and contentWEB user creation is allowed for them (option “Automatically create contentWEB user” in the Address book). It is recommended to specify here a default role with less contentWEB permissions, e.g. a role without permissions to recover from the archive. The roles to be assigned must be created on the Roles page.
Important: If there are multiple roles assigned for the same Exchange object (e.g. one role with less permissions in the provisioning settings, another role with more permissions in the Address book), then the rule is, that always the role with more permissions wins.Important: To be able to assign roles using the provisioning job, first the contentWEB user(s) creation must be allowed in the Address book, otherwise the role will not be assigned.
Roles containing Manage system and/or Manage tenant permissions are unavailable in the default roles’ dropdown list. If the role is changed in this configuration section, the next running email provisioning job will replace the previously assigned user permissions with the permissions defined in the newly assigned role.
In the Roles to assign configuration section you need to set:
Created user role: this is a default role, which be assigned for the Exchange objects (mailboxes/groups/entire server) if the “Use the role defined in the provisioning job” option is selected for the given Exchange object in the Address book.
User role on shared mailboxes: select a role, which will define the user’s permissions on the shared mailboxes on the Exchange server.
 For more information on how to assign explicit permissions for newly created contentWEB users, and how to change these explicit permissions, please refer to chapter Creating contentWEB users.
 - Scheduling settings: Select the running times of the provisioning job or create a new scheduler. For more information how to configure scheduler settings please refer to section Schedules described above.
- Notification settings: If the provisioning job could not run properly due to some reasons, contentACCESS can send a warning about the problem. The notification email message will be sent to the email address that is set here under Recipient list option. Here you can also choose, when these email messages should be sent: only if errors occur, or when errors or warnings occur, or always, regardless of the faultless running of the provisioning job.
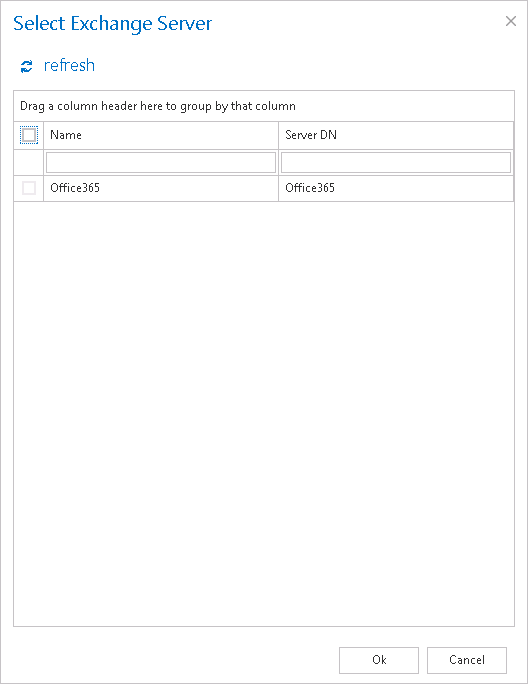
- Exchange servers: click on
 select option and select the Exchange servers to synchronize from the list of Select Exchange Server dialog.

- Exchange groups: all users of an Exchange server fall under an Exchange group (or can belong to even more Exchange groups simultaneously). In this section it is possible to specify one or more Exchange groups to be synchronized by the provisioning job.
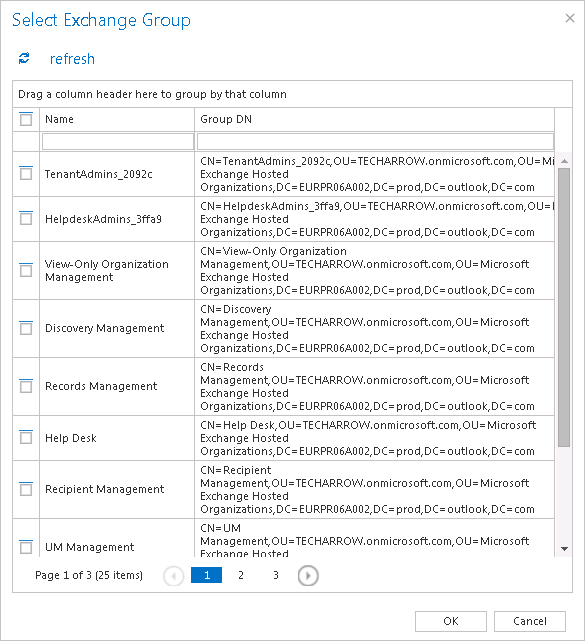
- selected from the list of all groups available on the Exchange – Click on
 select option and select the groups in the Select Exchange Group dialog’s list (Screenshot 1).
 - added manually to the groups to be provisioned – Click on + add and fill the group to the Add Exchange Group dialog. manually (Screenshot 2).


