10.17.Configuration of Delete job in File archive
This job type deletes data, which have been archived, from the archive.
Go to Jobs -> Add new -> Delete from archive.
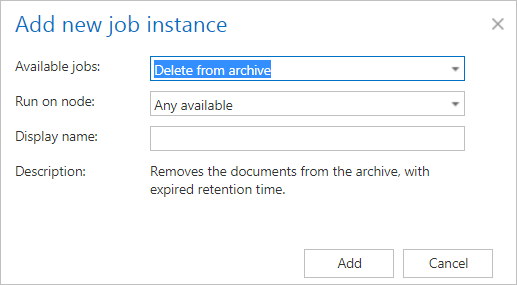
On the job’s configuration page go through the following sections; most of them are mandatory, filtering settings are optional:
✓ Running mode settings
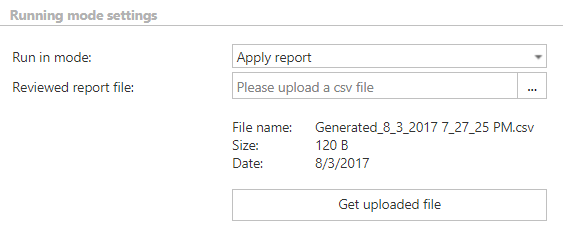
The job can be run in 3 modes:
1) Immediate deletion -> collects the expired documents and deletes them.

2) Create report -> collects the expired documents and provides a csv file with a list of documents. The administrator can delete documents from the list.

3) Apply report -> a csv file with a list of documents to be deleted must be uploaded. The administrator can delete documents from the list before running the job (only documents which are in the list will be processed). The job reads the list and if the documents are expired, deletes them.
✓ Scheduling settings
In this step the running times of the delete job must be selected. It is possible either to select a scheduler from the list or to create a new scheduler via the “Create new …” option.

✓ Folders to process
In this section the user is required to select the folder(s) where the archived data are located. There are two available options how the list of folders may be specified:
- The folder(s) may be added via +new option. In this case the folder(s) must be added manually one-by-one. Click on +new to open the File Path dialog.
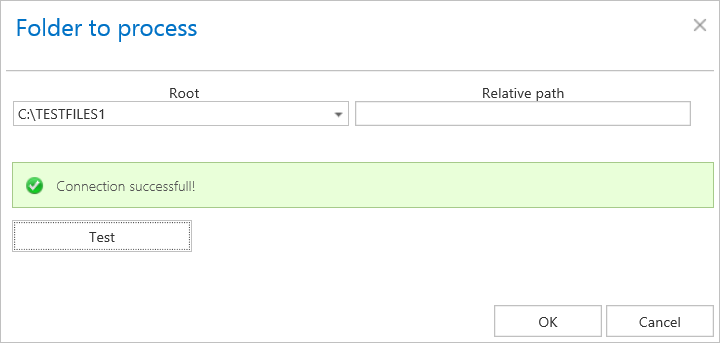
Click on “new” to specify the folder from where the files should be deleted. In the “Folder to process” dialog unroll the list of already created roots and select the one that should be applied. This dropdown lists the roots that are already configured (in File Archive settings: File Archive ⇒ Settings ⇒ Root folders). Enter the Relative path if necessary, test the path via the “Test” button and click “OK”.

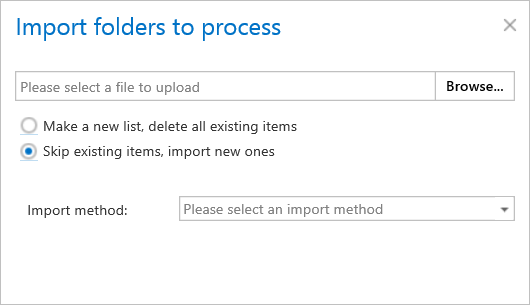
- The folder list may be also imported from a file. The file to be imported must contain the list of folders that should be processed. Click the import button and the Import file location dialog opens. Specify here the required settings according to chapter Importing contentACCESS configurations from files of this guide.

✓ Item filtering
This configuration enables for the user to filter among items by 3 types of criteria: by age, size or file type. It is also enabled to use more filters simultaneously. For filtering documents according to any of these criteria activate the filter button by checking the checkbox next to it, then click on the activated button.

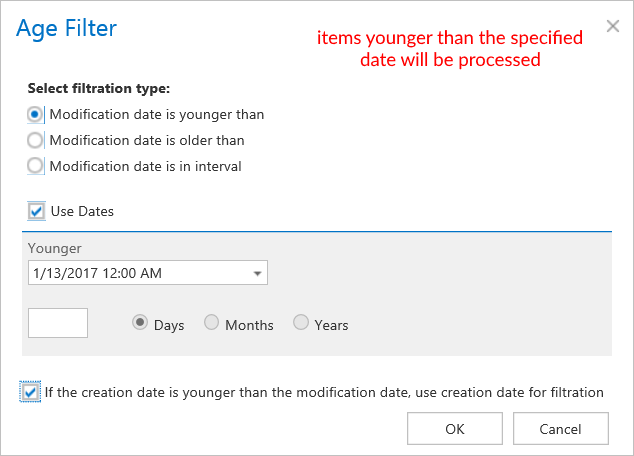
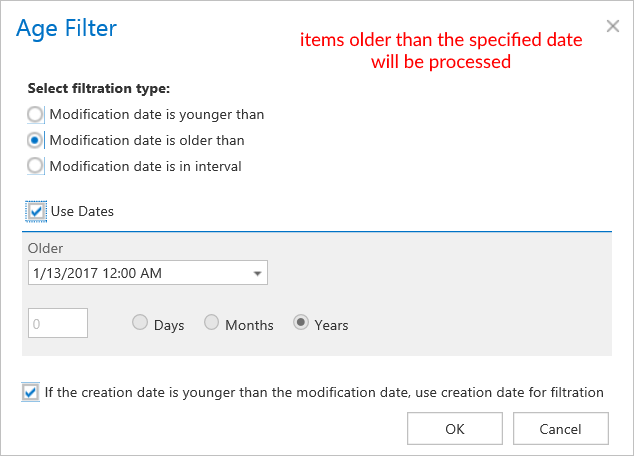
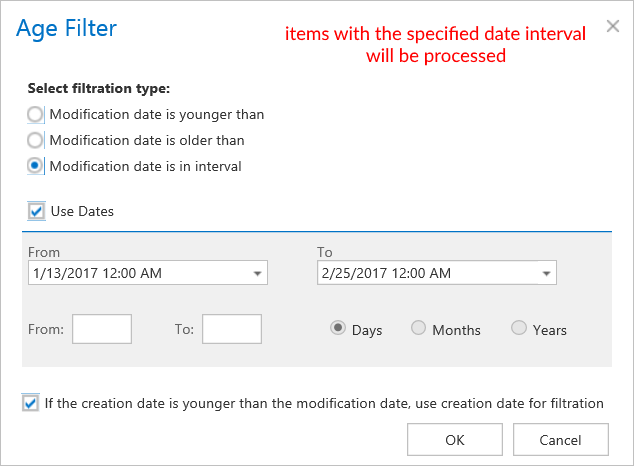
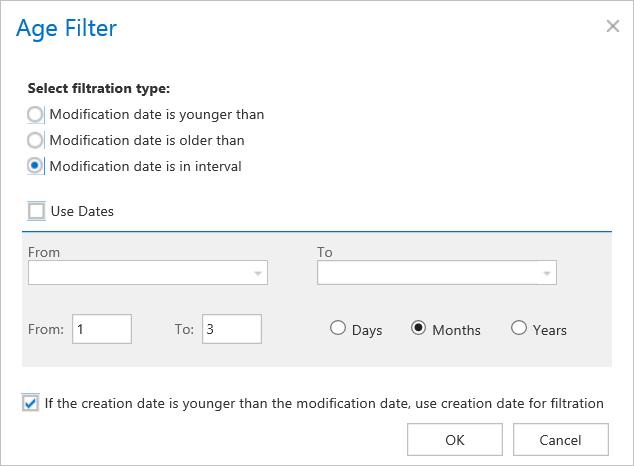
With this filter the user may select files to process with a specific age. The user has multiple choices here; he can select the filtration type from the list, and a) use either the Use dates option and pick up a date from the calendar, or b) he can enter a value into days/months/years textbox and search for the files which are younger than/older than or fall into time interval set here.
Using the creation date or modification date for filtering: By default the modification date is the determinative date, but this can be changed by checking the “If creation date is younger than the modification date, use creation date for filtration” checkbox. In certain cases the creation date of a file is set to younger date than the modification date of a file. This happens when a file is copied to another external disk (for example from disk G to disk I). In this case the creation date will be set to the date of the copy action. If the user would like to use this file in the future and would not like to delete it, this feature can solve the problem – it is possible to exclude the file with the newer creation date from the process. To create a proper policy take into consideration these rules: .
Examples of using dates:
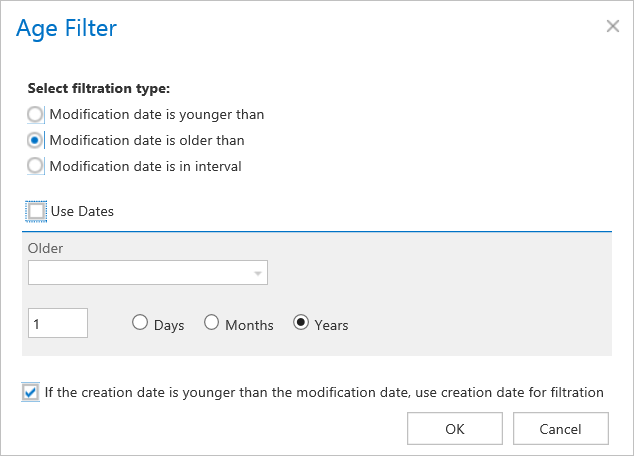
Examples of filtering using days/months/years:
If the Use dates checkbox is not selected, then the date selection option becomes inactive. In this case it is allowed to filter between items with Modification date is younger than/Modification date is older than a certain number of days/month/years. Enter the value into the From, To checkboxes next to the Days/Months/Years radio button (screenshot A). It is also allowed to filter out items which belong to a certain period of time, e.g. items that are 1-3 months old (screenshot B). If the Age filter has been set click OK.
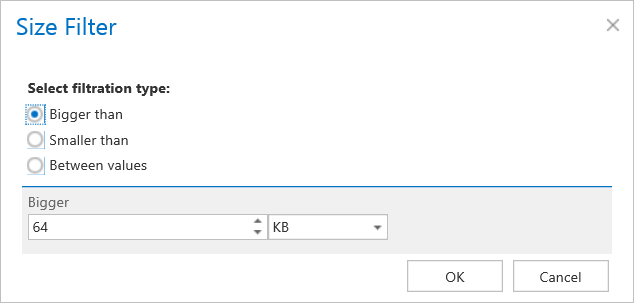
This filter can be very useful because it enables to find the biggest files and save space. For filtering files according to this criteria activate Size filter button by checking the checkbox next to it, then click on the active button.

In the Size filter dialog choose from the filtering types (Bigger than, Smaller than, or Between values), enter the size in kilobytes and click OK.
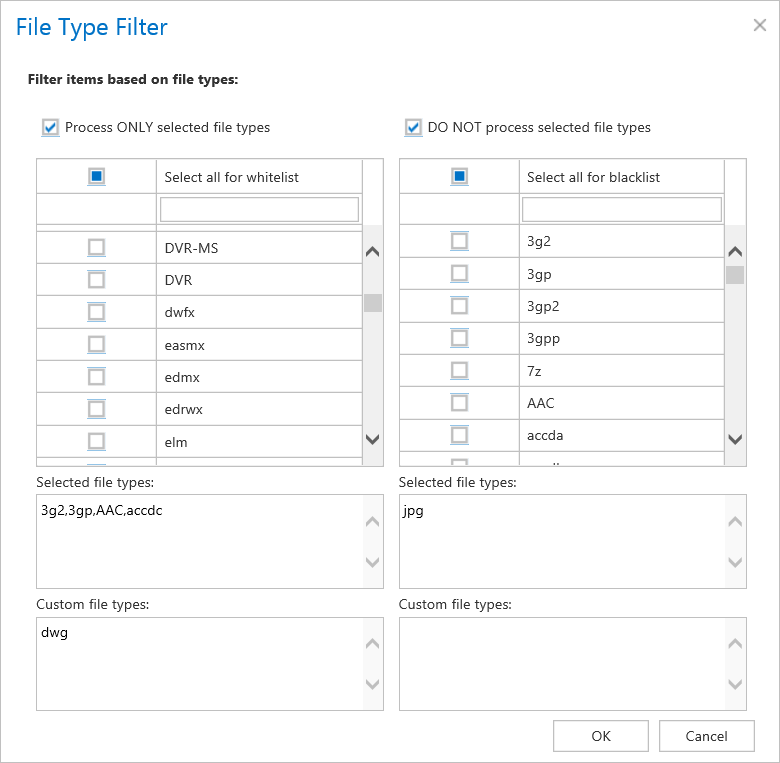
This filter was improved to select certain file types for processing. For filtering between documents according to this criteria activate File Type filter button by checking the checkbox next to it, then click on the active button.

In the File Type filter dialog the user may select the file types that need to be processed (option Process ONLY selected file types), or he may specify file types, that should be excluded from the processing (DO NOT process selected file types).
The file types selected in the whitelist/blacklist are displayed below the grid in a read-only text box. Any file types (also file types that are not included in the whitelist and/or blacklist) can be specified in the Custom file types text box (in this use case “dwg”).
✓ Notification settings
Select here, when you will need to get notification emails from the Delete job. It is possible to set here, if you need a notification email always/never, or, you need it only if an error/warning occurred during the process − for example, if the deletion of one or more items failed, then you may get a notification email about this error. Into the Recipient list textbox insert the email addresses of the people whom you would like to send these emails to – if there are multiple recipients, the addresses must be separated by “,” or “;”.

✓ Resource settings
Set the value, which will determine how many items will be processed simultaneously by the delete job. The recommended value is 2, as in our case.

At the end never forget to save your job configurations: click on Save in the left upper corner of UI.
When does the document expire?
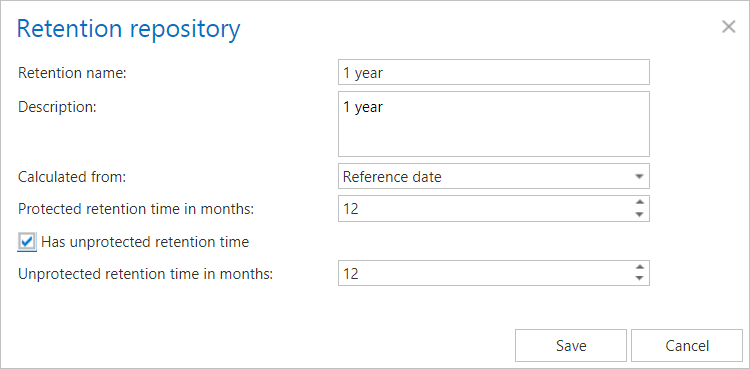
1) If the protected retention has expired (archive date / reference date + protected retention is in the past) and the document is not under legalhold and the document is marked for deletion
2) If the unprotected retention is defined and has expired (archive date / reference date + unprotected retention is in the past)
