6.21.Sharing settings
The sharing feature allows the user to specify the restriction and retention to be applied for the shared items when sharing them. It also automates the user invitation process in case the items are shared with an external recipient and sends an email with links pointing to the shared items. Full Auditing logs are provided about the sharing and file downloads, too.
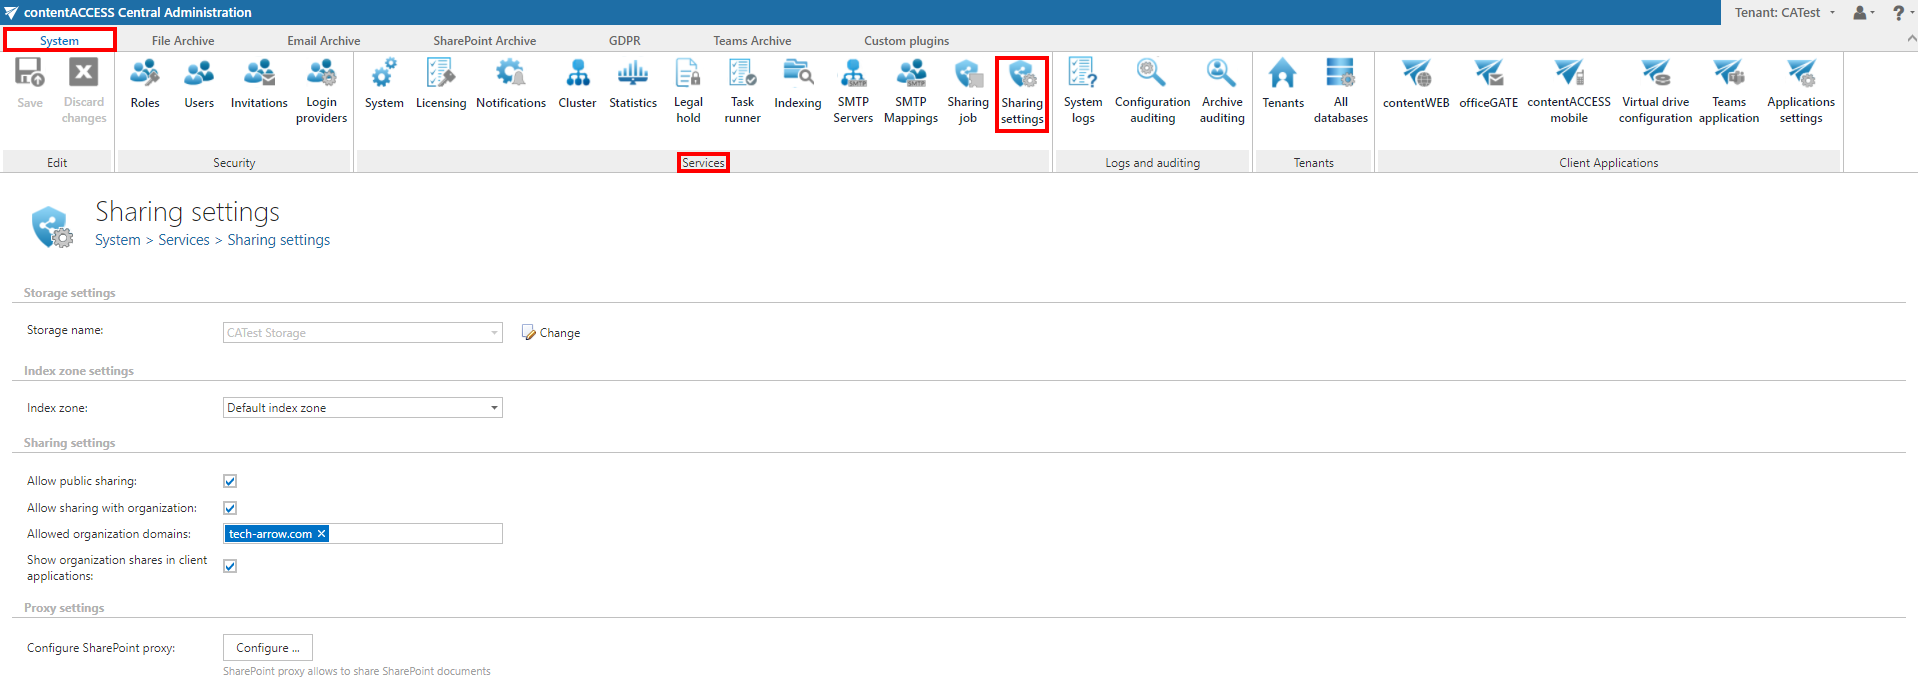
More settings for the Sharing module can be configured here. Navigate to System -> Services -> Sharing settings.

On this page, you will be able to set the following:
✓ Storage settings:
Choose an already configured storage from the dropdown list. The binaries for the files that were directly uploaded during the sharing will be stored here, items shared from the archive won’t be duplicated into this storage. For more information on how to set storages check section Storages above.

✓ Index zone settings:
Pick the Index zone that will be assigned to the shared items from the dropdown list. If you want to configure a new one, navigate to System ⇒ Services ⇒ Index zones.

✓ Sharing settings:
In this part, you can set the following:
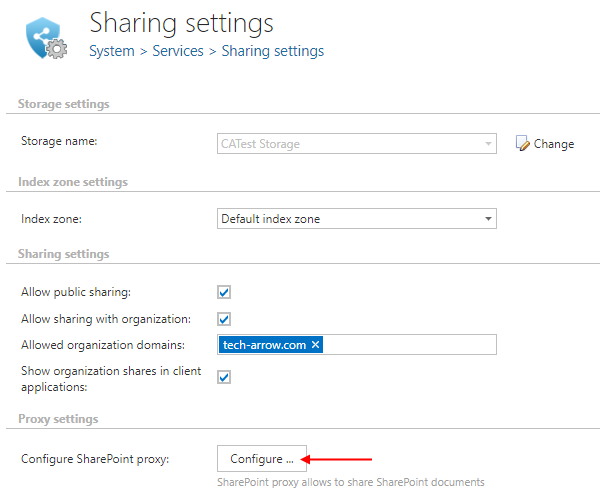
- Allow public sharing – if checked, you will be able to share archived items from contentACCESS Portal with anyone, even the people the sharing link or email is forwarded to will be able to open it; in case of public sharing, no authentication is required, therefore the Auditing is not able log the identity of the user that downloaded the item
- Allow sharing with organization – by checking this checkbox, the next two options will get enabled; the organization sharing will enable you to easily allow access to a file for everyone inside the organization. This is very useful when sharing company-wide documents.
- Allowed organization domains – in this textbox you can specify organization domain(s), which will be then used when selecting the option to share with “My organization” in contentACCESS Portal – the system will be checking the user’s login name for the domains. In case the organization owns multiple domains, all domains must be specified here for the users to be able to download the files.
- Show organization shares in client applications – if the option mentioned above was used, the organization shares will be visible in client applications; The files shared with organization access will be displayed for all users inside the organization.

✓ Proxy settings:
It is possible to also share not only archived, but also live SharePoint files that are not in the archive. By using the SharePoint proxy, all extra features (date/download restrictions, common view about the shared files,…) provided by contentACCESS are applied, while the files stay in SharePoint. The file download and access is done by a superuser, but during the sharing process, the permissions of the user that is sharing the file(s) are verified, if the user really has access to the file(s).
To Configure SharePoint proxy, click on the Configure… button.

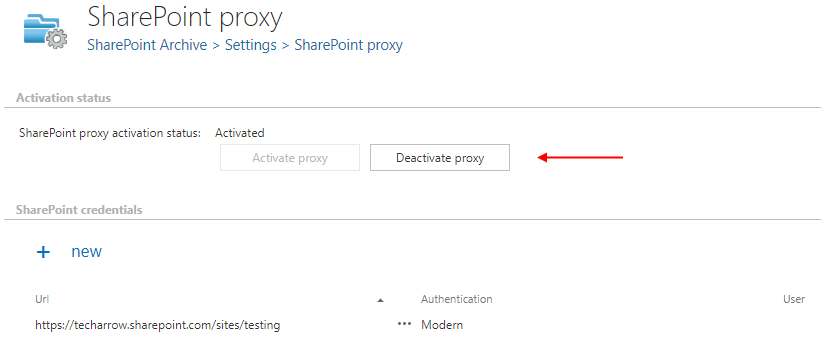
First, you will need to activate the SharePoint proxy by clicking on the Activate proxy button. In our case, it is already activated, that is why only the Deactivate proxy button is enabled.

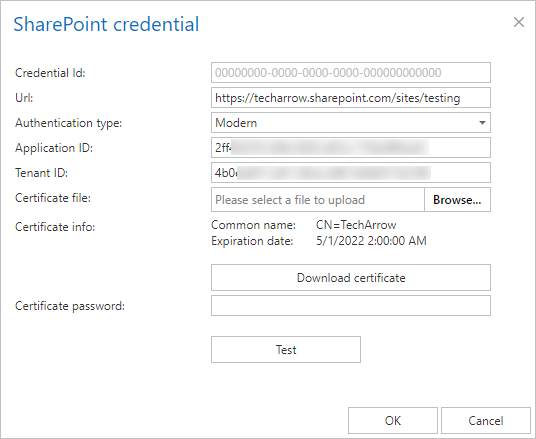
Each site collection you would like to share files from needs to be specified separately. To specify a new site collection, click on +new. The SharePoint credential window opens. Enter the URL and choose the Authentication type from the dropdown list – Integrated, Basic or Modern. All the authentication types are explained in this section.

