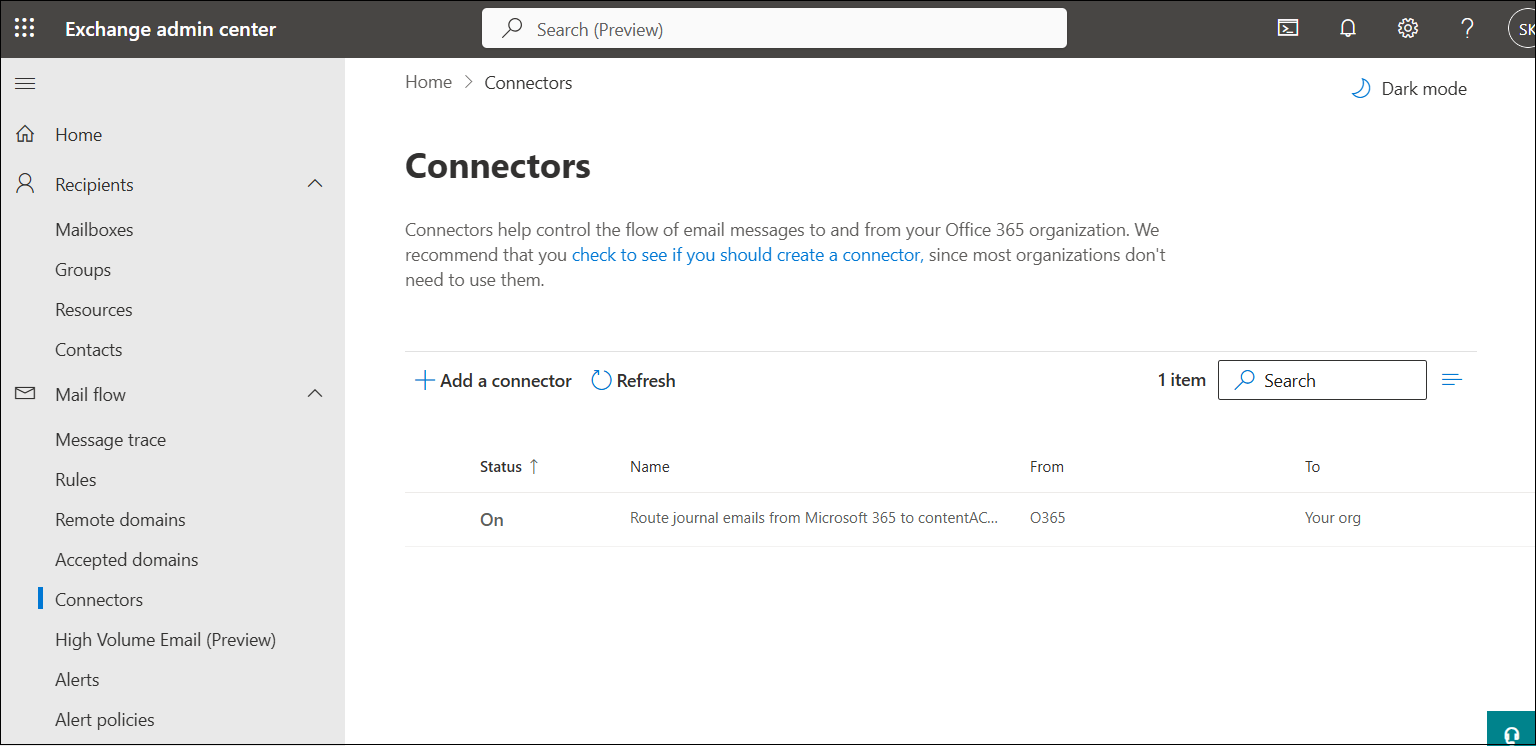
25.22.1.Configuring Microsoft 365 journal forwarding through third-party Exchange Online Protection
This section applies to the contentACCESS SMTP configuration.
The default Exchange Online Protection (EOP) for Microsoft 365 allows journaling without restrictions. However, when setting up EOP with a third-party solution, it is necessary to configure Microsoft 365 connectors (to properly route emails between Microsoft 365 and the external system). Failure to complete this step correctly may result in email delivery issues, anomalies in email display, or archiving failures.
Exchange Online Protection does not allow email forwarding to an external organization unless that organization is explicitly permitted. Since the contentACCESS SMTP server is not pre-authorized in your Microsoft 365 environment, a new connector must be created. This connector will enable communication between Microsoft 365 and the contentACCESS SMTP server.
Summary of steps in this guide:
- add a new mail flow connector
- configure email routing
- validate the connector
To demonstrate the configuration process, we will use the following test domains and emails:
| Component | Test Data | Description |
| Test Domain | testcompany.com | The simulated business domain used for testing. |
| Test Sender | user1@testcompany.com | A test sender email account. |
| Test Recipient | user2@testcompany.com | A test recipient email account. |
| Journal email | journal@testcompany.com | Email address where journaled emails will be stored. |
| Server Address | mailserver.testcompany.com | Simulated contentACCESS server receiving the emails. |
These values are replaced with real domain and server details when configuring the connector in a production environment.
To ensure proper email flow through a third-party service (such as contentACCESS), follow the steps below to configure a custom connector in Exchange Online.
1. Access the Exchange Admin Center
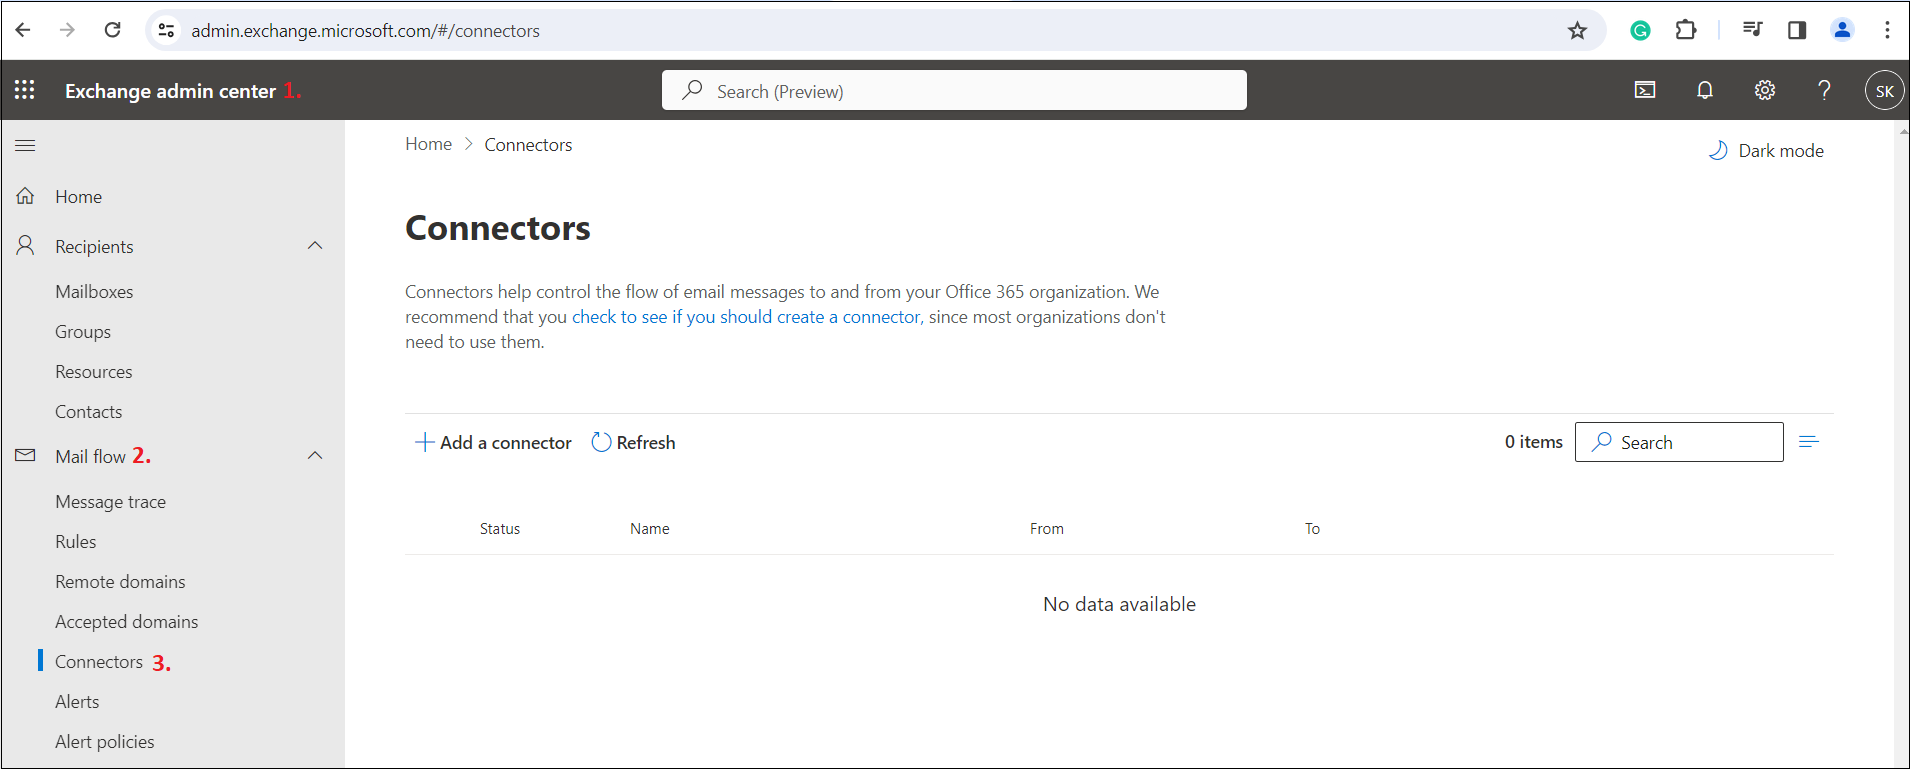
Sign in to the Exchange Admin Center, then navigate to Mail Flow from the left-hand panel. Click on Connectors to view existing configurations.
2. Create a new connector
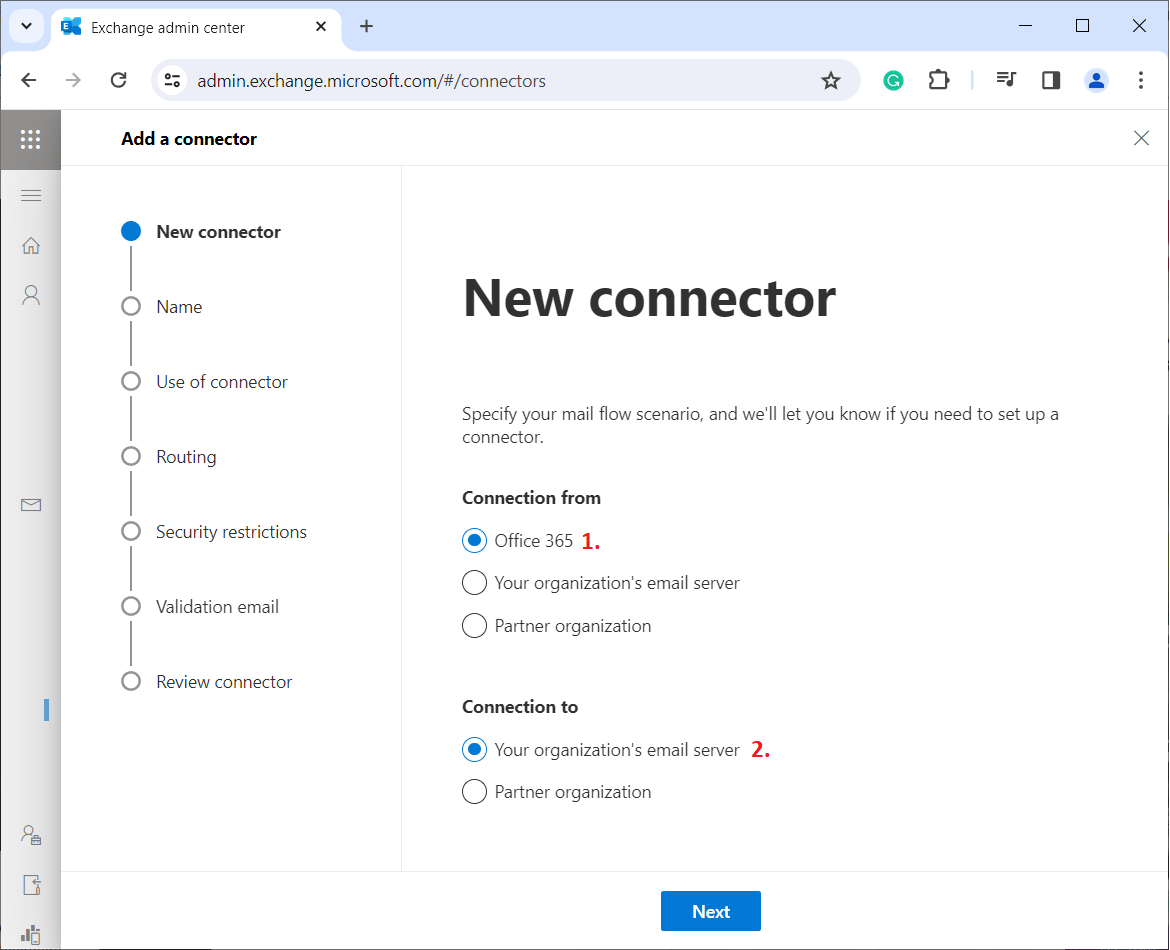
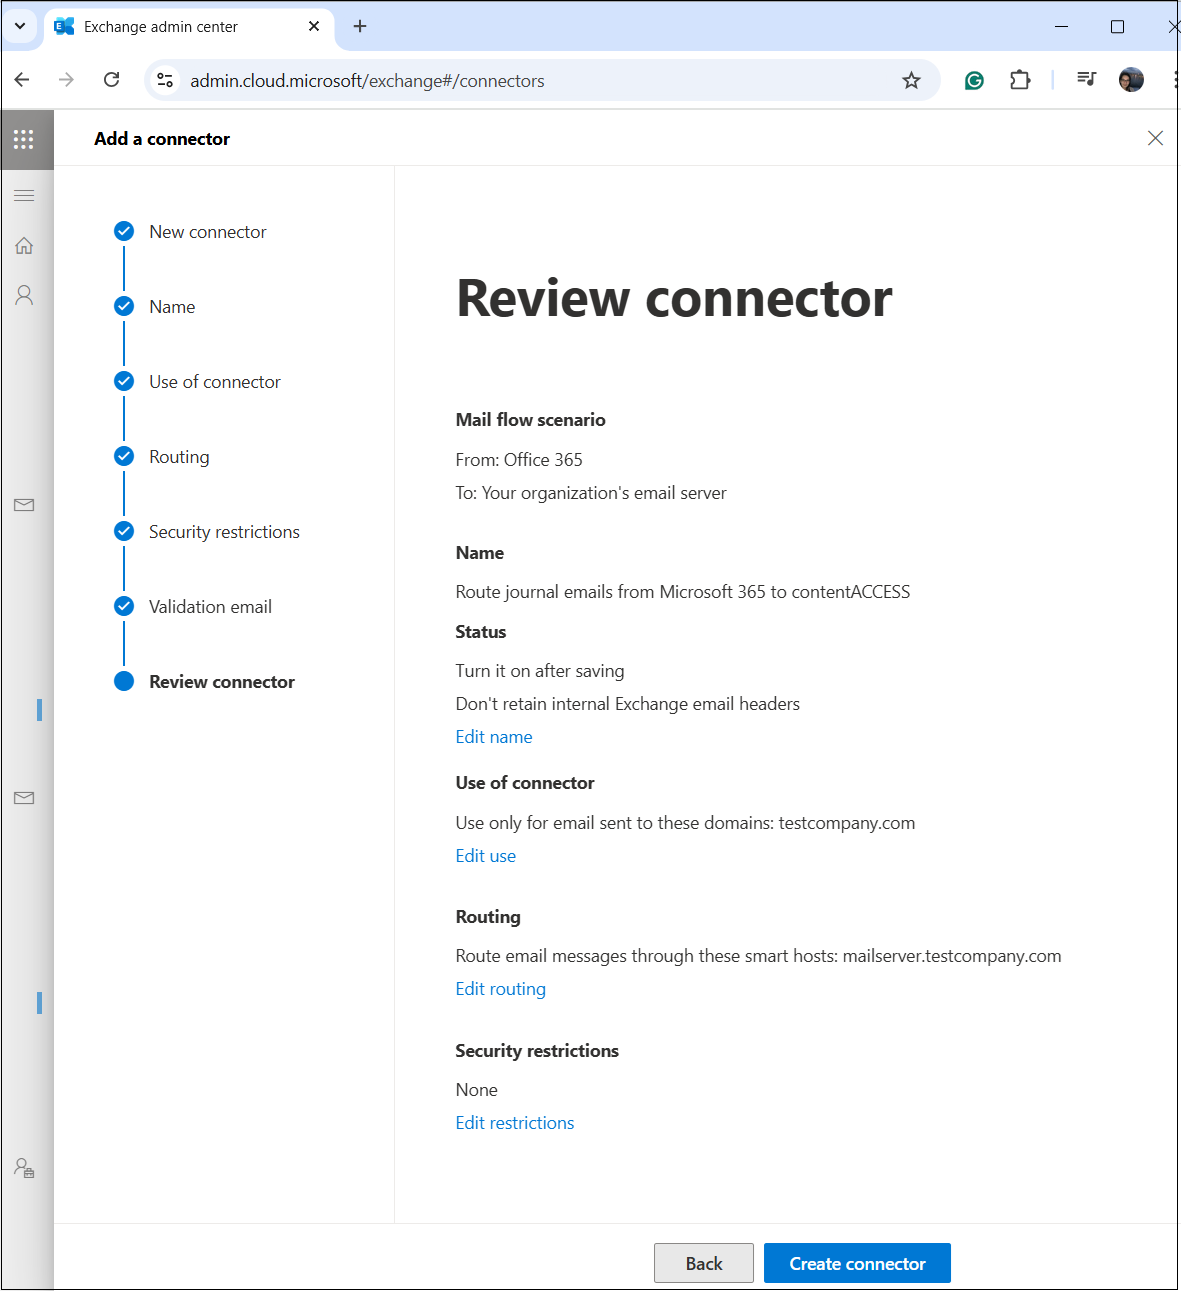
First, click the Add a connector button. Under Connection from, select Office 365 (as the emails originate from Microsoft 365). Next, select Your organization’s email server under Connect to (as emails will be routed to the contentACCESS server). Click Next to proceed.
3. Define Connector Settings
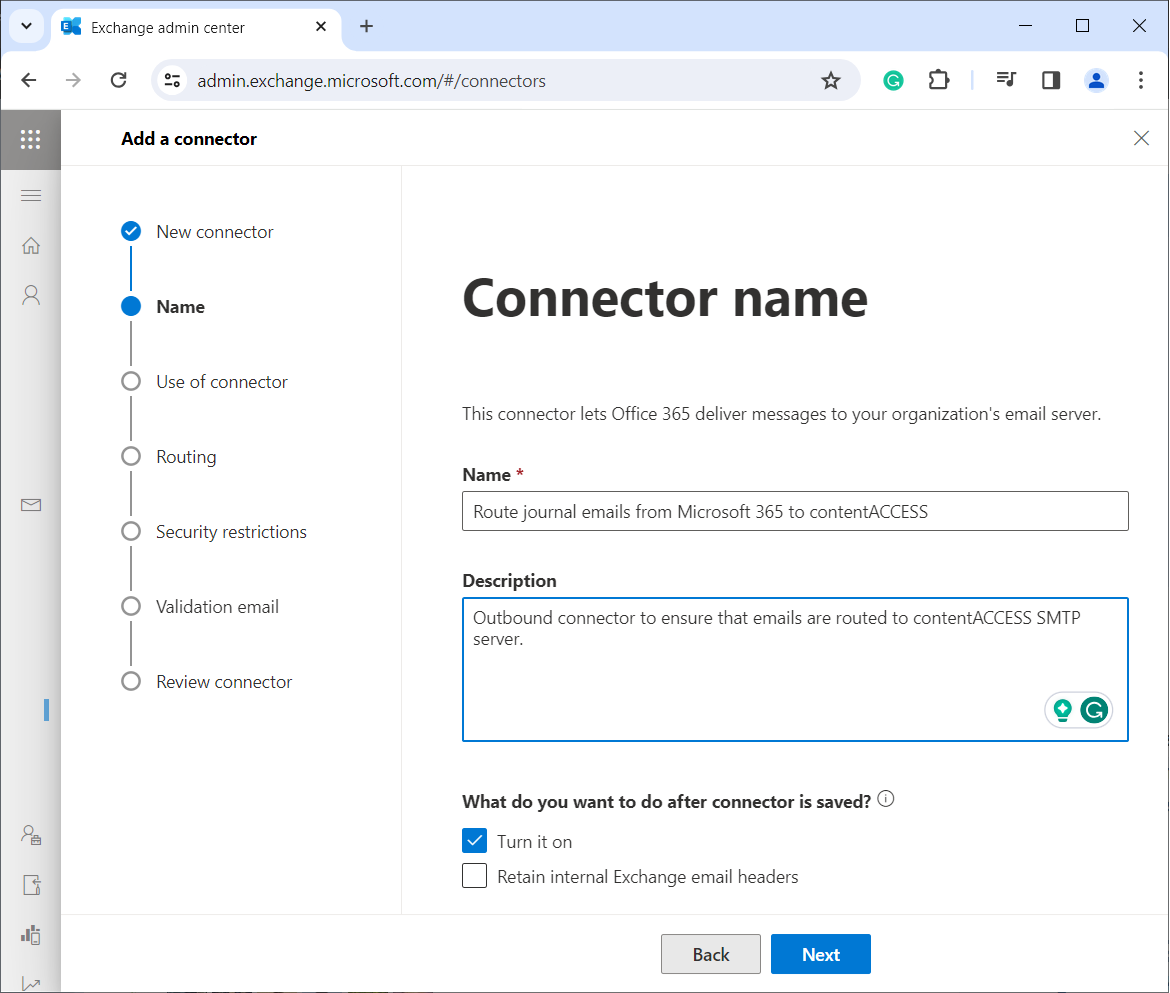
Enter the connector name (Route journal emails from Microsoft 365 to contentACCESS) in our case), add a description (optional), and check the Turn it on checkbox to enable the connector immediately. Click Next to continue.
4. Specify the target domain
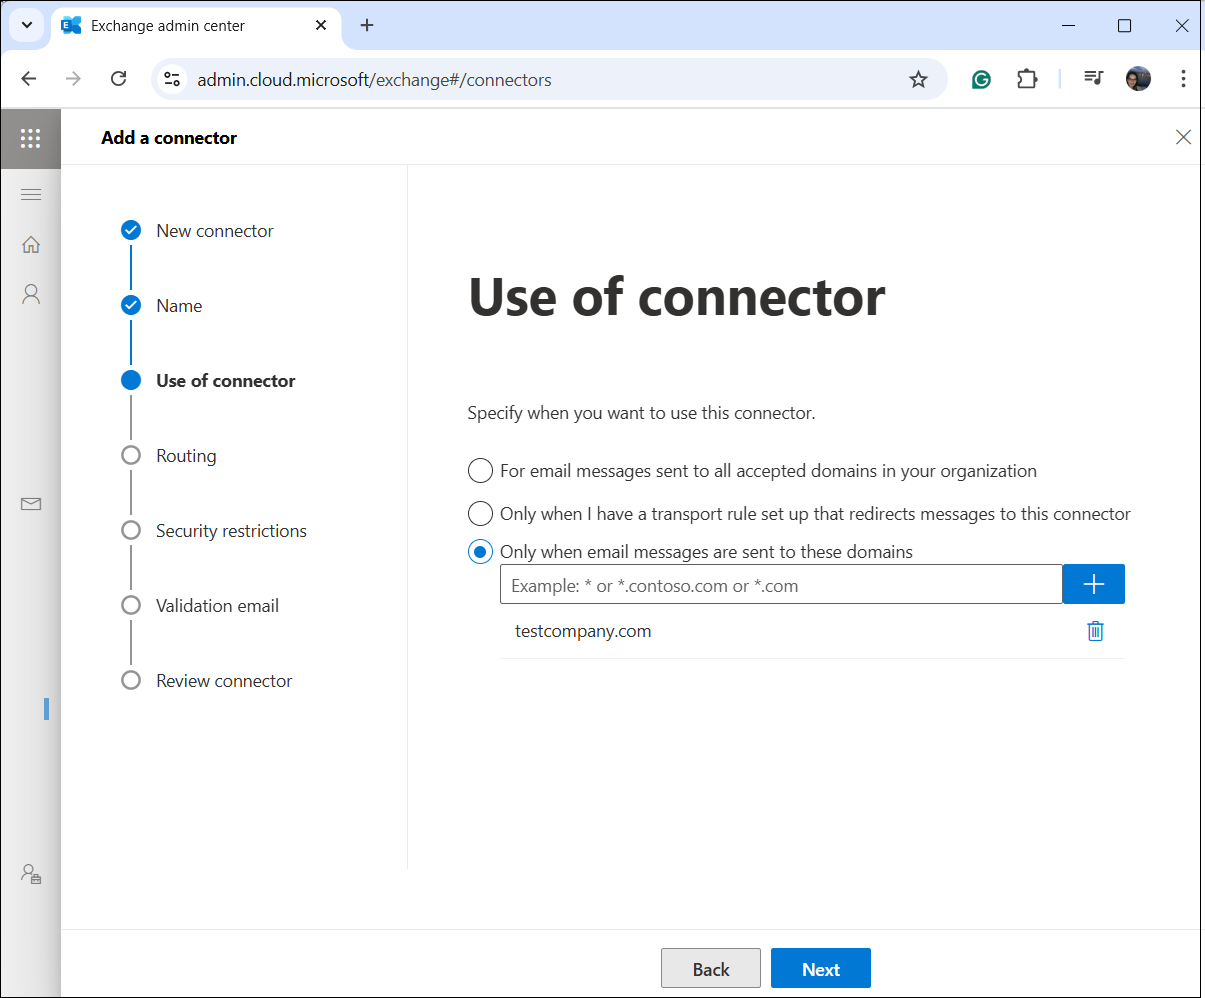
On the Use of connector tab, specify that the connector should be applied only when sending emails to specific domains. Add the domain (testcompany.com in our case), then click Next.
5. Define the destination server
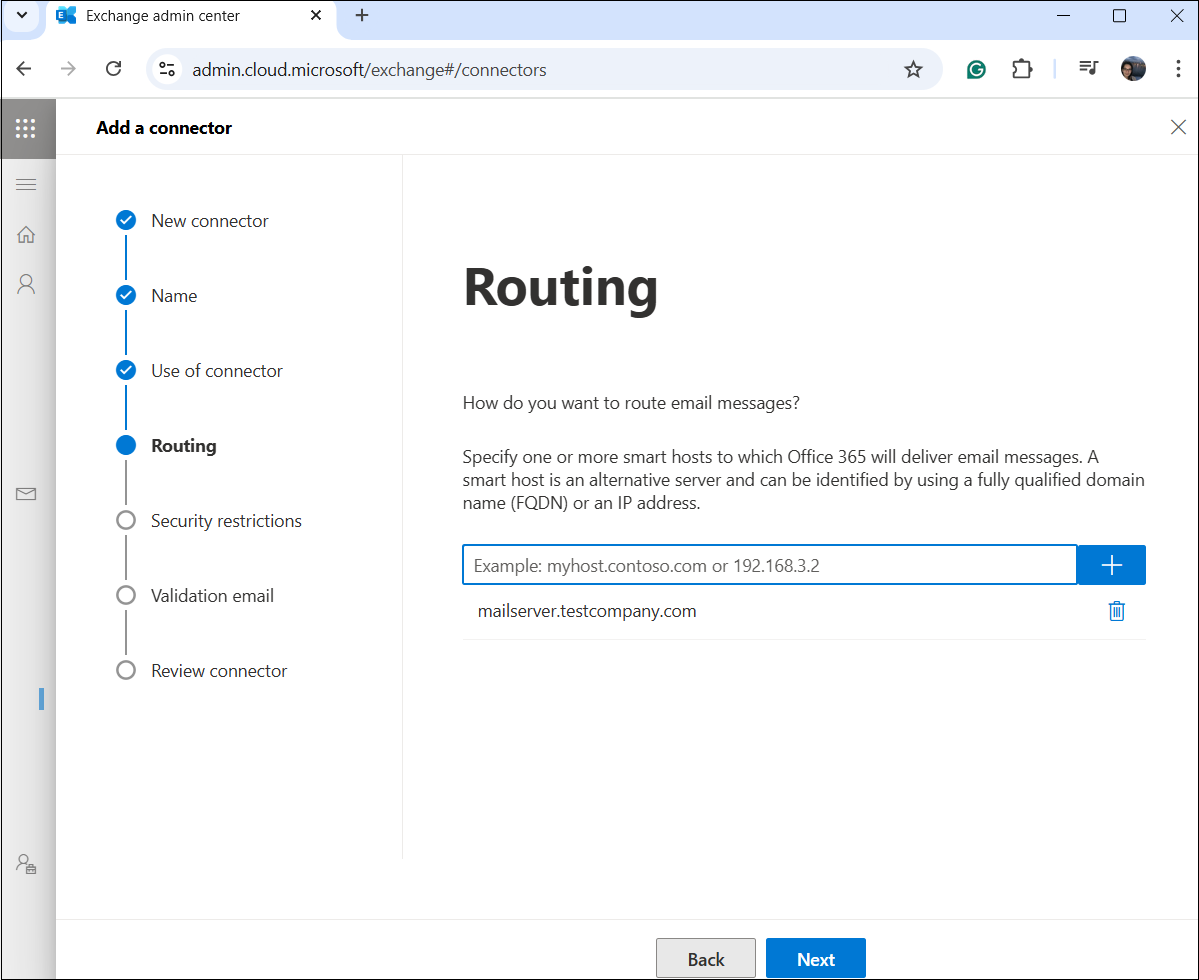
The next step is entering the name of the email server to which emails should be sent. In our demonstration, server address mailserver.testcompany.com simulates contentACCESS server. Click Next.
6. Configure security settings
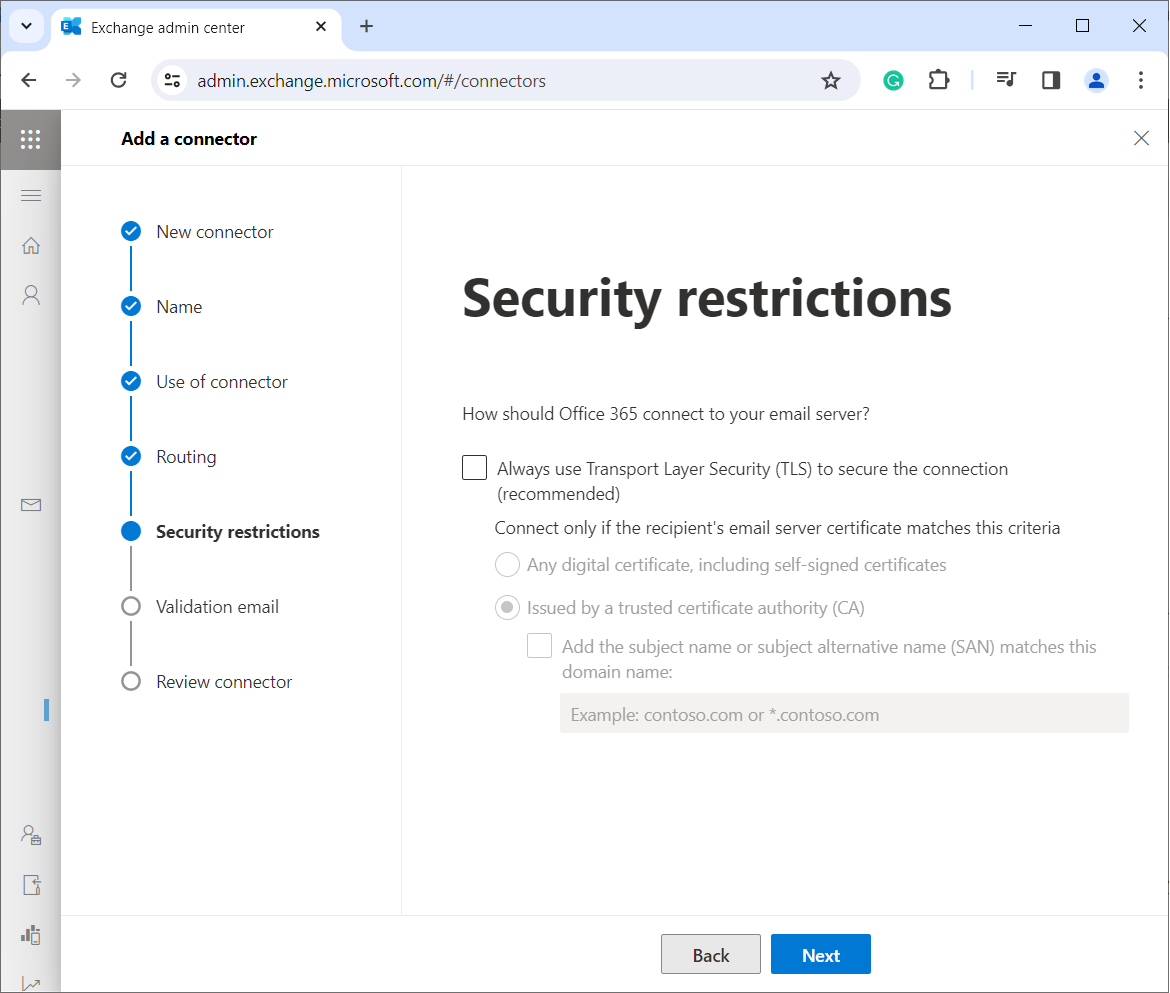
By default, Microsoft 365 requires TLS encryption for secure email transfer. However, some third-party archiving or filtering solutions may not support this, requiring it to be disabled for proper email delivery. Because of this, you need to turn off Transport Layer Security (TLS) on the Security Restrictions tab. Then click Next.
7. Set up the journal email address
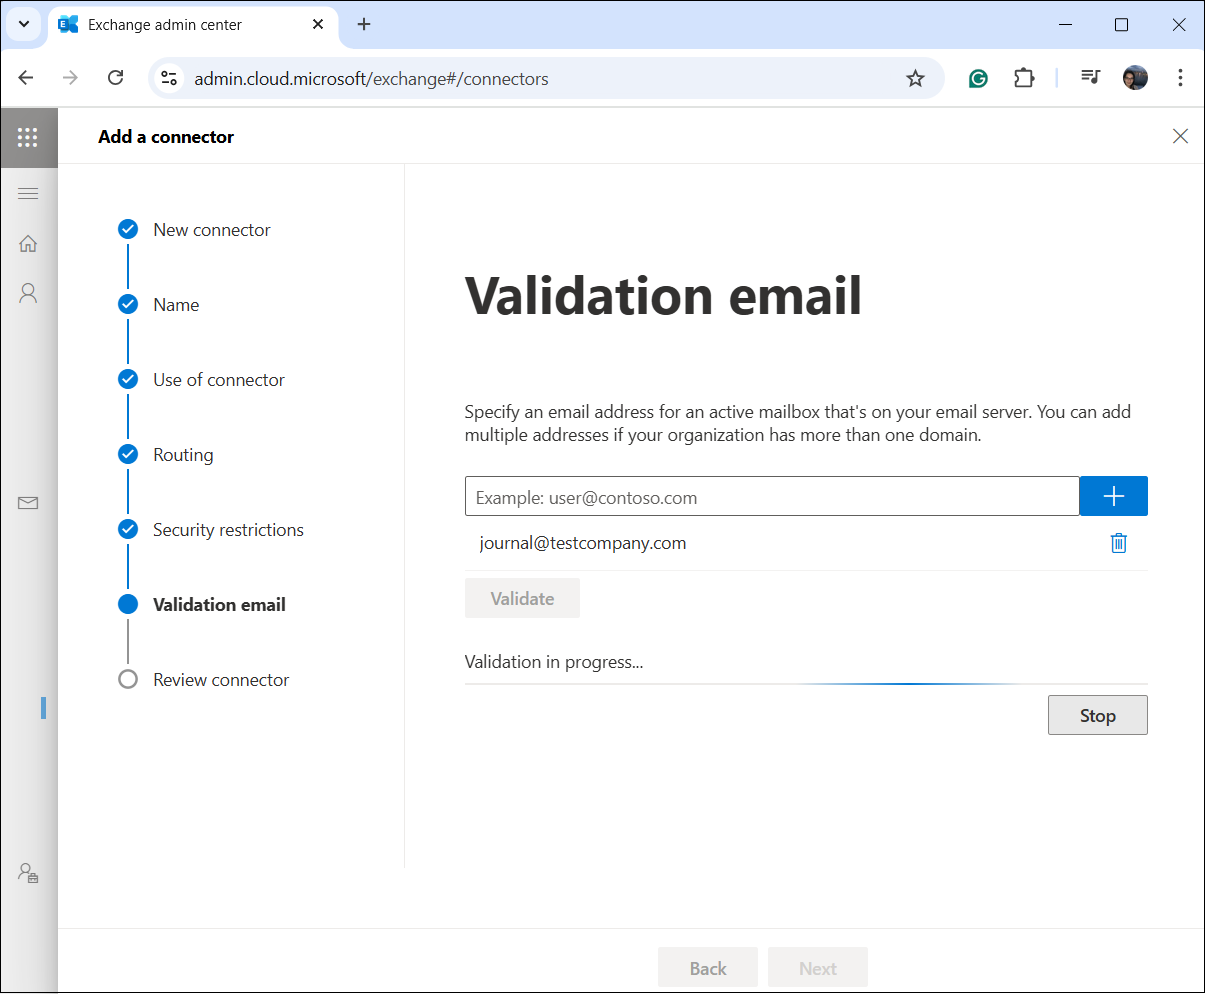
Journal emails contains copies of sent and received messages for compliance purposes. By specifying a journal recipient, archived messages will be forwarded to this mailbox.
As the last step, you need to specify the email address that will receive journaled emails (journal@testcompany.com in our case).
8. Review and Finalize
Check all configurations on the Review Connector page. If everything is correct, click Create connector to finalize the setup. The newly configured connector should now appear on the Connectors page.
9. Verification and testing
1. Verify connector functionality
To ensure that the connector is working as expected, send a test email from user1@testcompany.com to user2@testcompany.com and monitor if the email:
- successfully reaches the contentACCESS server: mailserver.testcompany.com
- is archived or processed correctly by the third-party service
2. Check connector logs
To confirm that the connector is actively being used, check the Exchange Message Trace logs:
- go to the Exchange Admin Center
- navigate to Mail flow -> Message Trace
- search for emails sent from user1@testcompany.com
- ensure the logs show that the email was routed through the newly created connector
3. Verify role assignment
To verify that the service principal was assigned correctly, use the following PowerShell command: Get-RoleGroupMember -Identity “TestConnector1”.
If the service principal was successfully assigned, PowerShell will not return any message. If verification is needed, this command will list the assigned members.

