contentACCESS documentation – version 3.0

  1. Introduction to contentACCESS
    1. Services provided by contentACCESS
    2. Software requirements
  2. Installation of contentACCESS
  3. contentACCESS Tools
    1. Installing Virtual drive
    2. Installing the Proxy server (contentACCESSWS)
    3. Installing the Proxy web services
    4. Installing Outlook forms
    5. Legacy email archive connectors
    6. Legacy archive connector for Metalogix Archive Manager Exchange Edition (MAM EE)
    7. Legacy archive connector for Email Lifecycle Manager (ELM)
    8. Installing TECH-ARROW’s WinShortcutter
  4. contentACCESS Central Administration
    1. Central administration login
    2. contentACCESS Central Administration user interface
  5. Tenants in contentACCESS
    1. How to create a new tenant
    2. Tenant limitations
    3. How to provide access to a tenant (adding new tenant administrators)
    4. Tenant administrator invitation types
  6. General system configurations
    1. Connection
    2. User interface
    3. Users — role types, creating new users, adding user logins
    4. How to activate your license key
    5. How to create user logins to an already existing user?
    6. System administrators
    7. Login providers
      1. External login provider configuration
      2. Associating an enabled provider with a user login
      3. contentACCESS users in third party systems
    8. System
    9. Licensing
    10. Notifications
    11. Monitoring — how to find out possible misconfigurations / reasons of potential system/job failures
    12. Distributed environment in contentACCESS — Clusters
    13. Statistics
    14. How to create/configure databases — All databases
  7. Common features
    1. Databases
    2. Schedules
    3. Retentions
    4. Storages
    5. Exchange connections
    6. Importing contentACCESS configurations from files
      1. Manual import of Exchange servers/groups/mailboxes to the contentACCESS Address book
      2. Importing File Archive root folders to be archived
  8. Creating new jobs in contentACCESS
  9. Jobs’ page, jobs’ context menu
  10. File Archive
    1. Introduction to File system archive
    2. File Archive settings
    3. Databases
    4. System settings
    5. Retentions
    6. Storages
    7. Root folders
    8. Aliases
    9. Schedules
    10. Provisioning settings and managing access to contentWEB
    11. Configuring aliases
    12. Configuration of jobs available in contentACCESS File Archive
    13. Configuration of File system archive job
    14. Configuration of a File system restore job
    15. Configuration of File system recovery job
    16. Configuration of Remote shortcutting job
    17. Active/inactive documents in File system archive
  11. Email Archive
    1. Important settings before creating an Email Archive job
    2. Database settings
    3. System settings
    4. Provisioning settings
    5. Retention settings
    6. Shortcuts in email archiving
    7. Storing of archived emails
    8. Creating email archive schedulers
    9. User experience
    10. Exchange 2013+: Mail app in OWA 2013+ or on MS Outlook 2013+ desktop version
      1. Deployment in contentACCESS Central Administration
      2. How Mail app works in MS Outlook 2013+ and OWA 2013+
    11. Exchange 2010: OWA 2010 integration
    12. Address book objects
    13. Granting access rights for mailbox users and explicit users to view the mailbox archive?
    14. Creating contentWEB users (option 1)
    15. Manage access to a mailbox archive (option 2)
    16. How the end user logs in to contentWEB (archive)
    17. Database and store assignment in email archiving
    18. How to assign database and storage to an Exchange group?
    19. How to assign database and storage to a mailbox?
    20. How to move data from source database/storage into a second (target) database/storage?
    21. Creating Email archive jobs: archive, restore, recovery, mailbox move, shortcut synchronizaion
    22. Email archive job
      1. Email archive job configuration
    23. Email restore job
      1. Email restore job configuration
    24. Email recovery job
      1. Email recovery job configuration
    25. Mailbox move job
      1. Mailbox move job configration
    26. Shortcut synchronization job
      1. Shortcut synchronization job configuration
  12. Custom plugins
  13. Email management job configuration
  14. SharePoint archive plugin
  15. Storage replication plugin
  16. Sharing plugin
  17. Datengut plugin
  18. Email synchronizer plugin
  19. contentWEB
    1. Logging in to contentWEB
  20. officeGATE
  21. accessGATE Mobile
  22. Virtual drive
  23. Terms of use
  24. FAQ

10.14.Configuration of a File system restore job

File system restore jobs are used to restore already archived items from shortcuts back into the original file location. To create a restore job, navigate to File Archive ⇒ Archive ⇒ Jobs button (File archive jobs page), and click on +new. In the Add new job instance dialog, select File system restore job from the dropdown list, select a node where the job should run from the Run on node dropdown list (if you would not like to specify a node here and the job should run on any available node, then select “Any available”), enter a Display name, and click on Add.

Documentation257
On the File system restore job’s configuration page the user is required to set the following sections:

✓ Scheduling settings:
In this step the running times of the restore job must be selected. It is possible either to select a scheduler from the list or to create a new scheduler via create new option. Restore jobs are run only in specific cases. In most of the cases a One time scheduler is used for the restore job (e.g. with start date 7th of September as in our case). (For more information about how to set schedulers refer to the section Schedules above.)

Documentation260

✓ Folder to process
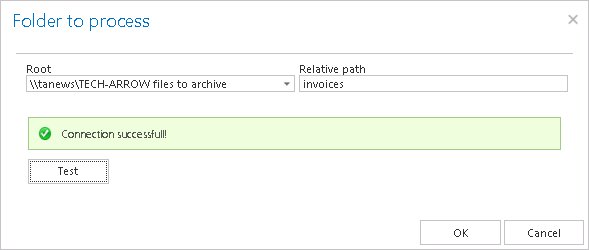
In this section you have to select the local folder(s) or remote share(s) where the shortcuts — which replaced the original files — are located. The job will restore the original files from these shortcuts. There are 2 methods how these folders may be specified:

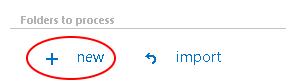
    1. Via “new” button:Click on + new and fill in the path to restore into the Folder to process dialog.

      cACCESS 2.9 doc 180
      cACCESS 2.9 doc 181
    2. Via the ”import” button:
      cACCESS 2.9 doc 182

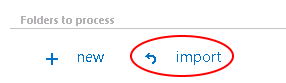
Import the folder path(s) to be restored from a file. Click “import”, browse for the import file, select the import method and specify the required settings, then upload the file with the desired file path(s). Learn more about files to import in chapter Importing contentACCESS configurations from files of this guide.

Important!!! It is highly recommended to specify file path(s) that can be accessed from anywhere. This is quite important also if the user has contentACCESS installed in a distributed environment (using multiple cluster nodes).

✓ Exclude folders
With this function you may set, which folders/subfolders should not be restored. If you would not like to exclude any folder from the restore process, you can skip these settings.

The folders may be excluded using one of the available methods: a) They may be added manually via the + new option; b) or may be imported in one of the available file formats via the import option.

cACCESS 2.9 doc 183

  1. Add exclude folders manually:
    Click on + new option. In the Exclude folder dialog’s textbox specify the folder(s) to be excluded. Use the hints that are listed in the same dialog. the same dialog.
    cACCESS 2.9 doc 184
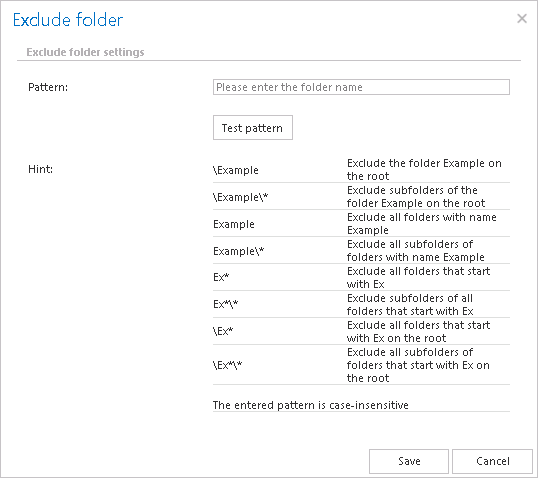
  2. Import the list of folders:
    Exclude folders may be imported as files in one of the available formats: CSV, XML, Tab delimited files or Space delimited file. The file to be imported must contain the list of folders to exclude. To import such a file with the list of folders refer to chapter Importing contentACCESS configurations from files of this guide.

✓ Modification date
This section allows to command to a restore job to restore the archived item a) either with the original modification date [original modification date (default)], or b) with the date of restore (restore date).

cACCESS 2.9 doc 185
It is rather recommended to restore the item with the original modification date, which is also set as default. However, “restore date” option might be useful in case, if an archive job on the selected folder path is already running and the age filter is set to younger older than the restore date. With this setting we can prevent the restored document from re-archiving. From this reason we also set in this use case “restore date” option.

✓ Notification settings.
Select here, when you will need to get notifications from the File Archive restore job. It is possible to set here, if you need a notification email always/never, or, you need it only in case when an error/warning occurred during the restoring process − for example, if the restore of one or more documents failed, then you will get a notification email about this error. Into the Recipient list textbox insert the email addresses of the persons, to whom you would like to send these emails. Notifications emails may be used as means of troubleshooting of possible failures/errors. (In this use case we do not require such notifications, so we set it to “Never”)

Documentation263

✓ Resource settings.
Set the value, which will determine how many items will be processed simultaneously by the file restore job. The recommended value is “2”.

Documentation264
At the end never forget to save your job configurations: click on Save in the left upper corner of UI.

The restore job has finished its task. The restored items can be viewed in the original file location, with the restore dates.

Yes No Suggest edit
Help Guide Powered by Documentor
Suggest Edit