contentACCESS documentation – version 3.0

  1. Introduction to contentACCESS
    1. Services provided by contentACCESS
    2. Software requirements
  2. Installation of contentACCESS
  3. contentACCESS Tools
    1. Installing Virtual drive
    2. Installing the Proxy server (contentACCESSWS)
    3. Installing the Proxy web services
    4. Installing Outlook forms
    5. Legacy email archive connectors
    6. Legacy archive connector for Metalogix Archive Manager Exchange Edition (MAM EE)
    7. Legacy archive connector for Email Lifecycle Manager (ELM)
    8. Installing TECH-ARROW’s WinShortcutter
  4. contentACCESS Central Administration
    1. Central administration login
    2. contentACCESS Central Administration user interface
  5. Tenants in contentACCESS
    1. How to create a new tenant
    2. Tenant limitations
    3. How to provide access to a tenant (adding new tenant administrators)
    4. Tenant administrator invitation types
  6. General system configurations
    1. Connection
    2. User interface
    3. Users — role types, creating new users, adding user logins
    4. How to activate your license key
    5. How to create user logins to an already existing user?
    6. System administrators
    7. Login providers
      1. External login provider configuration
      2. Associating an enabled provider with a user login
      3. contentACCESS users in third party systems
    8. System
    9. Licensing
    10. Notifications
    11. Monitoring — how to find out possible misconfigurations / reasons of potential system/job failures
    12. Distributed environment in contentACCESS — Clusters
    13. Statistics
    14. How to create/configure databases — All databases
  7. Common features
    1. Databases
    2. Schedules
    3. Retentions
    4. Storages
    5. Exchange connections
    6. Importing contentACCESS configurations from files
      1. Manual import of Exchange servers/groups/mailboxes to the contentACCESS Address book
      2. Importing File Archive root folders to be archived
  8. Creating new jobs in contentACCESS
  9. Jobs’ page, jobs’ context menu
  10. File Archive
    1. Introduction to File system archive
    2. File Archive settings
    3. Databases
    4. System settings
    5. Retentions
    6. Storages
    7. Root folders
    8. Aliases
    9. Schedules
    10. Provisioning settings and managing access to contentWEB
    11. Configuring aliases
    12. Configuration of jobs available in contentACCESS File Archive
    13. Configuration of File system archive job
    14. Configuration of a File system restore job
    15. Configuration of File system recovery job
    16. Configuration of Remote shortcutting job
    17. Active/inactive documents in File system archive
  11. Email Archive
    1. Important settings before creating an Email Archive job
    2. Database settings
    3. System settings
    4. Provisioning settings
    5. Retention settings
    6. Shortcuts in email archiving
    7. Storing of archived emails
    8. Creating email archive schedulers
    9. User experience
    10. Exchange 2013+: Mail app in OWA 2013+ or on MS Outlook 2013+ desktop version
      1. Deployment in contentACCESS Central Administration
      2. How Mail app works in MS Outlook 2013+ and OWA 2013+
    11. Exchange 2010: OWA 2010 integration
    12. Address book objects
    13. Granting access rights for mailbox users and explicit users to view the mailbox archive?
    14. Creating contentWEB users (option 1)
    15. Manage access to a mailbox archive (option 2)
    16. How the end user logs in to contentWEB (archive)
    17. Database and store assignment in email archiving
    18. How to assign database and storage to an Exchange group?
    19. How to assign database and storage to a mailbox?
    20. How to move data from source database/storage into a second (target) database/storage?
    21. Creating Email archive jobs: archive, restore, recovery, mailbox move, shortcut synchronizaion
    22. Email archive job
      1. Email archive job configuration
    23. Email restore job
      1. Email restore job configuration
    24. Email recovery job
      1. Email recovery job configuration
    25. Mailbox move job
      1. Mailbox move job configration
    26. Shortcut synchronization job
      1. Shortcut synchronization job configuration
  12. Custom plugins
  13. Email management job configuration
  14. SharePoint archive plugin
  15. Storage replication plugin
  16. Sharing plugin
  17. Datengut plugin
  18. Email synchronizer plugin
  19. contentWEB
    1. Logging in to contentWEB
  20. officeGATE
  21. accessGATE Mobile
  22. Virtual drive
  23. Terms of use
  24. FAQ

11.10.1.Deployment in contentACCESS Central Administration

    Important!!! Mail app prerequisites

  • Exchange 2013 or later version
  • MS Outlook 2013 or later desktop version or OWA.
  • Proxy installed over HTTPS connection (refer to section “Installing the Proxy web services“.
  • Default shortcut and a default retention must be set in contentACCESS Central Administration.
  • On the System page (System tab => Services group => System button => External accessibility settings) a HTTPS alias must be configured.
  • Role “Org Custom Apps” must be assigned for the EWS user on the Email Archive System settings page, in section EWS settings. This role enables an administrator to install and manage custom apps for the organization (read more about the role here).

 
The administrator is required do the following configurations for manual email archiving. He has to

  1. configure a shortcut that Mail app will use and set this shortcut as default (refer to section “Shortcuts in email archiving”);
  2. configure a retention that Mail app will use and set this retention as default (refer to section “Retentions”);
  3. install the Proxy server with HTTPS connection (refer to section “Installing the Proxy web services”);
  4. configure HTTPS based alias under External accessibility settings;
  5. install Mail app (section Mail app status);
  6. configure Mail app (section Mail app configuration)
  7. Activate Mail app for the desired mailboxes (section Activate mail app for).

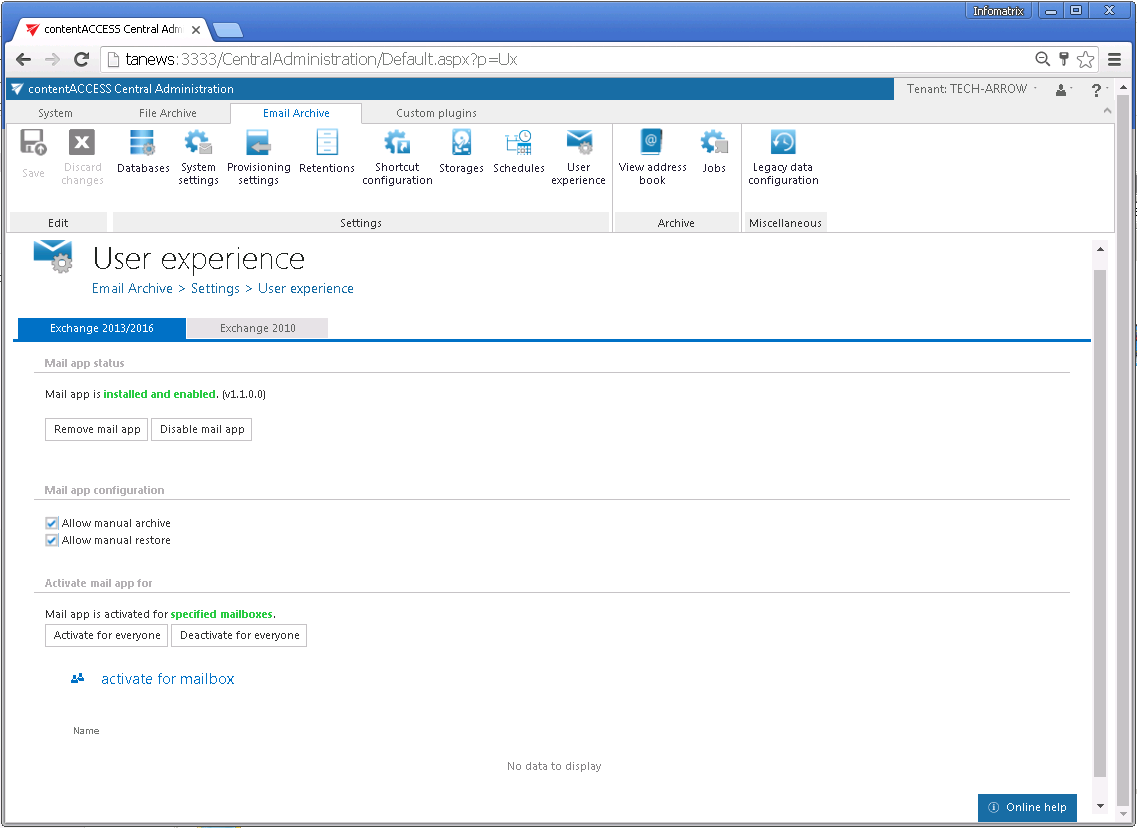
To install Mail app, navigate to Email Archive ⇒ Settings ⇒ User experience on the ribbon, and click on Exchange 2013/2016 tab on the User experience page:
mail app configured

Mail app status

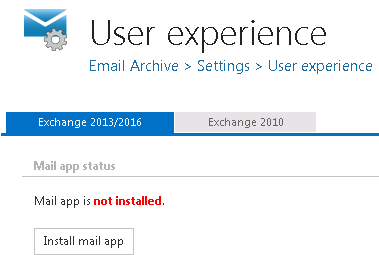
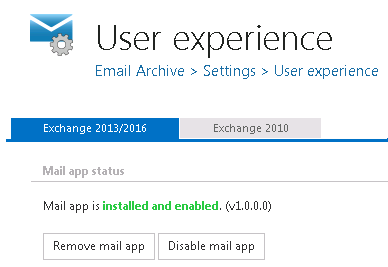
In section Mail app status you may install or remove mail app on the Exchange. To install it, click Install mail app button and wait until the installation process finishes (Screenshot A). With clicking on option Remove mail app you can uninstall this application from the Exchange; with clicking on Disable mail app the application can be globally disabled (turned off) for all Exchange groups/mailboxes (Screenshot B).
install mail app uninstall_disable mail app

Screenshot A: Installing Mail app.                                     Screenshot B: Uninstalling/disabling Mail app.

Mail app configuration

Once mail app is installed, you can set the mail app functionalities – manual archive and/or manual restore – to be used. This configuration will be applied globally for every mailbox. If manual archive and/or manual restore functionality is not allowed, the mailbox user can see a notification in the footer area of the mailapp and the button related to the disabled functionality is hidden.

This configuration is very useful e.g. if you want to allow manual restore for the users, but want to restrict manual archiving directly from the user mailboxes.

Activate mail app for Exchange servers/groups/mailboxes: The application is available for the user (in his mailbox) only in case if it’s activated for him. Once Mail app is installed and the functionality is configured, you can activate it for the mailboxes that will use this application. If Mail app is disabled, the activation settings are unavailable.

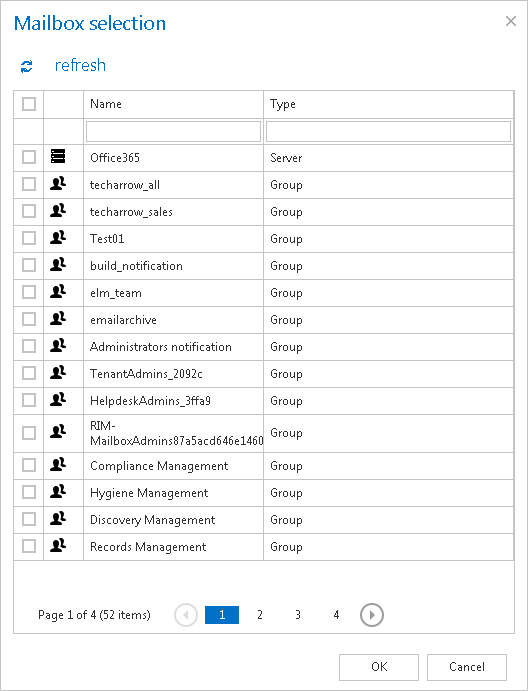
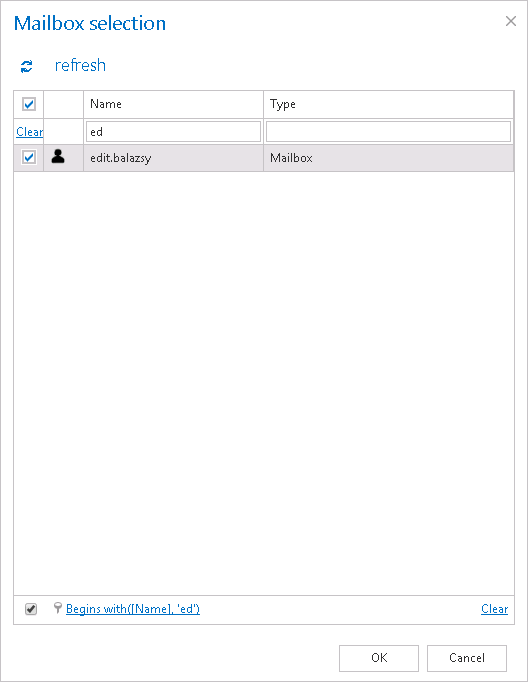
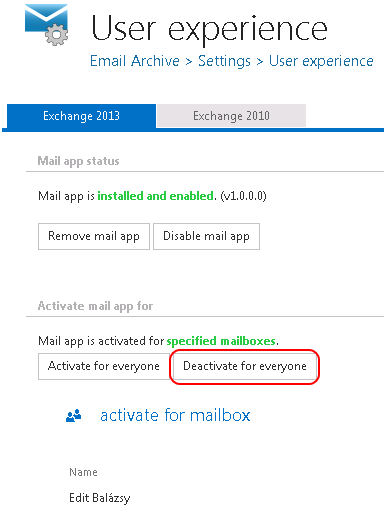
Scroll down to section “Activate mail app for”. Use option “Activate for everyone” if the application should be activated for every user. To activate it only for a given Exchange group/Exchange mailbox, click “activate for mailbox” and select the desired mailbox(es)/group(s) from the list of the Mailbox selection dialog. In this use case (refer to the pictures below) we have activated it for one user only.
Documentation367 Documentation368

It is also possible to deactivate the application for all configured Exchange groups/mailboxes (option “Deactivate for everyone”).
Documentation369

Yes No Suggest edit
Help Guide Powered by Documentor
Suggest Edit