- Introduction to officeGATE
- Getting started
- Launching officeGATE
- Connection Settings
- General officeGATE settings
- Offline file access settings
- License key activation
- Handling with documents using officeGATE
- Troubleshooting
4.2.3.Connecting to SharePoint site(s) ↑ Back to Top
The following SharePoint versions are supported by officeGATE:
- Office 365, SharePoint 2013, SharePoint 2010
- Foundation
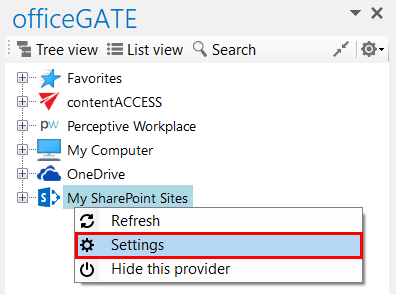
Open the SharePoint connector settings dialog with clicking on “Settings” in the ![]() SharePoint node’s context menu (or in officeGATE settings dialog ⇒ Providers tab).
SharePoint node’s context menu (or in officeGATE settings dialog ⇒ Providers tab).
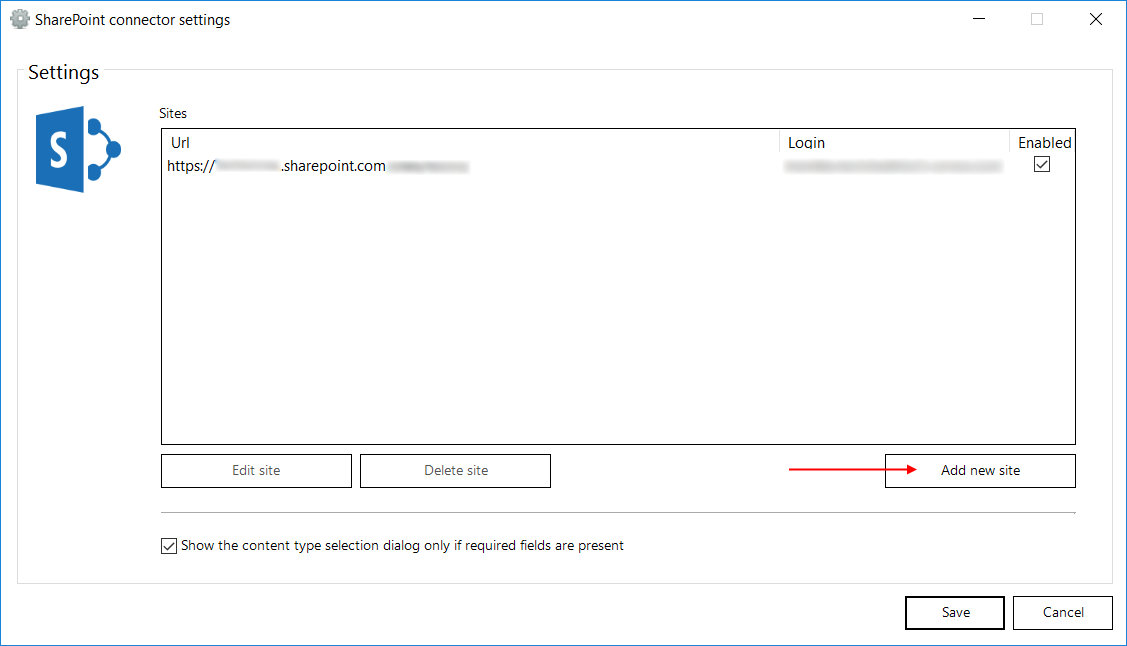
officeGATE supports the connection to multiple SharePoint sites. The already connected sites are listed in the SharePoint connector settings dialog. This dialog is empty when connecting to a SharePoint site for the first time. To add a new site to the list, click on “Add new site” button.
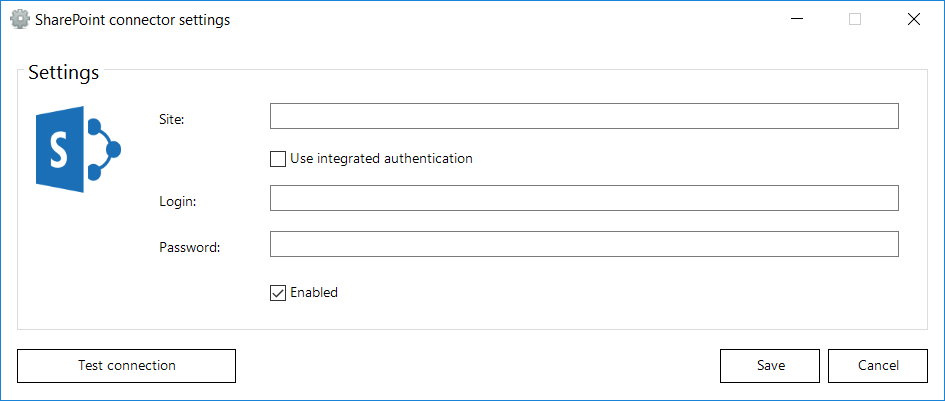
A new dialog (like on the picture below) will automatically open. In this dialog you need to specify the site that you want to connect to. Fill in the Site URL and enter Login with the corresponding Password. If the Use integrated authentication checkbox is checked, the user’s current Windows identity will be sent to the SharePoint server and used for authentication and the Login and Password textboxes will be disabled. Further check the connection with clicking the Test connection button and then click Save.
The Show the content type selection dialog only if required fields are present option (in the initial dialog) allows for the user to decide if the content type and metadata will be required:
- By each upload, regardless if there are required fields present – in this case the option should be turned off
- Only by uploading to containers requiring these properties – in this case the option should be turned on.
The required data are filled into a show-up dialog when uploading to a SharePoint container. For more information read this chapter.
Editing SharePoint sites
SharePoint settings in officeGATE need to be changed in many cases (due to the change of the password, for example). To change these settings select the site that you need to edit and click on the “Edit site” button. The settings dialog of the corresponding site will be opened, where you can change the URL, user or password (Screenshot A).
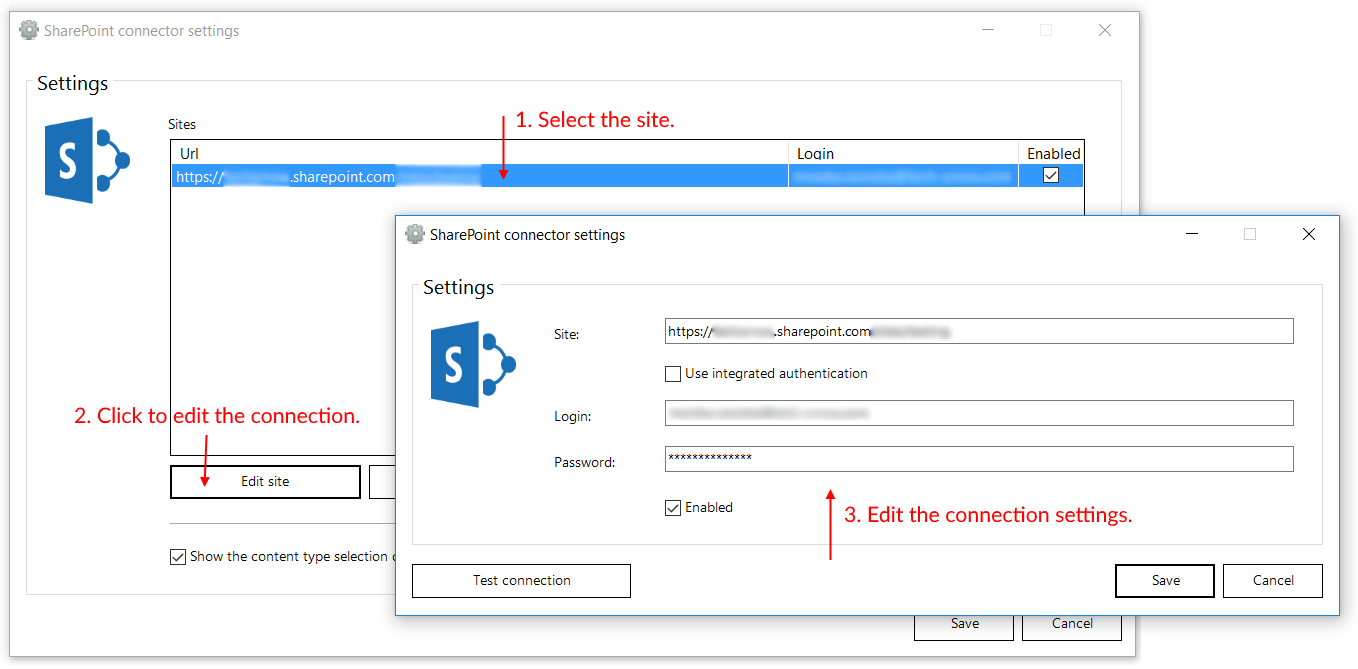
The sites can be also disabled/enabled with checking/unchecking the “Enabled” checkbox in the corresponding row (Screenshot B). If a SharePoint site has been disabled, it will not be connected to officeGATE (it will be hidden in the pane, too).
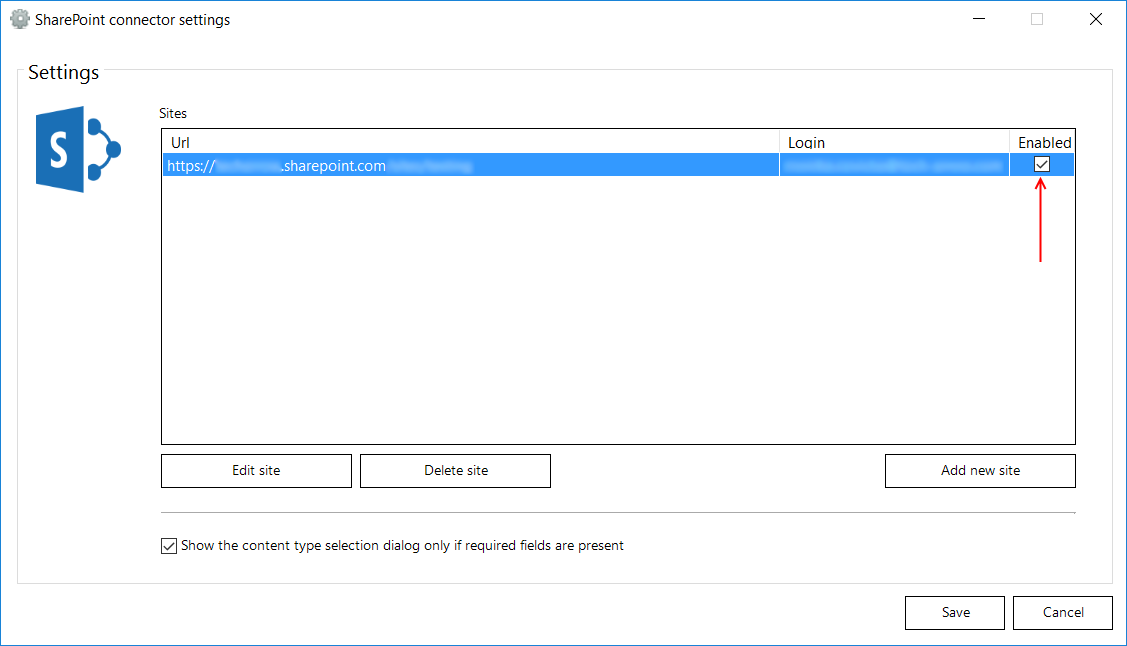
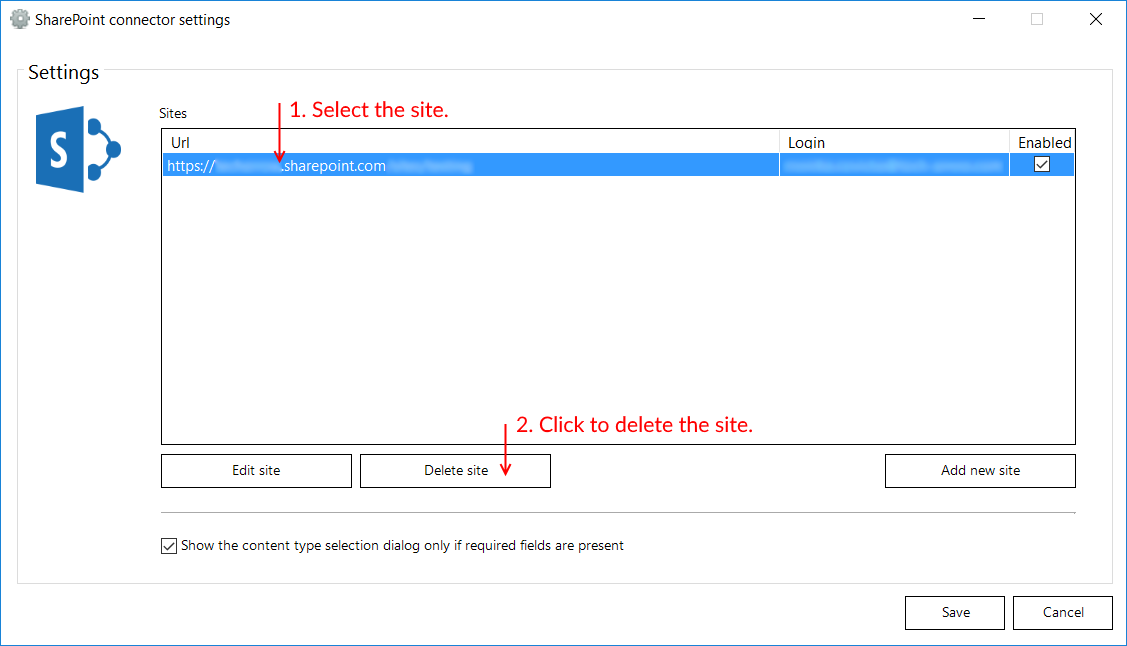
SharePoint sites can be also deleted from the list. To delete a site select it in the list, then click on option “Delete site” in the dialog (Screenshot C). The connection with deleted sites can be newly established with clicking on the “Add new site” button, and specifying the required fields in the dialog.
