7.5.Advanced search
With the advanced search function, the user may search in one or multiple entities simultaneously according to one or multiple search criteria. With advanced search it is not allowed to search in one folder only. It crawls the whole folder structure of the selected entity/entities.
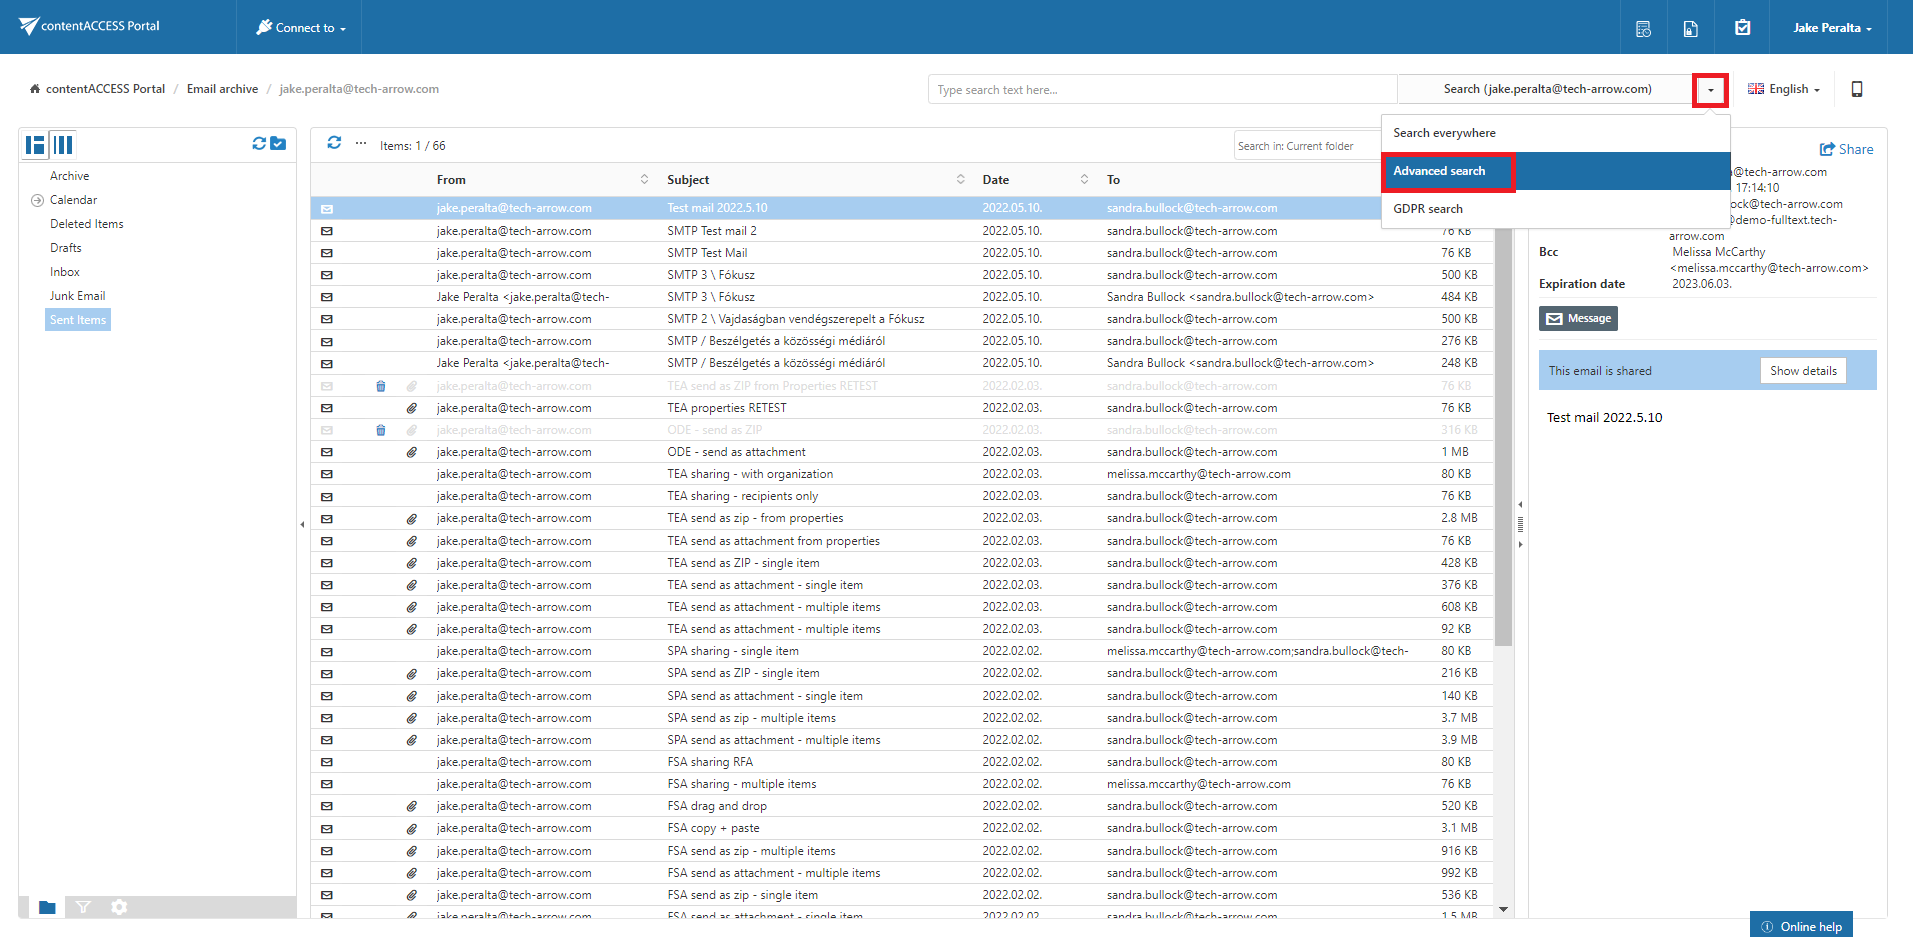
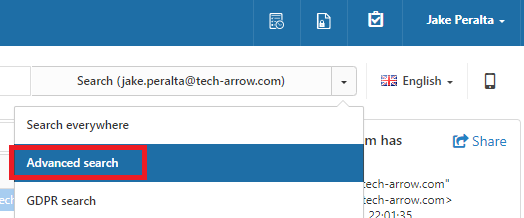
To start Advanced search, connect to an entity in the Connect to list. Then choose Advanced search option from the dropdown list on the right side of the user interface.
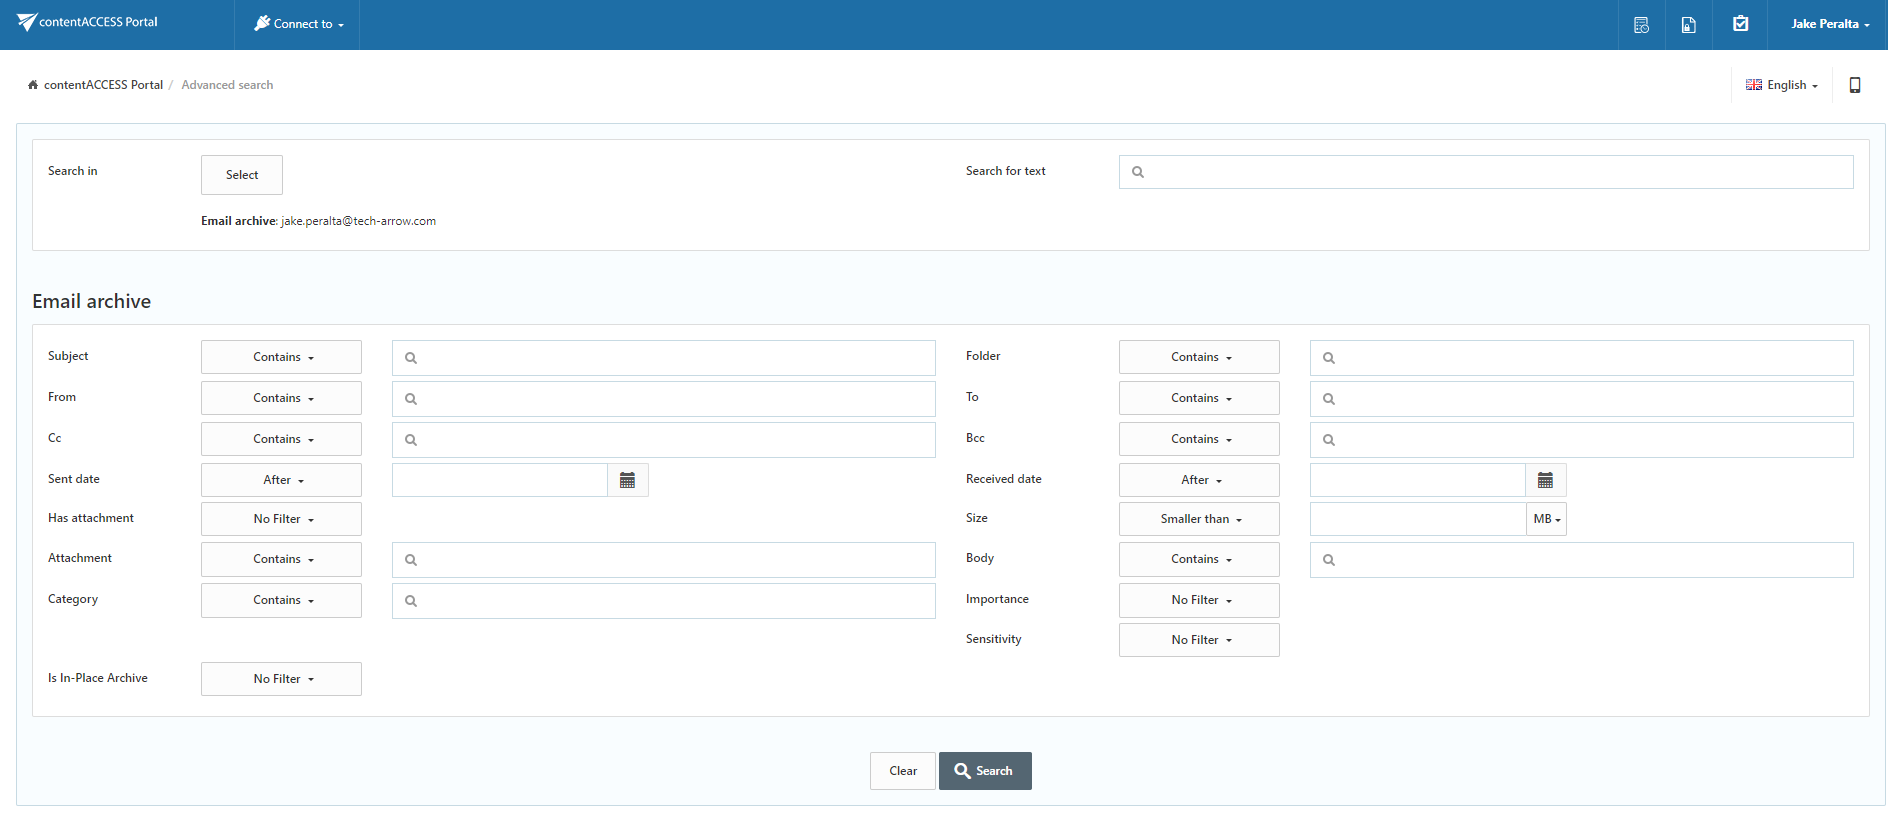
The Advanced search page will be loaded. Unroll the Search in dropdown list and select the entities (mailboxes/root folders) to be crawled. Search in filter lists all available mailboxes/roots on which the logged on user has the necessary access permissions.
If the user does a search using Advanced search and there are models which support Fulltext search and also those which don’t, a search mode selector will be visible. If the user selects Fulltext, it will search only in models which support Fulltext search. If the user selects Classic, it will search in models which support other types of search, except fulltext. For more information about this setting, read this section of the manual.
By using the advanced search criteria, the user may decide if documents with the identical name will be searched for (use the “Equals” filter), or also documents with this partial name will be searched for (use the “Contains” filter).
The range of parameters that can be set differs based on what kind of entity does the user Connect to (File archive, Email archive, SharePoint archive, Teams archive, Teams chat archive…). Here on the screenshot below the parameters common for all kind of entities can be seen.
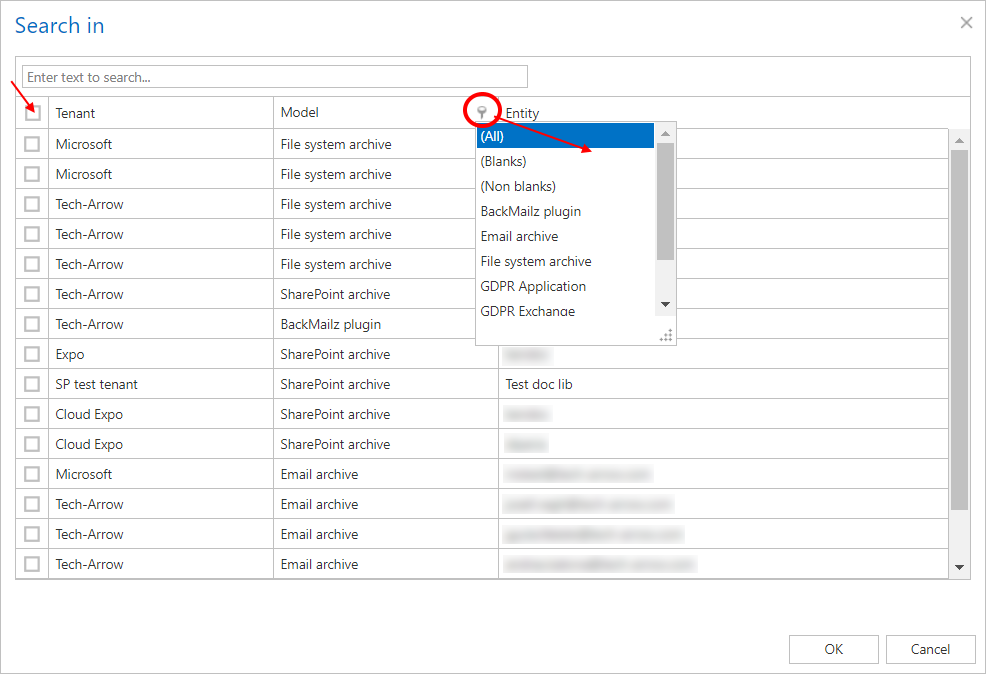
To select the desired entity (or entities), click on the Select button (upper left part of the screenshot above). Check the checkboxes of the entities you want to perform search in. If you check the Tenant checkbox (first one, marked on screenshot), then all entities listed below will be selected. If you click on the icon in the Model column (marked on screenshot), you will be able to filter entities by model type.
contentACCESS Portal enables advanced searching based on criteria set in the UI settings. For more information refer to the Editing Quick, Basic and Advanced search criteria subchapter of this guide.
Searching for an email message containing the phrase “test”
| Search criteria: | Mailbox: jake.peralta@tech-arrow.com |
| Date range: 10.02.2021 – 30.03.2021 | |
| Subject: contains phrase “test”. |
As we need to search for an item based on a non-textual value (date range), and we would like to search for the item according to multiple search criteria (date range and subject), we need to use the Advanced search of contentACCESS Portal.
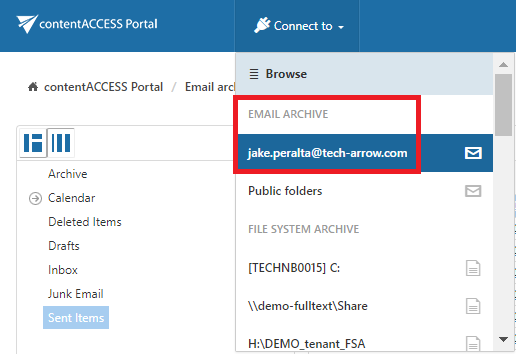
To start advanced search, connect to the archive mailbox of jake.peralta@tech-arrow.com in the Connect to list.
Select Advanced search option from the dropdown menu in the right upper part of the user interface.
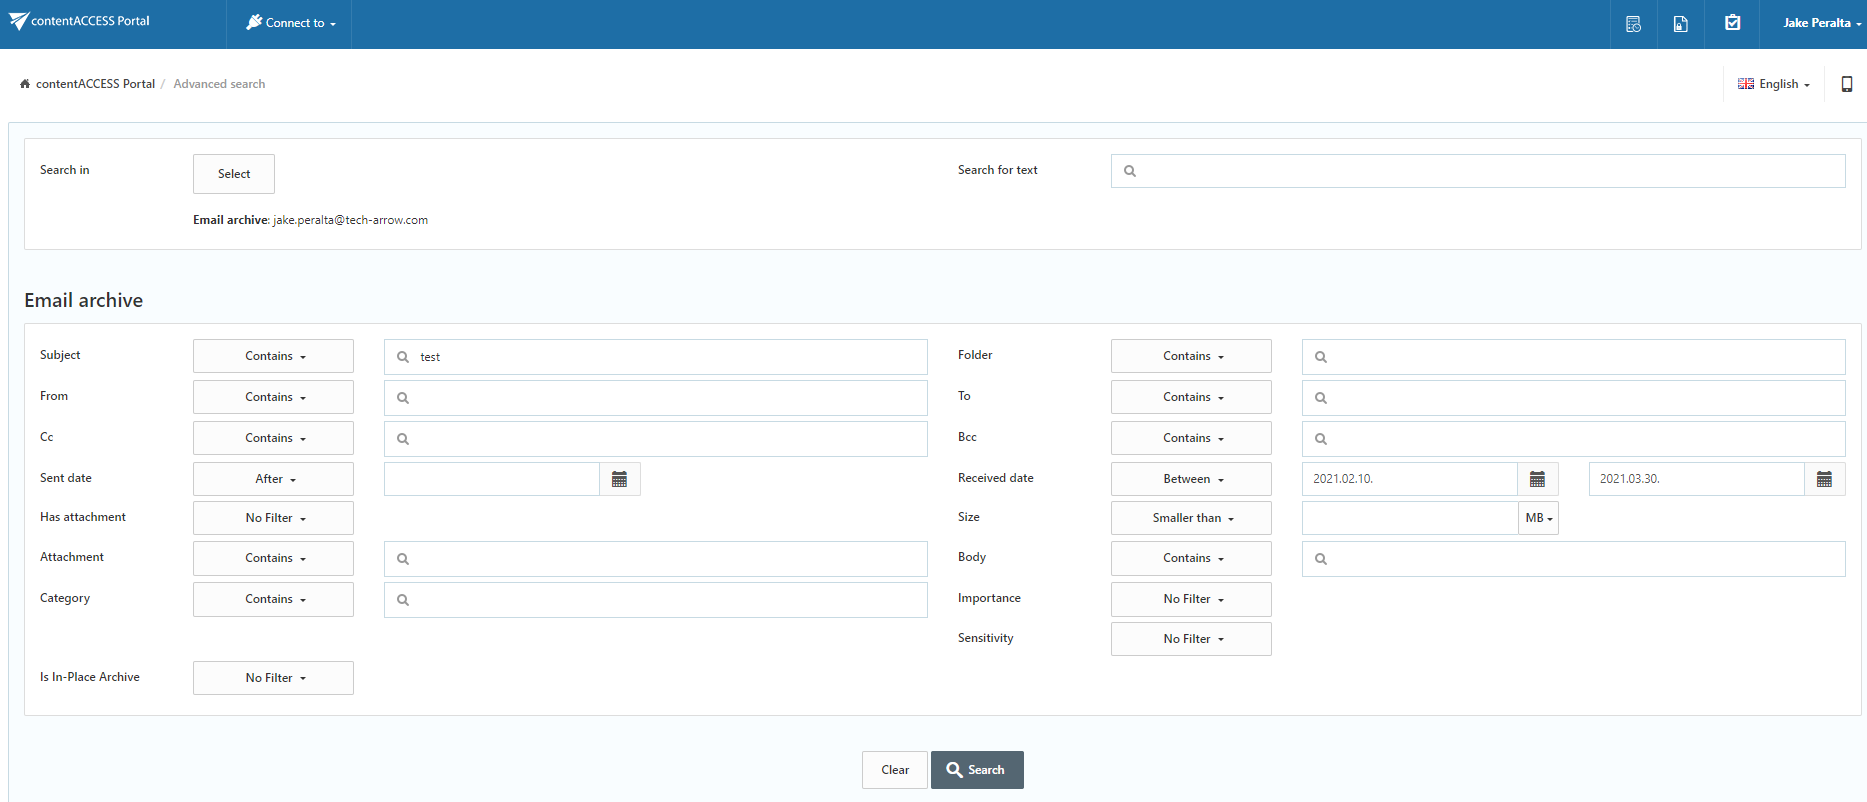
Specify the desired criteria:
- From the Search in dropdown list the user may select multiple archive mailboxes (root folders in case of file archive), on which he has access permissions. Now we are searching only in mailbox jake.peralta@tech-arrow.com that we have selected in the Connect to list.
- As we are searching for emails with subject containing “test”, we enter this phrase into the Subject text box.
- We are searching for emails in date range 10/02/2021 – 30/03/2021, so we select Between from the Received Date dropdown list. Then we specify the desired date range and click on Search.
The desired files have been found as displayed on the picture below:
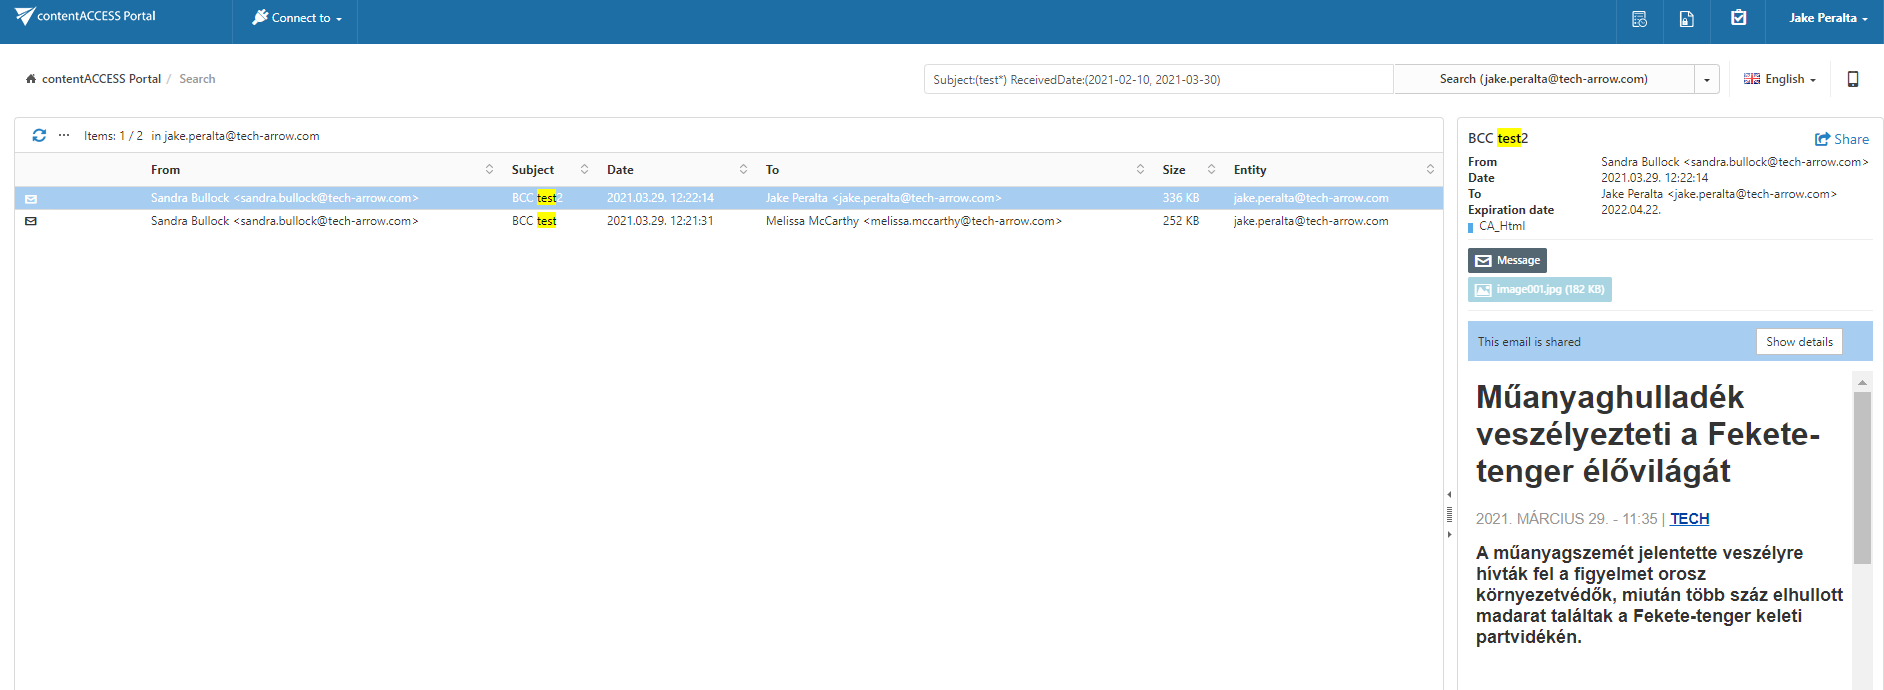 Note: In the search view the Folder column is automatically displayed as well. This feature simplifies the identification of the file location in the folder structure. The administrator may configure, which columns should be displayed in search view. This configuration is further described in chapter Table view column configurations of this guide

