11.1.Email Archive tasks
By default, the following actions can be run on the selected email archive items/folders using the toolbar buttons:
- Refresh
- Export selected message(s) as a PST file
- Export selected item(s) as a ZIP file
- Create report
- Share item(s)
- Recover selected item(s)
- Mark document(s) for delete
- Legal hold
The email archive tasks can be disabled/enabled in the Administrator’s settings on the Task types tab. For more information read section Enabling/disabling tasks.
It is possible to select
- the whole folder structure on the root,
- a recursive folder structure
- child folders
- and items to process.
For more information refer to section Folder selection methods.
Refresh
This option should be used if any items have not been displayed in the item list yet and the list of items should be reloaded.
Export selected message(s) as a PST file
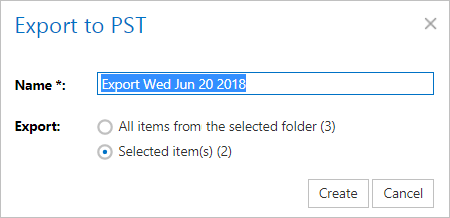
To export one or multiple mailbox items/mailbox folders as a PST file, select the items from the item list/mailbox folders from the navigation pane. Now click on the Export selected message(s) as a PST file button located above the list view.
Choose if you want to export all items from the current folder, or only the selected items. Click on Create or press enter.

The exported items/folders can be downloaded from the Tasks list. (For more information refer to section Download of export actions)
Export selected item(s) as a ZIP file
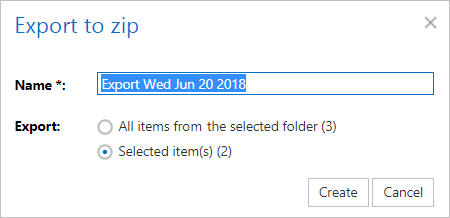
To export one or multiple mailbox archive item(s)/folder(s) into ZIP format, select the mailbox item(s) from the item list (or select the node in the tree view) and click on the Export selected item(s) as a ZIP file button located above the item list.

Choose if you want to export all items from the current folder, or only the selected items. Click on Create or press enter.

Create report

Read more about this feature here.
Share item(s)
With this option, you can easily share links pointing to the selected items, which can be later sent to other users.

Read more about this feature here.
Recover selected item(s)
Recovery is used to re-generate the emails from the archive back into the original location.
This processing type can be used in the following cases:
- A folder structure has been deleted;
- One or more folders have been deleted;
- One or more emails from the folder(s) have been deleted
and the user needs to get back these already archived items from the archive.
With the recovery function the archived items can be put back into their original mailbox location. It can also create the folder if it was deleted from the mailbox’s folder structure. It is possible to recover any part of the structure:
- One or multiple mailbox folders;
- Recursive folder structure;
- One or more folder contents.
- If there is a shortcut for the recovered email in the mailbox folder – the email won’t be recovered;
- If the email is already present in the mailbox folder – the email won’t be recovered;
- If the email has been deleted from the mailbox folder – the email will be recovered.
Recovery of deleted mailbox folder “Calendar”
In this use case we will recover the deleted mailbox folder “Calendar“. We would not like to involve the subfolders, so we double click on this folder’s checkbox in the navigation pane. Then we click on the recovery toolbar button above the list view:
Folder “Calendar” will be put back into the mailbox after the task is completed.
Export and recovery actions (accessible from the toolbar buttons of Email Archive and File System Archive) that run/are currently running can be viewed and downloaded from the Tasks list. For more information about the Tasks List refer to section Tasks list.
Mark document(s) for delete
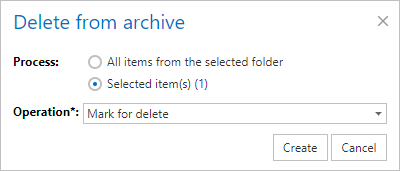
With this task you can mark/unmark emails to be later deleted from the archive by the Delete job. You can either way mark/unmark only the selected emails, or all emails from the current folder.

Select the desired action (mark or unmark) from the Operation dropdown list and then click Create.

Legal hold

Read more about this feature here.


